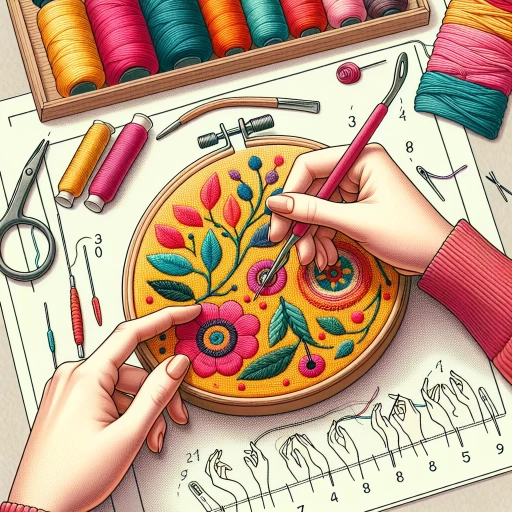
How To Punch Needle
Punch needle is a traditional craft that has been around for centuries, and it's experiencing a resurgence in popularity. This ancient technique involves using a specialized tool to push yarn or thread through a fabric, creating a unique and textured design. With its versatility and creative possibilities, punch needle is an excellent hobby for crafty individuals looking to explore new ways of expressing themselves. In this article, we'll delve into the world of punch needle, covering the basics of getting started, designing and creating your own projects, and advanced techniques to take your skills to the next level. Whether you're a seasoned crafter or a beginner, you'll learn how to bring your ideas to life with punch needle. To begin, let's start with the fundamentals and explore how to get started with punch needle.
Getting Started with Punch Needle
Punch needle is a fun and creative hobby that allows you to create unique and personalized textiles. To get started, it's essential to understand the basics of this craft. In this article, we'll explore the fundamental steps to help you begin your punch needle journey. First, you'll need to choose the right tools and materials, including the type of fabric, yarn, and punch needle tool that suits your project. Next, you'll need to understand the basic stitches, such as the simple running stitch and the more complex loop stitch. Finally, preparing your workspace is crucial to ensure a comfortable and efficient working experience. By mastering these three essential steps, you'll be well on your way to creating beautiful and intricate designs. So, let's start by choosing the right tools and materials, the foundation of any successful punch needle project.
Choosing the Right Tools and Materials
When it comes to punch needling, having the right tools and materials is crucial for achieving professional-looking results. To start, you'll need a punch needle tool, which typically consists of a hollow needle with a handle attached. There are different types of punch needles available, including adjustable and fixed needles, so it's essential to choose the right one for your project. Adjustable needles are ideal for beginners, as they allow you to adjust the length of the needle to accommodate different thicknesses of yarn or thread. Fixed needles, on the other hand, are better suited for more experienced crafters who prefer a more precise stitch. In addition to the punch needle tool, you'll also need a foundation material, such as monk's cloth or rug warp, to provide a stable base for your stitches. Monk's cloth is a popular choice for punch needling, as it's durable and easy to work with. You'll also need yarn or thread in the color of your choice, as well as a pair of scissors and a tapestry needle for weaving in ends. Optional materials include a hoop or frame to help keep your work taut, and a measuring tape or ruler to ensure accurate spacing and tension. By investing in the right tools and materials, you'll be able to create beautiful, high-quality punch needle pieces that will last for years to come.
Understanding the Basic Stitches
Understanding the basic stitches is essential to mastering the art of punch needle. The foundation stitch, also known as the "straight stitch," is the most basic stitch in punch needle. It involves inserting the needle into the fabric and pulling the yarn through, creating a straight line. The foundation stitch is used as the base for most other stitches and is a great starting point for beginners. The loop stitch is another fundamental stitch that involves creating a loop with the yarn and then inserting the needle back into the fabric. This stitch is great for creating texture and dimension in your design. The slip stitch is a versatile stitch that can be used to join two pieces of fabric together or to create a seamless join. It involves inserting the needle into the fabric and then pulling the yarn through, creating a small loop. The herringbone stitch is a reversible stitch that involves alternating between two colors to create a chevron pattern. This stitch is great for creating a subtle and sophisticated design. By mastering these basic stitches, you can create a wide range of designs and patterns, from simple to complex. With practice and patience, you can develop your skills and create beautiful and unique pieces of art with punch needle.
Preparing Your Workspace
Preparing your workspace is a crucial step in getting started with punch needle. To begin, choose a comfortable and well-lit area where you can sit and work without distractions. A dedicated craft table or a corner of your home office can be an ideal spot. Ensure the surface is clean, dry, and free from clutter. Cover your work surface with a protective cloth or mat to prevent damage from the needle and yarn. Next, gather all the necessary tools and materials, including your punch needle, yarn, hoop, and scissors. Organize them in a way that makes them easily accessible, such as in a small basket or container. Consider investing in a yarn bowl or a small tray to keep your yarn tidy and prevent tangles. Good lighting is also essential, so position a lamp or overhead light to illuminate your work area. Finally, take a few minutes to review your pattern or design, and make sure you have all the necessary materials and tools before starting your project. By preparing your workspace, you'll be able to focus on the creative process and enjoy the therapeutic benefits of punch needle.
Designing and Creating Your Punch Needle Project
Designing and creating your punch needle project can be a fun and rewarding experience, allowing you to express your creativity and bring your unique ideas to life. To get started, it's essential to have a clear plan and understanding of the design process. This involves sketching and transferring your design onto the fabric, selecting the right colors and threads to match your vision, and working with different fabric types to achieve the desired texture and look. By mastering these key elements, you'll be able to create a beautiful and professional-looking punch needle project that showcases your skills and style. In this article, we'll delve into the world of punch needle design, starting with the first crucial step: sketching and transferring your design.
Sketching and Transferring Your Design
Sketching and transferring your design is a crucial step in the punch needle process. To start, sketch your design onto paper or use a digital drawing tool to create a digital version. Consider the size and shape of your project, as well as the type of yarn or thread you'll be using. Keep in mind that punch needle designs work best with simple, bold lines and minimal details. Once you have your design, transfer it onto your foundation fabric using a pencil or a tracing wheel. You can also use a light box or a projector to enlarge or project your design onto the fabric. If you're using a digital design, you can print it out and use it as a guide. Alternatively, you can freehand your design directly onto the fabric, but this method can be more challenging and may result in a less precise design. Regardless of the method you choose, make sure to transfer your design carefully and accurately, as this will affect the overall look of your finished project.
Selecting Colors and Threads
When selecting colors and threads for your punch needle project, it's essential to consider the overall aesthetic and theme you want to achieve. Start by choosing a dominant color that will set the tone for your design, and then select complementary colors that will enhance and contrast with it. Consider the 60-30-10 rule, where 60% of your design features the dominant color, 30% a secondary color, and 10% an accent color. This will create a balanced and visually appealing color scheme. Next, think about the type of thread you want to use. Embroidery floss, yarn, and wool are popular choices for punch needle projects, each offering unique textures and effects. Embroidery floss is great for creating fine details and subtle color variations, while yarn and wool provide a more rustic and textured look. You can also experiment with mixing different thread types to achieve a unique and interesting effect. Additionally, consider the weight and thickness of the thread, as this will impact the overall density and texture of your design. Thicker threads will create a more dimensional and chunky look, while thinner threads will produce a more delicate and intricate design. Finally, don't forget to consider the colorfastness and durability of the thread, especially if your project will be exposed to light or heavy use. By carefully selecting your colors and threads, you'll be able to create a beautiful and long-lasting punch needle project that reflects your personal style and creativity.
Working with Different Fabric Types
When working with different fabric types, it's essential to consider their unique characteristics to ensure the best results for your punch needle project. Cotton and linen are popular choices for punch needle due to their natural fibers, breathability, and durability. Cotton is a great option for beginners, as it's easy to work with and can produce a soft, textured look. Linen, on the other hand, offers a more rustic and earthy feel, making it perfect for projects that require a bit more texture and visual interest. Monks cloth, a type of cotton fabric specifically designed for punch needle, is another excellent option. It's woven in a way that creates a smooth, even surface, making it ideal for intricate designs and detailed work. When working with these fabrics, it's crucial to use the right needle size and thread type to achieve the desired texture and appearance. For example, a larger needle and thicker thread can create a more textured, dimensional look, while a smaller needle and finer thread can produce a more delicate, intricate design. Additionally, it's essential to consider the weight and thickness of the fabric, as this can affect the overall look and feel of the finished project. By understanding the unique characteristics of different fabric types and choosing the right materials for your project, you can achieve professional-looking results and create beautiful, one-of-a-kind punch needle pieces.
Advanced Techniques and Tips for Punch Needle
Punch needle is a versatile and creative technique that allows crafters to produce unique and intricate designs. To take your punch needle skills to the next level, it's essential to explore advanced techniques and tips. One of the key aspects of punch needle is creating texture and dimension, which can be achieved through various methods, including using different yarn weights, colors, and stitch patterns. Additionally, experimenting with various stitch patterns and variations can add complexity and visual interest to your designs. However, even with experience, common mistakes and issues can arise, and knowing how to troubleshoot them is crucial. By mastering these advanced techniques and tips, you can unlock new possibilities and take your punch needle creations to new heights. In this article, we will delve into the world of advanced punch needle techniques, starting with the art of creating texture and dimension.
Creating Texture and Dimension
When it comes to creating texture and dimension in punch needle, there are several techniques to explore. One of the most effective ways to add texture is by varying the length and density of the yarn loops. By creating longer loops in certain areas, you can create a raised, three-dimensional effect, while shorter loops can produce a more subtle, flat texture. Another technique is to experiment with different yarn weights and fibers, as thicker yarns can create a more textured, chunky look, while finer yarns can produce a smoother, more delicate effect. Additionally, you can use different punch needle tools, such as a larger or smaller needle, to create varying loop sizes and textures. To add dimension, you can also try layering different colors or textures, creating a sense of depth and visual interest. For example, you can punch a background color, then add a contrasting color on top, creating a sense of layering and dimensionality. Furthermore, you can use techniques such as wrapping or twisting the yarn to create a more intricate, dimensional look. By experimenting with these techniques, you can add depth, texture, and visual interest to your punch needle projects, taking them to the next level.
Using Different Stitch Patterns and Variations
Using different stitch patterns and variations can add texture, visual interest, and depth to your punch needle projects. By experimenting with various stitches, you can create unique and intricate designs that showcase your creativity. One way to mix things up is to try different loop lengths, which can produce varying textures and densities. For example, longer loops can create a more open and airy fabric, while shorter loops result in a denser and more compact material. You can also play with the direction of your stitches, alternating between horizontal and vertical rows or creating diagonal patterns. Another technique is to combine different stitches, such as the basic punch needle stitch with the herringbone or chevron stitch, to add complexity and visual interest. Additionally, you can experiment with different yarn weights and colors to create contrasting textures and hues. By pushing the boundaries of traditional punch needle stitches, you can unlock new creative possibilities and take your projects to the next level. Whether you're looking to add subtle texture or make a bold statement, exploring different stitch patterns and variations can help you achieve your desired look and elevate your punch needle skills.
Troubleshooting Common Mistakes and Issues
When it comes to punch needle, even the most experienced crafters can encounter issues that hinder their progress. To troubleshoot common mistakes and issues, it's essential to identify the root cause of the problem. One of the most common issues is uneven tension, which can cause the fabric to pucker or distort. To resolve this, try adjusting the tension of your yarn or thread by gently pulling on the working end. If the issue persists, consider using a tension gauge to ensure consistent tension throughout your project. Another common problem is missed stitches, which can be caused by incorrect needle placement or inadequate yarn insertion. To fix this, carefully review your work and reinsert the yarn or thread into the missed stitch, making sure to maintain the correct tension. Additionally, if you notice that your stitches are becoming loose or uneven, it may be due to incorrect needle size or type. Experiment with different needles to find the one that works best for your project. Furthermore, if you encounter issues with yarn or thread breakage, try using a yarn needle to weave in ends and prevent further breakage. By identifying and addressing these common issues, you can ensure a smooth and enjoyable punch needle experience. Regularly cleaning and maintaining your punch needle tool can also help prevent issues, as dirt and debris can accumulate and cause problems. By troubleshooting common mistakes and issues, you can refine your skills and create beautiful, professional-looking punch needle projects.