How To Update Kodi
Kodi is a popular media player that offers a wide range of features and customization options, making it a favorite among cord-cutters and streaming enthusiasts. However, to ensure a seamless viewing experience, it's essential to keep Kodi up-to-date with the latest software updates. Updating Kodi can be a bit tricky, but with the right guidance, you can do it easily. In this article, we'll walk you through the process of updating Kodi, covering essential pre-update preparations, the steps to update Kodi on different devices, and troubleshooting common update issues. Before you start the update process, it's crucial to prepare your Kodi setup to avoid any potential issues. In the next section, we'll discuss the pre-update preparations you need to make to ensure a smooth update process.
Pre-Update Preparations
Before updating Kodi, it's essential to take some crucial steps to ensure a smooth transition. Pre-update preparations are vital to prevent data loss, ensure add-on compatibility, and choose the right update method. One of the most critical steps is to backup your Kodi data, which will be discussed in the next section. Additionally, checking for add-on compatibility is also vital to avoid any disruptions to your viewing experience. Furthermore, choosing the right update method can make a significant difference in the success of the update process. By taking these precautions, you can ensure that your Kodi update is successful and hassle-free. In this article, we will explore each of these steps in detail, starting with the importance of backing up your Kodi data.
Backup Your Kodi Data
To ensure a seamless Kodi update experience, it's essential to backup your Kodi data. This step is crucial in preserving your customized settings, installed add-ons, and media library. Kodi's backup feature allows you to save your data to an external device or cloud storage, making it easily accessible in case something goes wrong during the update process. To backup your Kodi data, go to the Kodi settings menu, select "System" or "System Settings," and then click on "Backup." Choose the backup location, select the data you want to backup, and Kodi will take care of the rest. It's recommended to backup your Kodi data regularly, not just before updating, to prevent data loss in case of unexpected issues. Additionally, you can also use third-party backup tools, such as Kodi Backup, to automate the backup process and ensure your data is safe. By taking the time to backup your Kodi data, you'll be able to restore your settings and media library quickly and easily, minimizing downtime and ensuring a smooth Kodi update experience.
Check for Add-on Compatibility
When updating Kodi, it's essential to check for add-on compatibility to ensure a seamless transition. Before updating, go through your installed add-ons and check their compatibility with the new Kodi version. You can do this by visiting the add-on's official website or checking the Kodi forums for any updates or announcements from the developers. Some add-ons might not be compatible with the latest Kodi version, so it's crucial to check beforehand to avoid any potential issues. If an add-on is not compatible, you might need to uninstall it or wait for an update from the developer. Additionally, you can also check the Kodi add-on repository for any updates or new versions of your installed add-ons. By checking for add-on compatibility, you can avoid any potential problems and ensure that your Kodi installation runs smoothly after the update.
Choose the Right Update Method
When it comes to updating Kodi, there are several methods to choose from, each with its own advantages and disadvantages. The right update method for you depends on your device, Kodi version, and personal preferences. Here are some popular update methods to consider: * **Manual Update**: This method involves downloading the latest Kodi version from the official website and installing it manually. It's a good option if you want full control over the update process and don't mind technical details. However, it can be time-consuming and requires some technical knowledge. * **Kodi's Built-in Update Feature**: Many Kodi versions come with a built-in update feature that allows you to update Kodi directly from the app. This method is convenient and easy to use, but it may not always work, especially if you're running an older Kodi version. * **Google Play Store Update**: If you're using an Android device, you can update Kodi through the Google Play Store. This method is straightforward and ensures that you get the latest version of Kodi. However, it may not be available for all devices or Kodi versions. * **Third-Party Update Tools**: There are several third-party update tools available that can help you update Kodi, such as Kodi Updater or Update Kodi. These tools can simplify the update process, but be cautious when using them, as they may not always be reliable or safe. * **Factory Reset and Reinstall**: If you're experiencing issues with your current Kodi installation, you may want to consider performing a factory reset and reinstalling Kodi from scratch. This method can be time-consuming, but it ensures that you get a clean and fresh Kodi installation. Ultimately, the right update method for you will depend on your specific situation and preferences. If you're unsure, you can always consult the Kodi community forums or seek help from a Kodi expert.
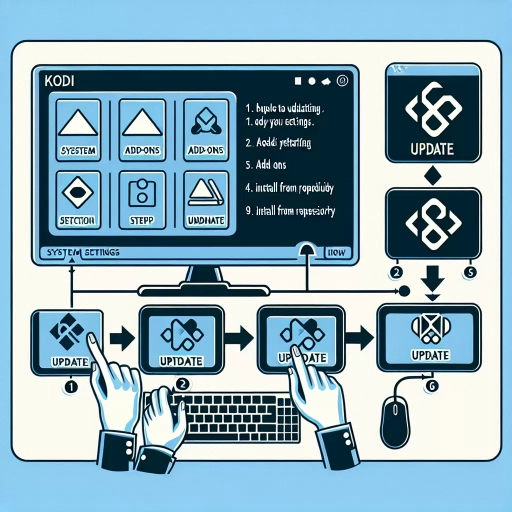
Updating Kodi on Different Devices
Kodi is a popular media player that allows users to stream and play various types of media content. To ensure a seamless viewing experience, it's essential to keep Kodi updated on your device. Updating Kodi can bring new features, improve performance, and fix bugs. In this article, we'll guide you through the process of updating Kodi on different devices. We'll cover the steps for updating Kodi on Windows and macOS, Android devices, and Linux and other devices. Whether you're using Kodi on a computer, smartphone, or streaming device, we've got you covered. So, let's start with updating Kodi on Windows and macOS, which is a relatively straightforward process that can be completed in a few simple steps.
Updating Kodi on Windows and macOS
Updating Kodi on Windows and macOS is a relatively straightforward process. To update Kodi on Windows, start by opening the Kodi application and clicking on the gear icon in the top left corner. From there, select "System" and then "System Information." Look for the "Update" button and click on it. Kodi will then check for any available updates and prompt you to download and install the latest version. Alternatively, you can also update Kodi on Windows by downloading the latest version from the official Kodi website and installing it manually. On macOS, the process is similar. Open Kodi and click on the "Kodi" menu in the top left corner. Select "Check for Updates" and Kodi will search for any available updates. If an update is found, click on the "Update" button to download and install the latest version. You can also update Kodi on macOS by downloading the latest version from the official Kodi website and installing it manually. In both cases, make sure to back up your Kodi data before updating to ensure that you don't lose any of your settings or installed add-ons.
Updating Kodi on Android Devices
Updating Kodi on Android devices is a relatively straightforward process that can be completed in a few simple steps. To start, open the Google Play Store on your Android device and search for Kodi. If an update is available, you will see an "Update" button next to the Kodi icon. Click on this button to begin the update process. Alternatively, you can also update Kodi by going to the Kodi website and downloading the latest APK file. Once the download is complete, navigate to the "Settings" app on your device, select "Security," and enable "Unknown sources" to allow the installation of apps from outside the Play Store. Then, go to the "Downloads" folder, find the Kodi APK file, and click on it to install the update. It's also important to note that if you have a custom skin or add-ons installed, you may need to reinstall them after updating Kodi. Additionally, it's always a good idea to back up your Kodi settings and data before updating to prevent any potential loss of information. By following these steps, you can easily update Kodi on your Android device and enjoy the latest features and improvements.
Updating Kodi on Linux and Other Devices
Updating Kodi on Linux and other devices is a relatively straightforward process. For Linux users, the easiest way to update Kodi is through the terminal. First, open the terminal and type "sudo apt-get update" to update the package list. Then, type "sudo apt-get install kodi" to install the latest version of Kodi. If Kodi is already installed, the command will update it to the latest version. Alternatively, users can also update Kodi through the Linux distribution's package manager, such as Ubuntu Software Center or Linux Mint Software Manager. For other devices, such as Android TV boxes, smart TVs, and streaming devices, the update process may vary. Typically, users can update Kodi through the device's app store or settings menu. For example, on Android TV boxes, users can go to the Google Play Store, search for Kodi, and click the "Update" button. On smart TVs, users can go to the TV's app store, search for Kodi, and follow the on-screen instructions to update. On streaming devices, such as Amazon Fire TV, users can go to the device's settings menu, select "System" or "System Update," and follow the on-screen instructions to update Kodi. In some cases, users may need to manually download the latest version of Kodi from the official Kodi website and install it on their device. Regardless of the device, it's essential to ensure that Kodi is updated to the latest version to access new features, security patches, and bug fixes.
Troubleshooting Common Update Issues
Troubleshooting common update issues in Kodi can be a frustrating experience, but with the right approach, you can resolve the problems and get back to enjoying your favorite media content. When Kodi updates fail, it can lead to a range of issues, including add-on installation errors, crashes, and freezes. To overcome these challenges, it's essential to identify the root cause of the problem and apply the appropriate solution. In this article, we'll explore three common update issues and provide step-by-step guides on how to resolve them. We'll start by looking at how to resolve add-on installation errors, which can occur when Kodi's dependencies are outdated or corrupted. By understanding the causes and solutions to these issues, you'll be able to troubleshoot common update issues in Kodi and get back to streaming your favorite content in no time. First, let's dive into resolving add-on installation errors.
Resolving Add-on Installation Errors
When updating Kodi, users may encounter errors related to add-on installation. These errors can be frustrating, but there are steps you can take to resolve them. First, check if the add-on is compatible with your Kodi version. Ensure that the add-on is updated to the latest version, as older versions may not be compatible with the latest Kodi release. If the add-on is compatible, try reinstalling it from the official Kodi repository or the add-on's official website. Sometimes, a simple reinstall can resolve the issue. If the problem persists, check the Kodi error log for more information about the error. The error log can provide clues about what's causing the issue, such as a dependency problem or a conflict with another add-on. You can also try disabling any recently installed add-ons to see if they're causing the issue. Additionally, check the Kodi forums or online communities for solutions to common add-on installation errors. Many users have encountered similar issues and have found solutions that can be applied to your situation. By following these steps, you should be able to resolve add-on installation errors and get your Kodi update up and running smoothly.
Fixing Kodi Crashes and Freezes
Kodi crashes and freezes can be frustrating, especially when you're in the middle of a movie or TV show. Fortunately, there are several steps you can take to troubleshoot and fix the issue. First, try restarting Kodi and your device to see if that resolves the problem. If the issue persists, check for any software updates for Kodi and your device's operating system, as these can often resolve compatibility issues. You can also try disabling any recently installed add-ons or plugins, as these can sometimes cause conflicts. Additionally, clearing the Kodi cache and thumbnails can help resolve issues related to data overload. If none of these steps work, you may need to perform a factory reset of Kodi, which will restore it to its default settings. In some cases, Kodi crashes and freezes can be caused by hardware issues, such as overheating or insufficient RAM, so it's worth checking your device's specifications and ensuring it meets the minimum requirements for running Kodi. By following these steps, you should be able to identify and fix the issue causing Kodi to crash or freeze.
Restoring Kodi to a Previous Version
If you're experiencing issues with the latest version of Kodi, you may want to consider restoring it to a previous version. This can be a useful troubleshooting step, especially if you've recently updated Kodi and are experiencing problems that weren't present before. To restore Kodi to a previous version, you'll need to uninstall the current version and then reinstall an older version. Before you start, make sure you've backed up your Kodi settings and data, as uninstalling the current version will delete all of your customizations and add-ons. You can find older versions of Kodi on the official Kodi website, or through a third-party repository. Once you've downloaded the older version, follow the installation instructions to install it on your device. Keep in mind that restoring Kodi to a previous version may not always resolve the issue, and you may need to try other troubleshooting steps as well. Additionally, be aware that using an older version of Kodi may leave you vulnerable to security risks, so it's recommended to only use this as a temporary solution until you can resolve the issue or update to a newer version.