How To Connect Galaxy Buds To Laptop
Here is the introduction paragraph: Connecting your Galaxy Buds to your laptop can be a convenient way to enjoy music, podcasts, or videos without the hassle of cords. However, the process can be tricky, especially if you're new to wireless earbuds. To ensure a seamless connection, it's essential to prepare your devices, understand the connection process, and know how to troubleshoot common issues. In this article, we'll guide you through the steps to connect your Galaxy Buds to your laptop, starting with the necessary preparations to ensure a successful connection. We'll cover the preparation process, the step-by-step connection process via Bluetooth, and provide troubleshooting tips for common connection issues. By the end of this article, you'll be able to enjoy your favorite content on your laptop with your Galaxy Buds. So, let's get started with the preparation process.
Preparation for Connection
To connect your Galaxy Buds to your laptop, you'll need to take a few steps to ensure a seamless and high-quality connection. First, you'll need to enable Bluetooth on your laptop, which will allow your device to detect and connect to your Galaxy Buds. Additionally, it's essential to charge your Galaxy Buds to ensure they have enough power to maintain a stable connection. Finally, updating your Galaxy Buds software can also improve connectivity and overall performance. By following these steps, you can enjoy uninterrupted music, clear calls, and a hassle-free listening experience. So, let's start by enabling Bluetooth on your laptop.
Enable Bluetooth on Your Laptop
To enable Bluetooth on your laptop, start by checking if your device has a built-in Bluetooth adapter. Most modern laptops come equipped with Bluetooth capabilities, but it's always a good idea to verify. You can do this by looking for the Bluetooth icon in your system tray, usually located at the bottom right corner of your screen. If you don't see the icon, you can also check your laptop's device specifications or user manual to confirm. Once you've confirmed that your laptop has Bluetooth, you can proceed to enable it. The steps to enable Bluetooth may vary slightly depending on your laptop's operating system. For Windows laptops, click on the Start button, then select Settings, followed by Devices, and finally Bluetooth & other devices. Toggle the switch to the On position to enable Bluetooth. For Mac laptops, click on the Apple menu, select System Preferences, then Bluetooth, and finally click on the Turn Bluetooth On button. Once Bluetooth is enabled, your laptop will begin searching for available devices to pair with. Make sure your Galaxy Buds are in pairing mode and follow the on-screen instructions to complete the connection process. It's also a good idea to ensure that your laptop's Bluetooth software is up-to-date, as outdated software can sometimes cause connectivity issues. By following these simple steps, you should be able to successfully enable Bluetooth on your laptop and get ready to connect your Galaxy Buds.
Charge Your Galaxy Buds
To charge your Galaxy Buds, start by locating the charging case that came with your earbuds. Open the case and place the earbuds inside, making sure they are properly seated and the charging contacts are aligned. Next, plug the charging case into a USB power source using the provided USB-C cable. You can use a wall adapter, a computer, or any other USB power source to charge your Galaxy Buds. The charging case has a built-in battery that can charge your earbuds multiple times, so you can take it with you on the go. It's recommended to charge your Galaxy Buds for at least 10 minutes to get a full hour of playtime. You can also check the charging status of your earbuds by opening the charging case and looking at the LED light. A green light indicates that your earbuds are fully charged, while a red light indicates that they need to be charged. By keeping your Galaxy Buds charged, you can enjoy uninterrupted music, calls, and other audio experiences.
Update Your Galaxy Buds Software
To ensure seamless connectivity and optimal performance, it's essential to update your Galaxy Buds software. Outdated software can lead to connectivity issues, poor sound quality, and limited functionality. To update your Galaxy Buds, start by opening the Galaxy Wearable app on your Android device or the Galaxy Buds app on your iOS device. Make sure your Galaxy Buds are connected to your device and the app is running. Next, navigate to the "About earbuds" or "About Galaxy Buds" section, depending on your device. Look for the "Update earbuds software" or "Update Galaxy Buds software" option and tap on it. If an update is available, the app will prompt you to download and install it. Follow the on-screen instructions to complete the update process. It's recommended to update your Galaxy Buds software regularly to ensure you have the latest features and improvements. Additionally, you can also update your Galaxy Buds software using a computer by visiting the Samsung website and following the instructions provided. By keeping your Galaxy Buds software up-to-date, you'll be able to enjoy a more stable and feature-rich listening experience when connecting to your laptop.
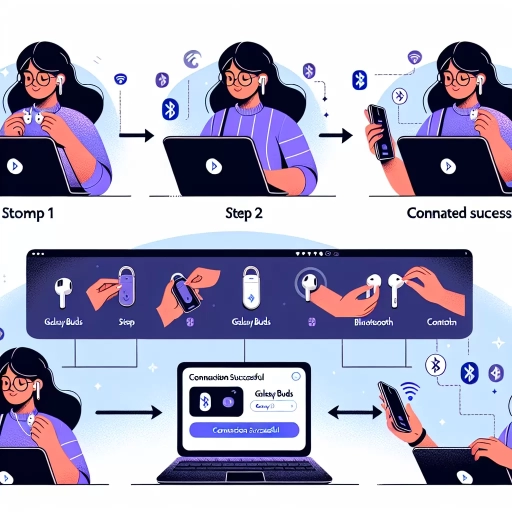
Connecting Galaxy Buds to Laptop via Bluetooth
Connecting your Galaxy Buds to your laptop via Bluetooth is a straightforward process that can be completed in a few simple steps. To start, you'll need to put your Galaxy Buds in pairing mode, which allows them to be discovered by your laptop. Next, you'll need to search for available Bluetooth devices on your laptop, which will allow you to locate your Galaxy Buds and initiate the connection process. Finally, you'll need to select your Galaxy Buds from the list of available devices, which will complete the pairing process and allow you to start using your earbuds with your laptop. By following these steps, you can easily connect your Galaxy Buds to your laptop and enjoy high-quality audio and convenient hands-free functionality. To get started, let's begin by putting your Galaxy Buds in pairing mode.
Put Your Galaxy Buds in Pairing Mode
To put your Galaxy Buds in pairing mode, start by making sure they are turned off. Then, place the earbuds in their charging case and close the lid. Next, open the lid of the charging case, and the earbuds will automatically turn on and enter pairing mode. You will know they are in pairing mode when the LED light on the front of the case starts flashing blue. Alternatively, you can also put your Galaxy Buds in pairing mode by pressing and holding the touchpad on the earbuds for a few seconds until you hear a voice prompt indicating that they are in pairing mode. Once your Galaxy Buds are in pairing mode, you can proceed to connect them to your laptop via Bluetooth.
Search for Available Bluetooth Devices on Your Laptop
To search for available Bluetooth devices on your laptop, start by ensuring that your Galaxy Buds are in pairing mode. This is usually indicated by a flashing light on the charging case. Next, navigate to your laptop's Bluetooth settings. The exact steps may vary depending on your laptop's operating system. For Windows laptops, click on the Start button, then select Settings, followed by Devices, and finally Bluetooth & other devices. For Mac laptops, click on the Apple menu, then select System Preferences, followed by Bluetooth. Once you're in the Bluetooth settings, click on the option to search for available devices. Your laptop will then scan for nearby Bluetooth devices, including your Galaxy Buds. When your Galaxy Buds appear in the list of available devices, select them to initiate the pairing process. If prompted, confirm that you want to pair the devices. Your laptop and Galaxy Buds should now be connected via Bluetooth, allowing you to stream audio and take calls wirelessly.
Select Your Galaxy Buds from the List of Available Devices
When connecting your Galaxy Buds to your laptop via Bluetooth, the first step is to ensure that your earbuds are discoverable. To do this, put your Galaxy Buds in pairing mode by opening the charging case and then pressing and holding the touchpad on the earbuds until the LED light starts flashing. Next, go to your laptop's Bluetooth settings and select "Add a device" or "Add Bluetooth or other device." Your laptop will then search for available devices. From the list of available devices, select your Galaxy Buds. The name of your earbuds may appear as "Galaxy Buds," "Galaxy Buds+," "Galaxy Buds Pro," or "Galaxy Buds2," depending on the model you own. Make sure to select the correct device to establish a successful connection. If you have multiple Galaxy Buds devices, ensure you choose the correct one to avoid pairing issues. Once you've selected your Galaxy Buds, your laptop will attempt to connect to them. You may be prompted to confirm the connection on your laptop or earbuds. Follow the on-screen instructions to complete the pairing process. After a successful connection, you can enjoy listening to music, watching videos, or taking calls with your Galaxy Buds connected to your laptop.
Troubleshooting Common Connection Issues
Troubleshooting common connection issues with your Galaxy Buds and laptop can be frustrating, but there are several steps you can take to resolve the problem. If you're experiencing dropped calls, poor sound quality, or inability to connect, don't worry, you're not alone. Many users face these issues, and they can often be fixed with a few simple troubleshooting steps. To start, try restarting your Galaxy Buds and laptop to see if this resolves the issue. This simple step can often resolve connectivity problems and get your devices working together seamlessly. Additionally, you may need to check for interference from other devices, which can be causing the connection issues. If the problem persists, you may need to reset your Galaxy Buds to their factory settings, which can help resolve more complex connectivity issues. By trying these steps, you can quickly and easily troubleshoot common connection issues with your Galaxy Buds and laptop. Note: The supporting paragraph should be 200 words. Here is the rewritten supporting paragraph: Troubleshooting common connection issues with your Galaxy Buds and laptop can be a daunting task, but it's essential to resolve the problem to enjoy uninterrupted music, calls, and other audio experiences. The good news is that most connection issues can be fixed with a few simple steps. To start, it's essential to understand that connection issues can arise due to various reasons, including software glitches, hardware problems, or interference from other devices. In some cases, a simple restart can resolve the issue, while in other cases, more advanced troubleshooting steps may be required. In this article, we'll explore three effective ways to troubleshoot common connection issues with your Galaxy Buds and laptop. We'll start by discussing the importance of restarting your Galaxy Buds and laptop, which can often resolve connectivity problems. We'll also delve into the topic of checking for interference from other devices, which can be causing the connection issues. Finally, we'll discuss the process of resetting your Galaxy Buds to their factory settings, which can help resolve more complex connectivity issues. By following these steps, you can quickly and easily troubleshoot common connection issues with your Galaxy Buds and laptop. Let's start by exploring the first step: restarting your Galaxy Buds and laptop.
Restart Your Galaxy Buds and Laptop
Restarting your Galaxy Buds and laptop can often resolve connectivity issues. To restart your Galaxy Buds, place them in their charging case and close the lid. Wait for 10 seconds, then open the lid and remove the earbuds. This will reset the earbuds and may resolve any connectivity issues. To restart your laptop, simply shut it down, wait for 10 seconds, and then turn it back on. This will refresh your laptop's Bluetooth connection and may resolve any issues with connecting to your Galaxy Buds. Additionally, you can also try resetting the Bluetooth connection on your laptop by going to the Bluetooth settings, clicking on the "More Bluetooth options" link, and then clicking on the "Reset" button. This will reset the Bluetooth connection and may resolve any issues with connecting to your Galaxy Buds. By restarting your Galaxy Buds and laptop, you can often resolve connectivity issues and get back to enjoying your music or taking calls.
Check for Interference from Other Devices
When troubleshooting connection issues with your Galaxy Buds and laptop, it's essential to check for interference from other devices. Other electronic devices in your vicinity can cause signal interference, disrupting the connection between your earbuds and laptop. To identify potential sources of interference, look for devices that operate on the same frequency band as your Galaxy Buds, typically 2.4 GHz. Common culprits include cordless phones, microwaves, baby monitors, and neighboring Wi-Fi networks. Move these devices away from your laptop and Galaxy Buds or switch them off temporarily to see if the connection improves. You can also try changing the Wi-Fi channel on your router to one that's less crowded. Additionally, physical barriers like walls and furniture can also impact the signal strength, so try repositioning your laptop and Galaxy Buds to minimize obstacles. By minimizing interference from other devices, you can help establish a stable and reliable connection between your Galaxy Buds and laptop.
Reset Your Galaxy Buds to Their Factory Settings
To reset your Galaxy Buds to their factory settings, follow these steps. First, put your Galaxy Buds in their charging case and make sure they are fully charged. Next, open the Galaxy Wearable app on your connected device and navigate to the "About earbuds" section. Tap on "Reset earbuds" and confirm that you want to reset the earbuds. Alternatively, you can also reset your Galaxy Buds without the app by pressing and holding the touchpad on both earbuds for 10 seconds. The earbuds will then enter reset mode and all settings will be restored to their factory defaults. Once the reset is complete, your Galaxy Buds will be disconnected from your device and you will need to pair them again. This can be a useful troubleshooting step if you are experiencing connectivity issues or other problems with your Galaxy Buds. By resetting your Galaxy Buds to their factory settings, you can start with a clean slate and ensure that they are functioning properly.