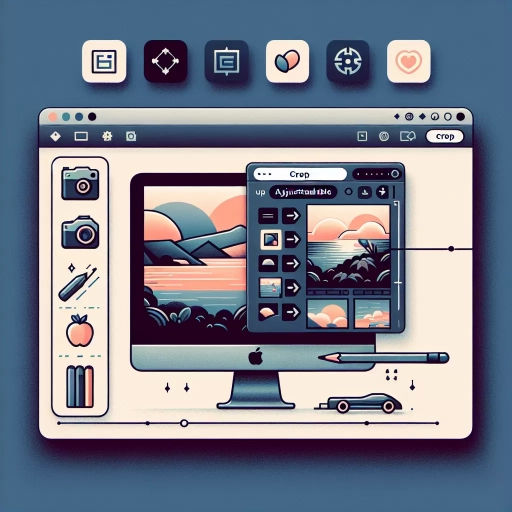
How To Crop On Mac
Cropping images on a Mac is a straightforward process that can be accomplished using various built-in and third-party applications. Whether you're a professional graphic designer or a casual user, cropping images is an essential skill to master. Fortunately, Mac users have several options to choose from, including using the Preview app, the Photos app, or third-party apps. In this article, we'll explore these three methods in detail, starting with the most convenient and widely used option: using Preview to crop images on Mac. With Preview, you can quickly and easily crop images without having to launch a separate application. We'll take a closer look at how to use Preview to crop images, as well as the other two methods, to help you become proficient in image cropping on your Mac. By the end of this article, you'll be able to crop images like a pro using the method that works best for you. Let's start with the simplest and most accessible option: Using Preview to Crop Images on Mac.
Using Preview to Crop Images on Mac
Cropping images is a common task for many Mac users, whether it's to remove unwanted parts of a photo, resize an image, or create a thumbnail. Fortunately, Mac's built-in Preview app makes it easy to crop images with just a few clicks. To get started, you'll need to open and select the image you want to crop in Preview. This is the first step in the process, and it's essential to do it correctly to ensure that you're working with the right image. Once you've opened and selected your image, you can then select the crop tool in Preview, which will allow you to define the area of the image that you want to keep. After selecting the crop tool, you can adjust the crop selection to fine-tune the area of the image that you want to crop, and finally, save the image with the new dimensions. In this article, we'll take a closer look at how to use Preview to crop images on Mac, starting with the first step: opening and selecting the image in Preview.
Opening and Selecting the Image in Preview
To open and select an image in Preview, start by locating the image file you want to crop on your Mac. You can find it in the Finder, on your desktop, or in a folder. Once you've found the image, you can open it in Preview by right-clicking (or control-clicking) on the file and selecting "Open With" followed by "Preview" from the dropdown menu. Alternatively, you can also double-click on the image file, and if Preview is set as the default image viewer on your Mac, it will automatically open in Preview. If you have multiple images open in Preview, you can select the one you want to crop by clicking on its thumbnail in the sidebar or by using the "Window" menu to select the image from the list of open files. Once the image is open and selected, you can proceed to crop it using the tools and features available in Preview.
Selecting the Crop Tool in Preview
To select the Crop Tool in Preview, start by opening the image you want to crop in the Preview application on your Mac. Once the image is open, click on the "Markup" toolbar button, which is represented by a pencil icon. This will open the Markup toolbar, where you can find various editing tools, including the Crop Tool. The Crop Tool is represented by a square icon with a dashed line around it. Click on this icon to select the Crop Tool. Alternatively, you can also use the keyboard shortcut "Command + K" to quickly select the Crop Tool. Once the Crop Tool is selected, you can start cropping your image by dragging the edges of the crop box to the desired size and position. You can also use the "Aspect Ratio" dropdown menu to choose a pre-defined aspect ratio for your cropped image. By selecting the Crop Tool in Preview, you can easily and efficiently crop your images to the desired size and shape.
Adjusting the Crop Selection and Saving the Image
When you're satisfied with the crop selection, you can fine-tune it by adjusting the edges. To do this, click and drag the edges of the crop selection to adjust its size and shape. You can also use the arrow keys to nudge the selection by small increments. If you want to maintain the aspect ratio of the original image, hold down the Shift key while dragging the edges. This ensures that the crop selection remains proportional to the original image. Once you've made the necessary adjustments, click the "Crop" button to apply the changes. If you're not happy with the result, you can always click the "Reset" button to start over. Finally, to save the cropped image, go to the "File" menu and select "Save" or press Command+S. You can choose to save the image in various formats, including JPEG, PNG, and TIFF. You can also choose to save the image with a new name or overwrite the original file. If you want to save the image with a new name, select "Save As" from the "File" menu and enter a new name for the file.
Cropping Images with Photos App on Mac
Cropping images is a fundamental editing technique that can greatly enhance the composition and overall look of a photo. With the Photos app on Mac, users can easily crop their images to remove unwanted parts, adjust the aspect ratio, and focus attention on the subject. To get started with cropping images in the Photos app, users need to access the image they want to edit. This can be done by launching the Photos app, selecting the image from the library, and opening it in the editing mode. Once the image is open, users can use the crop tool to adjust the crop settings and save the changes. In this article, we will explore the steps involved in cropping images with the Photos app on Mac, including accessing the image, using the crop tool, and adjusting the crop settings and saving the changes. By following these steps, users can improve the quality and composition of their photos. Let's start by accessing the image in the Photos app.
Accessing the Image in the Photos App
To access the image you want to crop in the Photos app on your Mac, start by opening the Photos app from the Dock or Applications folder. Once the app is open, you'll see your entire photo library displayed in the main window. You can browse through your photos by scrolling through the grid view or use the sidebar to navigate through your albums, media types, and years. If you know the exact location of the image you want to crop, you can quickly find it by using the search bar at the top right corner of the window. Simply type in keywords related to the image, such as the date, location, or event, and the Photos app will display the relevant results. Alternatively, you can also use the "Photos" tab in the sidebar to view all your photos in a chronological order. Once you've found the image you want to crop, click on it to open it in the Photos app's editing mode. From here, you can select the "Edit" button at the top right corner of the window to access the cropping tool and start editing your image.
Using the Crop Tool in the Photos App
The Photos app on Mac offers a robust Crop tool that allows users to trim and adjust their images with precision. To access the Crop tool, simply select the image you want to edit and click on the "Edit" button in the top right corner of the Photos window. This will open the image in the editing mode, where you can find the Crop tool in the toolbar at the top of the screen. The Crop tool is represented by a square icon with two arrows pointing inward. Clicking on this icon will activate the Crop tool, and you can start adjusting the image by dragging the edges of the crop box to the desired size. You can also use the aspect ratio presets, such as "Original," "Square," "3:2," and "16:9," to quickly crop your image to a specific ratio. Additionally, the Photos app allows you to flip and rotate your image while cropping, giving you even more control over the final result. Once you're satisfied with the crop, simply click "Done" to apply the changes and save the edited image. The Photos app also allows you to revert to the original image at any time, so you can experiment with different crops without worrying about losing the original file. Overall, the Crop tool in the Photos app is a powerful and intuitive feature that makes it easy to trim and adjust your images to perfection.
Adjusting the Crop Settings and Saving the Changes
When you're satisfied with the crop area, you can adjust the crop settings to fine-tune the selection. To do this, click on the "Aspect" dropdown menu and choose from a variety of preset aspect ratios, such as "Original," "Square," "3:2," "4:3," "5:4," or "16:9." You can also select "Free" to crop the image without any aspect ratio constraints. Additionally, you can adjust the "Angle" of the crop area by clicking and dragging the rotation handle or by entering a specific angle value in the "Angle" field. If you want to flip the image horizontally or vertically, you can click on the "Flip Horizontal" or "Flip Vertical" buttons. Once you've made the desired adjustments, click on the "Done" button to save the changes. The cropped image will be saved as a new file, and the original image will remain unchanged. You can also choose to save the cropped image in a different format, such as JPEG, PNG, or TIFF, by clicking on the "File" menu and selecting "Export." In the "Export" window, you can choose the desired file format, quality, and resolution, and then click on the "Export" button to save the cropped image.
Using Third-Party Apps to Crop Images on Mac
When it comes to cropping images on a Mac, the built-in Preview app can be limiting. Fortunately, there are many third-party apps available that offer more advanced features and flexibility. To get started with using a third-party app to crop images on your Mac, you'll need to download and install the app of your choice. This can be done by visiting the app's website or the Mac App Store, and following the installation instructions. Once installed, you can select and import the image you want to crop into the app, and then use the app's crop features to trim and adjust the image to your liking. Finally, you can export the cropped image in your desired format. In this article, we'll take a closer look at the process of using a third-party app to crop images on a Mac, starting with the first step: downloading and installing a third-party app.
Downloading and Installing a Third-Party App
To download and install a third-party app for cropping images on Mac, start by searching for a reputable app in the App Store or online. Some popular options include Skylum Luminar, Adobe Photoshop, and Canva. Once you've found an app that suits your needs, click the "Get" or "Download" button to begin the installation process. If you're downloading from the App Store, the app will automatically install on your Mac. If you're downloading from a website, you may need to drag the app icon to the Applications folder or follow the on-screen instructions to complete the installation. Once the app is installed, you can launch it from the Applications folder or the Launchpad. Before using the app, you may need to agree to the terms and conditions and create an account or log in if you already have one. Some apps may also offer a free trial or a one-time purchase option, so be sure to review the pricing and features before committing to a purchase. With the app installed and launched, you can now use it to crop your images on Mac. Simply select the image you want to crop, choose the desired crop settings, and save the edited image to your computer.
Selecting and Importing the Image into the App
When selecting and importing an image into the app, it's essential to choose the right file format and size to ensure optimal results. Most image editing apps support popular file formats like JPEG, PNG, and TIFF, but it's crucial to check the app's compatibility before importing. Additionally, consider the image's resolution and size, as high-resolution images may take longer to process and edit. To import the image, navigate to the app's file menu and select the "Open" or "Import" option. Then, browse to the location of the image file and select it. Some apps may also allow you to drag and drop the image file directly into the app's interface. Once the image is imported, it will be displayed in the app's editing window, ready for cropping and other editing tasks. It's also worth noting that some apps may offer additional features, such as automatic image enhancement or organization tools, to help streamline the editing process. By carefully selecting and importing the image, you can set yourself up for success and achieve professional-looking results with your cropped image.
Using the App's Crop Features and Exporting the Image
Using the App's Crop Features and Exporting the Image. Once you've selected the desired crop area, you can use the app's built-in features to fine-tune the crop. Many apps, including Preview and Photos, offer a range of tools to adjust the crop, such as aspect ratio, angle, and size. You can also use the app's editing features to enhance the image, such as adjusting the brightness, contrast, and saturation. When you're satisfied with the crop and edits, you can export the image in various formats, including JPEG, PNG, and TIFF. You can also choose the resolution and quality of the exported image, depending on your needs. For example, if you're sharing the image online, you may want to export it in a lower resolution to reduce the file size. On the other hand, if you're printing the image, you may want to export it in a higher resolution to ensure the best possible quality. Additionally, some apps allow you to export the image with a specific color profile, which can be useful if you're working with images that require precise color accuracy. Overall, using the app's crop features and exporting the image can help you achieve the desired result and ensure that your image looks its best.