How To Make Mario In Infinite Craft
Infinite Craft is a popular sandbox game that allows players to build and explore a blocky world filled with endless possibilities. One of the most exciting aspects of the game is the ability to create custom characters, including beloved icons like Mario. If you're looking to bring the iconic plumber to life in Infinite Craft, you'll need to understand the basics of the game, create a character model that captures Mario's signature look, and bring him to life with animations and interactions. In this article, we'll take you through the step-by-step process of making Mario in Infinite Craft, starting with the fundamentals of the game. By the end of this tutorial, you'll be able to create a Mario character that's sure to impress your friends and fellow players. So, let's get started by understanding the basics of Infinite Craft.
Understanding the Basics of Infinite Craft
Infinite Craft is a popular sandbox-style video game that offers players a unique and immersive gaming experience. For those new to the game, understanding its basics is crucial to unlocking its full potential. To get started, it's essential to grasp the fundamental concepts of Infinite Craft, including its features, game interface, and crafting system. In this article, we'll delve into the world of Infinite Craft, exploring what makes it tick, how to navigate its interface, and the intricacies of its crafting system. By the end of this journey, you'll be well-equipped to dive into the game and start building your own infinite world. So, let's begin by exploring what Infinite Craft is and what features it has to offer.
What is Infinite Craft and its Features
Infinite Craft is a popular sandbox-style video game that allows players to build and explore a blocky, 3D world filled with creatures, resources, and treasures. The game offers a unique blend of creativity, survival, and adventure elements, making it appealing to players of all ages and skill levels. One of the key features of Infinite Craft is its procedurally generated worlds, which means that each time a player starts a new game, they are presented with a unique and randomly generated environment to explore and build in. The game also features a vast array of blocks and items that can be used to build structures, craft tools, and fight off monsters. Players can mine resources, such as wood, stone, and minerals, to craft new items and build complex machines. The game also has a day-night cycle and weather system, which adds to the game's realism and immersion. Additionally, Infinite Craft has a multiplayer mode, allowing players to join or create servers and play with friends. The game's creative freedom and endless possibilities make it an ideal platform for players to express their imagination and creativity. Overall, Infinite Craft is a game that offers a unique and engaging gaming experience that is both fun and challenging.
Getting Familiar with the Game's Interface
Infinite Craft's interface is user-friendly and easy to navigate, making it simple for players to get started with creating their own Mario-inspired worlds. Upon launching the game, players are presented with a clean and intuitive menu that allows them to access various game modes, options, and settings. The main game screen is divided into several sections, including the game world, inventory, and toolbar. The game world is where players can build and explore their creations, while the inventory is used to store and manage blocks, items, and other resources. The toolbar provides access to various tools and features, such as the block selector, camera controls, and game settings. Players can also access the game's menu by pressing the 'Esc' key, which allows them to save and load worlds, adjust game settings, and exit the game. As players become more familiar with the interface, they can start to explore the game's various features and modes, including the creative mode, survival mode, and multiplayer mode. By understanding the game's interface, players can unlock the full potential of Infinite Craft and start creating their own unique Mario-inspired worlds.
Understanding the Crafting System
In Infinite Craft, the crafting system is a fundamental aspect of the game that allows players to create a wide variety of items, tools, and blocks. To understand the crafting system, players need to familiarize themselves with the 3x3 crafting grid, which is the primary interface for crafting. The grid is divided into nine squares, and players can place items in these squares to create new items. The game's crafting recipes are based on the arrangement of items in the grid, and players can discover new recipes by experimenting with different combinations of items. The crafting system also includes a search function, which allows players to quickly find specific recipes and items. Additionally, the game features a crafting book that contains a list of all available recipes, making it easier for players to plan and manage their crafting activities. By mastering the crafting system, players can create complex items, such as tools, armor, and decorative blocks, and unlock new possibilities for building and exploration in the game.
Creating Mario's Character Model
Creating Mario's character model is a complex process that requires attention to detail and a deep understanding of the character's iconic design. To bring Mario to life, designers must carefully consider every aspect of his appearance, from the shape of his body and head to the smallest details such as his eyes, nose, and mouth. In this article, we will explore the process of creating Mario's character model, including designing his body and head, adding details such as eyes, nose, and mouth, and creating his iconic red cap and blue overalls. By examining each of these elements, we can gain a deeper understanding of what makes Mario's character model so beloved and enduring. First, we will start by examining the foundation of Mario's character model: designing his body and head.
Designing Mario's Body and Head
When designing Mario's body and head, it's essential to capture the iconic plumber's proportions and features. Start by creating a rough outline of Mario's body, using simple shapes such as spheres, cylinders, and rectangles. For the body, use a combination of a cylinder for the torso and a sphere for the hips. The arms and legs can be represented by cylinders, with the hands and feet being spheres. The head is a crucial aspect of Mario's character, and it's essential to get it right. Use a combination of a sphere for the main head shape and a smaller cylinder for the nose. The eyes, eyebrows, and mouth can be created using simple shapes such as circles, rectangles, and triangles. To add more detail, you can use a combination of curves and lines to create the iconic "M" shape on Mario's hat, as well as the buttons on his overalls. When designing the head, pay attention to the proportions, making sure the eyes are large and expressive, and the nose is small and rounded. The mouth should be a small, curved line, and the eyebrows should be thick and expressive. By using simple shapes and paying attention to proportions, you can create a recognizable and iconic Mario character model.
Adding Details such as Eyes, Nose, and Mouth
When adding details to Mario's character model, it's essential to focus on the facial features that bring his personality to life. Start by adding the eyes, which are a crucial aspect of Mario's expressive face. Use a small, white, rounded shape to create the base of the eye, and then add a smaller, black circle in the center to represent the pupil. You can also add a slight curve to the top of the eye to give it a more rounded appearance. Next, move on to the nose, which is a small, rounded triangle that sits between the eyes. Use a gentle curve to connect the nose to the rest of the face, making sure it's centered and symmetrical. Finally, add the mouth, which is a small, curved line that sits below the nose. You can add a slight smile to the mouth by curving it upwards slightly, giving Mario his signature cheerful expression. By adding these facial features, you'll be able to bring Mario's character model to life and give him a personality that's instantly recognizable.
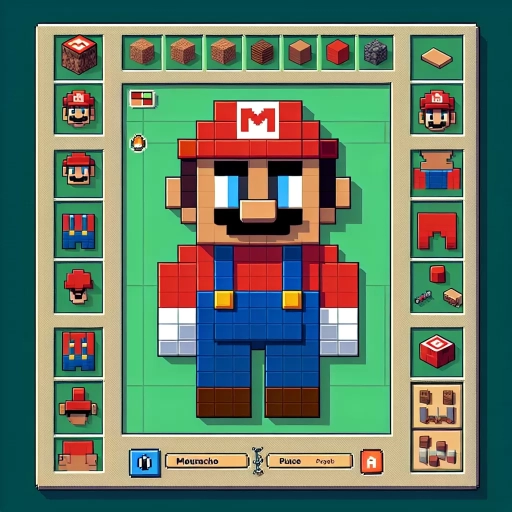
Creating Mario's Iconic Red Cap and Blue Overalls
The iconic red cap and blue overalls of Mario are an integral part of his character design, and creating them in Infinite Craft requires attention to detail and a bit of creativity. To start, you'll need to gather the necessary materials, including red and blue wool, which can be obtained by shearing sheep or trading with villagers. Once you have the materials, you can begin crafting the individual components of Mario's outfit. The red cap is a simple hat that can be crafted using six red wool blocks, arranged in a 2x3 pattern. The blue overalls are a bit more complex, requiring 12 blue wool blocks, arranged in a 3x4 pattern. To add the white buttons and belt, you can use white wool blocks and a bit of creative placement. Finally, to complete the look, you can add a red "M" emblem to the cap, using a red wool block and a bit of pixel art magic. With these components in place, you can assemble Mario's iconic outfit and bring the beloved character to life in Infinite Craft.
Bringing Mario to Life with Animations and Interactions
Bringing Mario to life with animations and interactions is crucial for creating an immersive gaming experience. To achieve this, we need to focus on three key aspects: creating walking and running animations for Mario, adding jumping and power-up animations, and enabling interactions with the game environment. By mastering these elements, we can make Mario's movements and actions feel more realistic and engaging. In this article, we will explore each of these aspects in detail, starting with the basics of creating walking and running animations for Mario. By understanding how to create these fundamental animations, we can lay the groundwork for more complex movements and interactions, ultimately bringing Mario to life in a way that captivates and delights players. With a solid foundation in walking and running animations, we can then build upon this knowledge to create more advanced animations and interactions, such as jumping and power-ups, and even enable Mario to interact with the game environment in a more meaningful way. Let's start by creating walking and running animations for Mario.
Creating Walking and Running Animations for Mario
Creating walking and running animations for Mario is a crucial step in bringing the iconic character to life in Infinite Craft. To start, you'll need to create a series of sprites that showcase Mario's different movements. For the walking animation, you can create a loop of 4-6 frames that show Mario's legs and arms moving in a slow and relaxed manner. Each frame should be slightly different, with Mario's legs and arms moving in a smooth and fluid motion. For the running animation, you can create a loop of 6-8 frames that show Mario's legs and arms moving in a faster and more energetic manner. You can also add some secondary animations, such as Mario's hat and mustache moving in the wind, to add some extra flair to the animation. Once you have your sprites created, you can use Infinite Craft's built-in animation tools to bring them to life. You can set the animation speed, add some easing to make the animation feel more natural, and even add some sound effects to enhance the overall experience. With a little practice and patience, you can create walking and running animations for Mario that are sure to delight players of all ages.
Adding Jumping and Power-Up Animations
Adding jumping and power-up animations to your Mario character can elevate the overall gaming experience. To create a jumping animation, start by designing a series of frames that showcase Mario's movement, from the initial jump to the peak and then back down. You can use a combination of keyframe animation and tweening to achieve a smooth and realistic motion. For the power-up animation, you can create a separate set of frames that highlight the transformation, such as Mario growing bigger or changing color. To add an extra layer of excitement, you can also include sound effects and particle effects, like sparks or stars, to enhance the visual impact. By incorporating these animations, you can bring Mario to life and create a more immersive experience for players.
Enabling Interactions with the Game Environment
In the world of Infinite Craft, enabling interactions with the game environment is crucial for creating an immersive experience. To achieve this, developers can utilize a combination of techniques such as collision detection, raycasting, and physics engines. Collision detection allows the game to recognize when Mario comes into contact with objects in the environment, such as blocks, pipes, or enemies. This information can then be used to trigger specific actions, like breaking blocks or taking damage from enemies. Raycasting, on the other hand, enables the game to simulate the way Mario interacts with the environment, such as throwing fireballs or using power-ups. By incorporating a physics engine, the game can also simulate real-world physics, making the interactions feel more realistic and responsive. For example, when Mario jumps on a Goomba, the physics engine can simulate the impact and make the Goomba react accordingly. By combining these techniques, developers can create a seamless and engaging experience that allows players to fully interact with the game environment.