How To Make Enamel Pins
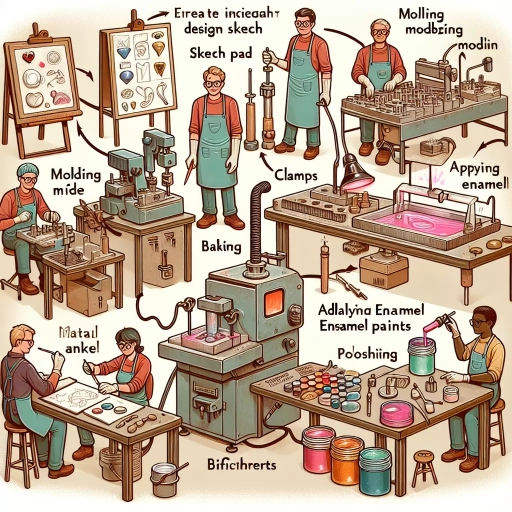 Creating your own enamel pins, whether for business branding or personal use, is a rewarding endeavor that allows you to flesh out your creativity, innovation, and entrepreneurial prowess. This in-depth guide will introduce you to the comprehensive, step-by-step process you can follow, from the initial inspiration to the final delivery. Even without prior designing or manufacturing skills, you're about to embark on a journey that's easily manageable with the right guidance and resources. In this article, we will cover three significant stages of enamel pin production. The first stage focuses on designing your enamel pin, where you can play with colors, themes, and sizes until you craft the perfect design that screams your personal expression. The next stage is about preparing your design for production, ensuring your finished piece perfectly mirrors your ideas. The final stage involves manufacturing and ordering your enamel pins, discussing different manufacturers, their capabilities, costs, and more. Now, without further ado, let's dive into the exciting stage of designing your enamel pin.
Designing Your Enamel Pin
Designing a personalized enamel pin can be an exciting but challenging process. This is a creative project that requires a good understanding of basics before proceeding into the nitty gritty of colors, fonts, and designs. To guide you through the process, let's break it down. The first step is understanding the basics of enamel pin design, including the importance of size, its shape, and the type of enamel you intend to use. Following this, choosing the right colors and fonts plays a pivotal role; it's essential to find a balance and harmony to create an eye-catching pin that stands out. Finally, creating a unique design is the fun part that brings all these steps together. Here is where your creativity shines, as you combine elements and ideas into a final product that speaks your personality. Now, let's dive into the first step: understanding the basic nuts and bolts of enamel pin design. It is essential to familiarize yourself with the necessary details and considerations to make the subsequent processes go smoothly, and result in a pin that truly represents you.
Understanding the Basics of Enamel Pin Design
Enamel Pin Design is not just about crafting small ornamental pieces; there's a lot more that goes into bringing a successful pin to fruition. As a step in the process of creating your own enamel pin, understanding the rudimentary elements of design is of essence. Two broad categories of enamel pins exist: soft enamel and hard enamel, each distinctive based off the manufacturing process. Soft enamel pins have a textured surface and are less expensive while hard enamel pins have a smooth, polished surface and are more long-lasting. When embarking on your design process, one must contemplate the type of enamel pin you want to make, because each will provide a different aesthetic. Establishing the size of your enamel pin is a crucial aspect in design; the standard size is usually between 0.75 to 2 inches, depending primarily on your design’s complexity and intended use. The pin-shaped form needs to incorporate a compelling design that is both visually appealing and meaningful to your target audience. Elements like shape, color, and detail play an instrumental role in developing a unique and striking design, hence requiring careful assessment. Colors in your design can either be vibrant or subtle, but they must importantly be coherent. Pantone Matching System (PMS) colors are typically used in enamel pin production to ensure uniformity. Also, subtle and small details can make an enamel pin design stand out. However, one needs to strike a balance between detail and clarity because too many details might overwhelm the design due to the compact size of pins. Moreover, it's essential to ascertain your pin’s purpose, be it for promoting a brand, expressing an idea, commemorating an event, or merely used as a fashion accessory. This perspective will guide your design process and help shape the final output. For instance, if you're making a pin for promoting a brand, including brand colors, logos, or taglines can make the pin more identifiable. Lastly, having an understanding of your budget is pivotal. Designing enamel pins can potentially accumulate costs: from mold creation, to pin manufacturing, to color filling, and card mounting. Every decision you make during the enamel pin design process has cost implications. Therefore, adopt an economical design strategy that doesn't compromise on the quality and vision of your pin. In summation, understanding the basic principles of enamel pin design involves a broad spectrum of facets ranging from choice of enamel pin type, determining the size, creating a striking design, selecting appropriate colors, incorporating the right amount of detail, and framing the purpose of the pin. A fine blend of these elements can pave the way for an effective and captivating enamel pin design.
Choosing the Right Colors and Fonts
of a successful enamel pin designs lies in choosing the right colors and fonts. Your choice of colors and fonts can make or break your enamel pin design. Colors – beyond their visual appeal – have psychological attributes that can elicit certain feelings from the viewer, making color selection crucial in your design. Choose colors that not only complement each other but also align with the message or feeling you want your pins to convey. For example, brighter, vibrant colors like reds and yellows tend to evoke feelings of excitement and happiness, while cooler hues, like blues and greens, are often associated with tranquility and calmness. Pastel shades are currently trendy in enamel pin designs, evoking a sense of nostalgia and whimsy. As for fonts, they are as integral to your pin design as colors. Every font has a personality, so your font choice should align with the overall emotion or idea your pin communicates. For instance, think about the powerful message a bold, block-like font could impart versus the gentle whisper of a delicate script font. Specialty fonts can add a dash of uniqueness and character to your pins, but remember they should still be legible even in the small size of an enamel pin. Take into consideration the characteristics of different fonts before deciding. Serif fonts, known for their small stroke at the end of larger ones, can create a notable, professional look. Sans serif fonts, known for their simplicity and modernity, may be appropriate for minimalist designs. Another aspect to consider is the color and font contrast. Stark contrasts attract attention, while subtle differences are more visually soothing. A high contrast could be suitable for a statement-making, loud pin design, while lower contrast would be ideal for a softer, more understated pin. Keep in mind the technical aspects of pin production when choosing your colors and fonts. Pantone Matching System (PMS) colors are most commonly used due to the accuracy and consistency in color reproduction. Be wary of the fact that some colors look differently when translated to enamel, so consult with your manufacturer to avoid any surprises. In summary, colors and fonts significantly impact the visual dynamics of enamel pin designs. Careful and thoughtful selection of both can underpin the emotional resonance of your design, helping it stand out in the sea of enamel pins, or convey a particular message more effectively. Your proactive choice of right colors and fonts is an essential step towards crafting a truly successful and captivating enamel pin design.
Creating a Unique and Eye-Catching Design
in crafting highly unique and eye-catching enamel pins is their design. Designing your enamel pin allows you to create a striking piece of personalized merchandise that not only showcases your creativity but helps you stand out. A well-thought-out design can elevate your pin's aesthetic, making it more likely to catch people's attention, whether worn on clothing or proudly displayed in a collection. Begin by brainstorming some initial concepts for your pin's design. What key elements or symbols do you want to portray? Consider your color palette too, as choosing the right combination of colors can bring vibrancy and energy to your design. If your pin is for a particular group or event, ensure you incorporate relevant iconography or branding. Next, think about the shape of your pin, which should be unique and attention-grabbing. Move beyond standard circular or square pins to consider bespoke shapes related to your design. An original shape, paired with vibrant colors and eye-catching symbolism, can help your enamel pin stand out in a sea of generic pins. Also, consider the materials you will use. Hard enamel pins are durable and will retain their sheen, making your design pop with a high-gloss finish. Soft enamel pins, on the other hand, provide a unique texture with raised and recessed areas that can add depth to your design. Moreover, think about the size of the pin. When it comes to enamel pins, size matters. Bigger pins are more eye-catching and offer more opportunities for intricate designs, but they may be heavy and cumbersome once attached. Smaller pins are discrete and easy-to-wear but limit how detailed your design can be. Consider your target demographic and their preferences when deciding on your pin's dimensions. When you have a firm idea of your design, it's important to sketch it out visually, either on paper or using digital illustration software. This visual representation will allow you to play around with the layout, colors, and size of your design and iron out any kinks before production. Remember, the best part of creating an enamel pin is the design process, which provides a canvas on which to display your creativity. Self-expression is perhaps the most rewarding aspect of custom pin design. By understanding the elements - concept, shape, color, material, and size - and their interplay, you can create a unique, highly visible and engaging design that matches the style and ethos of your brand, event, or personal vision. Unique and eye-catching designs not only set your pins apart but can also become a conversation starter, increasing the pin's visibility and likely, its popularity.
Preparing Your Design for Production
Process in creating an exceptional design does not end when its surface appears visually appealing. This well-crafted design should be prepared seamlessly for production by following crucial steps, ensuring the final outcome successfully conveys the intended message. This article will guide you through these important phases: converting your design into a digital format, ensuring the correct size and resolution, and preparing a mockup for review and approval. Translating your designs to a digital format ushers you into a world of endless possibilities, providing a foundation where modifications can be carried out with ease. Close attention must also be paid to the size and resolution, as these factors significantly influence the clarity and quality of the finished product. Furthermore, a well-prepared mockup serves as a final check to detect and rectify any errors before the approval process. Now, let's delve further into the first phase of making your designs production-ready: Converting Your Design into a Digital Format.
Converting Your Design into a Digital Format
After conceptualizing and refining your design, converting it into a digital format is the crucial next step in preparing your design for production. Utilizing software like Adobe Illustrator, Photoshop, or Graphic will help solidify your ideas and bring your concept into a tangible reality. Drawing software allows you to play and experiment with lines, details, colors, and shapes until you achieve your perfect design. Furthermore, digital illustration tools offer precision that is often unattainable with a traditional hand-drawn design. Before conversion, photograph or scan your design with high resolution to capture all the details. On launching your selected design software, load the image and create a new layer. Trace the design on the new layer, employing the software's tools to maintain the authenticity of your concept. This process might seem strenuous initially; however, it enhances the precision of your design and is crucial in the production of enamel pins, where detail and accuracy are key. Take the time to experiment with colors. Remember, enamel pins are vibrant, so select your colors boldly. Here’s where Pantone Matching System (PMS) comes in. It is a color matching system widely used in the printing industry to ensure color accuracy. Select your colors using the PMS to guarantee that your pins will be produced with the specific hues you intended. Additionally, you will need to consider the lines in your design (the metal lines that separate colors on the finished pin) - they play a vital role in readability and aesthetics of the enamel pin. Give each color section a metal line barrier to prevent colors from bleeding into each other. Your linework essentially forms the skeleton of your design; hence, attention to the width and placement of lines is essential. Once perfected, save your design in a vector format. Vector images are crucial for the production process as they can be scaled without loss of resolution or quality. A common vector file extension is .ai for Adobe Illustrator; however, .eps or .pdf files are also acceptable. Before sending off your design for production, it’s important to include notes detailing your chosen colors (with PMS codes) and any further specifications for the pin's size, shape or design intricacies. This ensures smoother communication with your production team and makes it more likely that the final product aligns perfectly with your vision. Converting your design into a digital format is a crucial juncture in the journey of transforming your concept into a tangible enamel pin. This stage forms the bedrock for the subsequent production process and allows for a degree of accuracy and precision necessary for creating high-quality enamel pins.
Ensuring the Correct Size and Resolution
The process of preparing your design for production, particularly when dealing with items like enamel pins, highly depends on ensuring that it is of the correct size and resolution. One cannot overlook this crucial aspect, as it directly impacts the final output's clarity, detail, and overall aesthetic appeal. As such, artists and designers must give this distinct consideration throughout their design process, actively exerting the effort to configured their design software to the correct settings for optimum results. To begin with, the size of your design must correlate accurately with your desired final product. For instance, if you plan on creating an enamel pin of 1 inch in diameter, your digital design should also be set to 1 inch. This congruent ratio ensures a more precise transition from digital design to physical production, minimizing modifications that might compromise your original design. Another pivotal element is resolution. A higher resolution equates to more detail in your design, resulting in a sharper and more distinguished final product. The resolution is measured in dots-per-inch (DPI) and, as a general rule, your design should have a minimum of 300 DPI to retain quality throughout the production phase. Lower resolutions tend not to display smaller, intricate details very well, leading to unimpressive finished products. Furthermore, the correct size and resolution also help your manufacturers comprehend your design better, minimizing misinterpretation or discrepancies that may occur otherwise. An array of design software allows you to select not only the dimensions of your designs but also their resolution. Using these features can be an invaluable asset to both yourself and your manufacturer. To cap it off, always seek your manufacturer's input or specification guidelines about the size and resolution. These insights can save you from making unnecessary adjustments later on, potentially saving your time and resources. Plus, it can guarantee that your design aligns seamlessly with the manufacturer's equipment and capabilities, thereby raising your chances of producing high-quality enamel pins. In essence, ensuring the correct design size and maintaining high-resolution quality are both vital steps in the process of preparing your design for production. If overlooked, the ramifications can range from minor aesthetic flaws to substantial design alterations, negatively affecting the entire production process. By complying with these standards, you ensure that your enamel pin design remains visually compelling and technologically compatible, ready for smooth transition from design software to physical shape, and primed for end-recipient satisfaction.
Preparing a Mockup for Review and Approval
Beneath the process of preparing your design for production, lies a crucial step: preparing a mockup for review and approval. This phase is pivotal as it can either propel your project towards success or cease progress with unrevealed faults. A mockup is essentially a full-sized model of your design, developed to display the visual representation of the product. For enamel pins, it is particularly significant because of the intricate details these tiny pieces of art hold. The idea of a mockup is to gain an exact understanding of how the finished product would look and see whether the design would work or if there are impending issues that need to be addressed before moving into production. In creating a mockup for your enamel pin, it is crucial to reflect every element accurately, especially the colour and size as they play an integral role in the overall look of the finished product. As enamel pins are often used for making a statement or as a symbol of belonging, the design and colour should precisely represent the intended message or identity. The size, on the other hand, influences the visibility and wearability of the pin. Before unveiling the mockup, it is essential to review it thoroughly. Another set of eyes could unveil potential issues the designer might have overlooked. Changes can be considerably easier and less expensive to make at the mockup stage, further emphasizing the importance of a thorough review. Once the in-house review of the mockup is complete, it's time for the approval process. Here, the mockup is presented to the client or decision-maker for critique. Transparency and open communication are keys to ensure that the final enamel pin meets everyone's expectations. Ultimately, the approval of the mockup is the green light for production. If the mockup isn't approved, modifications need to be made based on the feedback received. This stage may be iterative until the mockup meets the desired standards. However, once approved, production can begin, knowing that the resulting enamel pin will accurately reflect the initial design vision. The creativity involved in enamel pin design can be infinite, but the realistic rendering through the mockup is pivotal. Hence, investing time and resources into this stage can lead to admirably designed, high-quality enamel pins ready for the world to appreciate. The process of creating a mockup not only ensures that ideas are translatable into tangible products, but it also sets the foundation for an efficient, cost-effective production process.
Manufacturing and Ordering Your Enamel Pins
of any enamel pin project is the process of manufacturing and ordering. Before embarking on this adventure, a proper understanding of the procedure is pivotal. The manufacturing and the ordering process can be broadly categorized into three fundamental segments. Firstly, diligent research and selection of a trustworthy manufacturer greatly determine the quality of the final product. Without a reliable manufacturer, your design and effort can go to waste. Secondly, understanding the different types of enamel pins is similarly crucial. This knowledge can assist you to make informed decisions about the types of pins that will perfectly embody your ideas. Lastly, the ordering process, followed by reviewing the final product, forms the final step. This is where you actually get to see the physical product of all the planning and decision-making. These processes might appear cumbersome, but with a proper comprehension of each, your enamel pin project can completely transform. The first step, undoubtedly, is researching and selecting a reliable manufacturer, which significantly impacts the quality and durability of your enamel pins.
Researching and Selecting a Reliable Manufacturer
of successful enamel pin production lies in diligently researching and selecting an experienced and reliable manufacturer. This crucial step is often a determining factor in the final quality of your enamel pins. The same design can vary in appearance, quality, and overall impression in the hands of different manufacturers. Therefore, thorough research and careful selection are non-negotiable aspects of the manufacturing process. Start by compiling a list of potential manufacturers, preferably those specializing in enamel pin production. Sources can be local business directories, online marketplaces, social media groups, or recommendations from industry peers. Carry out in-depth research on each manufacturer; check their credentials, explore their portfolios, and analyze client reviews and feedback. Look for manufacturers who demonstrate a consistent track record of producing high-quality enamel pins. Take note of the detail, color accuracy, and finishes of the pins. This can give you an insight into their technical expertise and commitment to quality. Upon narrowing down your list, contact the manufacturers directly. This conversation gives you an opportunity to discuss your specific needs, gauge their customer service, and understand their production process. Ask about their design requirements, types of enamel used, color matching capabilities, available finishes, production turnaround times, and pricing details. Some manufacturers might offer physical or digital samples, providing a firsthand experience of their work quality. It’s advisable to order samples from a few shortlisted manufacturers. This investment helps assess pin quality, manufacturer reliability, and delivery timelines before placing a bulk order. The look and feel of the sample pin, along with the handling of the entire sample order process, can offer valuable direction in your final decision. Select a manufacturer who not only meets your quality expectations but also aligns with your budget and deadline requirements. Remember, the cheapest option isn't always the best; quality and reliability often come at a price. An open and consistent line of communication is also essential in establishing a long-term relationship with your manufacturer. In the enamel pin production process, your manufacturer is your partner, shaping your creative vision into tangible reality. Therefore, invest the time and resources in finding the right manufacturer and enjoy the rewarding journey of creating your unique enamel pins.
Understanding the Different Types of Enamel Pins
Enamel pins offer so much room for creativity because they come in a range of colors, designs, and even types of enamel. Understanding these variations is integral to the process of manufacturing and ordering your enamel pins. Firstly, we have soft enamel pins, which are the most widespread type. These are characterized by their unique texture, where the metal edges are slightly raised above the colored enamel areas, creating a somewhat 3-dimensional effect. Soft enamel pins are often chosen for their vibrant colors and the striking contrast between the metal and enamel, making them perfect for bold, intricate designs. Secondly, there are hard enamel pins, also known as Cloisonné pins. These provide a smooth, polished finish since the enamel is filled up to the same level as the metal borders, then polished until flat. This makes them exceptionally durable and resistant to scratching, but they are usually more expensive due to their labor-intensive production process. A third type of enamel pin is the die-struck pin, which doesn't use any enamel. Instead, it relies on creating images using just stamped metal, producing an elegant, understated effect. Die-struck pins are typically finished with either a high-polish surface for a shiny look or an antique finish for a vintage touch. Another type we can't leave out is the printed enamel pin. This type allows the most detailed designs since the graphics are printed directly onto the metal surface before being covered with an epoxy coating for protection. The result is a pin with practically no limitations in terms of color gradation and details, ideal for logos or branding objectives. Last but not least is the hybrid pin, a combination of hard and soft enamel. In this type, sections of a pin can be left with raised metal as in soft enamel pins, while other parts can be filled to the brim and polished, mimicking the style of hard enamel pins. This is an excellent choice for designs that need a mix of textures and finishes, offering a high level of customization. In conclusion, each type of enamel pin possesses unique qualities that cater to distinct aesthetic preferences and functional needs. When manufacturing and ordering your enamel pins, it’s crucial to understand these differences to ensure your final product accurately reflects your vision.
Placing Your Order and Reviewing the Final Product
Creating enamel pins involves multiple processes that require precision and attention to detail. Once the manufacturing process is complete, it's time to place your order and review the final product. This step is critical as it enables you to ensure that the pins are exactly to your taste and meet your desired standards. When placing your order for enamel pins, it's important to communicate clearly regarding your specifications. It's not just about selecting designs, it's also about choosing the right colors, shapes, sizes, and even the types of clasps. You may want to order in bulk or in small quantities depending on your needs, so ensure to mention your quantity requirements to the manufacturer explicitly. Most manufacturers provide an option to review and approve digital proof before moving forward with the full production. Make sure to take advantage of this step as it is your opportunity to ensure the final product will be up to expectation. Inspect the design, color scheme, and overall aesthetics closely. If you notice any error, it's easier to make amendments at this stage than after the whole batch is produced. After all, the final product should be the accurate physical embodiment of your designs. Once the final product is manufactured and delivered, rigorously review each pin. Check the quality, accuracy of design, and color matching. If you ordered specialty features such as glitter or glow-in-the-dark colors, make sure they are properly applied and functioning as expected. The pin should also be free from manufacturing defects such as smudges, discolorations, or chipped enamel. Although this process might seem daunting, remember that it's a one-time task for each design and no detail is too small when you are aiming for perfection. The bottom line is, pay close attention at each stage, starting from placing your order all the way up until you receive the final product, to ensure you have enamel pins you'll be proud to wear, share, or sell. By placing your order mindfully, and reviewing the final product diligently, you secure an enamel pin that genuinely represents your vision. This stage is not only about acquiring a product but also about delighting in the satisfying culmination of your creative venture. Whether you are creating pins for promotional purposes or personal satisfaction, the joy of holding high-quality enamel pins, crafted to your exact specifications, is unmatched. Your manufacturing and ordering journey ultimately brings your ideas to life in a vibrant, tangible form that can be cherished for many years to come.