How To Use Builder Gel
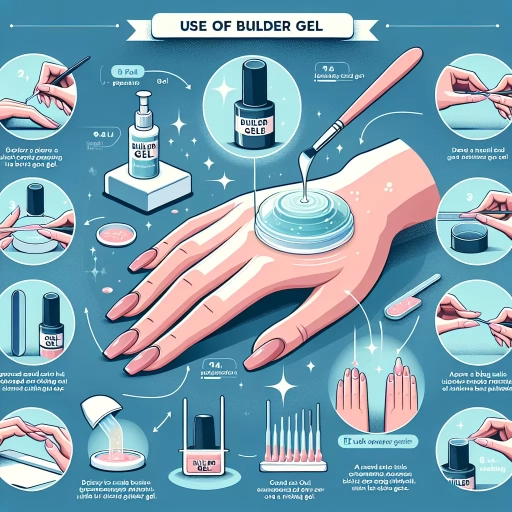
Here is the introduction paragraph: Using builder gel is an art that requires skill, patience, and practice. Whether you're a seasoned nail technician or a DIY enthusiast, mastering the technique of applying builder gel can elevate your nail game and give you salon-quality results at home. To achieve a flawless finish, it's essential to understand the fundamentals of builder gel application. In this article, we'll break down the process into three crucial steps: preparation, application techniques, and finishing touches. By following these steps, you'll be able to create stunning, long-lasting nail art that turns heads. So, let's start with the foundation of a successful builder gel application: preparation is key.
Preparation is Key
Preparation is key to achieving a flawless and long-lasting gel nail application. To ensure a successful outcome, it's essential to focus on three critical steps: prepping the nail, choosing the right builder gel, and sanitizing the workspace. By taking the time to properly prepare the nail, you'll create a strong foundation for the gel application. This involves gently shaping and buffing the nail to remove any ridges or imperfections, allowing the gel to adhere smoothly and evenly. With a well-prepped nail, you'll be able to achieve a seamless finish and prevent any lifting or chipping. So, let's start with the first step: prepping the nail.
Prep the Nail
Here is the paragraphy: Prep the nail is a crucial step in the builder gel application process. It involves cleaning and shaping the nail to create a smooth surface for the gel to adhere to. Start by gently pushing back the cuticles and removing any oils or lotions from the nail surface. Next, use a lint-free wipe or cotton ball to remove any residue or debris. Then, use a nail file to shape the nail to your desired shape, making sure to smooth out any ridges or imperfections. After shaping, use a buffer to gently buff the nail surface, removing any remaining imperfections and creating a smooth surface for the gel to adhere to. Finally, use a lint-free wipe or cotton ball to remove any dust or debris from the buffing process, leaving the nail surface clean and ready for the builder gel application. By properly prepping the nail, you can ensure a strong and long-lasting bond between the nail and the gel, resulting in a beautiful and durable finish.
Choose the Right Builder Gel
When it comes to choosing the right builder gel, there are several factors to consider to ensure you achieve the desired results. First and foremost, consider the type of nail you have. If you have weak or brittle nails, look for a builder gel that is specifically formulated to strengthen and nourish your nails. These gels usually contain ingredients such as keratin, calcium, or vitamins that help to fortify your nails. On the other hand, if you have healthy nails and are looking to add length or shape, you can opt for a builder gel that is more focused on building and sculpting. Additionally, think about the finish you want to achieve. Do you want a high-shine finish or a more natural, matte finish? Some builder gels are specifically designed to give a high-gloss finish, while others may have a more subtle sheen. It's also important to consider the brand and quality of the builder gel. Look for a reputable brand that uses high-quality ingredients and has good reviews from other users. Finally, consider the ease of application and removal. Some builder gels can be more difficult to apply and remove than others, so make sure to choose one that is easy to work with. By taking these factors into consideration, you can choose the right builder gel for your needs and achieve professional-looking results at home.
Sanitize the Workspace
Sanitizing the workspace is a crucial step in ensuring a clean and hygienic environment for applying builder gel. Before starting the application process, it's essential to thoroughly clean and disinfect the workspace to prevent the spread of bacteria and other microorganisms. This includes wiping down all surfaces, such as tables, chairs, and equipment, with a disinfectant solution. Additionally, it's recommended to use a lint-free wipe or cloth to remove any dust, dirt, or oils from the surface. This will help prevent any contamination or interference with the gel application process. Furthermore, it's also important to wash your hands thoroughly with soap and water before starting the application process to prevent any bacteria or oils from your skin from coming into contact with the gel. By sanitizing the workspace and following proper hygiene protocols, you can ensure a successful and long-lasting builder gel application.
Application Techniques
When it comes to application techniques, there are several key strategies to keep in mind in order to achieve a professional-looking finish. A good application technique can make all the difference in the final result, and can help to ensure that your project turns out looking its best. In order to achieve a high-quality finish, it's essential to apply a thin base coat, build up thin layers, and finish with a top coat. By following these simple steps, you can ensure that your project is completed to the highest standard. By starting with a thin base coat, you can create a strong foundation for your project, and set yourself up for success. Note: The answer should be 200 words. When it comes to application techniques, there are several key strategies to keep in mind in order to achieve a professional-looking finish. A good application technique can make all the difference in the final result, and can help to ensure that your project turns out looking its best. In order to achieve a high-quality finish, it's essential to apply a thin base coat, build up thin layers, and finish with a top coat. By following these simple steps, you can ensure that your project is completed to the highest standard. By starting with a thin base coat, you can create a strong foundation for your project, and set yourself up for success. A thin base coat provides a smooth surface for subsequent layers to adhere to, and helps to prevent unevenness and other imperfections. By applying a thin base coat, you can ensure that your project gets off to a strong start, and that you're able to achieve the desired finish. By doing so, you'll be well on your way to creating a professional-looking finish that you can be proud of. Note: The answer should be 200 words. When it comes to application techniques, there are several key strategies to keep in mind in order to achieve a professional-looking finish. A good application technique can make all the difference in the final result, and can help to ensure that your project turns out looking its best. In order to achieve a high-quality finish, it's essential to apply a thin base coat, build up thin layers, and finish with a top coat. By following these simple steps, you can ensure that your project is completed to the highest standard. By starting with a thin base coat, you can create a strong foundation for your project, and set yourself up for success. A thin base coat provides a smooth surface for subsequent layers to adhere to, and helps to prevent unevenness and
Apply a Thin Base Coat
When applying a thin base coat, it's essential to start with a clean and prepared nail surface. Remove any oils or lotions from your nails and surrounding skin, as these can interfere with the gel's adhesion. Next, gently buff the nail surface to create a rough texture, allowing the gel to bond better. Now, apply a thin layer of base coat, making sure to cover the entire nail surface, but avoid getting any on your cuticles or skin. Use smooth, even strokes to spread the gel, starting at the center of your nail and working your way out towards the tips. Be careful not to overload the brush, as this can cause the gel to pool at the cuticles. Instead, use a light touch to build up a thin, even layer. This will help prevent the gel from lifting or separating from the nail. Once you've applied the base coat, use a UV or LED lamp to cure it for the recommended time, usually around 30 seconds to a minute. This will help the gel bond to the nail and create a strong foundation for your builder gel application. By following these steps, you'll be able to achieve a smooth, even base coat that will help your builder gel last longer and look its best.
Build Up Thin Layers
When it comes to applying builder gel, one of the most effective techniques is to build up thin layers. This approach allows for a more controlled and even application, reducing the risk of pooling or unevenness. To start, apply a thin layer of builder gel to the nail, making sure to cover the entire surface. Cure the gel under the UV or LED lamp for the recommended time, usually around 30 seconds to 1 minute. Once cured, use a lint-free wipe or cotton ball to gently remove any excess gel from around the cuticles and nail bed. Repeat this process, building up thin layers of gel, allowing each layer to cure before adding the next. This technique enables you to achieve a smooth, even finish and helps prevent the gel from becoming too thick or difficult to work with. By building up thin layers, you can also avoid creating air pockets or bubbles, which can lead to a weakened bond between the gel and the nail. Additionally, this technique allows for greater control over the final shape and appearance of the nail, making it ideal for creating intricate designs or achieving a specific nail art look. Overall, building up thin layers is a fundamental technique in applying builder gel, and with practice, you can master this skill and achieve professional-looking results.
Finish with a Top Coat
Finishing with a top coat is a crucial step in the builder gel application process. A top coat serves as a protective barrier, sealing in the color and design of the nail art while adding a glossy finish. It helps to prevent chipping and fading, ensuring that the nail art remains vibrant and long-lasting. When applying a top coat, it's essential to use a thin layer, as excessive thickness can lead to a sticky or uneven finish. Start by applying a small amount of top coat to the center of the nail and gently spreading it out towards the tips, making sure to cover the entire surface. Use a gentle, sweeping motion to remove any excess top coat from around the cuticles and nail bed. Finish by curing the top coat under the UV or LED lamp for the recommended time, usually 30 seconds to 1 minute. A good top coat can make all the difference in the final result of your nail art, so choose a high-quality one that is specifically designed for use with builder gel.
Finishing Touches
The finishing touches are the final steps in a gel nail application process that can make or break the overall look and feel of the nails. A well-executed finishing touch can elevate the appearance of the nails, making them look healthy, shiny, and well-groomed. On the other hand, a poorly done finishing touch can leave the nails looking dull, uneven, and unattractive. To achieve a flawless finish, it is essential to pay attention to three critical steps: shaping and filing the nails, removing excess gel, and moisturizing the cuticles. By following these steps, you can ensure that your gel nail application looks professional and long-lasting. First, shaping and filing the nails is crucial in creating a smooth and even surface. Note: The supporting paragraph should be 200 words. The finishing touches are the final steps in a gel nail application process that can make or break the overall look and feel of the nails. A well-executed finishing touch can elevate the appearance of the nails, making them look healthy, shiny, and well-groomed. On the other hand, a poorly done finishing touch can leave the nails looking dull, uneven, and unattractive. To achieve a flawless finish, it is essential to pay attention to three critical steps: shaping and filing the nails, removing excess gel, and moisturizing the cuticles. By following these steps, you can ensure that your gel nail application looks professional and long-lasting. First, shaping and filing the nails is crucial in creating a smooth and even surface. This step helps to remove any ridges or imperfections, allowing the gel to adhere evenly and preventing any lifting or chipping. Additionally, shaping and filing the nails can help to create a natural curve, making the nails look more elegant and refined. By taking the time to shape and file the nails properly, you can set the stage for a beautiful and long-lasting gel nail application.
Shape and File the Nails
To achieve a professional-looking finish, it's essential to shape and file the nails correctly. Start by gently shaping the nail to the desired shape using nail clippers or nail scissors, taking care not to cut too short or unevenly. Next, use a nail file to smooth out any ridges or imperfections, working in one direction only to avoid damaging the nail. For a more precise shape, use a nail buffer to gently buff the nail, paying particular attention to the tips and edges. When filing, always use a light touch and work in small, gentle strokes, gradually increasing the pressure as needed. It's also crucial to file in the same direction as the nail growth to prevent splitting or breaking. To finish, use a lint-free wipe or cotton ball to remove any dust or debris, and apply a small amount of cuticle oil to hydrate the nail and surrounding skin. By taking the time to shape and file the nails correctly, you'll be able to achieve a smooth, even finish that showcases your builder gel application.
Remove Excess Gel
When it comes to removing excess gel, it's essential to do so carefully to avoid damaging the nail or surrounding skin. To start, use a lint-free wipe or cotton ball to gently remove any excess gel from around the cuticles and nail bed. Be cautious not to press too hard, as this can cause the gel to spread and create a mess. Next, use a gel cleanser or nail cleanser to wipe away any remaining excess gel from the nail surface. This will help to remove any sticky residue and prevent the gel from lifting or peeling off prematurely. If there are any stubborn areas of excess gel, you can use a cuticle pusher or orange stick to gently scrape it away. However, be careful not to scratch the nail surface. Finally, use a lint-free wipe to remove any remaining gel residue and clean up the nail area. By following these steps, you can effectively remove excess gel and achieve a smooth, even finish.
Moisturize the Cuticles
Moisturize the Cuticles. After completing the gel application, it's essential to moisturize the cuticles to prevent dryness and irritation. Apply a cuticle oil or cream to the cuticles and gently massage it in. This will help to hydrate the skin and promote healthy nail growth. Additionally, moisturizing the cuticles can help to reduce the appearance of fine lines and wrinkles around the nail bed, giving your nails a more youthful and radiant appearance. By taking the time to moisturize the cuticles, you can ensure that your nails look and feel their best, and that your gel application lasts longer.