How To Insert Page Break In Word
Here is the introduction paragraph: When working with Microsoft Word, managing page layout is crucial for creating professional-looking documents. One essential feature that helps achieve this is the page break. A page break allows you to control where a new page begins, ensuring that your content is organized and easy to read. In this article, we will explore how to effectively use page breaks in Word, starting with understanding the basics of page breaks, including their types and how they differ from section breaks. We will then delve into the step-by-step process of inserting a page break in Word, covering both manual and automatic methods. Finally, we will discuss how to customize and manage page breaks to suit your document's specific needs. By mastering these skills, you will be able to enhance the overall appearance and readability of your Word documents. Let's begin by understanding page breaks in Word.
Understanding Page Breaks in Word
When working with Microsoft Word, understanding page breaks is essential for creating well-formatted and visually appealing documents. Page breaks are a crucial element in Word that allows users to control the layout and flow of their content. In this article, we will delve into the world of page breaks in Word, exploring what they are, the different types available, and why they are an indispensable tool for any Word user. We will start by examining the fundamental question: what is a page break in Word? By grasping this concept, users can unlock the full potential of page breaks and take their document formatting to the next level. So, let's dive in and explore the basics of page breaks in Word, starting with the most essential question: what is a page break in Word?
What is a Page Break in Word?
A page break in Word is a feature that allows you to control where a page ends and a new one begins. It is a formatting mark that tells Word to start a new page at a specific point in your document. When you insert a page break, Word will automatically move the text that follows it to the next page, creating a new page break. This feature is useful when you want to control the layout of your document, such as when you're creating a report, a thesis, or a book. By inserting a page break, you can ensure that certain sections or chapters start on a new page, making your document more organized and easier to read. Additionally, page breaks can also be used to separate different sections of a document, such as a table of contents, an introduction, and a body of text. Overall, page breaks are an essential feature in Word that can help you create a well-structured and visually appealing document.
Types of Page Breaks in Word
In Word, there are two primary types of page breaks: manual and automatic. Manual page breaks are inserted by the user, allowing for precise control over the layout and flow of the document. There are three types of manual page breaks: Next Page, Continuous, and Even Page. A Next Page break starts a new section on the next page, while a Continuous break starts a new section on the same page. An Even Page break starts a new section on the next even-numbered page. Automatic page breaks, on the other hand, occur when Word determines that a page is full and inserts a break to start a new page. These breaks can be adjusted by modifying the page layout and formatting options. Understanding the different types of page breaks is essential for effective document design and layout in Word.
Why Use Page Breaks in Word?
Using page breaks in Word is essential for organizing and formatting your document effectively. Page breaks allow you to control where a page ends and a new one begins, ensuring that your content is presented in a logical and visually appealing way. By inserting page breaks, you can separate sections of your document, such as chapters, headings, or tables, and start a new page for each one. This helps to improve the readability and flow of your document, making it easier for readers to follow and understand. Additionally, page breaks enable you to create a clear and consistent layout, which is particularly important for formal documents, such as reports, theses, and academic papers. By using page breaks, you can also avoid awkward page breaks, such as those that occur in the middle of a sentence or paragraph, and ensure that your document looks professional and polished. Overall, using page breaks in Word is a simple yet effective way to enhance the organization, readability, and overall quality of your document.
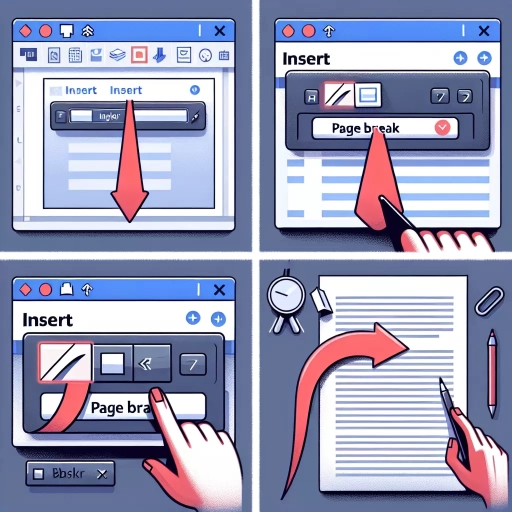
Inserting a Page Break in Word
Inserting a page break in Microsoft Word is a simple yet essential task that can help you organize and format your documents more effectively. When working on a long document, you may need to start a new page at a specific point, such as when beginning a new chapter or section. Fortunately, Word provides several ways to insert a page break, giving you flexibility and control over your document's layout. In this article, we will explore three methods for inserting a page break in Word: using the Insert Page Break option, using the keyboard shortcut, and using the Layout tab. By the end of this article, you will be able to choose the method that best suits your needs and workflow. Let's start by examining the first method: using the Insert Page Break option.
Using the Insert Page Break Option
When you need to start a new page in your document, using the Insert Page Break option is a convenient and efficient way to do so. This feature allows you to manually insert a page break at a specific point in your document, giving you more control over the layout and organization of your content. To use the Insert Page Break option, simply place your cursor where you want the page break to occur, go to the "Insert" tab in the ribbon, and click on the "Page Break" button in the "Pages" group. Alternatively, you can also use the keyboard shortcut "Ctrl + Enter" to insert a page break. Once you've inserted the page break, you can adjust the layout of your document as needed, including adding headers, footers, and other elements to each page. The Insert Page Break option is particularly useful when you need to create a new page for a specific section or chapter in your document, or when you want to separate a large block of text into more manageable sections. By using this feature, you can create a more organized and visually appealing document that is easier to read and understand.
Using the Keyboard Shortcut
Using the keyboard shortcut is another efficient way to insert a page break in Word. To do this, simply place your cursor where you want the page break to occur, and then press the "Ctrl + Enter" keys simultaneously. This will instantly insert a page break at the cursor's location, and you can continue typing on the next page. Alternatively, you can also use the "Fn + Enter" keys if you're using a laptop. This method is particularly useful when you're working on a long document and need to quickly insert multiple page breaks. By using the keyboard shortcut, you can save time and avoid having to navigate through the menus or ribbons. Additionally, this method also allows you to maintain your focus on the content of your document, rather than being distracted by the interface. Overall, using the keyboard shortcut is a convenient and efficient way to insert page breaks in Word, and it's definitely worth getting familiar with if you're a frequent user of the software.
Using the Layout Tab
When working with page breaks in Microsoft Word, the Layout tab is an essential tool to master. Located in the ribbon at the top of the screen, the Layout tab offers a range of features that allow you to customize the layout of your document, including the insertion of page breaks. To access the Layout tab, simply click on it in the ribbon, and you will be presented with a variety of options, including Margins, Orientation, Size, and Breaks. The Breaks section is where you will find the tools to insert a page break, including the "Page Break" button, which allows you to insert a manual page break at the cursor's current position. Additionally, the Layout tab also offers the "Section Break" feature, which enables you to divide your document into separate sections, each with its own layout and formatting options. By using the Layout tab, you can easily insert page breaks and customize the layout of your document to suit your needs. Furthermore, the Layout tab also provides options to adjust the margins, orientation, and size of your document, giving you complete control over the layout and appearance of your document. By mastering the Layout tab, you can take your document formatting to the next level and create professional-looking documents with ease.
Customizing and Managing Page Breaks
Customizing and managing page breaks is an essential skill for anyone working with documents, especially those that require precise formatting and layout. When working with long documents, it's crucial to have control over where page breaks occur to ensure that the content flows smoothly and is easy to read. In this article, we'll explore three key aspects of customizing and managing page breaks: viewing and deleting page breaks, adjusting page break settings, and using section breaks for complex documents. By mastering these techniques, you'll be able to take your document formatting to the next level and ensure that your content is presented in the best possible way. Let's start by exploring how to view and delete page breaks, a fundamental step in taking control of your document's layout.
Viewing and Deleting Page Breaks
Viewing and deleting page breaks is an essential skill when working with Microsoft Word documents. To view page breaks, go to the "Home" tab and click on the "Paragraph" group dialog box launcher. In the "Paragraph" dialog box, select the "Line and Page Breaks" tab. Check the box next to "Page break before" to display page breaks in your document. You can also use the keyboard shortcut "Ctrl+Shift+8" to toggle the display of page breaks on and off. Once you can see the page breaks, you can delete them by selecting the break and pressing the "Delete" key. Alternatively, you can use the "Find and Replace" feature to delete all page breaks in your document at once. To do this, press "Ctrl+H" to open the "Find and Replace" dialog box, type "^m" in the "Find what" field, and click "Replace All." This will delete all manual page breaks in your document. Note that this method will not delete automatic page breaks, which are inserted by Word when a page is full. To delete automatic page breaks, you need to adjust the page layout and formatting of your document.
Adjusting Page Break Settings
Adjusting page break settings in Microsoft Word allows you to control how your document is divided into pages. To access page break settings, go to the "Layout" or "Page Layout" tab, depending on your version of Word, and click on the "Breaks" button in the "Page Setup" group. From the drop-down menu, select "Page Break" to view the page break options. You can choose to insert a page break before or after a specific section or paragraph, or you can adjust the page break settings to control how Word handles page breaks automatically. For example, you can set Word to automatically insert a page break after a certain number of lines or paragraphs, or you can specify that a page break should be inserted before a specific heading or section. Additionally, you can adjust the page break settings to control the spacing between pages, such as setting a specific amount of space before or after a page break. By adjusting page break settings, you can customize the layout of your document and ensure that your content is presented in a clear and organized manner.
Using Section Breaks for Complex Documents
When working with complex documents, such as academic papers, technical reports, or business proposals, it's essential to use section breaks to organize and structure your content effectively. Section breaks allow you to divide your document into separate sections, each with its own formatting, layout, and pagination. This feature is particularly useful when you need to create a document with multiple chapters, appendices, or sections that require different formatting or numbering schemes. By inserting section breaks, you can create a clear and logical structure for your document, making it easier to navigate and understand. Additionally, section breaks enable you to apply different formatting and layout options to each section, such as changing the font, margins, or line spacing, without affecting the rest of the document. This feature is also useful when you need to create a table of contents or index, as section breaks allow you to define the scope of each section and generate accurate headings and page numbers. Overall, using section breaks is an essential skill for creating complex documents in Word, and can help you to produce professional-looking and well-organized documents with ease.