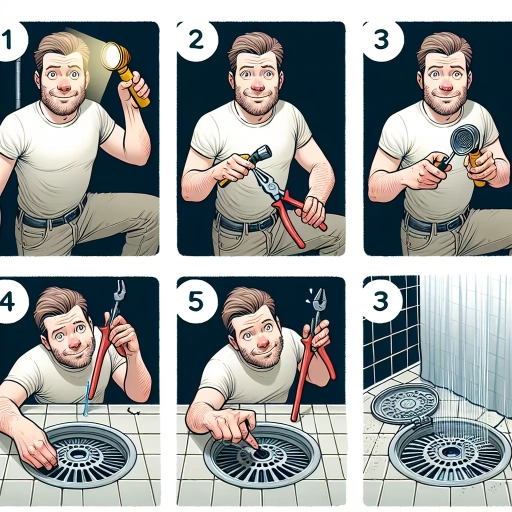
How To Remove Shower Drain Cover
Removing a shower drain cover can be a daunting task, but with the right approach, it can be done efficiently and effectively. Whether you're looking to clean your shower drain, replace a faulty cover, or simply inspect the drain for any blockages, knowing how to remove the cover is essential. To successfully remove a shower drain cover, it's crucial to understand the process involved, which can be broken down into three key steps: preparation, removal, and post-removal maintenance. In this article, we'll delve into each of these steps, starting with the importance of preparation. By understanding what tools and materials you'll need, as well as any potential challenges you may face, you'll be better equipped to tackle the task at hand. So, let's begin by exploring why preparation is key to a successful shower drain cover removal.
Preparation is Key
Preparation is key to a successful project, and this is especially true when it comes to DIY home repairs. Before starting any project, it's essential to take the necessary steps to ensure a smooth and safe process. This includes turning off the water supply, clearing the surrounding area, and gathering the necessary tools. By doing so, you'll be able to work efficiently and effectively, minimizing the risk of accidents and errors. In this article, we'll explore the importance of preparation in DIY home repairs, starting with the crucial step of turning off the water supply.
Turn Off the Water Supply
To remove a shower drain cover, it's essential to turn off the water supply to the shower. This is a crucial step to prevent any water from flowing into the drain while you're working on it. Locate the shut-off valves for the hot and cold water lines that supply the shower. These valves are usually found near the water supply lines, and they may be located behind the shower wall or near the water heater. Turn both valves clockwise to shut off the water supply. Open the shower faucet to drain the water from the pipes. Once the water has stopped flowing, you can proceed to remove the shower drain cover. It's also a good idea to place a bucket or a container under the drain to catch any remaining water that may spill out when you remove the cover. By turning off the water supply, you'll be able to work on the drain cover without any water flowing into it, making the process much safer and more efficient.
Clear the Surrounding Area
Clear the surrounding area around the shower drain cover to ensure a safe and efficient removal process. Start by picking up any personal items, such as towels, toiletries, or trash, that may be obstructing your access to the drain. Next, use a gentle cleanser and a soft-bristled brush to remove any visible debris, hair, or soap scum that may be accumulated around the drain cover. This will prevent any dirt or grime from getting in the way of your removal tools and make the process much smoother. Additionally, consider laying down a drop cloth or old towels around the drain to protect the surrounding floor from any potential water spills or messes. By clearing the surrounding area, you'll be able to focus on removing the shower drain cover without any distractions or obstacles, making the process much faster and more effective.
Gather the Necessary Tools
To remove a shower drain cover, you'll need to gather the necessary tools to make the process smooth and efficient. The tools required may vary depending on the type of drain cover you have, but some common ones include a screwdriver, preferably a flathead or Phillips head, depending on the screw type. You may also need a drain key or an adjustable wrench to loosen any corroded or stuck parts. Additionally, a pair of needle-nose pliers can come in handy for removing any small clips or screws. If your drain cover is held in place by a clip or spring, you may need a clip remover or a spring compressor to safely release the tension. It's also a good idea to have a bucket or container ready to catch any water that may spill out when you remove the cover. Having all these tools at your disposal will ensure that you can tackle the job with confidence and avoid any potential setbacks.
Removing the Shower Drain Cover
Removing a shower drain cover can be a daunting task, but it's a necessary step for cleaning and maintaining your shower drain. There are several methods to remove a shower drain cover, and the approach you take will depend on the type of cover you have. You can use a screwdriver or Allen wrench to remove the screws that hold the cover in place, lift the cover with a flathead screwdriver, or twist and pull the cover to release it from the drain. In this article, we will explore these methods in more detail, starting with using a screwdriver or Allen wrench to remove the screws that hold the cover in place.
Using a Screwdriver or Allen Wrench
Using a screwdriver or Allen wrench is a crucial step in removing the shower drain cover. To begin, you'll need to determine the type of screw or bolt that holds the cover in place. Most shower drain covers are secured with either a flathead screw or an Allen bolt. If you're unsure, take a closer look at the screw head or consult your shower's manual. Once you've identified the type of screw, select the corresponding screwdriver or Allen wrench. For flathead screws, use a flathead screwdriver, and for Allen bolts, use an Allen wrench that fits the bolt's size. Insert the screwdriver or Allen wrench into the screw head, making sure it's securely seated. Then, turn the screwdriver or Allen wrench counterclockwise to loosen the screw. Be careful not to strip the screw head by applying too much pressure. If the screw is particularly stubborn, you can use a bit of penetrating oil to help loosen it. Once the screw is loose, you should be able to remove the shower drain cover. If the cover is still stuck, you can use a gentle prying motion to help dislodge it. Remember to be patient and gentle when using a screwdriver or Allen wrench to avoid damaging the shower drain or surrounding area.
Lifting the Cover with a Flathead Screwdriver
To lift the cover with a flathead screwdriver, start by inserting the flathead screwdriver into the gap between the cover and the shower floor. Gently pry the cover upwards, working your way around the edges until it comes loose. Be careful not to scratch the shower floor or the cover itself. If the cover is stuck, you can use a bit more force, but be cautious not to damage the surrounding area. Once the cover is lifted, you should be able to see the screws or clips that hold it in place. Remove the screws or release the clips to completely remove the cover. If you're having trouble lifting the cover, you can also try using a rubber mallet or a cloth to protect the surface and provide extra grip. Additionally, if the cover is particularly stubborn, you can try soaking it in warm water or using a drain removal tool to help loosen it. By following these steps, you should be able to successfully lift the cover with a flathead screwdriver and access the shower drain.
Twisting and Pulling the Cover
Twisting and pulling the cover is a common method for removing shower drain covers, especially for those with a visible screw or clip. To start, locate the screw or clip that holds the cover in place. If it's a screw, use a flathead screwdriver to loosen it by turning it counterclockwise. Be careful not to strip the screw head. If it's a clip, use a pair of needle-nose pliers to grip the clip and pull it away from the drain. Once the screw or clip is removed, grasp the cover firmly and twist it counterclockwise while pulling it upwards. This should release the cover from the drain. If the cover is stuck, you can use a gentle rocking motion to help dislodge it. Be careful not to apply too much force, as this can damage the drain or surrounding area. If the cover still doesn't budge, you may need to use a drain removal tool or consult a professional for assistance.
Post-Removal and Maintenance
After removing the old shower drain cover, it's essential to follow a series of steps to ensure a proper post-removal and maintenance process. This process involves inspecting and cleaning the drain to remove any debris or mineral buildup, replacing the gasket or O-ring to prevent leaks, and reinstalling the shower drain cover to complete the job. By following these steps, you can ensure a watertight seal and prevent future clogs. In this article, we will guide you through the post-removal and maintenance process, starting with the crucial step of inspecting and cleaning the drain.
Inspecting and Cleaning the Drain
Inspecting and cleaning the drain is a crucial step in maintaining a clog-free shower drain. After removing the drain cover, take a moment to inspect the drain for any visible debris, hair, or soap scum buildup. Use a flashlight to illuminate the drain and look for any signs of mineral deposits or corrosion. If you notice any blockages, use a drain snake or plumber's auger to remove them. For tougher clogs, you can use a chemical drain cleaner, but be sure to follow the manufacturer's instructions and take necessary safety precautions. Once you've cleared any blockages, use a soft-bristled brush or a drain cleaning brush to scrub away any remaining debris or buildup. Rinse the drain thoroughly with warm water to remove any remaining debris. To prevent future clogs, consider using a drain screen or filter to catch hair and other debris before they enter the drain. Regularly cleaning and inspecting your shower drain can help prevent clogs and keep your shower running smoothly. Additionally, consider using a natural drain cleaner, such as baking soda and vinegar, to help break down any tough buildup and keep your drain flowing freely. By taking the time to inspect and clean your shower drain, you can help extend the life of your shower and prevent costly repairs down the line.
Replacing the Gasket or O-Ring
Replacing the gasket or O-ring is a crucial step in maintaining the shower drain cover's functionality and preventing leaks. Over time, the gasket or O-ring can become worn out, damaged, or mineral-encrusted, leading to water seepage and other issues. To replace the gasket or O-ring, start by inspecting the old one for any signs of damage or wear. If it's damaged, remove it carefully to avoid scratching the surrounding surface. Next, clean the area thoroughly with a soft brush and mild soap to remove any debris or mineral buildup. Once the area is clean, apply a small amount of silicone-based lubricant to the new gasket or O-ring, making sure to cover the entire surface. This will help the gasket or O-ring seal properly and prevent leaks. Finally, place the new gasket or O-ring onto the shower drain cover, ensuring it's centered and evenly spaced. Tighten the screws or clips securely, but avoid overtightening, which can damage the gasket or O-ring. By replacing the gasket or O-ring, you'll be able to maintain a watertight seal and prevent any future leaks or issues with your shower drain cover. Regularly inspecting and replacing the gasket or O-ring can also help extend the lifespan of your shower drain cover and prevent costly repairs down the line.
Reinstalling the Shower Drain Cover
Reinstalling the shower drain cover is a relatively straightforward process that requires attention to detail to ensure a secure and watertight seal. To begin, inspect the drain cover and the surrounding area for any debris or mineral buildup, and clean it thoroughly with a soft brush and mild soap. Next, apply a thin layer of plumber's putty or silicone sealant to the underside of the drain cover, making sure to cover the entire surface. Then, carefully place the drain cover over the drain, ensuring it is centered and even. Gently press the cover down, applying even pressure to avoid creating air pockets or gaps. Finally, tighten the screws or clips that hold the cover in place, making sure they are snug but not overtightened, as this can damage the cover or the surrounding tile. It's also a good idea to test the drain by running some water through it to ensure the cover is properly sealed and functioning correctly. By following these steps, you can ensure a successful reinstallation of your shower drain cover and maintain a safe and functional showering experience.