How To Spread Pizza Dough
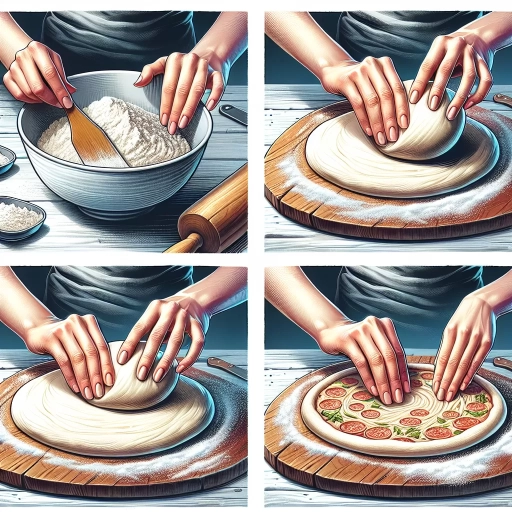
The art of spreading pizza dough is a crucial step in creating the perfect pie. It requires a combination of skill, patience, and practice to achieve a crust that is both crispy and chewy. To master the art of spreading pizza dough, it's essential to understand the importance of preparation, technique, and finishing touches. In this article, we will explore the key elements of spreading pizza dough, starting with the foundation of preparation. We will discuss the importance of having the right tools, ingredients, and environment to ensure a successful dough-spreading experience. By understanding the preparation process, you'll be able to set yourself up for success and move on to mastering the spreading technique, which involves using the right amount of force and motion to achieve the perfect shape. Finally, we'll cover the finishing touches, including shaping and topping your dough to create a delicious and visually appealing pizza. Preparation is Key.
Preparation is Key
When it comes to baking, preparation is key to achieving success. A well-prepared baker is a happy baker, and a happy baker produces delicious treats that impress family and friends. To ensure that your baked goods turn out light, fluffy, and full of flavor, it's essential to start with the basics. Choosing the right flour, understanding the role of yeast, and preparing the dough in advance are all crucial steps in the baking process. By taking the time to select the perfect flour for your recipe, you'll be laying the foundation for a successful bake. With so many types of flour available, it can be overwhelming to decide which one to use. In the next section, we'll explore the different types of flour and how to choose the right one for your baking needs.
Choose the Right Flour
When it comes to making pizza dough, choosing the right flour is crucial. The type of flour used can affect the texture, flavor, and overall quality of the crust. There are several types of flour to choose from, including all-purpose flour, bread flour, and Italian "00" flour. All-purpose flour is a good starting point for beginners, as it has a neutral flavor and a balanced protein content. However, bread flour has a higher protein content, which can result in a chewier crust. Italian "00" flour, on the other hand, has a finer texture and a lower protein content, making it ideal for Neapolitan-style pizzas. Ultimately, the choice of flour depends on the type of pizza you want to make and your personal preference. It's also worth noting that using a high-quality flour can make a big difference in the final product, so it's worth investing in a good brand. Additionally, some flours may have additives or preservatives, so it's a good idea to read the label and choose a flour that is unbleached and unbromated. By choosing the right flour, you can ensure that your pizza dough turns out light, airy, and full of flavor.
Understand the Role of Yeast
Yeast is a microorganism that plays a crucial role in the fermentation process of pizza dough. It is responsible for converting the sugars present in the dough into carbon dioxide gas, which causes the dough to rise. Yeast fermentation is a complex process that involves the breakdown of starches and sugars into simpler compounds, releasing carbon dioxide and ethanol as byproducts. The type and amount of yeast used can significantly impact the final texture and flavor of the crust. Active dry yeast is the most commonly used type of yeast in pizza dough, as it is easy to store and has a long shelf life. However, some pizza makers prefer to use fresh yeast or sourdough starter for a more complex flavor profile. Understanding the role of yeast in pizza dough is essential for achieving the perfect crust, as it allows you to control the fermentation process and adjust the recipe accordingly. By monitoring the yeast's activity and adjusting the temperature, humidity, and proofing time, you can optimize the fermentation process and produce a crust that is crispy on the outside and chewy on the inside.
Prepare the Dough in Advance
Preparing the dough in advance is a crucial step in achieving a perfectly spread pizza crust. By allowing the dough to rest and rise, you enable the gluten to relax, making it easier to shape and stretch. This process, known as "proofing," can be done several hours or even a day in advance, depending on your schedule and preferences. To prepare the dough in advance, start by mixing and kneading the ingredients as you normally would. Then, place the dough in a lightly oiled bowl, cover it with plastic wrap or a damp towel, and let it rest in a warm, draft-free area. The ideal temperature for proofing is between 75°F and 80°F (24°C and 27°C). As the dough rises, you'll notice it start to expand and develop a few large bubbles. This is a sign that the yeast is active and the dough is ready to be shaped. Once the dough has proofed, you can punch it down and divide it into smaller portions, depending on the size of pizza you want to make. At this point, you can either let the dough rest for another 30 minutes to an hour before shaping, or you can shape it immediately and let it rest for a shorter period of time. Either way, the key is to allow the dough to relax and become pliable, making it easier to spread and shape into a perfect circle. By preparing the dough in advance, you'll be rewarded with a crust that's crispy on the outside, chewy on the inside, and full of flavor.
Mastering the Spreading Technique
Mastering the spreading technique is a crucial skill for any baker, chef, or home cook looking to elevate their culinary game. To achieve a perfectly spread dough, one must first start with a ball of dough, ensuring it is the right size and consistency for the desired outcome. From there, it's essential to use the right amount of pressure, applying gentle yet firm strokes to coax the dough into its desired shape. Finally, the dough must be stretched and folded, allowing it to relax and redistribute its gluten, resulting in a smooth, even texture. By mastering these three key elements, anyone can achieve a beautifully spread dough, perfect for crafting delicious pizzas, breads, and pastries. So, let's begin by exploring the first crucial step: starting with a ball of dough.
Start with a Ball of Dough
Start with a ball of dough. This is the foundation of a perfectly spread pizza crust. To begin, gently remove the dough from the refrigerator and let it sit at room temperature for at least 30 minutes to allow it to relax and become more pliable. Next, lightly flour a clean surface, such as a countertop or a pastry mat, to prevent the dough from sticking. Place the dough in the center of the floured surface and gently press down on it with your fingers, applying gentle pressure to start to flatten it out. As you press, rotate the dough 90 degrees to ensure even flattening and to prevent the dough from developing any uneven areas. Continue to press and rotate the dough until it begins to take on a circular shape, at which point you can start to use your hands to gently stretch and shape the dough into a more uniform circle. Throughout this process, be careful not to overwork the dough, as this can cause it to become tough and dense. By starting with a ball of dough and gradually flattening and shaping it, you'll be well on your way to creating a delicious and evenly cooked pizza crust.
Use the Right Amount of Pressure
Applying the right amount of pressure is crucial when spreading pizza dough. Too little pressure can result in an uneven, thick crust, while too much pressure can cause the dough to tear or become too thin. To achieve the perfect balance, start by applying gentle pressure with your fingertips, gradually increasing the pressure as needed. This will help you develop a feel for the dough's resistance and allow you to adjust your pressure accordingly. As you spread the dough, pay attention to its texture and consistency, using more or less pressure to achieve the desired thickness and evenness. By mastering the art of applying the right amount of pressure, you'll be able to create a crust that's crispy on the outside and chewy on the inside, with a perfectly balanced texture that complements your favorite toppings.
Stretch and Fold the Dough
The stretch and fold technique is a crucial step in developing the gluten in pizza dough, which is essential for achieving a crispy crust and a well-balanced flavor. To perform the stretch and fold, start by gently lifting the dough out of the bowl or container it has been rising in, taking care not to deflate it. Hold the dough by the edges, with your hands positioned at the 3 o'clock and 9 o'clock positions, and gently stretch it outwards, keeping your arms straight and your elbows locked. As you stretch the dough, focus on developing the gluten by applying gentle tension, rather than pulling or tearing the dough. Once the dough has been stretched to about 1.5 to 2 times its original size, fold it back onto itself, using a gentle, sweeping motion. Repeat this process several times, rotating the dough 90 degrees after each fold to ensure even development. The stretch and fold technique helps to redistribute the yeast, develop the gluten, and create a more complex flavor profile, all of which are essential for creating a delicious and authentic pizza crust. By incorporating the stretch and fold into your pizza-making routine, you'll be able to achieve a crust that is crispy on the outside, chewy on the inside, and full of flavor.
Shaping and Finishing Touches
The final touches of a dish can make all the difference in its presentation and overall appeal. When it comes to shaping and adding finishing touches, there are several techniques that can elevate a dish from ordinary to extraordinary. Three key techniques to consider are forming a circle or rectangle, thinning out the edges, and adding a crust border. By mastering these techniques, cooks can add a professional touch to their dishes and make them more visually appealing. To start, forming a circle or rectangle is a great way to add symmetry and balance to a dish. This can be achieved by using a ring mold or a rectangular baking dish, and can be used for a variety of dishes, from savory tartes to sweet desserts. By forming a circle or rectangle, cooks can create a clean and elegant presentation that is sure to impress.
Form a Circle or Rectangle
To form a circle or rectangle, start by gently lifting the dough out of the bowl or surface it's been resting on, taking care not to stretch or pull it excessively. For a circular shape, place the dough onto a lightly floured surface or a piece of parchment paper, and use your hands to shape it into a round form. You can also use a pizza peel or a lightly floured pizza stone to help maintain the shape. To achieve a uniform circle, use your fingers to gently press the dough from the center outwards, working your way around the dough to create an even thickness. For a rectangular shape, place the dough onto a lightly floured surface or a piece of parchment paper, and use your hands to shape it into a rectangular form. You can also use a rectangular pizza peel or a lightly floured baking sheet to help maintain the shape. To achieve a uniform rectangle, use your fingers to gently press the dough from the center outwards, working your way around the dough to create an even thickness. In both cases, make sure to maintain a consistent thickness throughout the dough to ensure even cooking.
Thin Out the Edges
When it comes to shaping and finishing touches, thinning out the edges of the pizza dough is a crucial step. This process, also known as "par-baking" or "pre-baking," involves using your fingers or a pastry brush to gently stretch and thin out the edges of the dough, creating a crust that is crispy on the outside and chewy on the inside. To thin out the edges, start by holding the dough by the edges and gently stretching it outwards, using a gentle pulling motion. As you stretch, use your fingers to press the dough down and outwards, creating a thin, even layer. Be careful not to over-stretch the dough, as this can cause it to tear or become too thin. Next, use a pastry brush to apply a small amount of water to the edges of the dough, and then use your fingers to gently shape and smooth out the edges, creating a clean and even finish. By thinning out the edges of the pizza dough, you'll be able to create a crust that is crispy and golden, with a delicate texture that will add depth and complexity to your pizza. Additionally, thinning out the edges will also help to prevent the crust from becoming too thick and doughy, allowing the toppings to shine and the flavors to meld together in perfect harmony. With a little practice and patience, you'll be able to master the art of thinning out the edges and creating a truly exceptional pizza crust.
Add a Crust Border
Adding a crust border to your pizza dough is a simple yet effective way to enhance its appearance and texture. To create a crust border, start by holding the dough by the edges and gently stretching it outwards to form a lip around the perimeter. You can also use your thumbs to press the dough outwards and create a more defined border. As you shape the border, make sure to keep the dough evenly thick and avoid creating any weak spots that could lead to cracks or breaks during baking. A well-crafted crust border not only adds visual appeal to your pizza but also helps to contain the toppings and prevent them from spilling over during cooking. Additionally, a crust border can be topped with a variety of ingredients, such as sesame seeds, poppy seeds, or grated cheese, to add extra flavor and texture to your pizza. By taking the time to add a crust border to your pizza dough, you can elevate your pizza-making skills and create a more professional-looking pie that is sure to impress.