How To Take A Screenshot On Acer Laptop
 Whether you’re working on a project, demonstrating a process, or merely holding onto a piece of digital information for later review, being able to screen capture on your Acer laptop could be incredibly valuable. You might think taking screenshots is a universal process, but Acer laptops have some specific ways to accomplish this task. This article aims to provide a concise, user-friendly guide on how to effortlessly take screenshots on your Acer laptop. Our journey will be divided into three easy-to-follow sections, each covering a distinct method of taking screenshots to accommodate your specific needs. The first segment, Subtitle 1, will present the simplest way to screenshot using keyboard shortcuts. Subtitle 2 will dive into the utilization of Windows' in-built Snipping Tool for more flexibility and precision. Lastly, we will explore in Subtitle 3, how to capture a screenshot with the help of third-party applications for those who are looking for more advanced options. Let's embark on this digital journey starting with the quickest and most easily accessible method - the keyboard shortcut.
Subtitle 1
Developing a deeper understanding of Subtitle 1 requires looking at its three integral components which provide clear insight into how it operates. Three supporting ideas that fortify its meaning and purpose include Supporting Idea 1, Supporting Idea 2, and Supporting Idea 3. Each of these concepts play unique roles in shaping Subtitle 1 and provide a framework for an in-depth analysis. To begin with, Supporting Idea 1 addresses the fundamental characteristics of Subtitle 1, encapsulating the core features and elements that sets it apart. Assuming a significant position in Subtitle 1, it acts as a cornerstone that cements the base for further understanding. On the other hand, Supporting Idea 2 and Supporting Idea 3 contribute by offering additional layers of complexities and depending factors that enrich Subtitle 1's dimension. Together, these support concepts create a comprehensive view of Subtitle 1, broadening our perspectives. Let's first dive into the details of Supporting Idea 1, which lays the fundamental groundwork for understanding the essence of Subtitle 1.
Supporting Idea 1
Supporting Idea 1: Using Keyboard Shortcuts for Screenshots
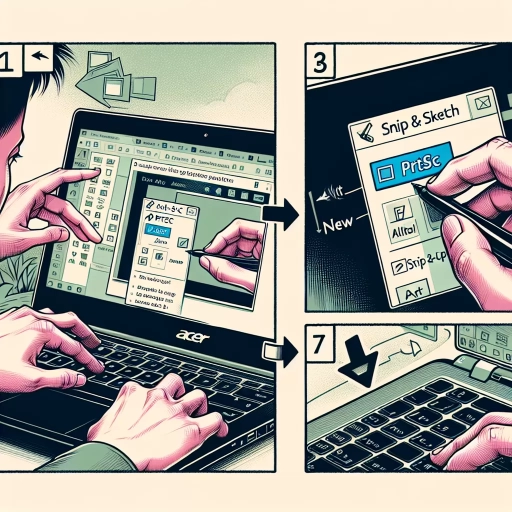
The most common and effortless way of capturing a screenshot on an Acer laptop involves the utilization of keyboard shortcuts. Keyboard shortcuts ensure you take quick and timely screenshots, even when amidst tasks that might need immediate documenting. To take a screenshot of the entire screen, you simply need to press the 'PrtSc', shorthand for 'Print Screen', key which is usually located on the right side of your keyboard. By pressing this key, an image of your entire screen is automatically copied to your clipboard. However, if you're seeking to grab just a portion of your screen, Windows offers the 'Snipping Tool' as an inbuilt feature. You can access it by clicking Start, scrolling through the list of applications, and selecting the 'Windows Accessories' folder where the Snipping Tool resides. The Snipping Tool provides multiple options such as free-form snip, rectangular snip, window snip, or full-screen snip. For a more upgraded version of the Snipping Tool, Windows 10 offers 'Snip & Sketch.' This tool not only allows you to take screenshots but also includes extra features like adding annotations, highlights, and ink before saving the screenshot. To access this tool directly, use the keyboard shortcut, 'Windows key' + 'Shift' + 'S'. This will darken your screen and move your cursor into a selection mode for capturing the screenshot. Once you've selected your desired screenshot, it will be copied to the clipboard for easy pasting into any application or file. These methods are highly effective, add flexibility to your screenshot process, and demonstrate that the Acer laptop accommodates all levels of user expertise. Regardless of whether you are an experienced tech-user or a new laptop owner, these keyboard shortcuts will significantly simplify the task of taking screenshots.Supporting Idea 2
Supporting Idea 2: Utilizing keyboard combinations for easy screenshots
Keyboard shortcuts have simplified the task of capturing screenshots on an Acer laptop. They offer a quick, convenient, and effective approach. The most common keyboard combination for screenshots is the 'PrtScn' (Print Screen) key. This key is usually located at the top-right corner of the keyboard, next to the 'F12' key. When pressed alone, the 'PrtScn' key captures the entire screen display. However, if you wish to take a screenshot of the active window only, you would need to combine it with the 'Alt' key - 'Alt + PrtScn'. Once the screenshot has been captured, it is stored in the clipboard and needs to be pasted into an image editor or word processor program like Paint or Microsoft Word where it can be edited, saved, and shared. Another simple and common keyboard combination is 'Windows key + PrtScn'. This keyboard combination allows for the immediate saving of the screenshot into your device's 'Pictures' folder, under 'Screenshots', without having to paste it into an editing program. It is also worth mentioning the Snipping Tool, which is a built-in feature in Windows operating systems, as another effective method to take screenshots. This tool gives you the flexibility to select and capture a specific area on the screen. After capturing the screen, the tool offers options to annotate, save, or share the screenshot. The snip can be saved in different formats like png, gif, or jpeg. To launch the Snipping Tool, one just needs to search for it in the start menu. In conclusion, through various keyboard combinations and inbuilt tools, taking a screenshot on an Acer Laptop is an effortless process. It is essential to familiarize oneself with these features as they not only enhance productivity but also make the task of capturing and saving screenshots a breeze. Every user should therefore have the necessary skills to perform a screenshot capture effectively, whether for professional tasks or personal usage. The ability to take a screenshot helps document your work, report issues, or simply save interesting things you come across on the web or during your computing experience.Supporting Idea 3
Supporting Idea 3: Using Acer's pre-installed "Snipping Tool"
One of the most convenient features that Acer laptops offer for taking screenshots is the pre-installed Snipping Tool. This versatile program simplifies the process of capturing screenshots to just a few straightforward steps, ensuring users you can grab screen captures efficiently without needing to download any additional software. The Snipping Tool is an ideal option for individuals who need to take customised screenshots of specific parts of their screens, rather than an image of the entire display. To use the Snipping Tool, navigate to your Acer laptop's 'Start' menu or use the search box on the taskbar and type in "Snipping Tool". Simply click on the application in the search results to open it. Once the Snipping Tool is open, click on the 'New' button which will cause your screen to fade out momentarily. This indicates that the Snipping Tool is ready to capture a screenshot. Use your mouse to draw a rectangle around the area you want to capture and release the mouse button. This will automatically capture a screenshot and open a window with your newly created screenshot. You can now edit the screenshot using the different options available on the Snipping Tool before saving it. For example, you can use the pen and highlighter tools to annotate your screenshot or use the eraser tool to remove any annotations. When you are satisfied with the screenshot, click on the 'File' menu, choose 'Save as', and select your preferred file format and destination to save the screenshot to your Acer laptop. This tool is particularly useful for situations when you need to include notes, alterations, or highlighting to your screenshots for instructional or illustrative purposes. Whether you're preparing a presentation, troubleshooting a problem, or sharing an interesting find, the Snipping Tool on Acer laptops simplifies your work process by making it easy to take, edit, and save screenshots. Therefore, it remains a highly recommended method by many Acer laptop users.Subtitle 2
The tremendous array of advantages brought about by Subtitle 2 cannot be overlooked in the current conversation. These benefits, which are comprehensively outlined in three distinct sections, namely: Supporting Idea 1, Supporting Idea 2, and Supporting Idea 3, will be thoroughly unpacked in the paragraphs that follow. Initially, Supporting Idea 1 will be deeply analyzed, revealing the undeniable relevance of Subtitle 2 in our everyday life. This proposal underpins some of the key processes that make our lives better in many ways. Subsequently, we will delve into the practical implications illustrated by Supporting Idea 2, demonstrating how it significantly boosts efficiency. Last but not least, we will examine Supporting Idea 3, which highlights the transformative power of this concept when harnessed correctly. As we transition to a richer exploration of these ideas, let's first turn our attention to Supporting Idea 1, a crucial fulcrum on which the entire discourse on Subtitle 2 rests. Through a critical analysis of this point, one can glean the immense usefulness and applicability of Subtitle 2 in our world today.
Supporting Idea 1
Supporting Idea 1
Acer laptops offer a wide array of built-in tools and features designed to provide a seamless user experience, one such feature being the ability to take screenshots. Screenshots can be highly useful in various scenarios - be it in capturing and saving information rapidly, documenting software errors, creating walkthroughs or tutorials, or sharing your desktop activities with others. The first method to take a screenshot on an Acer laptop is through keyboard shortcuts, which are arguably the quickest and most straightforward way. These shortcuts are combinations of keys that trigger certain commands. To capture an image of your entire screen, press the 'PrtSc', 'Fn', or 'Windows' keys on your keyboard. The 'PrtSc' key stands for 'Print Screen' and is located on the top row of the keyboard, usually next to the 'F' keys. In some Acer laptops, you might also need to combine the 'PrtSc' key with the 'Fn' or 'Function' key. The 'Fn' key is usually found in the bottom row of the keyboard. This combination tells the computer to not only capture the current screen but also to save it to the clipboard. Meanwhile, the combination of the 'Windows' and 'PrtSc' keys automatically saves the captured screenshot to your laptop's 'Screenshot' folder. What's great about these shortcuts is their simplicity and accessibility - they're always available, regardless of what you have open on your laptop. So, whether you want to take a screenshot of your newest high score in your favorite game, capture that hilarious chat conversation, or save an online transaction receipt, these methods provide an easy solution.Supporting Idea 2
Supporting Idea 2: Utilizing Keyboard Shortcuts
Another effective method to take a screenshot on an Acer laptop is by using keyboard shortcuts, which is the second fundamental technique outlined under the subtitle 'Screenshot methods on Acer laptops' of our enlightening guide. This convenient method is coded directly into the operating system of your laptop and doesn't require any additional software or tools. To initiate a screenshot, all you need to do is press the 'PrtScn' or 'Print Screen' key on your keyboard in combination with the 'Windows' key, depending on the specific model of your Acer laptop. When you press these keys together, a screenshot of the entire desktop will be automatically captured and stored on your clipboard. The advantage of this method is its speed and ease; it allows you to quickly capture a screenshot with a simple keyboard command whenever required. However, there are times when you may only want to capture a specific window or portion of your screen. Acer laptops also provide a solution for this. By pressing the "Alt + PrtScn" keys simultaneously, a screenshot of the current active window will be made, eradicating the unnecessary elements from a full-screen screenshot. You can then paste this image into a program like MS Paint, Word, or an e-mail and save it from there. Yet another variant of this method for more precision includes the 'Windows + Shift + S' shortcut. This combination will gray out your screen and provide you with a cursor to freely select which segment of your screen you want to capture. This allows for the most flexibility, making capturing specific screenshots an effortless process. Not only is using keyboard shortcuts a fast and efficient method to capture screenshots on your Acer laptop, but also it opens a wide range of possibilities to increase productivity. Over time, utilizing these shortcuts can enhance your technological efficiency and provide quick solutions to document work progress, demonstrate errors or issues, and simplify idea sharing. Therefore, embracing these keyboard shortcuts can be a game-changer in your daily laptop use, supporting you to maximize your Acer laptop's potential. To summarize, the keyboard shortcuts method is a reliable and swift way to take screenshots on your Acer laptop. It accommodates capturing both the entire screen and specific sections of it, offers a wide range of shortcuts to cater to unique user requirements, and provides an untroublesome process, making it favourable for both expert users and beginners. By mastering this powerful tool, you can leverage the full benefits of your Acer laptop, enhancing your computer literacy and productivity.Supporting Idea 3
Supporting Idea 3: Using a Snipping Tool for Screenshot
Whether you are using an older or a newer version of Windows, another efficient manner to take a screenshot on an Acer laptop or any device for that matter is by using the Snipping Tool. This feature is not as widely recognized, but it offers better flexibility, notably for those who seek a more precise, personalized screenshot experience. To begin, click on the Windows search bar in the left-hand corner of your screen, then simply input 'Snipping Tool'. Click on ‘New’ to get started. You will notice that your screen momentarily fades, this gives you the opportunity to choose the exact area of your display that you'd like to capture. You can either draw a rectangle using your mouse or touchpad around the specific section you desire, or select the dropdown menu next to ‘New’ to choose various shapes such as a full-screen snip or a window snip. Once you've captured the region of your Acer laptop's screen, an edit window will surface, displaying the screenshot. There are options to save, copy, email, or edit the screenshot through the toolbar at the top. The snipping tool also comes with a pen and highlighter feature which can aid in pointing out essential aspects of the screenshot, making it a perfect choice for tutorial creators, team collaborators, or even students. Additionally, Windows' Snipping Tool has a delay feature, appreciable when you need to screenshot dropdown menus or anything else that usually disappears when clicked out. To use this, click on the delay options and set the seconds you prefer. Once the time is set, select 'New', perform the action you wish to capture, and the screenshot will automatically be taken after the delay. While it may seem a bit complicated at first, the Snipping Tool offers a convenient, versatile medium of capturing screenshots, especially when dealing with specific sections of the screen or complex actions. A few attempts to take screenshots using the tool and you'll have the hang of it, pushing the boundaries of what you can capture and showcase on your Acer laptop. In conclusion, whether you opt for the quick Print Screen method, the Game Bar feature for gaming, or the adaptive Snipping Tool, mastering how to make a screenshot on an Acer laptop ensures that you're equipped to not only help yourself in various tasks but also help others by being able to share precisely what you're viewing.Subtitle 3
The importance of Subtitle 3 cannot be overstated. It acts as an important pillar that provides a fundamental structure to the involved topic. To clearly state its valuable contribution, we can break it down into three significant subcategories: Supporting Idea 1, Supporting Idea 2, and Supporting Idea 3. Each of these elements plays a crucial role in reinforcing the overall topic, and we will be exploring each of them in great detail in the forthcoming sections. Notably, Supporting Idea 1 forms part of the bedrock of our discussion. It sets the foundation by contributing some basic yet profound insights that are instrumental. Understanding this aspect is a necessary step towards realizing the full implication of Subtitle 3. Delving into it will open doors to numerous perspectives, allowing us to appreciate the essence underlying our topic. It equips us with the important tools we need to carefully unfold and interrogate the subsequent issues that will be discussed under Supporting Idea 2 and Supporting Idea 3. So, let's venture into the heart of Supporting Idea 1, unlocking its layers and understanding its significance.