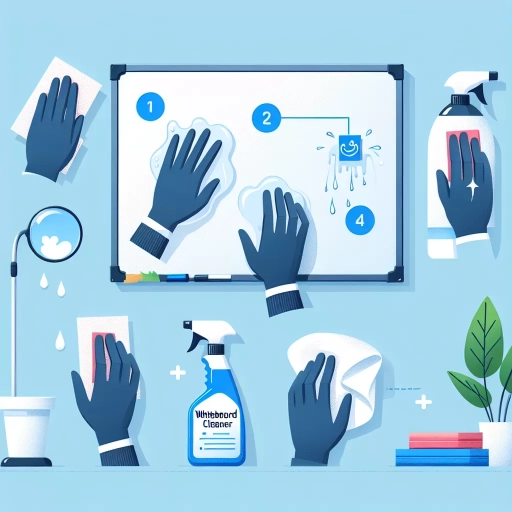
How To Clean Whiteboard
Whiteboards have become an indispensable tool in classrooms, offices, and homes, offering a versatile surface for brainstorming, teaching, and organizing ideas. However, the convenience of these erasable surfaces comes with the responsibility of proper maintenance. Over time, whiteboards can accumulate stubborn stains, ghosting, and residue that can hinder their effectiveness and appearance. Learning how to clean your whiteboard effectively is crucial for preserving its functionality and extending its lifespan. This article will guide you through the process of restoring your whiteboard to its pristine condition, covering three essential aspects: the supplies and preparation needed for a thorough cleaning, effective techniques for tackling different types of stains, and best practices for maintaining your whiteboard's longevity. By following these expert tips and tricks, you'll ensure that your whiteboard remains a clear, bright, and reliable writing surface for years to come. Let's begin by exploring the essential supplies you'll need to gather and the preparation steps required before embarking on your whiteboard cleaning journey.
Essential Supplies and Preparation
Maintaining a clean and functional whiteboard is crucial for effective communication and learning in various settings, from classrooms to boardrooms. However, the process of cleaning a whiteboard involves more than just wiping it down with any available cloth. To achieve optimal results and preserve the longevity of your whiteboard, it's essential to approach the task with careful preparation and the right supplies. This article will guide you through the key steps to ensure your whiteboard cleaning endeavor is successful and efficient. We'll explore three critical aspects of the process: gathering the appropriate cleaning materials, assessing the current condition of your whiteboard, and protecting the surrounding areas and surfaces. By focusing on these elements, you'll be well-equipped to tackle even the most stubborn marks and stains while safeguarding your whiteboard's surface and its environment. With these insights in mind, let's delve into the essential supplies and preparation needed to achieve a spotless, like-new whiteboard that's ready for your next big idea or important presentation.
Gathering the right cleaning materials
Gathering the right cleaning materials is a crucial step in ensuring your whiteboard remains in pristine condition and continues to serve its purpose effectively. While whiteboards are designed for easy cleaning, using the wrong materials can lead to damage, discoloration, or residue buildup that can compromise the board's functionality. To maintain your whiteboard's quality and longevity, it's essential to assemble a collection of appropriate cleaning supplies. First and foremost, invest in high-quality dry-erase markers. These markers are specifically formulated to write smoothly on whiteboards and erase easily without leaving stubborn stains. Avoid using permanent markers or other writing implements that can potentially damage the board's surface. Next, procure a good-quality whiteboard eraser. While many whiteboards come with a basic eraser, upgrading to a microfiber or felt eraser can significantly improve your cleaning efficiency and reduce the likelihood of streaks or smudges. For more thorough cleaning, consider purchasing a specialized whiteboard cleaning solution. These products are designed to remove stubborn marks and restore the board's surface without causing damage. Alternatively, you can create a homemade solution using a mixture of water and isopropyl alcohol or vinegar. However, be cautious when using DIY solutions, as some ingredients may not be suitable for all types of whiteboards. Microfiber cloths are invaluable for whiteboard maintenance. These soft, lint-free cloths are excellent for wiping down the board after using a cleaning solution, ensuring a streak-free finish. Keep a supply of these cloths on hand and wash them regularly to maintain their effectiveness. For stubborn stains or ghosting (faint residual marks), you may need to employ a magic eraser or a specialized whiteboard restorer. These products can help revive older whiteboards or remove particularly challenging marks. However, use them sparingly and follow the manufacturer's instructions to avoid damaging the board's surface. Don't forget to gather some paper towels or disposable wipes for quick cleanups and emergencies. While not ideal for regular use due to their potential to leave lint behind, they can be handy for immediate spills or marks. Lastly, consider assembling a small cleaning kit that includes all these materials. Store this kit near your whiteboard for easy access, ensuring that you always have the right tools at hand to keep your board in top condition. By gathering and using the appropriate cleaning materials, you'll not only maintain the appearance and functionality of your whiteboard but also extend its lifespan, making it a valuable and long-lasting tool for your home, office, or classroom.
Assessing the condition of your whiteboard
Assessing the condition of your whiteboard is a crucial first step in the cleaning process, as it helps determine the most appropriate cleaning method and products to use. Whiteboards come in various materials, including melamine, porcelain, and glass, each with its own unique characteristics and cleaning requirements. Begin by examining the surface closely, looking for signs of wear, stubborn stains, or damage that may require special attention. Start by identifying the type of residue on your whiteboard. Regular use often leaves behind ghosting or shadowing from old markings, which can be particularly challenging to remove. Take note of any areas with heavy buildup, as these may need extra care during the cleaning process. Additionally, check for any permanent marker stains, which require a different approach than standard dry-erase marker residue. Next, inspect the overall condition of the whiteboard surface. Look for scratches, dents, or areas where the coating may have worn thin. These imperfections can affect the board's performance and may require more gentle cleaning techniques to avoid further damage. For older whiteboards, pay attention to any yellowing or discoloration, as this can indicate a breakdown of the surface material and may impact the effectiveness of your cleaning efforts. Consider the age and usage history of your whiteboard, as this can provide valuable insight into its current condition. Heavily used boards may have more ingrained stains and wear, while newer boards might only require light cleaning. If your whiteboard has been neglected for an extended period, be prepared for a more intensive cleaning process to restore it to its original condition. Take into account any previous cleaning attempts and their results. If certain methods or products have proven ineffective or caused damage in the past, make a note to avoid them this time. Conversely, if you've had success with particular techniques, consider incorporating them into your current cleaning plan. Lastly, assess the surrounding environment of your whiteboard. Factors such as exposure to direct sunlight, temperature fluctuations, or high humidity can impact the board's condition over time and may influence your choice of cleaning products. By thoroughly evaluating the state of your whiteboard before beginning the cleaning process, you can tailor your approach to address specific issues and achieve the best possible results, ensuring that your whiteboard remains a reliable and effective tool for communication and collaboration.
Protecting surrounding areas and surfaces
When it comes to cleaning whiteboards, protecting the surrounding areas and surfaces is a crucial step that often goes overlooked. Whiteboards are typically mounted on walls or placed in high-traffic areas, making it essential to safeguard nearby objects and surfaces from potential damage or staining during the cleaning process. By taking the time to properly prepare your workspace, you can ensure a thorough cleaning while maintaining the integrity of your environment. Begin by removing any items that are in close proximity to the whiteboard, such as chairs, desks, or decorative elements. This not only creates a clear workspace but also prevents accidental spills or splatters from damaging these objects. If you're dealing with a wall-mounted whiteboard, consider laying down a drop cloth or old sheet on the floor beneath it to catch any drips or debris that may fall during cleaning. For whiteboards that are part of a larger office or classroom setup, it's wise to cover nearby electronics, such as computers, projectors, or smart devices, with plastic sheeting or towels. This extra layer of protection guards against any cleaning solution that might accidentally spray or splash onto sensitive equipment. Don't forget to secure the covering material to prevent it from slipping off during the cleaning process. If your whiteboard is surrounded by other surfaces, such as wooden frames or metal edges, take care to protect these areas as well. Apply painter's tape along the edges of the whiteboard to create a barrier between the writing surface and its surroundings. This simple step can prevent cleaning solutions from seeping into cracks or crevices and potentially causing damage or discoloration to adjacent materials. For whiteboards situated near electrical outlets or light switches, exercise extra caution. Cover these fixtures with plastic bags or waterproof tape to prevent any moisture from entering and causing electrical hazards. It's also a good idea to unplug any nearby electronics as an added safety measure. When using spray cleaners, be mindful of overspray that could affect nearby walls or furniture. Consider using a spray bottle with a focused nozzle to direct the cleaning solution precisely where it's needed, or apply the cleaner directly to your cleaning cloth instead of spraying it onto the whiteboard surface. By taking these precautionary steps to protect surrounding areas and surfaces, you not only safeguard your workspace but also create a more efficient and worry-free cleaning experience. This attention to detail ensures that your focus remains on restoring your whiteboard to its pristine condition without the added stress of potential collateral damage. Remember, a few extra minutes spent on preparation can save you from costly repairs or replacements in the long run, making it an invaluable part of your whiteboard cleaning routine.
Effective Cleaning Techniques for Different Types of Stains
Maintaining a clean and pristine whiteboard is essential for effective communication in classrooms, offices, and meeting spaces. However, even with regular use, whiteboards can accumulate various types of stains that may seem challenging to remove. This comprehensive guide will explore effective cleaning techniques for different types of stains, ensuring your whiteboard remains in top condition for years to come. We'll begin by addressing the common issue of removing everyday dry-erase marker residue, providing simple yet effective methods to keep your board looking fresh. Next, we'll tackle the more stubborn stains and ghosting that can occur over time, offering proven solutions to restore your whiteboard's surface. For those unfortunate accidents involving permanent markers, we'll share techniques to salvage your board without causing damage. By mastering these cleaning methods, you'll be able to maintain a professional and functional whiteboard surface, enhancing collaboration and productivity in your workspace. Before we delve into these specific cleaning techniques, let's first examine the essential supplies and preparation needed to tackle any whiteboard cleaning challenge effectively.
Removing everyday dry-erase marker residue
Removing everyday dry-erase marker residue is a common challenge faced by whiteboard users in offices, classrooms, and homes. While dry-erase markers are designed to be easily wiped away, over time, residue can accumulate and become stubborn, making the whiteboard appear dull and dirty. Fortunately, there are several effective techniques to tackle this issue and restore your whiteboard to its pristine condition. The first line of defense against marker residue is regular cleaning with a standard whiteboard eraser or microfiber cloth. These tools are often sufficient for removing fresh marks and preventing buildup. However, for more stubborn residue, a slightly damp cloth or paper towel can be used to gently wipe the surface. It's important to avoid using excessive water, as this can damage the whiteboard's surface or seep behind it. For tougher stains, isopropyl alcohol is a highly effective solution. Apply a small amount to a cloth or paper towel and gently rub the affected area. The alcohol helps break down the marker ink without damaging the whiteboard surface. Alternatively, you can use a mixture of equal parts water and white vinegar for a more natural cleaning solution. This mixture is particularly effective for removing ghosting or shadowing left behind by markers. In cases where standard methods fall short, specialized whiteboard cleaning solutions are available. These products are formulated to remove tough stains and residue without harming the board's surface. Always follow the manufacturer's instructions when using these cleaners to ensure optimal results and longevity of your whiteboard. For extremely stubborn marks, a magic eraser or melamine foam can be used as a last resort. However, it's crucial to use these sparingly and gently, as they can be abrasive and potentially damage the whiteboard's surface if used too aggressively or frequently. Prevention is key in maintaining a clean whiteboard. Using high-quality dry-erase markers and avoiding leaving marks on the board for extended periods can significantly reduce residue buildup. Additionally, implementing a regular cleaning schedule, even when the board appears clean, can prevent the accumulation of invisible residue that becomes harder to remove over time. It's worth noting that some whiteboards may have specific care instructions provided by the manufacturer. Always consult these guidelines before trying new cleaning methods to ensure you're not inadvertently damaging the surface. By employing these techniques and maintaining a consistent cleaning routine, you can keep your whiteboard looking clean and professional, ensuring it remains an effective tool for communication and collaboration in any setting.
Tackling stubborn stains and ghosting
Tackling stubborn stains and ghosting on whiteboards can be a frustrating experience, but with the right techniques and a bit of patience, you can restore your whiteboard to its pristine condition. Stubborn stains often result from leaving marks on the board for extended periods or using non-approved writing implements, while ghosting occurs when faint traces of previous writing remain visible even after erasing. To address these issues, start by using a high-quality whiteboard cleaner specifically designed for removing tough stains. Apply the cleaner generously to the affected areas and let it sit for a few minutes to penetrate the stains. Then, use a clean, soft cloth or microfiber towel to gently scrub the area in circular motions. For particularly stubborn marks, you may need to repeat this process several times. If commercial cleaners don't yield satisfactory results, you can try some DIY solutions. A mixture of equal parts water and white vinegar can be effective in breaking down stubborn stains. Another option is to create a paste using baking soda and water, which can be gently applied to the stained area and left for a few minutes before wiping clean. For ghosting issues, isopropyl alcohol can be a powerful ally. Apply it to a cloth and gently rub the affected areas. The alcohol helps dissolve the residual ink that causes ghosting. However, be cautious not to use alcohol too frequently, as it may damage the whiteboard's surface over time. In some cases, you may need to employ more unconventional methods. A magic eraser or melamine foam can work wonders on tough stains, but use it sparingly to avoid damaging the board's surface. For extreme cases, you might consider using a non-abrasive toothpaste, applying it gently with a soft cloth and then rinsing thoroughly. Prevention is key to maintaining a clean whiteboard. Always use high-quality, board-approved markers and erase writing promptly after use. Regularly clean the board with appropriate cleaners, and avoid using harsh chemicals or abrasive materials that can damage the surface. If all else fails and the stains or ghosting persist, it may be time to consider resurfacing or replacing your whiteboard. Some specialized companies offer resurfacing services that can breathe new life into old, stained boards. Alternatively, investing in a new, high-quality whiteboard might be the most cost-effective solution in the long run, especially if your current board has seen years of heavy use. Remember, maintaining a clean whiteboard not only enhances its appearance but also ensures its functionality and longevity. By addressing stubborn stains and ghosting promptly and effectively, you can keep your whiteboard in top condition, ready for clear, crisp writing and seamless communication in your workspace or classroom.
Dealing with permanent marker accidents
Dealing with permanent marker accidents on whiteboards can be a frustrating experience, but there are several effective methods to tackle this common problem. While permanent markers are designed to resist easy removal, quick action and the right techniques can help restore your whiteboard to its pristine condition. One of the most surprising yet effective solutions is to simply write over the permanent marker stain with a dry-erase marker. The solvents in the dry-erase ink can help break down the permanent ink, allowing you to wipe both away together. This method works best when the permanent marker stain is relatively fresh. For more stubborn or older stains, isopropyl alcohol (rubbing alcohol) can be a powerful ally. Apply the alcohol to a cloth or paper towel and gently rub the affected area. The alcohol helps dissolve the permanent ink, making it easier to wipe away. Be cautious not to use too much pressure, as this could potentially damage the whiteboard's surface. Hand sanitizer, which often contains a high percentage of alcohol, can also be used in a pinch and works similarly. Another household item that can come to the rescue is toothpaste, particularly non-gel varieties. The mild abrasives in toothpaste can help lift the permanent marker ink without damaging the whiteboard. Apply a small amount to the stain, gently rub it in, and then wipe clean with a damp cloth. This method may require a bit more elbow grease but can be effective for particularly stubborn marks. For those seeking a more natural solution, vinegar can be surprisingly effective. Mix equal parts vinegar and water, apply the solution to the stain, and let it sit for a few minutes before wiping away. The acidity of the vinegar helps break down the ink, making it easier to remove. This method is especially useful for those who prefer to avoid harsh chemicals in their cleaning routines. In cases where these household remedies fall short, commercial whiteboard cleaners specifically designed for removing permanent marker can be employed. These products are formulated to tackle tough stains without damaging the whiteboard surface. Always follow the manufacturer's instructions when using these specialized cleaners. Prevention is key in avoiding future permanent marker accidents. Clearly label permanent markers and store them separately from dry-erase markers to reduce the risk of mix-ups. Additionally, consider using whiteboard markers with erasable ink that appears permanent but can be removed with water, offering a safeguard against accidental permanent markings. By employing these techniques and taking preventive measures, you can effectively deal with permanent marker accidents and maintain your whiteboard in excellent condition, ensuring it remains a valuable tool for communication and collaboration in your workspace or classroom.
Maintaining Your Whiteboard for Longevity
Whiteboards have become an indispensable tool in various settings, from classrooms and offices to homes and creative spaces. Their versatility and ease of use make them a popular choice for brainstorming, teaching, and organizing ideas. However, to ensure your whiteboard remains a reliable and effective tool for years to come, proper maintenance is crucial. This article will guide you through the essential steps to maintain your whiteboard for longevity, focusing on three key areas: establishing a regular cleaning routine, proper storage and handling of whiteboard markers, and preventive measures to avoid damage and discoloration. By implementing these strategies, you'll not only extend the life of your whiteboard but also ensure it remains in optimal condition for clear, smudge-free writing and easy erasing. Whether you're a teacher, business professional, or home user, these maintenance tips will help you get the most out of your whiteboard investment. Before we delve into these maintenance techniques, let's first explore the essential supplies and preparation needed to properly care for your whiteboard.
Establishing a regular cleaning routine
Establishing a regular cleaning routine is crucial for maintaining the longevity and functionality of your whiteboard. By implementing a consistent cleaning schedule, you can prevent the buildup of stubborn stains, ghosting, and other issues that may compromise the board's performance over time. A well-maintained whiteboard not only looks more professional but also ensures that your ideas and information are clearly visible, enhancing communication and productivity in your workspace. To establish an effective cleaning routine, start by determining the frequency of use for your whiteboard. Boards that are used daily or multiple times a week should be cleaned more frequently than those used occasionally. As a general rule, aim to clean your whiteboard at least once a week, or more often if it sees heavy use. Set aside a specific time for this task, such as Friday afternoons or Monday mornings, to ensure it becomes a habit. Begin your routine by removing all dry-erase marker residue using a high-quality whiteboard eraser or a soft, lint-free cloth. Be thorough in your erasing, paying special attention to areas where ink tends to accumulate, such as corners and along the edges of the board. For stubborn marks, use a whiteboard cleaning solution specifically designed for this purpose. Avoid using harsh chemicals or abrasive materials, as these can damage the board's surface. After erasing, inspect the board for any remaining stains or ghosting. Address these issues promptly using appropriate cleaning methods, such as a mixture of water and isopropyl alcohol or a commercial whiteboard cleaner. Be sure to test any new cleaning solution on a small, inconspicuous area first to ensure it doesn't damage the surface. Once the board is clean, use a microfiber cloth to buff the surface, removing any residual cleaning solution and restoring the board's smooth finish. This step is essential for maintaining the board's writability and ensuring that markers erase easily in the future. Incorporate preventative measures into your routine, such as using only high-quality dry-erase markers and avoiding leaving ink on the board for extended periods. Encourage others who use the whiteboard to erase their work when finished and to report any cleaning issues they encounter. By establishing and adhering to a regular cleaning routine, you'll not only extend the life of your whiteboard but also create a more inviting and efficient workspace. A clean, well-maintained whiteboard serves as a blank canvas for creativity and collaboration, fostering better communication and idea-sharing among team members. Remember that consistency is key – the more diligent you are in following your cleaning routine, the easier it becomes to maintain your whiteboard's pristine condition over time.
Proper storage and handling of whiteboard markers
Proper storage and handling of whiteboard markers are crucial aspects of maintaining your whiteboard for longevity. These seemingly simple tools require specific care to ensure optimal performance and prevent unnecessary wear on your whiteboard surface. By following best practices for marker storage and use, you can extend the life of both your markers and your whiteboard, ultimately saving time and money while maintaining a professional appearance in your workspace. First and foremost, always store your whiteboard markers horizontally. This simple practice prevents the ink from pooling at one end of the marker, which can lead to uneven ink distribution and premature drying. Many marker sets come with specially designed holders or cases that keep the markers horizontal, but if yours don't, consider investing in a dedicated marker tray or simply laying them flat in a drawer. Temperature and humidity play significant roles in marker longevity. Store your markers in a cool, dry place away from direct sunlight and heat sources. Extreme temperatures can cause the ink to expand or contract, potentially leading to leaks or dried-out markers. Similarly, high humidity can affect ink consistency and may even promote mold growth inside the marker barrel. When using whiteboard markers, always replace the cap immediately after use. This simple habit prevents the ink from drying out and extends the marker's lifespan considerably. Ensure that the cap clicks firmly into place to create an airtight seal. If you notice that a cap is cracked or doesn't fit snugly, replace it promptly to prevent the marker from drying out. Rotate your marker usage regularly to promote even wear and prevent any single marker from drying out due to infrequent use. This practice also helps you identify when markers are running low on ink, allowing you to replace them before they unexpectedly fail during an important presentation or meeting. Be mindful of the pressure you apply when writing. Excessive force can damage both the marker tip and the whiteboard surface. Use a light touch to preserve the integrity of the marker nib and prevent unnecessary wear on your whiteboard. When selecting whiteboard markers, opt for high-quality brands known for their longevity and smooth writing experience. While they may be more expensive initially, premium markers often last longer and perform better, providing better value in the long run. Additionally, consider using refillable markers to reduce waste and save money over time. Lastly, be cautious about mixing different brands or types of markers on your whiteboard. Some inks may interact negatively with others, potentially causing staining or making it difficult to erase. Stick to a single brand or type of marker whenever possible to ensure consistent performance and easy cleaning. By implementing these storage and handling practices, you'll not only extend the life of your whiteboard markers but also contribute to the overall longevity and appearance of your whiteboard. Proper care of these essential tools ensures that your whiteboard remains a reliable and effective communication tool in your professional or educational environment.
Preventive measures to avoid damage and discoloration
Preventive measures play a crucial role in maintaining the pristine condition of your whiteboard and ensuring its longevity. By implementing a few simple strategies, you can significantly reduce the risk of damage and discoloration, keeping your whiteboard looking fresh and functional for years to come. First and foremost, always use high-quality, whiteboard-specific markers. These markers are designed to be easily erasable and less likely to leave stubborn stains or ghosting effects. Avoid using permanent markers, as they can penetrate the board's surface and cause lasting damage. If permanent markers are accidentally used, act quickly to remove them using specialized cleaning solutions or rubbing alcohol. Regularly erasing your whiteboard is essential to prevent the buildup of ink residue. Make it a habit to erase the board after each use or at the end of each day. This practice not only keeps the surface clean but also prevents ink from drying and becoming more difficult to remove over time. When erasing, use a soft, clean eraser or microfiber cloth to avoid scratching the surface. To further protect your whiteboard, consider implementing a "no food or drink" policy in its vicinity. Accidental spills can lead to staining and potential damage to the board's surface. If a spill does occur, clean it immediately using appropriate cleaning methods to minimize the risk of permanent marks or discoloration. Another important preventive measure is to avoid using abrasive materials or harsh chemicals when cleaning your whiteboard. Stick to manufacturer-recommended cleaning solutions or mild, non-abrasive cleaners. Harsh chemicals can strip away the protective coating on the board's surface, making it more susceptible to staining and damage. Environmental factors also play a role in whiteboard maintenance. Keep your whiteboard away from direct sunlight, as prolonged exposure can cause fading and discoloration. Similarly, avoid placing the board near heat sources or in areas with high humidity, as these conditions can affect the board's surface and potentially warp its structure. Regular deep cleaning is essential for maintaining your whiteboard's appearance and functionality. Schedule periodic deep cleaning sessions, using appropriate cleaning solutions and techniques, to remove any stubborn marks or buildup that may have accumulated over time. This practice helps restore the board's surface and prevents long-term staining. Lastly, consider using a protective cover when the whiteboard is not in use for extended periods. This simple step can shield the surface from dust, accidental marks, and environmental factors that may contribute to discoloration or damage. By incorporating these preventive measures into your whiteboard maintenance routine, you can significantly extend its lifespan and keep it in optimal condition. A well-maintained whiteboard not only enhances the visual appeal of your space but also ensures consistent performance for all your writing and presentation needs.