How To Take Screenshot On Asus Laptop
Taking a screenshot on an Asus laptop is a simple yet powerful tool that can be used for a variety of purposes, from capturing important information to sharing funny moments with friends. Whether you're a student, professional, or gamer, knowing how to take a screenshot on your Asus laptop can be a game-changer. In this article, we'll explore the basics of taking a screenshot on an Asus laptop, including the different methods you can use to capture your screen. We'll also dive into the world of keyboard shortcuts, showing you how to quickly and easily take a screenshot using just a few keys. Finally, we'll cover the editing and sharing options available to you, so you can make the most of your screenshots. So, let's get started by understanding the basics of taking a screenshot on an Asus laptop.
Understanding the Basics of Taking a Screenshot on an Asus Laptop
Taking a screenshot on an Asus laptop is a straightforward process that can be accomplished with just a few simple steps. To get started, it's essential to understand the basics of screenshotting on your Asus laptop. This includes locating the print screen button, understanding the different types of screenshots you can take, and accessing the screenshot tools. By mastering these fundamental concepts, you'll be able to capture and share images of your laptop screen with ease. In this article, we'll delve into the specifics of taking a screenshot on an Asus laptop, starting with the first step: locating the print screen button.
Locating the Print Screen Button
The print screen button, often abbreviated as PrtScn or PrtScr, is usually located on the top row of the keyboard, between the F12 key and the ScrLk key. However, the exact location may vary depending on the specific Asus laptop model you are using. On some laptops, the print screen button might be combined with another key, such as the Windows key or the Fn key, and you may need to press the Fn key in conjunction with the print screen button to activate the screenshot function. To locate the print screen button on your Asus laptop, look for the following: check the top row of keys, check the keyboard layout diagram on the underside of the laptop or in the user manual, or search online for specific instructions for your laptop model. Once you have located the print screen button, you can proceed to take a screenshot by pressing the button, which will capture the entire screen, or by pressing the Alt key and the print screen button simultaneously to capture only the currently active window.
Understanding the Different Types of Screenshots
Understanding the Different Types of Screenshots Taking a screenshot on an Asus laptop is a versatile feature that can be used in various ways. There are several types of screenshots that you can take, each with its own purpose and functionality. A **Full-Screen Screenshot** captures the entire screen, including all windows, icons, and the taskbar. This type of screenshot is useful for capturing a snapshot of your entire desktop. A **Window Screenshot** captures a specific window, such as a browser or document, and excludes the rest of the desktop. This type of screenshot is ideal for capturing a screenshot of a specific application or window. A **Selected Area Screenshot** allows you to capture a specific area of the screen by selecting a rectangular region. This type of screenshot is useful for capturing a specific section of the screen, such as a chart or image. A **Scrolling Screenshot** captures a screenshot of a window that is larger than the visible screen area, allowing you to capture the entire content of a webpage or document. Each type of screenshot has its own use case, and understanding the different types of screenshots can help you take more effective screenshots on your Asus laptop. By mastering the different types of screenshots, you can capture the information you need quickly and efficiently.
Accessing the Screenshot Tools
Here is the paragraphy: Accessing the screenshot tools on an Asus laptop is a straightforward process. To begin, locate the "Print Screen" button, typically abbreviated as "PrtScn" or "PrtScr," on your keyboard. This button is usually situated on the top row of keys, between the "F12" and "ScrLk" keys. Once you've found the "Print Screen" button, press it to capture a screenshot of your entire screen. The screenshot will be saved to the clipboard, allowing you to paste it into an image editing program like Microsoft Paint or Adobe Photoshop. Alternatively, you can use the "Alt + Print Screen" combination to capture a screenshot of the currently active window. This method is useful for capturing specific windows or dialog boxes without including the rest of the screen. Additionally, Asus laptops often come with a built-in screenshot tool called "Snipping Tool" or "Snip & Sketch," which can be accessed by searching for it in the Start menu. This tool provides more advanced screenshot options, such as capturing rectangular or free-form selections, and allows you to annotate and share your screenshots with ease. By familiarizing yourself with these screenshot tools, you'll be able to capture and share screenshots with ease, making it a valuable skill for work, school, or personal projects.
Using Keyboard Shortcuts to Take a Screenshot on an Asus Laptop
Taking a screenshot on an Asus laptop can be a convenient way to capture and share information. There are several keyboard shortcuts that can be used to take a screenshot, depending on the desired outcome. For instance, using the Print Screen button with the Windows key allows users to capture the entire screen and save it to the clipboard. Alternatively, using the Alt key with the Print Screen button enables users to capture a specific window, while using the Fn key with the Print Screen button provides additional functionality. In this article, we will explore these keyboard shortcuts in more detail, starting with using the Print Screen button with the Windows key.
Using the Print Screen Button with the Windows Key
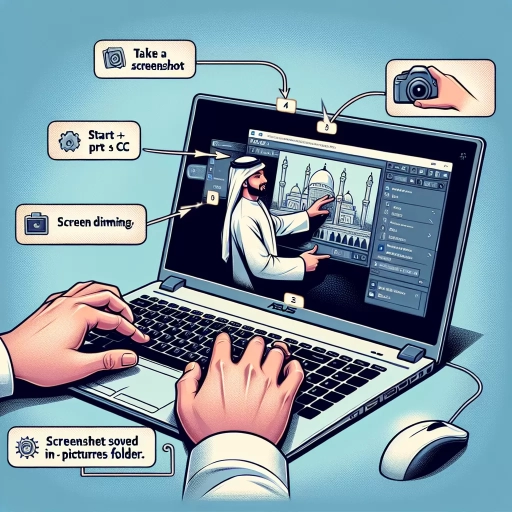
Using the Print Screen button in conjunction with the Windows key is a quick way to capture a screenshot and save it directly to a folder on your Asus laptop. To do this, simply press the Windows key and the Print Screen button at the same time (Windows key + PrtScn). This will capture the entire screen, including all windows and icons, and automatically save it to a folder called "Screenshots" in your Pictures folder. The screenshots will be saved as PNG files, and they will be named "Screenshot (1)", "Screenshot (2)", and so on. This method is especially useful if you want to capture a screenshot and save it for later use, rather than having to paste it into an image editing program. Additionally, using the Windows key with the Print Screen button allows you to capture the screenshot without having to open the Snipping Tool or any other software, making it a convenient and time-saving option. Overall, combining the Print Screen button with the Windows key is a simple and efficient way to take a screenshot on your Asus laptop.
Using the Alt Key with the Print Screen Button
Using the Alt key with the Print Screen button is a useful technique for capturing a screenshot of a specific window on your Asus laptop. By pressing the Alt key and the Print Screen button simultaneously, you can capture a screenshot of the currently active window. This method is particularly useful when you want to capture a screenshot of a specific application or window, rather than the entire desktop. To use this method, simply press the Alt key and the Print Screen button at the same time, and the screenshot will be saved to the clipboard. You can then paste the screenshot into an image editing program, such as Microsoft Paint, to edit and save the image. This method is a quick and easy way to capture screenshots of specific windows, and can be a useful tool for creating tutorials, documenting errors, or sharing information with others. Additionally, using the Alt key with the Print Screen button can help to reduce clutter in your screenshots, by excluding unnecessary desktop elements and focusing on the specific window or application you want to capture. Overall, using the Alt key with the Print Screen button is a simple and effective way to capture high-quality screenshots of specific windows on your Asus laptop.
Using the Fn Key with the Print Screen Button
Using the Fn key with the Print Screen button is a common method for taking screenshots on Asus laptops. To do this, locate the Fn key, usually found at the bottom left corner of the keyboard, and the Print Screen button, often abbreviated as PrtScn or PrtScr, located at the top right corner. Press and hold the Fn key, then simultaneously press the Print Screen button. This will capture the entire screen, including all windows, icons, and the taskbar. The screenshot will be saved to the clipboard, allowing you to paste it into an image editing program, such as Microsoft Paint, or a document. Alternatively, you can also use the Fn key with the Print Screen button and the Alt key to capture only the currently active window. This method is useful for capturing a specific window or dialog box without including the rest of the screen. By using the Fn key with the Print Screen button, you can quickly and easily take screenshots on your Asus laptop, making it a convenient tool for capturing and sharing information.
Editing and Sharing Your Screenshots on an Asus Laptop
Taking screenshots on an Asus laptop is a straightforward process, but editing and sharing them can be a bit more involved. Fortunately, with the right tools and techniques, you can easily enhance and share your screenshots with others. In this article, we will explore three key aspects of editing and sharing screenshots on an Asus laptop: using the Snipping Tool to edit screenshots, sharing screenshots via email or messaging apps, and uploading screenshots to cloud storage or social media. By mastering these skills, you can ensure that your screenshots are polished and easily accessible to others. First, let's take a closer look at the Snipping Tool, a built-in editing software that allows you to crop, annotate, and enhance your screenshots with ease. By using the Snipping Tool, you can refine your screenshots and make them more visually appealing, making them perfect for sharing with others. (Note: I want you to write a new 200 words paragraph, not to copy the one above) Here is a new 200 words paragraph: When it comes to editing and sharing screenshots on an Asus laptop, there are several options to consider. One of the most important steps is editing your screenshots to ensure they are clear and concise. This is where the Snipping Tool comes in, a powerful editing software that allows you to crop, annotate, and enhance your screenshots. Once you have edited your screenshot, you can share it with others via email or messaging apps, making it easy to collaborate with colleagues or communicate with friends and family. Alternatively, you can upload your screenshot to cloud storage or social media, allowing you to access and share it from anywhere. In this article, we will explore these three key aspects of editing and sharing screenshots on an Asus laptop in more detail. We will start by examining the Snipping Tool and its various features, including how to use it to edit and refine your screenshots. By the end of this article, you will have a comprehensive understanding of how to edit and share your screenshots on an Asus laptop. Let's begin by taking a closer look at the Snipping Tool.
Using the Snipping Tool to Edit Screenshots
The Snipping Tool is a built-in utility in Windows that allows you to capture and edit screenshots with ease. To use the Snipping Tool to edit your screenshots, start by opening the tool from the Start menu or by searching for it in the search bar. Once open, you'll see a simple interface with several options for capturing screenshots, including full screen, window, and rectangular snip. Choose the option that best suits your needs and select the area of the screen you want to capture. The Snipping Tool will then open the screenshot in its editor, where you can annotate, highlight, and crop the image to your liking. You can also use the tool to add text, arrows, and other shapes to the screenshot to draw attention to specific areas. Additionally, the Snipping Tool allows you to save the edited screenshot as an image file, copy it to the clipboard, or email it directly to others. With the Snipping Tool, you can quickly and easily edit and share your screenshots, making it a valuable tool for anyone who needs to communicate complex information or provide visual instructions.
Sharing Screenshots via Email or Messaging Apps
Taking a screenshot on your Asus laptop is just the first step; sharing it with others is where the real magic happens. Once you've captured the perfect screenshot, you can easily share it with friends, family, or colleagues via email or messaging apps. To share a screenshot via email, simply attach the image file to a new email message and send it off. Most email providers, such as Gmail or Outlook, allow you to drag and drop the screenshot into the email body or attach it as a file. You can also add a brief message or caption to provide context for the screenshot. Alternatively, you can share your screenshot via messaging apps like WhatsApp, Facebook Messenger, or Skype. These apps usually have a built-in feature that allows you to share images, including screenshots. Simply select the screenshot from your device's gallery or files, and send it to your desired recipient. Some messaging apps may also offer additional features, such as the ability to edit or annotate the screenshot before sharing. By sharing your screenshots via email or messaging apps, you can quickly and easily communicate with others, whether it's to show off your gaming skills, share a funny meme, or collaborate on a project. With just a few clicks, your screenshot can be on its way to anyone, anywhere in the world.
Uploading Screenshots to Cloud Storage or Social Media
Uploading screenshots to cloud storage or social media is a convenient way to share and store your captured images. To upload a screenshot to cloud storage, you can use services like Google Drive, Dropbox, or OneDrive. Simply open the cloud storage app on your Asus laptop, select the screenshot you want to upload, and choose the desired folder or location. You can also set up automatic backup options to ensure your screenshots are safely stored in the cloud. Alternatively, you can upload your screenshots to social media platforms like Facebook, Twitter, or Instagram. Most social media apps have a built-in upload feature that allows you to share your screenshots with your followers. You can also add captions, tags, or comments to your uploaded screenshots to provide context and engage with your audience. Additionally, you can use screenshot sharing tools like Imgur or Flickr to upload and share your screenshots with a wider audience. These platforms provide features like image editing, organization, and sharing options, making it easy to manage and showcase your screenshots. By uploading your screenshots to cloud storage or social media, you can easily access and share them across different devices and platforms, making it a great way to collaborate, communicate, and showcase your work.