How To Fix Rubbery Slime
Here is the introduction paragraph: Are you tired of dealing with rubbery slime that's more frustrating than fun? You're not alone! Many slime enthusiasts have encountered this issue, but the good news is that it's often easy to fix. To get started, it's essential to understand what causes rubbery slime in the first place. This knowledge will help you identify the root of the problem and choose the best solution. In this article, we'll explore the common causes of rubbery slime, provide basic fixes to get you started, and even dive into advanced techniques to achieve the perfect slime. By the end of this article, you'll be equipped with the knowledge and skills to transform your rubbery slime into a fun and playful texture. So, let's begin by understanding the causes of rubbery slime.
Understanding the Causes of Rubbery Slime
Rubbery slime is a common problem that many slime enthusiasts face, and it can be frustrating to deal with. However, understanding the causes of rubbery slime can help you to identify and fix the issue. There are several reasons why your slime may be turning out rubbery, including overmixing the slime, insufficient liquid starch, and using the wrong type of glue. Overmixing the slime can cause the polymers to break down, leading to a rubbery texture. Insufficient liquid starch can also cause the slime to become too sticky and rubbery. Using the wrong type of glue can also affect the texture of the slime, leading to a rubbery consistency. By understanding these causes, you can take steps to prevent rubbery slime and create a slime that is fun and enjoyable to play with. One of the most common causes of rubbery slime is overmixing the slime.
Overmixing the Slime
Overmixing the slime is a common mistake that can lead to a rubbery texture. When you mix the slime ingredients together, you're creating a chemical reaction that forms the slime's structure. Overmixing disrupts this process, causing the polymers to become over-crosslinked and resulting in a stiff, rubbery slime. This is because the excessive mixing breaks down the slime's molecular structure, leading to a loss of its natural flexibility and elasticity. To avoid overmixing, it's essential to mix the ingredients just until they come together in a cohesive ball. Stop mixing as soon as the slime starts to form, and then knead it gently with your hands to distribute the ingredients evenly. This will help preserve the slime's natural texture and prevent it from becoming too rubbery. Additionally, using a mixer or blender can also contribute to overmixing, so it's best to mix the slime ingredients by hand to maintain control over the mixing process. By being mindful of your mixing technique and avoiding overmixing, you can create a slime that's smooth, stretchy, and fun to play with.
Insufficient Liquid Starch
When it comes to making slime, one of the most common issues that can arise is the presence of insufficient liquid starch. Liquid starch is a crucial ingredient in slime recipes, as it helps to bind the polymers together and create a smooth, stretchy texture. If there is not enough liquid starch in the mixture, the slime may turn out too sticky, too dry, or even rubbery. This is because the liquid starch helps to regulate the amount of moisture in the slime, and without enough of it, the slime can become unbalanced. To fix this issue, it's essential to add more liquid starch to the mixture, but it's also important to do so gradually, as adding too much at once can cause the slime to become too sticky or even turn into a liquid. By adding small amounts of liquid starch and kneading the slime thoroughly, you can help to achieve the perfect balance of texture and consistency. Additionally, using a high-quality liquid starch that is specifically designed for slime-making can also help to ensure that your slime turns out right. By understanding the importance of liquid starch and how to use it effectively, you can create slime that is fun, stretchy, and perfect for playing with.
Using the Wrong Type of Glue
Using the wrong type of glue is a common mistake that can lead to rubbery slime. When choosing a glue for slime-making, it's essential to select a white glue, also known as PVA glue, that is specifically designed for crafting and slime-making. This type of glue has the right consistency and properties to create a smooth and stretchy slime. However, if you use a glue that is not suitable for slime-making, such as super glue, hot glue, or epoxy, it can result in a rubbery and unworkable slime. These types of glues are too strong and can cause the slime to become stiff and rigid, making it difficult to stretch and mold. Additionally, using the wrong type of glue can also affect the slime's texture and consistency, leading to a rubbery and unpleasant feel. To avoid this mistake, make sure to choose a high-quality white glue that is specifically designed for slime-making, and follow the recipe instructions carefully to ensure the best results.
Basic Fixes for Rubbery Slime
If you're struggling with rubbery slime, don't worry, you're not alone. Many slime enthusiasts have encountered this issue, and the good news is that it's relatively easy to fix. There are several ways to rescue your rubbery slime, and we'll explore three effective methods in this article. One approach is to add more liquid starch, which can help to balance out the texture and create a more pliable slime. Another option is to introduce a new ingredient, glycerin, which can add moisture and flexibility to your slime. Finally, increasing the moisture content of your slime can also help to alleviate the rubbery texture. By trying out these simple fixes, you can transform your rubbery slime into a fun and playable texture. So, let's start by exploring the first method: adding more liquid starch.
Adding More Liquid Starch
If your slime is still too rubbery after adding more borax solution, you can try adding more liquid starch. This is because liquid starch helps to break down the polymers in the glue, making the slime less sticky and more pliable. To add more liquid starch, start by mixing 1-2 tablespoons of liquid starch with 1-2 tablespoons of warm water. Stir the mixture well until the starch is fully dissolved. Then, slowly add the starch mixture to your slime, stirring constantly with a spoon or spatula. Continue adding the starch mixture in small increments, stirring well after each addition, until you achieve the desired consistency. Be careful not to add too much liquid starch, as this can make the slime too dry and crumbly. It's also important to note that adding more liquid starch may affect the slime's texture and make it more prone to drying out over time. However, if you're looking for a quick fix to make your slime less rubbery, adding more liquid starch can be a good solution.
Introducing a New Ingredient: Glycerin
Glycerin is a natural ingredient that can be used to fix rubbery slime. It is a humectant, which means it helps retain moisture in the slime, making it softer and more pliable. Adding a small amount of glycerin to your slime can help to balance out the texture and make it more enjoyable to play with. Glycerin can be found in most pharmacies or online, and it is generally inexpensive. When using glycerin to fix rubbery slime, start by adding a small amount (about 1-2 teaspoons) to the slime and mix well. You can then add more glycerin as needed until you achieve the desired texture. It's also important to note that glycerin can make the slime more sticky, so be sure to wash your hands thoroughly after playing with it. Additionally, if you're using a slime recipe that includes borax, you may need to adjust the amount of borax you use when adding glycerin, as it can affect the slime's texture. Overall, glycerin is a great ingredient to have on hand when fixing rubbery slime, and it can be used in conjunction with other ingredients to achieve the perfect texture.
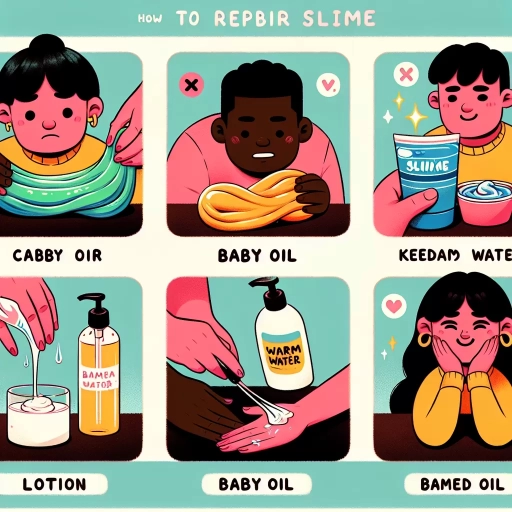
Increasing the Moisture Content
Increasing the moisture content of your slime is a simple and effective way to fix its rubbery texture. To do this, you can try adding a small amount of warm water to the slime and then kneading it in thoroughly. Start with a tiny amount of water, such as a teaspoon, and add it to the slime gradually, checking the texture after each addition. You can also try adding a few drops of glycerin or a small amount of lotion to the slime, as these ingredients can help to retain moisture and improve the slime's texture. Another option is to add a small amount of saline solution, which can help to increase the moisture content of the slime while also reducing its stickiness. When adding any of these ingredients, be sure to mix them in thoroughly and knead the slime well to ensure that the moisture is evenly distributed. By increasing the moisture content of your slime, you should be able to achieve a softer, more pliable texture that is more fun to play with.
Advanced Techniques to Achieve the Perfect Slime
Creating the perfect slime is a challenging yet rewarding task that requires patience, creativity, and a willingness to experiment. To take your slime game to the next level, it's essential to explore advanced techniques that can help you achieve the desired texture, consistency, and appearance. One approach is to use a slime activator, which can help to enhance the slime's texture and make it more pliable. Another technique is to experiment with different ratios of ingredients, such as glue, water, and borax, to create unique and varied slime textures. Additionally, adding a texture modifier, such as glitter or sand, can add an extra layer of depth and visual interest to your slime. By incorporating these advanced techniques into your slime-making routine, you can create truly one-of-a-kind slime creations that are sure to impress. One of the most effective ways to achieve the perfect slime is by using a slime activator, which can help to unlock the full potential of your slime.
Using a Slime Activator
Using a slime activator is a game-changer for achieving the perfect slime texture. A slime activator is a liquid solution that helps to strengthen the slime's structure, making it less sticky and more pliable. When added to rubbery slime, a slime activator can work wonders in transforming it into a smooth and stretchy consistency. The activator helps to break down the polymers in the slime, allowing them to re-form into a more cohesive and elastic network. This results in a slime that is not only less sticky but also more durable and resistant to breakage. To use a slime activator, simply add a few drops to your rubbery slime and knead it in thoroughly. You can also experiment with different ratios of slime to activator to achieve the desired texture. Some popular slime activators include borax, saline solution, and liquid starch. By incorporating a slime activator into your slime-making routine, you can take your slime game to the next level and achieve a texture that is truly out of this world.
Experimenting with Different Ratios of Ingredients
Experimenting with different ratios of ingredients is a crucial step in achieving the perfect slime. By adjusting the proportions of glue, water, borax, and other additives, you can significantly impact the texture, consistency, and overall quality of your slime. For instance, increasing the amount of borax can result in a firmer, more rubbery slime, while adding more water can create a softer, more pliable texture. Similarly, altering the ratio of glue to water can affect the slime's clarity and transparency. To experiment with different ratios, start by making small batches of slime using varying proportions of ingredients. This will allow you to test and compare the results, making adjustments as needed to achieve the desired consistency and texture. You can also try adding different ingredients, such as glycerin, saline solution, or liquid starch, to see how they impact the slime's properties. By experimenting with different ratios and ingredients, you can develop a deeper understanding of the slime-making process and create unique, high-quality slimes that meet your specific needs and preferences.
Adding a Texture Modifier
Adding a texture modifier is a great way to take your slime game to the next level. By incorporating different textures, you can create a unique and engaging slime experience. One popular texture modifier is glitter. Adding a handful of glitter to your slime mixture can give it a sparkly and eye-catching appearance. Another option is to add some texture beads, which can provide a fun and tactile experience. You can also experiment with adding different materials like sand, rice, or even coffee grounds to create a more rugged and interesting texture. If you're feeling adventurous, you can even try adding some foam beads or cloud slime to create a light and airy texture. The key is to experiment and find the right combination of textures that work for you. By adding a texture modifier, you can create a slime that is not only fun to play with but also visually appealing. So don't be afraid to get creative and try out different textures to take your slime to the next level.