How To Add A Video To Powerpoint
Adding a video to PowerPoint can be a great way to enhance your presentation and engage your audience. With the ability to add videos from various sources, including your computer and online platforms, you can easily incorporate multimedia content into your slides. In this article, we will explore the different ways to add a video to PowerPoint, including adding a video from your computer, adding a video from online sources, and customizing and optimizing your PowerPoint video. Whether you're looking to add a tutorial, a promotional video, or a personal message, we'll show you how to do it with ease. So, let's get started by exploring the first method: adding a video to PowerPoint from your computer.
Adding a Video to PowerPoint from Your Computer
Adding a video to PowerPoint from your computer can enhance your presentation and make it more engaging for your audience. There are several ways to add a video to PowerPoint, and the method you choose will depend on the type of video file you have and where it is located. In this article, we will explore three methods for adding a video to PowerPoint: inserting a video file from your hard drive, using the PowerPoint video library, and converting video formats for compatibility. By the end of this article, you will know how to add a video to PowerPoint from your computer and make your presentations more dynamic. To get started, let's take a look at the first method: inserting a video file from your hard drive.
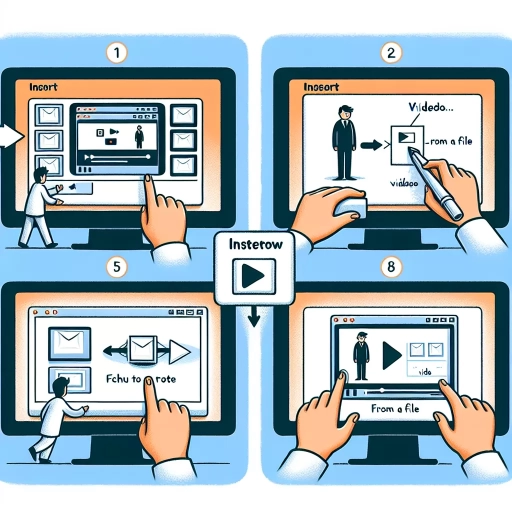
Inserting a Video File from Your Hard Drive
To insert a video file from your hard drive into your PowerPoint presentation, start by clicking on the "Insert" tab in the ribbon. Then, click on the "Video" button in the "Media" group. A drop-down menu will appear, and you should select "Video from File" from the options. This will open a file explorer window, allowing you to navigate to the location of the video file on your computer. Once you've located the file, select it and click "Insert" to add it to your presentation. The video will be inserted into the current slide, and you can resize it or move it to a different location as needed. You can also preview the video by clicking on the "Preview" button in the "Video Tools" tab, which will allow you to check the video's audio and video quality before sharing your presentation with others. Additionally, you can also add a bookmark to the video, which will allow you to start the video from a specific point during your presentation. To do this, click on the "Video Tools" tab, then click on the "Bookmarks" button, and select the point in the video where you want to start playing it from. By inserting a video file from your hard drive, you can add engaging multimedia content to your PowerPoint presentation and make it more interactive and dynamic.
Using the PowerPoint Video Library
Using the PowerPoint Video Library is a convenient way to add videos to your presentation without having to upload or link to external files. The library offers a wide range of high-quality videos that can be easily inserted into your slides. To access the library, simply click on the "Online Pictures" button in the "Images" group of the "Insert" tab, and then select "Video" from the drop-down menu. From there, you can browse through the various categories and search for specific videos using keywords. Once you've found a video you like, simply click on it to insert it into your slide. The video will be automatically formatted to fit the slide, and you can adjust its size and position as needed. You can also add captions, trim the video, and adjust the playback settings to customize the video to your liking. Additionally, the PowerPoint Video Library is constantly updated with new content, so you'll always have access to fresh and relevant videos to enhance your presentations. By using the PowerPoint Video Library, you can add engaging and informative videos to your presentations without having to worry about file size or compatibility issues.
Converting Video Formats for Compatibility
When adding a video to PowerPoint from your computer, it's essential to ensure the video file is in a compatible format to avoid any playback issues. PowerPoint supports various video formats, including MP4, AVI, MOV, and WMV. However, if your video file is in a different format, such as FLV, MKV, or WebM, you may need to convert it to a compatible format. Converting video formats can be a straightforward process using free online tools or software. For instance, you can use online video converters like Convertio, Online-Convert, or ClipConverter to convert your video file to a compatible format. Alternatively, you can use video editing software like Adobe Premiere Pro, Final Cut Pro, or DaVinci Resolve to convert and edit your video file. When converting video formats, it's crucial to maintain the original video quality to ensure it plays smoothly in PowerPoint. You can also use PowerPoint's built-in video conversion feature, which allows you to convert video files to a compatible format during the import process. To do this, go to the "Insert" tab, click on "Video," and then select "Online Video" or "Video from File." PowerPoint will automatically convert the video file to a compatible format during the import process. By converting your video file to a compatible format, you can ensure seamless playback and avoid any compatibility issues when adding a video to PowerPoint from your computer.
Adding a Video to PowerPoint from Online Sources
Adding a video to a PowerPoint presentation can be a great way to enhance the content and engage the audience. There are several ways to add a video to PowerPoint from online sources, including embedding a YouTube video, linking to a Vimeo video, and using PowerPoint's online video search feature. These methods allow users to easily incorporate videos into their presentations without having to download or upload files. In this article, we will explore each of these methods in detail, starting with embedding a YouTube video in PowerPoint. By the end of this article, you will be able to add a video to your PowerPoint presentation from online sources with ease. First, let's take a look at how to embed a YouTube video in PowerPoint.
Embedding a YouTube Video in PowerPoint
To embed a YouTube video in PowerPoint, start by opening your PowerPoint presentation and navigating to the slide where you want to add the video. Then, go to the "Insert" tab in the ribbon and click on the "Video" option. From the drop-down menu, select "Online Video." In the "Insert Video" dialog box, click on the "YouTube" option and enter the video's URL or search for the video by keyword. Once you've found the video, click "Insert" to add it to your slide. The video will be embedded in your presentation, and you can resize it or move it around as needed. You can also add a title or caption to the video by clicking on the "Video Tools" tab and using the "Add Caption" or "Add Title" options. To preview the video, click on the "Play" button, and to make it play automatically when the slide is displayed, check the "Play in Background" box. By embedding a YouTube video in PowerPoint, you can add engaging multimedia content to your presentation and make it more interactive and dynamic.
Linking to a Vimeo Video in PowerPoint
To link to a Vimeo video in PowerPoint, start by opening your PowerPoint presentation and navigating to the slide where you want to add the video. Then, go to the "Insert" tab in the ribbon and click on the "Online Video" button. In the "Insert Video" dialog box, select "From a Video Embed Code" and paste the Vimeo video's embed code into the box. You can obtain the embed code by going to the Vimeo video's page, clicking on the "Share" button, and selecting "Embed." Copy the code and paste it into the PowerPoint dialog box. Make sure to uncheck the box next to "Display video information" if you don't want the video title and other information to appear on the slide. Click "Insert" to add the video to your slide. The video will be linked to the Vimeo server, and it will play directly from the server when you run the presentation. This method allows you to add a Vimeo video to your PowerPoint presentation without having to download the video file, which can be especially useful if you're working with large video files or if you want to ensure that the video is always up-to-date.
Using PowerPoint's Online Video Search Feature
Using PowerPoint's online video search feature is a convenient way to find and add videos to your presentation without having to leave the application. To access this feature, go to the "Insert" tab in PowerPoint and click on the "Video" button. From the drop-down menu, select "Online Video" and then click on "Search YouTube" or "Search Bing" depending on your preference. You can then enter your search query in the search bar and browse through the results to find the video you want to add. Once you've found the video, click on it to preview it and then click "Insert" to add it to your presentation. The video will be embedded directly into your slide, and you can resize it or move it around as needed. You can also use the "Search YouTube" feature to find videos that are specifically licensed for commercial use, which can be useful if you're creating a presentation for a business or professional setting. Additionally, PowerPoint's online video search feature also allows you to search for videos from other online sources such as Vimeo, and you can also use the "Search" feature to find videos that are already stored on your computer or network. Overall, using PowerPoint's online video search feature is a quick and easy way to add engaging and relevant videos to your presentation.
Customizing and Optimizing Your PowerPoint Video
When it comes to creating engaging and informative videos in PowerPoint, customization and optimization are key. A well-crafted video can capture your audience's attention, convey your message effectively, and leave a lasting impression. However, with so many features and options available, it can be overwhelming to know where to start. In this article, we'll explore three essential techniques to take your PowerPoint video to the next level: trimming and editing video clips, adding captions and subtitles, and optimizing video playback for smooth performance. By mastering these skills, you'll be able to create a polished and professional video that resonates with your audience. Let's start by diving into the first technique: trimming and editing video clips in PowerPoint, which allows you to refine your video's pacing, tone, and overall narrative.
Trimming and Editing Video Clips in PowerPoint
Trimming and editing video clips in PowerPoint allows you to refine your video content and make it more engaging for your audience. To trim a video clip, select the video and go to the "Video Tools" tab in the ribbon. Click on the "Trim Video" button and a new window will appear, displaying the video timeline. You can then drag the start and end points of the timeline to trim the video to the desired length. Additionally, you can also split the video into multiple segments and remove unwanted parts. PowerPoint also allows you to add fades, transitions, and other effects to enhance the visual appeal of your video. You can also adjust the video's brightness, contrast, and color to match your presentation's theme. Furthermore, you can add captions, subtitles, and audio descriptions to make your video more accessible. By trimming and editing your video clips, you can create a more polished and professional-looking presentation that will captivate your audience.
Adding Captions and Subtitles to Your Video
Adding captions and subtitles to your video can significantly enhance its accessibility and engagement. Captions are the text version of the audio content, displayed on the screen in synchronization with the video, while subtitles are the text version of the dialogue, also displayed on the screen. Both captions and subtitles can be added to your video in PowerPoint, allowing you to reach a wider audience, including those who are deaf or hard of hearing, and those who prefer to watch videos with captions. To add captions and subtitles to your video in PowerPoint, you can use the built-in captioning feature, which allows you to upload a caption file or create one from scratch. You can also use third-party captioning tools, such as Rev.com or GoTranscript, to create and add captions to your video. Additionally, you can customize the appearance of your captions and subtitles, including the font, size, color, and position, to ensure they are clear and easy to read. By adding captions and subtitles to your video, you can make it more accessible, engaging, and effective, and reach a wider audience with your message.
Optimizing Video Playback for Smooth Performance
Optimizing video playback is crucial for a seamless PowerPoint presentation. To ensure smooth performance, start by compressing your video file using a tool like HandBrake or Adobe Media Encoder. This reduces the file size, making it easier for PowerPoint to handle. Next, consider converting your video to a compatible format, such as MP4 or WMV, which PowerPoint supports natively. Additionally, ensure your video is optimized for the target device's screen resolution and frame rate. For example, if your presentation will be displayed on a 1080p screen, ensure your video is also in 1080p. You can also use PowerPoint's built-in video editing tools to trim, crop, or adjust the video's brightness and contrast. Furthermore, consider embedding the video instead of linking to it, as this allows PowerPoint to load the video more efficiently. Finally, test your presentation on the target device to ensure the video plays smoothly and without any issues. By following these steps, you can optimize your video playback and deliver a professional-looking presentation.