How To Change Heic To Jpg On Iphone
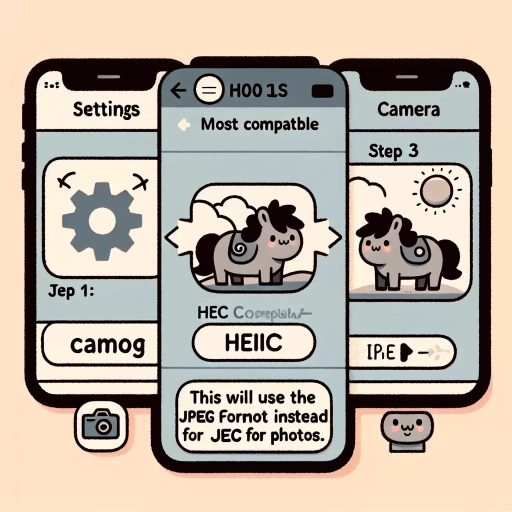
If you're an iPhone user, you're likely familiar with the HEIC file format, which is the default format for photos taken on Apple devices. However, this format may not be compatible with all devices or platforms, making it necessary to convert HEIC files to a more widely accepted format like JPG. Fortunately, there are several ways to change HEIC to JPG on an iPhone, and we'll explore three methods in this article. You can use the Photos app, a third-party app, or a computer or cloud service to make the conversion. Let's start with the most straightforward method: using the Photos app.
Using the Photos App
The Photos app on your iPhone or iPad is a powerful tool for managing and editing your photos. With the rise of HEIC images, which offer better compression and quality than traditional JPEGs, many users are looking for ways to convert their HEIC files to JPEGs for easier sharing and compatibility. Fortunately, the Photos app makes it easy to do just that. To get started, you'll need to open the Photos app and select the HEIC image you want to convert. From there, you can tap the share icon and choose the "Save as JPEG" option, which will allow you to save the JPEG image to your camera roll or files app. By following these simple steps, you can easily convert your HEIC images to JPEGs and share them with others. So, let's dive in and explore how to use the Photos app to convert your HEIC images to JPEGs, starting with opening the Photos app and selecting the HEIC image.
Open the Photos App and Select the HEIC Image
To convert HEIC to JPG on iPhone using the Photos app, start by opening the Photos app on your device. Once the app is open, navigate to the "Media Types" or "Albums" section, depending on your iOS version, and select the "Photos" or "All Photos" album. Locate the HEIC image you want to convert and tap on it to open it in full-screen mode. You can also use the "Select" option to choose multiple HEIC images at once if you need to convert multiple files. With the image open, tap the "Share" icon, which looks like a box with an arrow coming out of it. This will open the share menu, where you can select the "Save as Files" or "Save to Files" option, depending on your iOS version. This will allow you to save the HEIC image as a JPG file. You can also use the "Mail" or "Messages" option to share the image and have it automatically converted to JPG. Alternatively, you can use the "Duplicate" option to create a copy of the HEIC image, and then use the "Edit" option to convert it to JPG. By following these steps, you can easily convert HEIC to JPG on your iPhone using the Photos app.
Tap the Share Icon and Choose the "Save as JPEG" Option
To save a HEIC file as a JPEG on an iPhone, you can use the Photos app. Open the Photos app and select the HEIC image you want to convert. Tap the share icon, which looks like a box with an arrow coming out of it, located at the bottom left corner of the screen. This will open the share menu, where you can choose various options to share or save your image. From the share menu, select the "Save as JPEG" option. This will convert your HEIC image to a JPEG file and save it to your iPhone's camera roll. You can then access the JPEG image from the Photos app and use it as needed. Note that this method will create a new JPEG file, leaving the original HEIC file intact.
Save the JPEG Image to Your Camera Roll or Files App
When you want to save a JPEG image to your iPhone, you have two convenient options: the Camera Roll or the Files app. To save an image to your Camera Roll, simply open the Photos app, select the image you want to save, and tap the "Share" icon (represented by a box with an arrow coming out of it). From the share menu, tap "Save to Camera Roll." The image will be saved to your Camera Roll, where you can access it later. Alternatively, you can save the image to the Files app, which allows you to organize and store files in a more structured way. To do this, open the Files app, navigate to the location where you want to save the image, and tap the "+" icon in the top-right corner. Then, select "Save Image" and choose the JPEG image you want to save. The image will be saved to the Files app, where you can access it later and even share it with others. Both methods allow you to easily save JPEG images to your iPhone, giving you flexibility and convenience when working with images.
Using a Third-Party App
Using a third-party app is a convenient and efficient way to convert HEIC images to JPEG format. This method is particularly useful for those who need to convert multiple images at once or require more advanced features than what is offered by online conversion tools. To use a third-party app, you will first need to download and install a HEIC to JPEG converter app on your device. Once installed, you can select the HEIC image you want to convert and choose the conversion option that best suits your needs. Finally, you can save the converted JPEG image to your device, making it easy to share or use in various applications. By following these simple steps, you can quickly and easily convert your HEIC images to JPEG format using a third-party app. To get started, download and install a HEIC to JPEG converter app on your device.
Download and Install a HEIC to JPEG Converter App
To download and install a HEIC to JPEG converter app, start by opening the App Store on your iPhone. In the search bar, type "HEIC to JPEG converter" and select the desired app from the search results. You can choose from a variety of apps, such as HEIC Converter, Convert HEIC to JPEG, or Photo Converter, among others. Once you've selected an app, click the "Get" button next to it, and then click "Install" to begin the download process. You may be prompted to enter your Apple ID password or use Touch ID/Face ID to authenticate the download. Wait for the app to download and install on your iPhone, which should only take a few seconds. Once the installation is complete, you can open the app and start converting your HEIC files to JPEG format. Be sure to read the app's reviews and check its ratings before downloading to ensure you're getting a reliable and efficient converter. Additionally, some apps may offer in-app purchases or subscriptions, so be aware of any potential costs before proceeding. By following these simple steps, you can easily download and install a HEIC to JPEG converter app on your iPhone and start converting your files with ease.
Select the HEIC Image and Choose the Conversion Option
To convert HEIC images to JPG on your iPhone using a third-party app, start by selecting the HEIC image you want to convert. You can do this by opening the Photos app, navigating to the album or folder where the image is stored, and tapping on the image to open it. Once the image is open, you'll need to choose a conversion option. Many third-party apps, such as HEIC Converter, Photo Converter, or Convert HEIC to JPG, offer a range of conversion options, including batch conversion, resizing, and compression. You can choose the option that best suits your needs, depending on whether you want to convert a single image or multiple images at once, and whether you want to adjust the image size or quality. Some apps may also offer additional features, such as the ability to convert images in bulk or to save the converted images to a specific album or folder. By selecting the HEIC image and choosing the conversion option, you can easily convert your HEIC images to JPG format using a third-party app on your iPhone.
Save the Converted JPEG Image to Your Device
To save the converted JPEG image to your device, you can follow these simple steps. First, open the third-party app you used to convert the HEIC image to JPEG. Then, locate the converted image in the app's gallery or library. Tap on the image to open it, and then look for the "Save" or "Download" option, usually represented by a downward arrow or a floppy disk icon. Tap on this option to save the JPEG image to your iPhone's Photos app. Alternatively, you can also share the image directly to other apps, such as email or messaging apps, by tapping the "Share" option. If you want to save the image to a specific album or folder, you can do so by tapping the "Save to Album" or "Save to Folder" option. Once you've saved the image, you can access it from your iPhone's Photos app, where you can view, edit, or share it as needed. By following these steps, you can easily save the converted JPEG image to your device and use it as you would any other image file.
Using a Computer or Cloud Service
If you have an iPhone or iPad, you may have encountered HEIC images, which are a type of file format used by Apple devices. However, not all devices or software support HEIC images, which can make it difficult to share or edit them. Fortunately, there are several ways to convert HEIC images to JPEG, a more widely supported format. To do this, you can transfer the HEIC image to a computer or cloud service, use a HEIC to JPEG converter software or online tool, or download or access the converted JPEG image. By following these steps, you can easily convert your HEIC images to JPEG and share them with others or edit them using your preferred software. To get started, the first step is to transfer the HEIC image to a computer or cloud service.
Transfer the HEIC Image to a Computer or Cloud Service
Transferring HEIC images to a computer or cloud service is a straightforward process that can be accomplished in a few steps. To transfer HEIC images to a computer, connect your iPhone to the computer using a USB cable. If you're using a Mac, the Photos app will automatically open, and you can select the HEIC images you want to transfer. If you're using a Windows PC, you'll need to open the File Explorer, navigate to the iPhone's storage, and select the HEIC images. You can also use the Windows Photos app to import the HEIC images. Alternatively, you can use cloud services like Google Drive, Dropbox, or OneDrive to transfer HEIC images. Simply upload the images to the cloud service using the iPhone app, and then access them from your computer. You can also use the cloud service's automatic upload feature to transfer all your iPhone photos, including HEIC images, to the cloud. Once the HEIC images are transferred to your computer or cloud service, you can convert them to JPEG format using various software or online tools.
Use a HEIC to JPEG Converter Software or Online Tool
Using a HEIC to JPEG converter software or online tool is a straightforward and efficient way to convert your HEIC files to JPEG format. These tools are specifically designed to handle the conversion process, ensuring that your images are converted quickly and accurately. With a HEIC to JPEG converter, you can easily convert multiple files at once, saving you time and effort. Additionally, many of these tools offer advanced features such as batch conversion, image resizing, and quality adjustment, giving you more control over the conversion process. Some popular online tools include SmallPDF, Convertio, and Online-Convert, while software options like Adobe Photoshop and XnConvert are also available. By using a HEIC to JPEG converter, you can easily convert your HEIC files to JPEG format, making them compatible with a wider range of devices and applications.
Download or Access the Converted JPEG Image
To download or access the converted JPEG image, you can follow these steps. If you used a cloud service like Google Drive or Dropbox to convert your HEIC file, you can access the converted JPEG image by logging into your account and navigating to the folder where the file was saved. You can then download the JPEG image to your computer or mobile device by clicking on the "Download" button. Alternatively, if you used a computer software like Adobe Photoshop or Preview to convert your HEIC file, you can access the converted JPEG image by opening the software and navigating to the folder where the file was saved. You can then save the JPEG image to your computer or mobile device by clicking on the "Save As" button. Additionally, if you used an online conversion tool, you can usually download the converted JPEG image directly from the website by clicking on the "Download" button. In some cases, the converted JPEG image may be sent to your email address, in which case you can access it by opening the email and clicking on the attachment. Regardless of the method you used to convert your HEIC file, you should be able to access and download the converted JPEG image with ease.