How To Freeze Rows And Columns In Excel
Here is a 200-word introduction paragraph for the article: Freezing rows and columns in Excel is a powerful feature that allows users to lock specific parts of their spreadsheet in place, making it easier to navigate and analyze large datasets. By freezing rows and columns, users can keep important headers and data visible at all times, even when scrolling through the spreadsheet. However, many users struggle to effectively use this feature, leading to frustration and wasted time. In this article, we will explore the basics of freezing rows and columns in Excel, providing a step-by-step guide on how to do it correctly. We will also troubleshoot common issues that users may encounter when trying to freeze rows and columns, such as formatting problems and data loss. By the end of this article, readers will have a comprehensive understanding of how to freeze rows and columns in Excel, enabling them to work more efficiently and effectively. To start, let's begin by understanding the basics of freezing rows and columns in Excel.
Understanding the Basics of Freezing Rows and Columns in Excel
When working with large datasets in Excel, it's essential to understand how to effectively manage and navigate your spreadsheet. One crucial feature that can greatly enhance your productivity is freezing rows and columns. But what exactly is freezing rows and columns in Excel, and why is it so important? Freezing rows and columns allows you to lock specific rows or columns in place, making it easier to view and analyze your data. But why would you want to do this in the first place? The answer lies in the benefits it provides, from improved data visualization to increased efficiency. By freezing rows and columns, you can ensure that your most important data remains visible at all times, making it easier to make informed decisions. So, let's dive deeper into the world of freezing rows and columns in Excel, starting with the basics: what is freezing rows and columns in Excel?
What is Freezing Rows and Columns in Excel?
Freezing rows and columns in Excel is a feature that allows you to lock specific rows or columns in place, so they remain visible on the screen even when you scroll through the rest of the worksheet. This is particularly useful when working with large datasets, as it enables you to keep important headers, titles, or reference data in view at all times. By freezing rows or columns, you can ensure that your data remains organized and easily accessible, making it easier to analyze and work with. For instance, you can freeze the top row to keep your column headers visible, or freeze the first column to keep your row labels in view. This feature is especially helpful when working with multiple worksheets or collaborating with others, as it helps to maintain a clear and consistent view of the data. Overall, freezing rows and columns is a simple yet powerful tool in Excel that can greatly enhance your productivity and data management capabilities.
Why Freeze Rows and Columns in Excel?
Freezing rows and columns in Excel is a useful feature that allows you to lock specific rows or columns in place, making it easier to view and analyze large datasets. By freezing rows and columns, you can keep important headers, titles, or data visible at all times, even when scrolling through a large spreadsheet. This feature is particularly useful when working with large datasets, as it helps to prevent confusion and errors by keeping key information in view. Additionally, freezing rows and columns can also help to improve the overall readability and organization of your spreadsheet, making it easier to understand and work with. By freezing rows and columns, you can create a clear and consistent layout, making it easier to focus on the data that matters most. Overall, freezing rows and columns is a simple yet powerful feature in Excel that can greatly improve your productivity and efficiency when working with large datasets.
Benefits of Freezing Rows and Columns in Excel
Freezing rows and columns in Excel offers numerous benefits that can enhance your productivity and make data analysis more efficient. By freezing rows and columns, you can keep important data, such as headers and labels, visible at all times, even when scrolling through large datasets. This feature is particularly useful when working with large spreadsheets, as it allows you to quickly identify and analyze data without having to constantly scroll back to the top or left side of the sheet. Additionally, freezing rows and columns can help to prevent errors by ensuring that formulas and formatting are applied consistently throughout the dataset. Furthermore, this feature can also improve data visualization by allowing you to create custom views of your data, making it easier to identify trends and patterns. Overall, freezing rows and columns in Excel is a simple yet powerful tool that can significantly improve your data analysis and productivity.
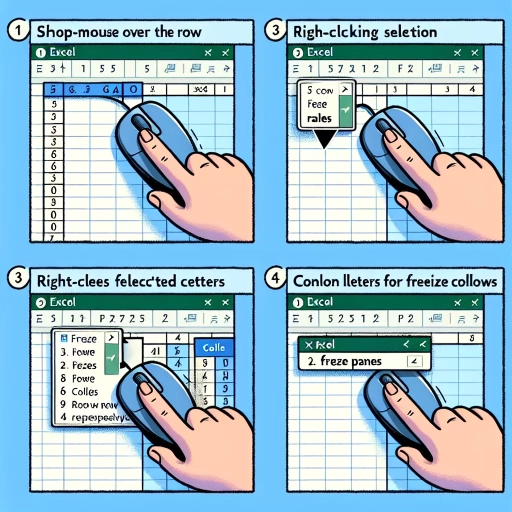
Step-by-Step Guide to Freezing Rows and Columns in Excel
When working with large datasets in Excel, it's essential to have a clear view of your data's structure and organization. Freezing rows and columns can help you achieve this by keeping specific parts of your spreadsheet visible while scrolling through the rest of the data. In this article, we'll provide a step-by-step guide on how to freeze rows and columns in Excel. To do this, you'll need to start by selecting the rows and columns you want to freeze, which can be a bit tricky if you're new to Excel. Once you've made your selection, you can use the Freeze Panes option to lock those rows and columns in place. Finally, you can adjust the frozen rows and columns to fine-tune your view. By following these steps, you'll be able to keep your data organized and easily accessible. So, let's get started by selecting the rows and columns to freeze.
Selecting the Rows and Columns to Freeze
When selecting the rows and columns to freeze, it's essential to consider the layout and structure of your Excel worksheet. To freeze rows, select the row below the one you want to freeze. For example, if you want to freeze the first row, select the second row. To freeze columns, select the column to the right of the one you want to freeze. For instance, if you want to freeze the first column, select the second column. You can also freeze both rows and columns simultaneously by selecting the cell at the intersection of the row and column you want to freeze. Additionally, you can freeze multiple rows or columns by selecting the entire range of cells you want to freeze. It's also important to note that you can only freeze rows and columns in the worksheet you are currently working on, and not across multiple worksheets. By carefully selecting the rows and columns to freeze, you can ensure that your data remains visible and easily accessible, making it easier to analyze and work with your data.
Using the Freeze Panes Option in Excel
Using the Freeze Panes option in Excel is a powerful feature that allows you to lock specific rows or columns in place, making it easier to view and analyze large datasets. By freezing panes, you can keep important headers or data visible while scrolling through the rest of the worksheet. To use the Freeze Panes option, select the cell below the row or to the right of the column you want to freeze, go to the "View" tab in the ribbon, and click on "Freeze Panes." From there, you can choose to freeze the top row, first column, or both, or select a specific row or column to freeze. You can also use the "Freeze Panes" dialog box to customize the freeze settings, such as freezing multiple rows or columns at once. Once you've frozen the panes, you can scroll through the rest of the worksheet without the frozen rows or columns moving. This feature is especially useful when working with large datasets or when you need to keep specific data visible while analyzing other parts of the worksheet. Additionally, you can also use the "Unfreeze Panes" option to remove the freeze settings and return to the normal view. By mastering the Freeze Panes option, you can improve your productivity and make it easier to work with complex data in Excel.
Adjusting the Frozen Rows and Columns
Adjusting the frozen rows and columns in Excel is a straightforward process that allows you to customize the layout of your spreadsheet to suit your needs. To adjust the frozen rows, select the row below the one you want to freeze and go to the "View" tab in the ribbon. Click on "Freeze Panes" and select "Freeze Panes" again from the drop-down menu. In the "Freeze Panes" dialog box, select the "Rows" option and enter the number of rows you want to freeze in the "Rows to freeze" field. You can also adjust the frozen columns by selecting the column to the right of the one you want to freeze and following the same steps. Alternatively, you can also use the "Split" feature to divide your worksheet into separate panes, allowing you to scroll through different parts of your data independently. To do this, select the row or column where you want to split the worksheet and go to the "View" tab. Click on "Split" and adjust the split bar to your desired position. This feature is particularly useful when working with large datasets or when you need to compare data from different parts of your worksheet. By adjusting the frozen rows and columns, you can create a more efficient and effective workflow, making it easier to analyze and manipulate your data.
Troubleshooting Common Issues with Freezing Rows and Columns in Excel
When working with large datasets in Excel, freezing rows and columns can be a game-changer for improving readability and navigation. However, issues with freezing rows and columns can be frustrating and hinder productivity. Common problems include frozen rows and columns not working as expected, not displaying correctly, or being stuck and unable to be unfrozen. To troubleshoot these issues, it's essential to understand the underlying causes and apply the right solutions. In this article, we'll explore three key areas to help you overcome these challenges: resolving frozen rows and columns that aren't working, fixing display issues, and unfreezing rows and columns when needed. By the end of this article, you'll be equipped with the knowledge to tackle these common problems and get back to working efficiently in Excel. Let's start by resolving frozen rows and columns that aren't working.
Resolving Frozen Rows and Columns Not Working
When resolving frozen rows and columns not working in Excel, there are several steps you can take to troubleshoot the issue. First, check if the worksheet is protected or shared, as freezing rows and columns may not work in these cases. If the worksheet is protected, unprotect it by going to the "Review" tab and clicking "Unprotect Sheet." If the worksheet is shared, stop sharing it by going to the "Review" tab and clicking "Stop Sharing." Next, check if the rows or columns are already frozen. If they are, you won't be able to freeze them again. To check, go to the "View" tab and click "Freeze Panes." If the rows or columns are already frozen, you'll see a checkmark next to "Freeze Panes." If not, you can try freezing them again. Another possible issue is that the rows or columns are not selected correctly. Make sure to select the entire row or column you want to freeze by clicking on the row or column header. You can also try selecting the cell below or to the right of the row or column you want to freeze and then freezing the panes. Additionally, check if there are any merged cells in the rows or columns you're trying to freeze. Merged cells can prevent freezing from working properly. To fix this, unmerge the cells by going to the "Home" tab and clicking "Merge & Center" and then selecting "Unmerge Cells." Finally, if none of these steps work, try restarting Excel or checking for any software updates. By following these steps, you should be able to resolve the issue of frozen rows and columns not working in Excel.
Fixing Frozen Rows and Columns Not Displaying Correctly
When fixing frozen rows and columns not displaying correctly, there are several steps you can take to resolve the issue. First, check if the freeze panes are applied correctly by going to the "View" tab and selecting "Freeze Panes" to see if the rows and columns are properly selected. If the issue persists, try resetting the freeze panes by selecting "Unfreeze Panes" and then reapplying the freeze. Additionally, ensure that the worksheet is not in a protected or shared mode, as this can prevent the freeze panes from working correctly. You can also try adjusting the column widths or row heights to see if this resolves the issue. If the problem is specific to a particular worksheet or workbook, try copying the data to a new worksheet or workbook to see if the issue is resolved. Furthermore, check for any conflicts with other Excel features, such as conditional formatting or tables, which can sometimes interfere with the freeze panes. If none of these steps resolve the issue, try restarting Excel or checking for any software updates. By following these steps, you should be able to fix frozen rows and columns not displaying correctly and get your worksheet back to normal.
Unfreezing Rows and Columns in Excel
When working with large datasets in Excel, it's common to encounter issues with frozen rows and columns. One of the most frustrating problems is when rows or columns become "unfrozen" unexpectedly, causing your carefully arranged layout to become disorganized. If you're experiencing this issue, there are a few potential causes and solutions to explore. Firstly, check if you've accidentally unfrozen the rows or columns by clicking on the "Unfreeze Panes" button in the "View" tab. If this is the case, simply re-freeze the rows or columns by selecting the cell below and to the right of the row or column you want to freeze, and then clicking on the "Freeze Panes" button. Another possible cause is that you've inserted or deleted rows or columns, which can cause the frozen panes to become unfrozen. To resolve this, try re-freezing the rows or columns after making the changes. Additionally, if you're using a template or a worksheet that was created by someone else, it's possible that the frozen panes were not set up correctly. In this case, try re-freezing the rows or columns from scratch to ensure that they're set up correctly. Finally, if none of these solutions work, try checking for any add-ins or macros that may be interfering with the frozen panes. By troubleshooting these common issues, you should be able to resolve the problem and get your frozen rows and columns working correctly again.