How To Insert A Horizontal Line In Word
Here is the introduction paragraph: Inserting a horizontal line in Microsoft Word can be a useful way to separate sections of text, add visual interest to a document, or create a sense of continuity. There are several ways to achieve this, and the method you choose will depend on your specific needs and preferences. In this article, we will explore three different methods for inserting a horizontal line in Word: using the Horizontal Line Tool, using Borders and Shading, and using Shapes and Graphics. Each of these methods has its own advantages and disadvantages, and we will discuss the benefits and drawbacks of each approach. First, let's take a look at the simplest and most straightforward method: Using the Horizontal Line Tool.
Using the Horizontal Line Tool
The Horizontal Line Tool is a versatile feature in Microsoft Word that allows users to add a professional touch to their documents. With this tool, users can create a variety of horizontal lines that can be used to separate sections, highlight important information, or add visual interest to a page. In this article, we will explore how to use the Horizontal Line Tool to enhance the design and functionality of your documents. We will cover how to access the Horizontal Line Tool in the Ribbon, customize the horizontal line style to suit your needs, and insert multiple horizontal lines to create a unique design element. By mastering the Horizontal Line Tool, you can take your document design to the next level and create a more engaging and effective document. To get started, let's first explore how to access the Horizontal Line Tool in the Ribbon.
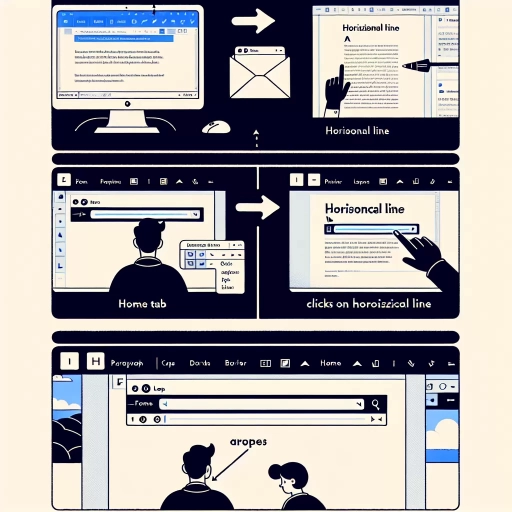
Accessing the Horizontal Line Tool in the Ribbon
To access the Horizontal Line Tool in the Ribbon, navigate to the "Home" tab in the top navigation bar of your Microsoft Word document. Within the "Home" tab, locate the "Paragraph" group, which is typically situated in the middle section of the Ribbon. Click on the "Borders" button, represented by a small icon of a box with a border, to open the "Borders and Shading" dialog box. In the "Borders and Shading" dialog box, select the "Horizontal Line" option from the "Borders" tab. This will allow you to choose from a variety of pre-designed horizontal lines, including different styles, colors, and widths. Alternatively, you can also access the Horizontal Line Tool by clicking on the "Insert" tab in the Ribbon and then selecting "Shapes" from the "Illustrations" group. From the "Shapes" gallery, choose the "Line" option and then select the "Horizontal Line" option from the drop-down menu. Both methods will enable you to insert a horizontal line into your Word document.
Customizing the Horizontal Line Style
Customizing the horizontal line style in Microsoft Word allows users to personalize the appearance of their documents and enhance the visual appeal of their content. To customize the horizontal line style, users can access the "Borders and Shading" dialog box by going to the "Home" tab, clicking on the "Paragraph" group, and selecting "Borders and Shading." From there, they can choose from a variety of line styles, including solid, dashed, dotted, and double lines, and adjust the line width and color to suit their needs. Additionally, users can also customize the line style by using the "Horizontal Line" feature in the "Insert" tab, which allows them to choose from a range of pre-designed line styles and adjust the line's width, color, and alignment. By customizing the horizontal line style, users can add a professional touch to their documents and make their content more engaging and readable. Furthermore, customizing the horizontal line style can also help to create visual hierarchy and separate different sections of the document, making it easier for readers to navigate and understand the content. Overall, customizing the horizontal line style is a simple yet effective way to enhance the appearance and functionality of a document in Microsoft Word.
Inserting Multiple Horizontal Lines
Inserting multiple horizontal lines in a Word document can be a useful feature for organizing and separating content, creating visual interest, and adding emphasis to specific sections. To insert multiple horizontal lines, you can use the Horizontal Line Tool, which is a built-in feature in Microsoft Word. To access this tool, go to the "Home" tab in the ribbon and click on the "Paragraph" group. Then, click on the "Borders" button and select "Horizontal Line" from the drop-down menu. This will insert a single horizontal line, but you can easily add multiple lines by repeating the process. Alternatively, you can also use the "AutoFormat" feature to insert multiple horizontal lines at once. To do this, type three or more hyphens (-) or underscores (_) on a new line and press the "Enter" key. Word will automatically convert these characters into a horizontal line. You can repeat this process to insert multiple lines. Another way to insert multiple horizontal lines is by using the "Shapes" feature. To do this, go to the "Insert" tab in the ribbon and click on the "Shapes" button. Then, select the "Line" shape and draw a horizontal line on the page. You can repeat this process to insert multiple lines. Regardless of the method you choose, inserting multiple horizontal lines can add visual interest and organization to your Word document.
Using Borders and Shading
Borders and shading are essential elements in document design, allowing you to add visual interest, create hierarchy, and draw attention to specific information. When used effectively, borders and shading can enhance the overall appearance of your document and make it more engaging for your audience. In this article, we will explore three key techniques for using borders and shading in your documents: applying a bottom border to a paragraph, using the shading tool to create a horizontal line, and customizing border and shading options. By mastering these techniques, you can add a professional touch to your documents and make them more effective at communicating your message. Let's start by looking at how to apply a bottom border to a paragraph, a simple yet effective way to add visual interest to your text.
Applying a Bottom Border to a Paragraph
Applying a bottom border to a paragraph is a simple yet effective way to add visual interest and separate sections of text in a Microsoft Word document. To apply a bottom border to a paragraph, start by selecting the paragraph or paragraphs you want to add the border to. You can do this by clicking and dragging your cursor over the text or by using the "Select All" option if you want to apply the border to the entire document. Once your text is selected, go to the "Home" tab in the ribbon and click on the "Borders" button in the "Paragraph" group. This will open a drop-down menu with various border options. Click on the "Bottom Border" option to apply a border to the bottom of your selected paragraph. You can also use the keyboard shortcut "Ctrl+Shift+B" to apply a bottom border quickly. If you want to customize the appearance of your border, you can click on the "Borders and Shading" option at the bottom of the drop-down menu. This will open a dialog box where you can choose from various border styles, colors, and widths. You can also use this dialog box to apply borders to other sides of your paragraph, such as the top, left, or right. By applying a bottom border to a paragraph, you can add a professional touch to your document and make it easier to read and understand.
Using the Shading Tool to Create a Horizontal Line
Using the Shading Tool to Create a Horizontal Line. To create a horizontal line using the Shading tool, follow these steps: First, place your cursor where you want the line to appear. Then, go to the Home tab in the ribbon and click on the Shading button in the Paragraph group. In the Shading dialog box, select the Fill tab and choose a color for your line. You can choose from a variety of colors, including solid colors, gradients, and textures. Next, select the Patterns tab and choose a pattern for your line. You can choose from a variety of patterns, including solid lines, dashed lines, and dotted lines. Once you have selected a color and pattern, click OK to apply the shading to your line. To make the line horizontal, go to the Layout tab in the ribbon and click on the Alignment button in the Arrange group. Select the Horizontal alignment option to align the line horizontally. You can also adjust the line's width and height by using the Size and Position dialog box. To do this, select the line and go to the Layout tab in the ribbon. Click on the Size and Position button in the Arrange group and adjust the width and height of the line as needed. Finally, you can use the Shading tool to create a horizontal line that spans the entire width of the page. To do this, select the line and go to the Home tab in the ribbon. Click on the Shading button in the Paragraph group and select the Fill tab. Choose a color for your line and select the Patterns tab. Choose a pattern for your line and click OK to apply the shading. Then, go to the Layout tab in the ribbon and click on the Alignment button in the Arrange group. Select the Horizontal alignment option to align the line horizontally. You can also adjust the line's width and height by using the Size and Position dialog box. By following these steps, you can use the Shading tool to create a horizontal line in Word that meets your needs.
Customizing Border and Shading Options
Customizing Border and Shading Options. To further enhance the appearance of your document, you can customize the border and shading options in Microsoft Word. To do this, select the text or paragraph you want to modify, then go to the "Home" tab and click on the "Borders and Shading" button in the "Paragraph" group. In the "Borders and Shading" dialog box, you can choose from various border styles, colors, and widths. You can also add shading to your text by selecting a fill color and pattern. Additionally, you can customize the border and shading options for specific sections of your document, such as the header and footer, by using the "Apply to" dropdown menu. Furthermore, you can use the "Custom" option to create a unique border style by specifying the border width, style, and color for each side of the paragraph. By customizing the border and shading options, you can add visual interest and professionalism to your document.
Using Shapes and Graphics
Using shapes and graphics can elevate the visual appeal of your content, making it more engaging and effective in conveying your message. One way to do this is by incorporating horizontal lines to break up text, create visual interest, and draw attention to important information. In this article, we'll explore three ways to use shapes and graphics to create horizontal lines that enhance your content. We'll start by looking at how to insert a horizontal line using the shapes tool, a simple yet effective method for adding a basic line to your content. We'll also discuss how to customize the line style and color to match your brand or design aesthetic. Finally, we'll explore how to use graphics to create a decorative horizontal line that adds a touch of personality to your content. By the end of this article, you'll have the skills and knowledge to create horizontal lines that take your content to the next level. Let's start by inserting a horizontal line using the shapes tool.
Inserting a Horizontal Line Using the Shapes Tool
When it comes to inserting a horizontal line in Word, the Shapes tool offers a convenient and flexible solution. To get started, navigate to the "Insert" tab in the ribbon and click on the "Shapes" button, located in the "Illustrations" group. This will open a drop-down menu featuring a variety of shape options, including lines, rectangles, and polygons. From this menu, select the "Line" option, which is represented by a simple horizontal line icon. Once you've selected the line shape, your cursor will change to a crosshair pointer, indicating that you're in drawing mode. To insert a horizontal line, simply click and drag the crosshair pointer to the desired location on your page. As you drag, you'll see a horizontal line appear, which you can adjust in length and position to suit your needs. If you want to create a perfectly horizontal line, you can hold down the Shift key while dragging, which will constrain the line to a horizontal orientation. Alternatively, you can also use the "Scribble" tool, which allows you to draw a freehand line. However, for a more precise and professional-looking horizontal line, the Shapes tool is generally the better choice. Once you've inserted your horizontal line, you can customize its appearance by using the various formatting options available in the "Format" tab, such as changing the line color, width, and style. Overall, the Shapes tool provides a quick and easy way to insert a horizontal line in Word, making it a useful feature to have in your toolkit.
Customizing the Line Style and Color
Customizing the line style and color is a crucial step in enhancing the visual appeal of your horizontal line in Word. To do this, select the line by clicking on it, and then navigate to the "Format" tab in the ribbon. In the "Current Selection" group, click on the "Shape Outline" dropdown menu. From here, you can choose from a variety of line styles, including solid, dashed, and dotted lines. You can also adjust the line width by selecting a specific point size or using the "Weight" option to create a thicker or thinner line. Additionally, you can change the line color by selecting a color from the "Theme Colors" or "Standard Colors" palette, or by creating a custom color using the "More Colors" option. Furthermore, you can also add a gradient or texture to your line by using the "Gradient" or "Texture" options. By customizing the line style and color, you can create a horizontal line that complements your document's design and effectively separates sections of text.
Using Graphics to Create a Decorative Horizontal Line
Using graphics to create a decorative horizontal line in Word is a great way to add visual interest to your document. To do this, you can use the Shapes tool to insert a line, and then customize its appearance using various graphics options. First, go to the "Insert" tab and click on the "Shapes" button. From the drop-down menu, select the "Line" option. You can then draw the line across the page by clicking and dragging your mouse. To make the line more decorative, you can add a border or a fill color. To do this, select the line and go to the "Format" tab. From here, you can choose from a variety of border styles and colors, or select a fill color to add some texture to your line. You can also add some visual interest to your line by adding a shadow or a 3D effect. To do this, select the line and go to the "Format" tab, then click on the "Effects" button. From here, you can choose from a variety of shadow and 3D effects to add some depth to your line. Additionally, you can also use the "Picture" tool to insert a decorative image that can be used as a horizontal line. To do this, go to the "Insert" tab and click on the "Picture" button. From here, you can select a decorative image from your computer or from the internet, and then resize it to fit across the page. By using graphics to create a decorative horizontal line, you can add a professional touch to your document and make it more visually appealing.