How To Make Only One Page Landscape In Word
 Navigating the world of Word document formatting can often be a daunting task. This article is designed to guide you to conquer one of its lesser-known intricacies - making a single page landscape in Word. Through a step-by-step guide, this piece provides an efficient strategy to accomplish this often-needed, yet perplexing, formatting task. We will first take an exploratory journey into the basics of Word document formatting, laying a solid foundation to fully understand the process. Moving forward, we will delve into specific steps to convert just one page of your document into a landscape orientation seamlessly, without affecting the orientation of your other pages. Lastly, in a bid to wrap up with a flourish, expert tips and solutions for fine-tuning and troubleshooting the landscape orientation will be discussed thoroughly. By the end of this article, turning a single page into landscape orientation amidst a sea of portrait pages will no longer be an enigma. Let's first venture into the realm of understanding the fundamentals of Word document formatting.
Understanding the Basics of Word Document Formatting
Informative and high-quality content is indeed necessary, not only for clarity but also for easy comprehension. One fundamental tool every writer should be well-versed in is Word document formatting. A document’s format goes beyond just making it look appealing. It's a craft that has a profound effect on the flow, readability, and accessibility of the text. This article will break down the nuances of Word document formatting – a key to successful content creation. We will examine three pivotal aspects that shape the overall structure and design of a document. Firstly, understanding the dissimilarities of "Landscape" and "Portrait" Orientation, which play a significant role in structuring the visual layout of your pages. Secondly, delving into the functions and applications of 'Page Layout' options that afford you more control over your document settings. Lastly, we navigate one of the most critical but often overlooked features— the "Breaks" command, a feature that significantly affects page continuity and content distribution. Starting with illustrating the differences between 'Landscape' and 'Portrait' orientations will set the foundation for your understanding of how document formatting truly matters.
Defining Landscape and Portrait Orientation
In the world of word document formatting, the terms 'Landscape' and 'Portrait' play a pivotal role. These terms refer to the two possible orientations of a text document. Much like their names suggest, the 'Portrait' orientation embodies an upright form mimicking a portrait painting's dimensions, while the 'Landscape' orientation imitates the broader, horizontal perspective of a landscape artwork. When setting up your Word document, the default orientation is usually in 'Portrait', characterized by its taller length than width. This vertical layout has proven ideal for text-heavy materials such as letters, legal documents, and most typed documents, catering well to human eye movement when reading. On the other hand, the 'Landscape' orientation, with its emphasis on width over length, is a better fit when dealing with wider visuals that won't fit neatly within the confines of a vertical frame. Ideal for incorporating tables, charts, and wide images, it provides a broad, readily-absorbable visual overview, akin to sweeping one's gaze across a landscape view. Manipulating these orientations in your Word document can significantly improve its aesthetic quality and readability. For instance, while typing a lengthy report, you may encounter instances where you need to insert a table or a diagram that can only fit effectively in a landscape format. In this context, changing the orientation of just a single page to 'Landscape' within a predominantly 'Portrait' report can dramatically enhance your formatting game, providing necessary flexibility within readability. Understanding the difference between the Landscape and Portrait orientation in Word formatting is not just fundamental but also instrumental in creating impactful, efficient, and well-structured documents. It facilitates varied visual presentation options, dynamic content representation, and efficient use of page space, all under the umbrella of one singular document.
The Function and Use of Page Layout Options
The Function and Use of Page Layout Options
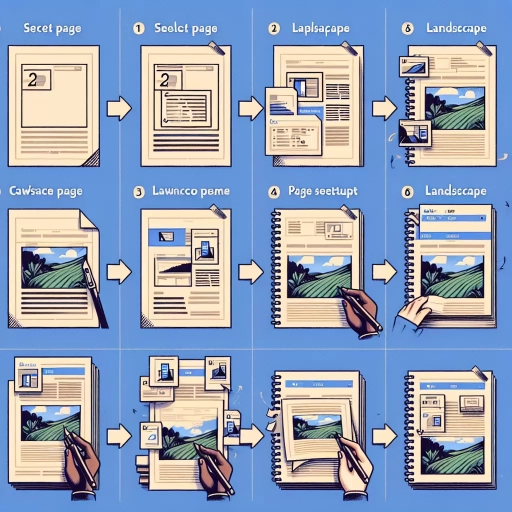
Page layout options serve as a critical aspect of Word document formatting. They possess various functional capabilities that assist in making your content more readable and visually appealing. One such capability is the ability to alter the orientation of a single page within a document, a feature that becomes incredibly useful when you have diagrams, charts, or images that don’t quite fit the portrait format. The primary function of page layout options is to provide users with the ability to dictate how their text and other content elements are positioned on the page. This control extends to a myriad of factors, among them being margins, page sizes, indentation, alignment, columns, and orientation. Each of these factors plays a pivotal role in determining the overall layout of a page and can dramatically alter how a viewer interacts with the content. For instance, adjusting the page's orientation from portrait to landscape or vice versa can significantly impact how much content can fit on a single page. Landscape orientation typically allows for wider images or charts to be incorporated without compromise, making it especially useful for content heavy in graphics. On the other hand, portrait mode caters to lengthy text, making it ideal for written documents such as essays or reports. To make only one page landscape in Word, navigate to the 'Page Layout' tab, and select on 'Breaks'. A dropdown menu will appear – click on 'Next Page' under 'Section Breaks'. Afterwards, navigate back to the 'Page Layout' tab and click on 'Orientation'. From the dropdown menu, select 'Landscape'. This action will create a landscape page right after the previously selected page break. It's worth noting that this page will remain independent from the rest of the document, meaning changes made within this page will not affect other pages within the same document. The use of page layout options is not only limited to ensuring aesthetics, but it also aids in enhancing text readability and comprehension. For example, certain margin settings may make it easier for readers to follow lines of text, or specific alignment options can make bullet points or numbered lists appear more organised and coherent. In conclusion, the page layout options in Word offer an invaluable tool to create attractive and structured documents. Understanding these options will allow you to more effectively communicate your information and ideas, thereby enhancing your overall document presentation and reader experience.Exploring the Breaks Command in Word
Exploring the Breaks Command in Word is an integral part of understanding the basics of Word Document formatting, especially when you want to make one page landscape in a Word document. The Breaks command in Word is a versatile feature that provides users with a range of formatting capabilities. It provides the option to create a consistent layout throughout your document or switch it up from page to page, section to section. You can intuitively control how your text flows, the arrangement of columns or sections, and even the orientation of specific pages in your document. An important aspect of using the Breaks command is mastering section breaks, particularly when you want to change just one page to landscape orientation. Section breaks allow you to divide your Word document into disparate sections that each have their unique formatting. With a simple insertion of a 'Next Page' section break, you can quickly change the subsequent page's orientation to landscape while keeping the rest of the document in portrait mode. The meticulous use of section breaks provides you with autonomy over the layout of individual pages, thereby giving you a customized and polished document. The handy page breaks feature is also a part of the Breaks command. This feature splits your document into separate pages, ensuring that a new line of text or a new element, such as a heading, starts on a fresh page. This helps in making your document look more professional and neat while enabling a smooth, enjoyable reading experience for your audience. Exploring and applying the Breaks command appropriately in your Word document is, therefore, essential in developing a structured, seamless, and well-presented document. It simplifies the complex process of customizing your document's layout and orientation, transforming it into a more manageable task. This powerful command, alongside other Word features, indeed redefines your experience with document formatting, providing you with the means to craft standout Word documents. So, understanding the Breaks command truly empowers you in your journey towards mastering the basics of Word Document formatting.
Steps to Convert A Single Page to Landscape Orientation in Word
In the digital age, mastering tools like Microsoft Word is crucial. One such skill involves converting a single-page orientation from portrait to landscape or vice versa. Various steps need to be carefully executed to facilitate this alteration without disturbing any surrounding content. The process can be logically divided into three segments. First, we place 'Section Breaks' around the page to segregate it from the rest of the document. This initial step is crucial in specifying the boundaries of the change. Next, we alter the 'Page Orientation' within these section breaks to transform the chosen page’s layout. Lastly, it's essential to preserve the 'Layout and Content Alignment' during the process, ensuring that the transformation doesn’t result in misaligned text or graphics. Understanding and following this process carefully can help you achieve the desired format without any disruptions. Now, let’s delve into the details of the foremost stage - placing the section breaks for the desired page.
Placing the Section Breaks for the Desired Page
In successfully converting a single page to Landscape orientation in Word, a critical step is the precise placement of Section Breaks. This is a key technique that allows Word users to manipulate the orientation of individual pages within a multi-page document. Section Breaks may initially appear as a complex tool to utilize, but they are fundamentally simple and exceedingly useful when understood. They serve as differentiators and partition a document into distinct sections, enabling the application of varying formatting within the same Word file. To implement this effectively, understanding where to insert a Section Break is pivotal. The process starts with identifying the page that needs orientational alteration. Once that's determined, careful placement of the Section Breaks is the next step to ensuring this action affects only a single page, leaving the rest of the document unaffected. You want to place the first break at the end of the page preceding the desired page you wish to convert to Landscape. Then, place another break at the end of the page you aim to convert. This effectively isolates or 'sandwiches' this page into a unique section of its own. To do this, first ensure your Word application displays all formatting marks. Navigate to the toolbar in your Word window, select the 'Home' tab, then look for the '¶' sign in the Paragraph group and click it. Now, navigate your cursor to the end of your target page, then select 'Layout' > 'Breaks' > 'Next Page'. Repeat this action at the end of the page to convert. This results in a separate section bound by breaks, within which you can manipulate the page orientation without affecting the remaining document. Remember! You should have a clear idea of where your content lies in relation to these section breaks. Any modification done between these points will only affect the content within. Effectively placing section breaks to create a single page in Landscape orientation has numerous applications in daily work life. It allows for the incorporation of broad tables, diagrams, or charts that wouldn't typically fit into a Portrait-oriented page, enhancing document presentation and comprehensibility. In fact, this method can make a meaningful difference in helping communicate data-heavy or complex concepts more effectively, adding an extra layer of polish and effectiveness to your Word documents.
Changing the Page Orientation in the Section Breaks
In the process of creating a word document, formatting plays a significant role in enhancing the overall readability and visual appeal of the content. One such innovative formatting technique is the use of Section Breaks to switch the page orientation within the document. This is especially beneficial when you have specific data, such as charts, graphs, or wide images, that exhibit better in a landscape layout, while the rest of the document remains in the default portrait orientation. Changing the Page Orientation in Section Breaks is straightforward and effective. To perform this, the first step is to place your cursor at the beginning of the page that you want in landscape layout. From the top navigation bar, click on ‘Layout’ or ‘Page Layout’ (based on your Word version) and then choose 'Breaks'. A dropdown menu will present itself, revealing various types of breaks. Opt for the 'Next Page' under 'Section Breaks'. This sets a division between the portrait pages and the single landscape one. Now, you are ready to alter the pressure. Again, go back to the ‘Layout’ tab and click on the ‘Orientation’ option. Two options will appear: Portrait and Landscape. Choose Landscape. This change will apply to the entire section after the break point, converting the page layout. The key to ensuring that only the desired page changes orientation is to encase it with Section Breaks both before and after. Without this proper encasing, immaculate formatting could be seriously compromised. Employing Section Breaks and changing page orientation, when coupled with other bespoke formatting options like font styles, paragraph spacing, and bulleted lists, contributes significantly to create eye-catching and efficient Word documents. Though it might seem a simple task, understanding and correctly utilizing these features is instrumental in deftly manipulating your written piece to not just communicate your points effectively, but also to stand superior in a pool of regular, one-note documents. In a world where digital data is growing exponentially, the implementation of these features and tactics not only aid in better expression and comprehension but also fortify your document, giving it a professional sheen that commands reader attention. Section Breaks and changing the page orientation is a practical, yet a powerful tool that truly augments your Word document's visual appeal and effectiveness. Further, it adds versatility to your document and broadens the scope of your presentation capabilities.
Preserving the Layout and Content Alignment During the Process
Preserving the Layout and Content Alignment During the Process While endeavoring to convert a single page to landscape orientation in Word, an often overlooked yet essential aspect is preserving the layout and content alignment during the process. The reorientation of a page can inadvertently disrupt established margins, content placement, and overall document formatting. This critical step is crucial not only for aesthetic purposes but also for maintaining the narrative flow and ensuring easy readability of the document. To successfully safeguard the layout and content alignment, the first step lies in identifying the specific single page that needs reorientation. This requires a clear understanding of your document layout and the purpose of the page to be converted. Once this is determined, users should apply section breaks before and after the identified page. These breaks function as protective buffers, ensuring the reorientation does not affect adjacent pages. Moreover, remember to handle the text wrapping and alignment settings post reorientation carefully. Word's default settings might place your text awkwardly, disrupting the overall professional look of your document. It is recommended to use the “Layout” or “Page Layout” menus. Here you can manage the text alignment, alter the margins if necessary, and ensure that your text and graphics are centered or aligned as per your requirement. Also, users need to pay attention to the re-scaling of images and tables in the landscape page. The converted page will have more horizontal space available; therefore, appropriately rescaling these elements can enhance readability and the overall look of the page. Another excellent tip that helps in preserving the alignment is the use of the “Rulers” feature in Word. This tool enables users to have a visual guide during reorientation, ultimately facilitating more accurate alignment of the content. Altogether, preserving the layout and content alignment during a page orientation process in Word need not be a daunting task. By following these steps and maintaining a keen eye on the alignment and layout, users can ensure a swift transition to a landscape page without disrupting the overall visual consistency of the document. Remember, the goal is to enhance the readability and flow of your content, and careful conversion is a significant stride towards that end.
Fine-Tuning and Troubleshooting the Landscape Orientation
In today's digital age, correctly fine-tuning and troubleshooting the landscape orientation of your content can be the determining factor between your website's high or low rankings. This implication necessitates a comprehensive understanding of the process, with core emphasis placed on three pivotal procedures; Correcting Misalignments and Disturbances Post-Orientation Change, Managing the Content Flow Across Different Pages, and Maintaining Consistency in the Document's Appearance. To start with, correcting misalignments and disturbances post-orientation change is a crucial step for aesthetically pleasing content. This ensures the text remains cohesive and easily navigated by your audience. Next, managing the content flow across different pages enables a fluid user experience, with seamless transitions between sections. Lastly, maintaining a consistent document appearance preserves the professionalism of your website, promoting strong user engagement. As we delve deeper into this topic, our first point of focus will be a guide on Correcting Misalignments and Disturbances Post-Orientation Change. Remember, the ultimate goal is to satisfy both your audience and the search engine's algorithms.
Correcting Misalignments and Disturbances Post-Orientation Change
Changing a document's orientation from portrait to landscape in Microsoft Word is a common requirement in professional and academic settings. However, navigating this seemingly simple task can become quite a puzzle when only one page needs to be changed, or when there are misalignments and disturbances to content post-orientation shift. This can especially be challenging when dealing with multi-page documents, where one wrong click can throw off your formatting or scramble your content. In this context, it is fundamental to understand the process of correcting these misalignments and disturbances post-orientation change. Dealing with post-orientation change issues often involves 'fine-tuning'. Crucial to this process is the effective usage of section breaks. After changing a single page's orientation to landscape, Word automatically applies the change to all pages. To prevent this, you'll need to add a 'Next Page' section break before and after the landscape page. The 'Next Page' section break isolates the landscape page from the rest of the document, allowing you to correct misalignments without impact on other pages. It's important to be aware of the common pitfalls while implementing these changes. For instance, content may appear off-center or disturbed due to incorrect margin settings. If you find your content sandwiched too close to the edge of the page, or your bullet points posing a series off, adjusting the margins can often help solve the problem. Correcting alignment issues doesn't stop at margins, especially when dealing with complex elements like tables or images. For instance, you might find that a table spanning multiple pages now appears cut-off or broken following the orientation change. Troubleshooting this might involve manually adjusting the table size, shrinking oversized cell widths or tweaking the row heights. Figuring out these adjustments can feel tedious, but their impact can be quite dramatic. When done right, these fine-tuning efforts can transform a disordered, challenging-to-read document into a neatly organized and engaging one. By giving careful attention to the process of tweaking document after an orientation change, you can not only improve readability and aesthetic appeal but also refine your Word manipulation skills, turning a necessary evil into a mastered art. So, the next time you find yourself wrestling over a landscape page in a sea of portrait-oriented content, remember, with the right approach and a bit of fine-tuning, you can correct any misalignments and disturbances post-orientation change, adding polish and professionalism to your work.
Managing the Content Flow Across Different Pages
As part of fine-tuning and troubleshooting the 'landscape orientation' in a word document, a critical aspect to consider is managing the content flow across different pages. Making a single page landscape in a word document may seem like a minor change, but it significantly impacts the document's structure and the audience's readability. In managing the content flow, understanding the key message of each page is vital. The landscape page should not disrupt this flow; instead, it should enhance the information conveyed by making the most of the space offered by the wider format. With data visualization, diagrams, graphs, or wide images, landscape orientation can ensure compatibility without compromising image quality or readability. Consider the landscape page as a storytelling opportunity, ideal for visually intensive messages or data. In SEO content creation, it allows more keyword integration chances without disrupting the written content's natural flow on portrait pages. For user engagement, this landscape page can be a refreshing visual change, stimulating the audience's engagement levels. Managing the content flow also includes continuity and transition. Prior and subsequent pages should gradually lead in and out of the landscape format, making it an integral part of the narration, not an abrupt interruption. This transition may be achieved by introducing the landscape page's content in the previous page and recapitulating or continuing the content on the subsequent page. Moreover, maintain the consistent use of design elements like fonts, color schemes, and layouts. Any change in formatting should align with the overall document theme and design, contributing seamlessly to the digital narrative. Finally, test the landscape page across different devices to ensure it functions as intended, with no disruption to the overall content flow. A well-optimized landscape page broadens your ways of digital storytelling, enriches user experience, and ultimately contributes to better SEO rankings.
Maintaining Consistency in the Document's Appearance
Maintaining consistency in a document's appearance is an essential aspect in fine-tuning and troubleshooting the Landscape Orientation in Word. When you transition one page of your content to a landscape layout while leaving the others in the traditional portrait style, it is crucial to maintain uniformity in design elements and styles throughout all pages. As a part of ensuring a comprehensive landscape orientation, visual consistency can significantly enhance readability and flow in your document. This involves consistent font styles and sizes, similar margins, uniform spacing, and standard color themes. Enticed by these visually appealing elements, readers can smoothly navigate through the information presented, notwithstanding the shift from portrait to landscape. Moreover, inconsistencies in your document's appearance can cause unnecessary distractions from your primary content. It could trigger visual discomfort, potentially discouraging readers from diving deeper into your content, thus negatively impacting your engagement rates. Therefore, it's paramount to streamline stylistic variations when only one page is toggled to landscape. A good practice to maintain consistency is to use Style Sets and Themes in Word. These tools allow you to apply predetermined styles, such as font styles, sizes, colors, and other formatting choices across your entire document with just a few clicks. They can effectively give you a uniform aesthetic even if one or more pages are set to landscape. User-friendly tools like Word's 'Page Break' and 'Section Break' features can also help maintain aesthetic uniformity. They allow the landscape-oriented page to exist independently, preventing any unintended formatting drifts onto other pages. Continually fine-tuning and troubleshooting your document's appearance is a proactive approach to ensuring consistency throughout. It involves constantly monitoring and adjusting your format settings to provide a harmonious blend between the landscape page and those in portrait layout. Regularly examining your document to identify and address inconsistencies can help you achieve a polished, seamless, and visually cohesive look overall. To summarize, maintaining consistency in your document's appearance is not merely a design choice, but an essential detail in creating an engaging and congregate digital narrative. While a shift to landscape orientation can offer distinct advantages, it's crucial to ensure that this does not compromise the overall appearance and readability of your document.