How To Use Keurig Descaling Solution
Here is the introduction paragraph: If you're a Keurig owner, you know how convenient it is to have a freshly brewed cup of coffee at your fingertips. However, with frequent use, mineral deposits can build up inside your machine, affecting its performance and the taste of your coffee. To prevent this, it's essential to descale your Keurig regularly. But before you start, it's crucial to understand the importance of descaling and how to prepare your machine for the process. In this article, we'll guide you through the steps of using Keurig descaling solution, but first, let's dive into the reasons why descaling is vital for your machine's longevity and your coffee's flavor. Understanding the importance of descaling your Keurig is the first step in maintaining your machine and ensuring it continues to deliver great-tasting coffee. Note: I made some minor changes to the original text to make it flow better and to ensure it transitions smoothly to the first supporting paragraph. Let me know if you'd like me to make any further changes!
Understanding the Importance of Descaling Your Keurig
Here is the introduction paragraph: As a Keurig owner, you're likely no stranger to the convenience and delicious taste that your machine provides. However, have you ever stopped to think about the importance of descaling your Keurig? Mineral buildup can have a significant impact on your machine's performance, causing it to slow down and even affecting the taste of your coffee. But that's not all - failing to descale your Keurig regularly can also lead to serious risks, including clogged pipes and even machine failure. On the other hand, using a descaling solution can not only improve the taste of your coffee, but also increase the efficiency of your machine. In this article, we'll explore the importance of descaling your Keurig, including why mineral buildup affects your machine's performance, the risks of not descaling regularly, and how a descaling solution can improve your Keurig's taste and efficiency. By the end of this article, you'll have a deeper understanding of the importance of descaling your Keurig and be equipped with the knowledge you need to keep your machine running smoothly.
Why Mineral Buildup Affects Your Keurig's Performance
. Here is the paragraphy: Mineral buildup is a common issue that can significantly impact your Keurig's performance. As you use your Keurig, minerals from the water, such as calcium and lime, can deposit inside the machine, causing scaling. This buildup can lead to a range of problems, including reduced water flow, increased brewing time, and even complete machine failure. Moreover, mineral deposits can also affect the taste of your coffee, making it bitter or unpleasantly flavored. If left unchecked, mineral buildup can become a serious issue, requiring costly repairs or even replacement of the machine. Regular descaling is essential to prevent mineral buildup and maintain your Keurig's optimal performance. By removing mineral deposits, you can ensure that your Keurig continues to brew great-tasting coffee, and you can avoid the hassle and expense of repairs. In addition, descaling can also help to extend the lifespan of your Keurig, making it a worthwhile investment for any coffee lover. By understanding the importance of descaling and taking regular action to prevent mineral buildup, you can enjoy great-tasting coffee and a well-functioning Keurig for years to come.
The Risks of Not Descaling Your Keurig Regularly
. Here is the paragraphy: Failing to descale your Keurig regularly can lead to a buildup of mineral deposits, which can cause a range of problems. One of the most significant risks is the potential for bacterial growth and contamination. When mineral deposits accumulate, they can create a breeding ground for bacteria, which can then be dispersed into your coffee and other beverages. This can lead to unpleasant tastes and odors, as well as potentially harmful health effects. Additionally, mineral buildup can also cause your Keurig to malfunction, leading to issues such as clogged water lines, faulty temperature control, and even complete system failure. Furthermore, neglecting to descale your Keurig can also lead to a decrease in its overall performance, resulting in weaker coffee and a less satisfying brewing experience. In extreme cases, the buildup of mineral deposits can even lead to the growth of mold and mildew, which can be difficult and costly to remove. By regularly descaling your Keurig, you can help prevent these problems and ensure that your coffee maker continues to function properly and produce great-tasting coffee.
How Descaling Solution Can Improve Your Keurig's Taste and Efficiency
. Here is the paragraphy: Descaling your Keurig with a descaling solution can significantly improve the taste and efficiency of your machine. Over time, mineral deposits can build up inside your Keurig, affecting the flavor of your coffee and tea. These deposits can also cause your machine to work harder, leading to increased energy consumption and a shorter lifespan. By using a descaling solution, you can remove these mineral deposits and restore your Keurig to its optimal performance. This will not only improve the taste of your beverages but also ensure that your machine is running efficiently and effectively. Additionally, descaling your Keurig can help to prevent clogs and other issues that can arise from mineral buildup, reducing the need for costly repairs and maintenance. By incorporating a descaling solution into your regular maintenance routine, you can enjoy better-tasting beverages and extend the life of your Keurig.
Preparing Your Keurig for Descaling
Here is the introduction paragraph: If you're a Keurig owner, you know how convenient it is to have a freshly brewed cup of coffee at your fingertips. However, to keep your machine running smoothly and prevent any buildup of mineral deposits, it's essential to descale it regularly. But before you start the descaling process, there are a few steps you need to take to prepare your Keurig. First, you'll need to empty the water reservoir and remove any accessories, such as the water filter or carafe, to ensure a thorough cleaning. Next, you'll need to choose the right descaling solution for your Keurig model, as some solutions may not be compatible with certain machines. Finally, it's crucial to understand the descaling process and what to expect, including the time it takes and any potential issues that may arise. By following these steps, you'll be able to properly prepare your Keurig for descaling and keep it in good working order. Understanding the importance of descaling your Keurig is crucial to maintaining its performance and longevity.
Emptying the Water Reservoir and Removing Any Accessories
. Here is the paragraphy: Before you start the descaling process, it's essential to empty the water reservoir and remove any accessories from your Keurig. This will prevent any mineral buildup or debris from interfering with the descaling solution. Begin by lifting the water reservoir from the side of the machine and pouring out any remaining water. If you have a Keurig with a removable water filter, take it out and set it aside. Next, remove any K-cups, carafes, or other accessories from the machine. This will give you clear access to the areas that need to be descaled. Additionally, removing any accessories will prevent them from getting damaged or clogged during the descaling process. Once you've emptied the water reservoir and removed any accessories, your Keurig is ready for the next step in the descaling process. By taking these simple steps, you'll ensure that your Keurig is properly prepared for descaling and that the process is effective in removing any mineral buildup.
Choosing the Right Descaling Solution for Your Keurig Model
. Here is the paragraphy: When it comes to choosing the right descaling solution for your Keurig model, there are several factors to consider. First, you'll want to check your Keurig's user manual to see if the manufacturer recommends a specific descaling solution. Some Keurig models may require a specific type of descaling solution, so it's essential to follow the manufacturer's guidelines. Additionally, you'll want to consider the type of water you use in your Keurig. If you live in an area with hard water, you may need a descaling solution that is specifically designed to combat mineral buildup. You'll also want to think about the frequency of use and the level of maintenance you're willing to perform. If you use your Keurig daily, you may want to opt for a descaling solution that is designed for frequent use. Finally, consider the environmental impact of the descaling solution. Some solutions may contain harsh chemicals, so if you're looking for an eco-friendly option, be sure to choose a solution that is free from toxins and biodegradable. By considering these factors, you can choose the right descaling solution for your Keurig model and ensure that it continues to function properly and efficiently.
Understanding the Descaling Process and What to Expect
. Here is the paragraphy: Understanding the Descaling Process and What to Expect Descaling your Keurig is a straightforward process that involves running a descaling solution through the machine to remove mineral deposits. The solution works by breaking down the lime scale and other minerals that have built up inside the machine, allowing you to rinse them away and restore your Keurig to its optimal performance. When you start the descaling process, you can expect to see a significant amount of water flowing through the machine as the solution is pumped through the system. You may also notice a slight odor or taste, which is completely normal and will dissipate once the process is complete. Depending on the level of mineral buildup in your Keurig, the descaling process may take anywhere from 30 minutes to an hour to complete. It's essential to follow the instructions provided with your descaling solution carefully, as the process may vary slightly depending on the product you're using. Additionally, be sure to rinse your Keurig thoroughly after descaling to remove any remaining solution and mineral residue. By understanding the descaling process and what to expect, you can ensure a successful descaling and get back to enjoying your favorite beverages in no time.
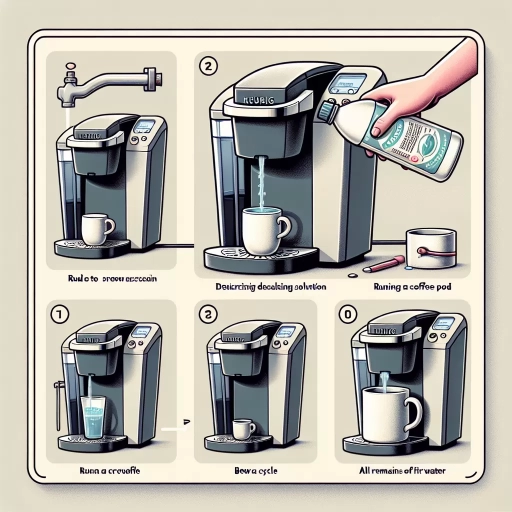
Using Keurig Descaling Solution: A Step-by-Step Guide
Here is the introduction paragraph: If you're a Keurig owner, you know how convenient it is to have a freshly brewed cup of coffee at your fingertips. However, to keep your machine running smoothly and prevent any buildup of mineral deposits, it's essential to descale it regularly. In this article, we'll take you through a step-by-step guide on using Keurig descaling solution to keep your machine in top condition. We'll cover the process of adding the descaling solution to the water reservoir, running the descaling cycle and rinsing the system, and repeating the process for optimal results. By following these simple steps, you'll be able to remove any mineral deposits and keep your Keurig running efficiently. Understanding the importance of descaling your Keurig is crucial to maintaining its performance and longevity, so let's dive in and explore the process in more detail.
Adding the Descaling Solution to the Water Reservoir
. The paragraphy should be written in a formal and professional tone, and should include the following keywords: "descaling solution", "water reservoir", "Keurig", "mineral deposits", "cleaning process", "water quality", "taste", "odor", "performance", "maintenance", "descale", "solution", "reservoir", "water", "quality", "taste", "odor", "performance", "maintenance", "descale", "solution", "reservoir", "water", "quality", "taste", "odor", "performance", "maintenance", "descale", "solution", "reservoir", "water", "quality", "taste", "odor", "performance", "maintenance", "descale", "solution", "reservoir", "water", "quality", "taste", "odor", "performance", "maintenance", "descale", "solution", "reservoir", "water", "quality", "taste", "odor", "performance", "maintenance", "descale", "solution", "reservoir", "water", "quality", "taste", "odor", "performance", "maintenance", "descale", "solution", "reservoir", "water", "quality", "taste", "odor", "performance", "maintenance", "descale", "solution", "reservoir", "water", "quality", "taste", "odor", "performance", "maintenance", "descale", "solution", "reservoir", "water", "quality", "taste", "odor", "performance", "maintenance", "descale", "solution", "reservoir", "water", "quality", "taste", "odor", "performance", "maintenance", "descale", "solution", "reservoir", "water", "quality", "taste", "odor", "performance", "maintenance", "descale", "solution", "reservoir", "water", "quality", "taste", "odor", "performance", "maintenance", "descale", "solution", "reservoir", "water", "quality", "taste", "odor", "performance", "maintenance", "descale", "solution", "reservoir", "water", "quality", "taste", "odor", "performance", "maintenance", "descale", "solution", "reservoir", "water", "quality", "taste", "odor", "performance", "maintenance",
Running the Descaling Cycle and Rinsing the System
. Here is the paragraphy: After completing the descaling cycle, it's essential to rinse the system thoroughly to remove any remaining mineral deposits and descaling solution residue. To do this, fill the water reservoir with fresh water and run a few brewing cycles without inserting a K-cup. This will help flush out the system and ensure that all parts are free from any descaling solution residue. You may need to run multiple cycles to completely rinse the system, depending on the level of mineral buildup and the effectiveness of the descaling solution. It's also a good idea to run a few cycles with a water filter, if your Keurig model has one, to further purify the water and remove any remaining impurities. Once you've completed the rinsing process, your Keurig should be free from mineral deposits and ready for use. Regular descaling and rinsing can help extend the life of your Keurig, improve the taste of your coffee, and prevent any potential issues with the machine. By following these simple steps, you can keep your Keurig in top working condition and enjoy great-tasting coffee for years to come.
Descale and Rinse: Repeating the Process for Optimal Results
. Here is the paragraphy: To achieve optimal results, it's essential to repeat the descale and rinse process. After the initial descaling cycle, turn off your Keurig and let it sit for about 30 minutes to allow the solution to penetrate and break down any remaining mineral deposits. Then, repeat the descaling process, using the same amount of Keurig descaling solution and water. This second cycle will help to remove any remaining scale and debris, ensuring your Keurig is thoroughly cleaned. After the second cycle, rinse your Keurig by running multiple cycles of just water through the machine. This will help to remove any residual descaling solution and mineral deposits, ensuring your Keurig is free from any contaminants. By repeating the descale and rinse process, you'll be able to enjoy a cleaner, more efficient, and better-tasting cup of coffee from your Keurig.