How To Crop In Canva
 Digital artistry accommodates an assortment of dimensions and designs, and cropping is one fundamental function that alters these dimensions, potentially enhancing the focus and composition of your work. This article endeavours to offer an in-depth guide on how to master the art of cropping in Canva, a popular graphic design platform. Our guide commences with an essential introduction, 'Getting Started with Cropping in Canva', providing a step-by-step walk-through on initiating your cropping process. Subsequently, we will heighten your skills with our 'Cropping Techniques in Canva', sharing multiple ways to cater the innovative cropping methodologies to your needs. Not stopping there, we will also provide 'Best Practices for Cropping in Canva', ensuring your creative endeavours maximise the software's potential. As we're about to delve into the first section, prepare to equip yourself with vital knowledge that will turn your artistry into a piece that demands attention. So, let's get started with cropping in Canva.
Getting Started with Cropping in Canva
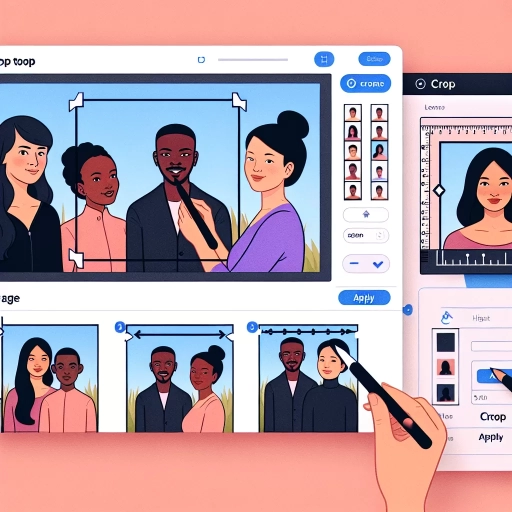
Beginners and seasoned designers alike often turn to Canva for its simplicity, yet expansive range of tools, including the versatile cropping feature. Getting started with cropping in Canva might seem straightforward but, in order to maximize the platform's potential, it's important to understand its cropping tools, know how to select the right crop type, and learn the best ways to set up your image for cropping. First, dissecting Canva's cropping tools is key, as they offer much more than merely shortening or lengthening your image dimensions. These tools help you to tailor your images to specific sizes, shapes, or even mimic eye-catching patterns for more artistic designs. Then, choosing the right crop type is another determining factor for the final product. The correct crop type can focus on an image's main subject or emphasize the finest details, transforming the overall perception of your design. Lastly, setting up your image for cropping means considering composition and balance to increase visual appeal. Now, let's delve deeper into our first point: understanding Canva's cropping tools.
Understanding Canva's Cropping Tools
Cropping an image doesn’t merely reduce its size; it offers an opportunity to refocus the visual narrative. Canva has a plethora of built-in cropping tools that empower its users to master their visual designs expertly and effortlessly. Understanding how to manipulate these cropping tools can redefine and optimize your graphic creations. The first tool in Canva's box of cropping solutions is the basic crop feature. A simple rectangle shape that becomes active when you double-click an image, allowing you to reshape it by dragging the corners or sides. It is wonderful if you need simple, straight cuts that resize or remove unwanted edges from your image. The aspect ratio crop tool is your ticket to pre-configured sizes. Canva offers a variety of aspect ratios (square, Instagram, Facebook, Twitter, etc.) that do the guesswork for you. By fitting your pictures into these preset frames, your images come out perfectly-cropped for specific social media platforms. Understanding this tool is crucial to maintaining platform-appropriate aesthetics in your designs. The shape crop tool provides speculative cropping frames besides rectangles and squares. Hearts, stars, circles -- any shape in Canva's repertoire can also serve as a cropping frame. When an image is placed in these types, it gets cropped to that shape, allowing you to add creative flair to your designs. The Canva crop tool also comes with lasso and eraser options. The lasso allows you to freehand crop irregular shapes, while the eraser lets you delete specific parts of the image. You can crop in fine detail, giving you the power to create bespoke cut-outs. Lastly, the grid cropping tool allows you to crop different segments of an image at once. By dividing your image into a grid, you can select and resize specific segments for a unique picture collage effect. Understanding this tool could give your designs a new dimension in narrative and visual appeal. Each cropping tool in Canva provides unique functionality to give your designs a distinct voice. While it may appear overwhelming, each is intuitive and easy to master with practice. By understanding and effectively leveraging these cropping tools, you can redefine your images from simple pictures to storytelling masterpieces. In the end, cropping in Canva isn't just about size reduction; it's about intelligent editing, imaginative flair, and narrative craft.
Choosing the Right Crop Type
Fundamentally, the process of cropping in Canva starts with choosing the right type of crop. This involves selecting a cropping shape or restraining box that best suits your intended design goal. Standard cropping, circular cropping, or art frame cropping are among the choices provided by Canva. Every one of them serves diverse roles and personalizes your visuals in distinctive ways. Standard cropping, which is the most common type, allows you to cut out unwanted areas and resize your image to fit a particular space on your design. It essentially reshapes your photo to convey your message more accurately, providing a suitable visual context. Oftentimes, circular cropping is used to create compelling profile pictures or to highlight a specific portion of an image, radiating a more modern and dynamic appeal. It's a widely used cropper type on social media platforms that gives your photo a refreshing facelift. The art frame crop functions similar to circular cropping but with edges of various forms and sizes. This robust crop type can add a touch of creativity and uniqueness to your image, making it the centerpiece of your design or a complementary visual element. When deciding on a crop type, it is essential to understand the emotional impact and visual message you want to convey. If you're trying to create a conventional look that puts the focus on the subject of the image, then standard cropping might be your best bet. On the other hand, if your design calls for a more artistic or playful approach, the circular or art frame crops would be more suitable. Another crucial factor in selecting the right crop type is the image quality. High resolution photos are preferable when cropping since they minimize the risk of pixelation or blurring. For instance, if the image you selected has details that you don't want to lose, using the standard crop would be highly recommended since it allows the preservation of most parts of the image. Finally, the specific space available for your image in your design blueprint should also influence your crop type choice. When negotiating a tight space, circular and art frame cropping types can provide better options because of the unique shapes they create. They can breathe life into smaller spaces and still pack a visual punch without overwhelming other elements in the design. In summary, with proper understanding of your design needs, the type of image, and the available space, choosing the right crop type can help you create a mesmerizing design that strategically captures your audience's attention.
Setting Up Your Image for Cropping
Before you start cropping your image in Canva, it's crucial to set your image in the correct way to ensure high-quality and optimal results. First, upload your selected image to Canva. This can easily be done by clicking on the 'Uploads' tab on the left sidebar and selecting the image from your files. It's advisable to select an image that surpasses the size of your project because cropping reduces the size of the image, and selecting a smaller image may result in resolution loss and blurred edges. Once your image is uploaded, it's crucial to set it up accurately. This implies positioning the image correctly on your canvas, adjusting the size if necessary, and rotating it if required. To position the image, simply drag and drop it onto your canvas. The image should cover the entire canvas if it is to be the key focal point of your design. After that, you should consider the aspect ratio, which is the width to height proportion. An incorrectly chosen aspect ratio might distort your image during cropping. Canva has a variety of preset aspect ratios available for you to choose from to make this task easier. However, you also have the option of customising the aspect ratio according to your needs, which gives you more creative freedom over how your image appears when cropped. Adjusting the size is another crucial part of setting up your image for cropping. To alter the size of your image, simply select it and drag one of the corner handles inward to shrink it or outward to enlarge it. Remember that enlarging a small image excessively might degrade its quality, so it's best to start with a larger image that fits your project's requirements. Rotating the image is a tool often over-looked, but it can give you interesting perspectives, especially when it comes to cropping. By rotating your image, you can alter the way details and elements line up, thus influencing the ultimate result once cropped. Lastly, it's vital to ensure the focus area of your image remains within the marks of your desired crop. The focus area includes the most important elements or details of your image. Therefore, always consider what should be left in the frame after the crop. Setting up your image correctly for cropping is not merely about uploading the image and positioning it on the canvas. It's also about understanding how the cropping tool can affect the final outcome and making necessary adjustments for an appealing and professional design. Doing so is an essential step in the process of learning how to crop in Canva effectively.
Cropping Techniques in Canva
of creating any stunning visual presentation in Canva often begins with a straightforward yet essential step - cropping. This powerful tool allows users to remove unwanted edges from images or focus on a particular part of the picture for enhanced illustrations. This article will delve into the various ways one can implement cropping techniques in Canva. These are segregated into three detailed paragraphs, beginning with how to use the crop tool for basic edits. We then explore the broadened horizons of advanced cropping techniques with Canva's features and finally rounding up with guidelines on resizing and reformatting your crop - to optimize your design further. The idea is not merely to learn using the crop tool but to master it so that the user can maximize their image editing capabilities. As we move forward to the first supporting paragraph -"Using the Crop Tool for Basic Edits", we shall simplify image editing by starting with the basics, thereby empowering even the most novice of Canva users to create aesthetically pleasing designs efficiently and with ease.
Using the Crop Tool for Basic Edits
The Crop tool is an essential component in the realm of graphic design and picture editing, and it plays a crucial role in the cropping techniques one can utilize in Canva. Essentially, the Crop tool allows you to trim away parts of an image that are unnecessary or distracting and place a greater emphasis on the subject of the image. This gives you a central control over the focal point of your design. It's like using a pair of virtual scissors to cut out any part of the picture that does not serve your purpose. Experience the power of this tool by loading your image into the Canva platform whereupon you can immediately start the process of cropping. With the picture ready in Canva, head to the toolbar and select the Crop tool. A dotted line will appear around the edges of the image, and this represents the 'crop frame.' You can click and drag this to adjust how much of the image you wish to keep as well as its location. Beyond purely aesthetic benefits, cropping an image can enhance your design by ensuring the viewer's focus is where you want it. For example, one can crop out an image to place emphasis on a product being advertised, the face of a person, or a specific part of interior decor for a design-focused post. Carefully, and thoughtfully cropped images not only create intrigue but can also guide the viewer's eye to the most crucial parts of your design, creating a visually compelling narrative. The crop tool is also particularly beneficial when working with images that do not fit well into your design template. By cropping, you can manipulate the image to the required dimensions, thus ensuring seamless integration within your template. Therefore, the crop tool not only helps in aesthetic refinement but also addresses practical alignment and adjustment issues that might spring up during the designing process. Lastly, the crop tool in Canva allows you to experiment and explore your creativity. You can play around with image framing, try blotting out unnecessary elements or focus on unconventional parts of the photo – all these subtle changes can dramatically transform the mood and meaning of the image. This flexibility propels the crop tool from a simple editing function to a powerful creative control in your hands. So if you've never used the crop tool before, go ahead and experiment a little - sometimes, what's left out is just as important as what's left in. As they say in the world of photography and design - the magic is all in the framing! In summary, the crop tool is genuinely a saving grace, enabling you to produce high-quality, dynamic, and engaging designs in Canva. Whether you're looking to create cohesive designs, remove distracting elements, or showcase your creative flair, the crop tool in Canva is certainly an invaluable resource to master.
Advanced Cropping Techniques with Canva's Features
The utilization of advanced cropping techniques can greatly enhance your designs and images on Canva— a popular graphic design platform known for its ease of use, versatility, and broad range of features. The advanced cropping techniques in Canva not only let you specifically tailor the dimensions and shapes of the images but also enable you to creatively express your ideas and concepts in effective and powerful ways. One tool in Canva's expansive toolbox is the freeform crop feature, making it possible to manually design the shape of your crops, providing an overall unique effect to your final project. You'll find that you're not just limited to traditional shapes like circles, squares, or rectangles. You can even create uniquely shaped textual content with this feature. Canva's proportion crop tool is another notable feature. This tool lets you crop your images according to certain fixed proportions, such as 16:9 or 1:1. It's particularly useful for specific projects that require uniformity and consistency in image sizes, especially if you're working on things like collated photo albums or a curated image collection. For a bit of creative flair, try Canva's shape crop feature. With this feature, you can crop your images into various shapes instantly. Whether you need to crop an image into a heart for a romantic post or a star for a celebratory design, this practical tool provides an immediate result with just a few clicks. Another advanced feature in Canva's lineup is the cloning tool. This feature can allow you to clone your images to create a repeated pattern. It's a neat trick for creating eye-catching designs, perfect for backgrounds, banner designs, or flyers. Remember, these aren't just your average photo edits. They're a creatively empowering process—a chance to transform fleeting ideas into compelling images, all within Canva's accessible platform. Understanding and utilizing these advanced cropping tools will not only give you control over your design elements but also ensures your images come out looking professionally made, regardless of your skill level, thus, building credibility for your brand, blog, or personal portfolio. It's this level of detail, creative range, and user-friendly design provided by Canva's cropping tools that bring your ideas to life, allowing you an impressive canvas on which you can compose, design, and redefine your visual masterpieces.
Resizing and Reformatting Your Crop
Cropping images in Canva is a worthwhile skill to learn, but equally important is understanding how to resize and reformat your crop effectively. Resizing modifies the dimensions of an object within the Canva interface. It plays a crucial role in determining the actual display size on screen or paper. On the other hand, reformatting changes the aspect ratio, not just the size, of the object. It modifies the width-height proportions to fit into a specific space, screen, or layout. Perfecting these techniques allows for more control over your visual presentation, especially when working with different platforms, print sizes, and design needs. Each platform and format typically has recommended and maximum dimensions, and adhering to these can significantly increase the effectiveness of your design communication. Resizing can happen either proportionally or disproportionately. Proportional resizing maintains the same aspect ratio, preventing the image from distorting as it increases or decreases in size. It's handy when the dimension requirements in pixel terms are tied to specific proportions, for example, an Instagram post (1:1 square) or LinkedIn banner (4:1 rectangle). However, disproportionate resizing allows you to alter each side independently, which may cause stretching or squishing, but useful when adjusting to unconventional dimension requirements. Reformatting, on the other hand, varies from resizing, as it involves adjusting the whole canvas or artboard according to the new aspect ratio. Reformatting helps when the design needs to be consistently replicated across different mediums with varying dimensions. It can ensure that all the elements within the design retain their relative size and positioning despite the changes in overall canvas size. Understanding the power of resizing and reformatting in Canva can dramatically increase the flexibility of your designs. Whether you have to design visuals for a multi-platform marketing campaign, customize PowerPoint presentations, or create print layouts of different sizes, mastering these techniques can be a game-changer. Your creativity is no longer confined within the limitations of a single canvas size. Instead, it can adapt and evolve across an infinity of dimensions, all while preserving the original aesthetics and impact of the design. Be mindful, though, that constant resizing and reformatting may reduce the quality of images, especially when consistently increasing from the original size. Sharpness and clarity may suffer, resulting in a blurry or pixelated output. This is why it's essential to consider the resolution and scale images appropriately when using these cropping techniques in Canva. With practice and precision, you can ensure your designs always look their best, no matter their size or format. In conclusion, there's no one-size-fits-all when it comes to designs. Learn to resize and reformat effectively, and you'll have a powerful tool to take your creative ventures to the next level.
Best Practices for Cropping in Canva
The complexities and technicalities of graphic designing can often dampen the creative spirit. However, tools such as Canva open up an easier path to professional design. One such feature is Canva's cropping tool. Although cropping might seem like a straightforward action, incorporating best practices can significantly enhance your designs. This article will cover three fundamental aspects of effective cropping in Canva: ensuring proportional cropping, using guides and rulers for accurate cropping, and finally, exporting your cropped image. Recognizing the importance of these elements can help you bring precision and a refined finesse to your designs. The first of these, ensuring proportional cropping, is an integral part of efficient design. It keeps a check on the balance and symmetry of your images, ensuring that they sync seamlessly with your design vision. So, let's dive deeper into how proportional cropping can lend more effectiveness to your Canva designs.
Ensuring Proportional Cropping
of every graphic design endeavor is the fundamental principle of proportion. When cropping images in Canva, ensuring proportional cropping ought to be one of your key considerations. A proportional crop does not only enhance the visual appeal of your design but also contributes significantly to maintaining the intended narrative of your image. Primarily, Canva offers various crop ratios like 1:1, 9:16, 16:9, among others, to enable proportional cropping easily. These preset options cater to most of the commonly used proportions that fit the criteria of social media posts, blogs, presentations, etc. Making proper use of these options will give your design a professional look and maintain the consistency necessary for an engaging visual story. Additionally, to ensure a proportionate scale, it is crucial to anchor your images. This involves using grid lines - both horizontal and vertical - to align your image details correctly. You need to place key parts of your imagery, such as a person's eyes in a portrait image, along these lines or at their intersections. This technique, known as the 'Rule of Thirds', can exponentially improve the overall proportion of your cropped image. Besides the technical aspect, the content of your image should also lead your cropping decision. Removing unnecessary items or noise from your images can make the main subject stand out. However, one should be careful not to eliminate essential parts of the image that contribute to the story or emotion it should evoke. Skilful cropping goes beyond merely reducing image size and includes thoughtful consideration of the image content. As a rule of thumb, always maintain original image proportions, even if you alter its size. This involves maintaining the image’s aspect ratio, the width and height ratio that has a significant impact on how the image looks post-cropping. Changing this may distort the image, making it look stretched or squashed. If you have to alter an image's proportion drastically, reconsider selecting a different image that better suits your design needs. Furthermore, sometimes, despite carefully planned cropping, the output image may appear pixelated or of low quality. To avoid this, ensure the original image is of high resolution. It is always easier and better to crop or scale down a high-resolution image, retaining image clarity and quality. Proportional cropping helps maintain a balanced, harmonious look and ensures a professional result by preventing any image distortion. It forms the basis of good design aesthetics, guiding the viewer’s eye to the key elements of an image or design. Therefore, when cropping images on Canva, ensure to maintain proportionality, bringing the desired balance and harmony to your design. In conclusion, ensuring proportional cropping in Canva requires a synthesis of understanding the preset cropping options, use of ‘Rule of Thirds’, thoughtful content consideration, maintaining original image proportions, and using high-resolution images. By following these best practices, you can ensure the aesthetic and narrative integrity of your images, there on creating visually pleasing and impactful designs.
Using Guides and Rulers for Accurate Cropping
Utilizing Guides and Rulers for precise cropping is an essential aspect of the Best Practices for Cropping in Canva, ensuring absolute precision. These tools function as visual aids that facilitate accurate resizing, alignment, balancing, and positioning of elements on the design layout, thereby achieving professional-quality creations. To access these features, navigate to the toolbar located on the right-hand side of your canvas. On activating these tools, horizontal and vertical rulers will appear on the sides of your canvas, and you can drag guides down or across from these borders to any position on your layout, simplifying the task of aligning your elements perfectly. Cropping with precision is a vital step in creating visually appealing designs which can possibly contribute to the overall success of your design project. By using these guidelines, the graphic elements in your project will have a sense of balance and uniformity particularly in spaces, sizes, shapes and proportions. This further helps to avoid skewed images or disjointed layouts that can negatively impact the visual appeal of the design. Moreover, these tools notably assist in achieving consistency across multiple designs or throughout a design portfolio. For instance, if you’re working on a series of social media posts, using guides and rulers will ensure that each post has the same margins, padding, and alignment, thereby creating a coherent and unified visual identity. This level of precision is often what differentiates amateur designs from professional ones. One remarkable functionality of Canva's guides and rulers is the opportunity they provide to lock your elements in place. This ensures some sense of permanence, shielding them from unintended modifications. It also secures the correct alignment and relative positioning when other elements are being added or removed. This aspect of the guide and ruler tools is crucial when reproducing designs on a mass scale, helping to maintain consistent branding and preventing inconsistencies that could tarnish your professional image. In conclusion, the use of guides and rulers during the cropping process in Canva not only assures accuracy but also enhances the overall design quality. Remember, understanding and utilizing these tools effectively will lead to more accurate, consistent and appealing design outcomes — paving the way for a polished, proficient and outstanding visual presentation which captures your audience's attention. Consequently, it's a design best practice worth mastering to bring your creativity to life in Canva with streamlined precision and uniformity. The ability to accurately crop and align graphics using guides and rulers is one of the key elements that sets a professional designer apart from an amateur one. Therefore, always ensure you make significant use of these tools to achieve the desired precision for stunning design outputs.
Exporting Your Cropped Image
After you've followed the efficient cropping steps in Canva, the next vital stage is exporting the cropped image. This process seems simple, but it must be done with utmost precision to prevent distortion and quality loss. Every image cropping and editing action you undertake in Canva retains your original image's quality. Therefore, when you export the cropped image, you should aim to maintain this attribute. First, ensure that you have saved all edits on your cropped image before proceeding to export. Canva offers different file formats like PNG, JPEG, or PDF for exportation. The file format you choose to export your image largely depends on your subsequent usage of the picture. PNG format is recommended for images with transparent backgrounds or ones you intend to use on online platforms, due to its high-quality resolution. JPEG is a good choice for print purposes and large photographs as it retains the most quality despite compression. PDF format is ideal for instances where you need to share the image with someone else for editing or printing. To export, locate the "Download" button in the top-right corner of the screen. Click on it to open the file type options, then select your preferred format. Make sure the quality level slider is set to its maximum, ensuring the best possible quality. Depending on the picture's complexity and size, Canva might take a few seconds to process the download request. Wait patiently until the processing bar is complete, then your download will start automatically. You have to keep track of the location where you're saving your file on your local storage. It's good practice to create a particular folder for Canva downloads so that it's easier to locate the files later, possibly for further editing or usage. Afterward, view the downloaded file using an appropriate application to verify that it meets your desired quality expectations. In a case where you're not satisfied with the output, return to Canva and recheck your cropping or editing, then export again. One mistake some users make is attempting to edit the image after it has been exported out of Canva. This action can degrade the image quality as Canva is primarily equipped with efficient tools to maintain quality during the process. Remember, the ultimate goal of exporting your cropped image is to have the final output exactly or very close to what you visualized before the cropping process. Hence, take advantage of the different options that Canva offers when exporting your pictures. By implementing these steps in your exporting process, you achieve the highest possible quality for your cropped image, making it visually compelling and highly valuable for your desired application.