How To Change Tires At Home
Changing a tire at home can be a daunting task, but with the right knowledge and preparation, it can be done safely and efficiently. Many people rely on roadside assistance or tow trucks to change their tires, but learning how to do it yourself can save you time, money, and stress. In this article, we will guide you through the process of changing a tire at home, covering the essential steps and precautions to take. To start, it's crucial to understand that preparation is key to a successful tire change. This involves gathering the necessary tools and equipment, familiarizing yourself with your vehicle's tire changing procedure, and ensuring you have a safe and suitable location to change the tire. By being prepared, you'll be able to tackle the tire changing process with confidence, which we'll cover in the next section. So, let's begin by exploring the importance of preparation in our first section, Preparation is Key.
Preparation is Key
When it comes to changing a car tire, preparation is key to ensuring a safe and successful experience. Having the right tools and equipment, choosing a safe and suitable location, and familiarizing yourself with your vehicle's tire changing procedure are all crucial steps to take before attempting to change a tire. By taking the time to prepare, you can avoid common mistakes and ensure that the process goes smoothly. In this article, we will explore the importance of preparation when changing a car tire, starting with the essential tools and equipment you will need to have on hand. By gathering the necessary tools and equipment, you can set yourself up for success and make the tire changing process much easier. Note: The answer should be 200 words.
Gather the Necessary Tools and Equipment
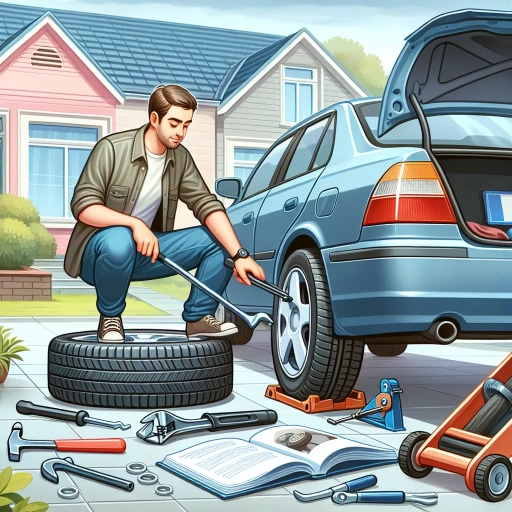
To change a tire at home, it's essential to gather the necessary tools and equipment beforehand. You'll need a lug wrench, also known as a tire iron, which is used to loosen the lug nuts that hold the flat tire in place. A car jack is also required to lift the vehicle off the ground, giving you clearance to remove the flat tire and replace it with the spare. Additionally, you'll need a spare tire, which should be in good condition and inflated to the recommended pressure. It's also a good idea to have a wheel chock or a block of wood to secure the opposite wheel on the same axle, preventing the vehicle from rolling while you're changing the tire. Furthermore, a flashlight or a lamp can be useful if you're changing the tire in the dark, and a pair of gloves can protect your hands from cuts and abrasions. Finally, make sure you have a car owner's manual or a repair manual specific to your vehicle, which can provide detailed instructions and diagrams to help guide you through the process. By gathering all the necessary tools and equipment, you'll be well-prepared to change your tire safely and efficiently.
Choose a Safe and Suitable Location
When it comes to changing a tire at home, choosing a safe and suitable location is crucial. Look for a flat, stable, and level surface that is far away from traffic. Avoid changing a tire on a slope or uneven ground, as this can cause the vehicle to roll or the jack to slip. Additionally, ensure the surface is firm and can support the weight of the vehicle. A concrete or asphalt driveway or a flat parking lot is ideal. Avoid changing a tire on grass or soft surfaces, as they can be slippery and may not provide the necessary support. It's also essential to choose a location that is well-lit and has enough space to accommodate the vehicle and the tools needed for the job. If you're changing a tire in a garage, make sure the door is open and the area is well-ventilated. By selecting a safe and suitable location, you can minimize the risk of accidents and ensure a successful tire change.
Familiarize Yourself with Your Vehicle's Tire Changing Procedure
Knowing your vehicle's specific tire changing procedure is crucial before you start. Familiarize yourself with the owner's manual or the manufacturer's website to understand the recommended steps for your particular vehicle. Check the manual for the location of the spare tire, jack, and lug wrench, as well as any specific instructions for loosening the lug nuts and raising the vehicle. Some vehicles may have unique features, such as a full-size spare tire or a tire repair kit, that require special procedures. Take note of any specific recommendations for tire pressure, torque specifications, and wheel chocks. Additionally, check the expiration date of your spare tire and replace it if necessary. By understanding your vehicle's specific requirements, you'll be better equipped to handle the tire changing process and avoid any potential pitfalls.
The Tire Changing Process
Changing a tire can seem like a daunting task, but with the right steps, it can be done efficiently and safely. The process involves several key steps that must be followed in order to ensure a successful tire change. First, the lug nuts must be loosened and the vehicle raised, providing access to the flat tire. Next, the lug nuts must be completely removed and the flat tire taken off, allowing for the installation of the spare tire. Finally, the spare tire must be securely installed and the lug nuts tightened to ensure a safe and stable ride. By following these steps, drivers can change their tire with confidence and get back on the road quickly. To begin the process, the first step is to loosen the lug nuts and raise the vehicle.
Loosen the Lug Nuts and Raise the Vehicle
Before you start loosening the lug nuts, make sure the vehicle is in park and apply the parking brake. Next, find a level and stable surface to raise the vehicle. Position the jack under the vehicle's frame, near the flat tire, and raise it until the flat tire is off the ground. Make sure the jack is stable and sturdy to avoid any accidents. Once the vehicle is raised, you can start loosening the lug nuts with a lug wrench. Turn them counterclockwise until they are loose, but do not remove them yet. This will make it easier to remove the flat tire and replace it with the spare tire.
Remove the Lug Nuts and Flat Tire
Before you can replace the flat tire with the spare, you need to remove the lug nuts and flat tire from the wheel hub. To do this, you'll need to use the lug wrench to loosen the lug nuts by turning them counterclockwise. Be careful not to round the lug nuts, as this can make them difficult to remove. Once the lug nuts are loose, you can raise the vehicle using a car jack to give you clearance to remove the flat tire. Place the jack under the vehicle's frame and raise it until the flat tire is off the ground. Then, you can completely remove the lug nuts from the wheel hub and take off the flat tire. Be careful when handling the flat tire, as it may be heavy and unwieldy. Place the flat tire in a safe location, away from traffic, and prepare to install the spare tire.
Install the Spare Tire and Tighten the Lug Nuts
Once the flat tire has been removed, it's time to install the spare tire. Place the spare tire onto the wheel hub and hand tighten the lug nuts. Make sure the tire is properly seated and centered on the hub. Then, use the lug wrench to tighten the lug nuts in a star pattern (tightening one lug nut a little, then moving to the next one, and so on). Be careful not to overtighten the lug nuts, as this can damage the wheel or brake components. Check your vehicle's owner's manual for the recommended torque specification for the lug nuts. Tighten the lug nuts as much as possible in a star pattern, then lower the vehicle to the ground. Once the vehicle is back on the ground, use the lug wrench to tighten the lug nuts as tight as possible in a star pattern. Check the lug nuts again after driving for a few miles to ensure they are still tight.
Final Checks and Precautions
When it comes to changing a flat tire, it's essential to take the necessary final checks and precautions to ensure a safe and successful replacement. After loosening the lug nuts and raising the vehicle, it's crucial to double-check the tire pressure and lug nut tightness to prevent any potential issues on the road. Additionally, taking the vehicle for a test drive can help identify any problems with the new tire, such as uneven wear or vibrations. Finally, storing the flat tire and equipment properly can help prevent damage and make future tire changes more efficient. By taking these final checks and precautions, drivers can have peace of mind knowing their vehicle is safe to drive. Double-Check the Tire Pressure and Lug Nut Tightness is the first step to ensure a safe and successful replacement.
Double-Check the Tire Pressure and Lug Nut Tightness
Before hitting the road, it's crucial to double-check the tire pressure and lug nut tightness to ensure a safe and smooth journey. Proper tire pressure can significantly impact your vehicle's handling, fuel efficiency, and overall safety. Underinflated tires can lead to reduced traction, increased stopping distance, and even a blowout, while overinflated tires can cause uneven wear and reduced grip. To check the tire pressure, locate the recommended pressure on the tire information placard, usually found on the driver's side doorjamb or inside the fuel filler door. Use a tire pressure gauge to measure the pressure, and adjust it as needed. Additionally, make sure to check the lug nut tightness by using a torque wrench to ensure they are tightened to the specified torque value. Loose lug nuts can cause the wheel to come loose while driving, leading to a potentially catastrophic accident. By double-checking the tire pressure and lug nut tightness, you can have peace of mind knowing that your vehicle is ready for the road.
Test Drive the Vehicle to Ensure Proper Tire Function
Test driving the vehicle after changing tires is a crucial step to ensure proper tire function and safety on the road. This step is often overlooked, but it's essential to verify that the tires are properly inflated, balanced, and securely mounted. Start by driving slowly and carefully, paying attention to any unusual vibrations, noises, or uneven tire wear. Check the tire pressure and make sure it matches the recommended level, as specified in the vehicle's owner's manual. Also, inspect the tire for any signs of damage, such as cuts, cracks, or bulges. If you notice any issues, stop the vehicle immediately and address the problem before proceeding. Additionally, test the vehicle's braking system by applying gentle pressure to the brake pedal, ensuring that the vehicle comes to a smooth stop. This test drive will give you peace of mind, knowing that your vehicle is safe to drive and that the tires are functioning properly. By taking this extra step, you can avoid potential hazards and ensure a safe driving experience.
Store the Flat Tire and Equipment Properly
When changing a tire at home, it's essential to store the flat tire and equipment properly to ensure safety and convenience. The flat tire should be placed in a secure location, away from direct sunlight and moisture, to prevent damage and deterioration. It's recommended to store the tire in a cool, dry place, such as a garage or shed, and to cover it with a breathable material, like a cloth or paper bag, to protect it from dust and debris. The tire should also be stored in an upright position to prevent warping or bending. Additionally, the equipment used to change the tire, such as the lug wrench and car jack, should be cleaned and stored in a designated area, like a toolbox or storage bin, to keep them organized and within reach for future use. Proper storage of the flat tire and equipment will help prevent accidents, damage, and loss, and will also make the process of changing a tire at home more efficient and stress-free.