How To Green Screen On Capcut
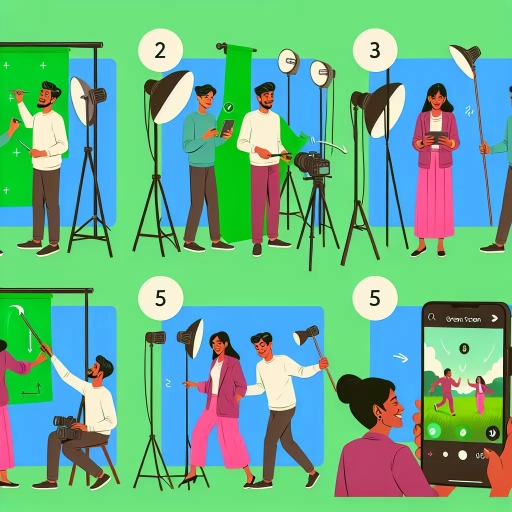
Here is the introduction paragraph: Green screening, also known as chroma keying, is a popular video editing technique used to replace the background of a video with a different image or video. With the rise of mobile video editing apps, it's now easier than ever to create professional-looking green screen videos on the go. CapCut, a popular video editing app, offers a range of features that make it easy to green screen like a pro. To get started with green screening on CapCut, it's essential to understand the basics of the technique, prepare your video for green screening, and apply the green screen effects. In this article, we'll take you through the process of green screening on CapCut, starting with the fundamentals. First, let's dive into understanding the basics of green screening on CapCut.
Understanding the Basics of Green Screening on CapCut
Green screening, also known as chroma keying, is a popular technique used in video production to replace the background of a video with a different image or video. CapCut, a popular video editing app, offers a range of features that make it easy to achieve professional-looking green screening effects. In this article, we will explore the basics of green screening on CapCut, including what green screening is and its purpose, the key features of CapCut that support green screening, and the system requirements for achieving high-quality green screening effects. By understanding these basics, you can unlock the full potential of green screening on CapCut and take your video editing skills to the next level. So, let's start by exploring what green screening is and its purpose.
What is Green Screening and its Purpose
Green screening, also known as chroma keying, is a visual effects technique used in film, television, and video production to replace the background of a shot with a different image or video. The purpose of green screening is to create the illusion that the subject is in a different location or environment, without actually having to film on location. This is achieved by filming the subject in front of a green or blue screen, which is then replaced with the desired background image or video in post-production. The green screen is used because it is a color that is not commonly found in human skin tones or hair, making it easier to isolate and remove from the image. The purpose of green screening is to create a seamless and realistic composite image, allowing filmmakers and videographers to create complex and imaginative scenes without the need for expensive location shoots or elaborate set builds. By using green screening, creators can also add special effects, such as explosions, fire, or water, to a scene without having to actually film them. Overall, green screening is a powerful tool for visual storytelling, allowing creators to bring their imagination to life and transport their audience to new and exciting worlds.
Key Features of CapCut for Green Screening
Here is the paragraphy: CapCut offers a range of key features that make it an ideal choice for green screening. One of the standout features is its advanced chroma keying tool, which allows for precise control over the green screen effect. With this tool, users can adjust the sensitivity, threshold, and spill reduction to achieve a seamless blend between the foreground and background elements. Additionally, CapCut's green screen feature supports multiple color options, including green, blue, and purple, giving users more flexibility when it comes to choosing the best color for their project. The app also includes a range of pre-made templates and effects that can be used to enhance the green screen effect, such as transitions, filters, and text overlays. Furthermore, CapCut's user-friendly interface makes it easy to import and export files, as well as share projects directly to social media platforms. Another notable feature is the app's ability to support 4K video editing, allowing users to create high-quality green screen videos with ease. Overall, CapCut's key features make it a powerful and versatile tool for creating professional-looking green screen videos.
System Requirements for Green Screening on CapCut
To effectively utilize the green screening feature on CapCut, it's essential to ensure your device meets the necessary system requirements. For a seamless experience, your smartphone or tablet should have at least 4GB of RAM, although 8GB or more is recommended for smoother performance. A 64-bit processor is also a must, with a minimum clock speed of 1.8 GHz. In terms of storage, a minimum of 2GB of free space is required, but having more available storage is always beneficial. Additionally, your device should be running on Android 8.0 or later, or iOS 11.0 or later. A high-quality display with a resolution of at least 1080p is also necessary for optimal video editing. Furthermore, a stable internet connection is required for downloading and uploading videos, as well as accessing CapCut's online features. By meeting these system requirements, you can enjoy a hassle-free green screening experience on CapCut and produce high-quality videos with ease.
Preparing Your Video for Green Screening on CapCut
Green screening is a popular technique used in video production to replace the background of a video with a different image or video. To achieve a seamless green screen effect, it's essential to prepare your video properly. In this article, we'll guide you through the process of preparing your video for green screening on CapCut, a popular video editing app. To start, you'll need to choose the right background for your video, which we'll discuss in more detail below. Additionally, you'll need to record your video with a green screen, and then import it into CapCut for editing. By following these steps, you'll be able to create a professional-looking green screen effect that enhances your video. So, let's dive in and explore the first step in preparing your video for green screening: choosing the right background for your video.
Choosing the Right Background for Your Video
Choosing the right background for your video is a crucial step in creating a professional and visually appealing green screen effect. The background you choose can make or break the overall look and feel of your video, so it's essential to select one that complements your subject and enhances the story you're trying to tell. When selecting a background, consider the color palette, texture, and mood you want to convey. For example, if you're creating a video for a travel company, a bright and sunny background with a beach or mountain landscape would be perfect. On the other hand, if you're creating a video for a tech company, a modern and sleek background with a cityscape or futuristic design would be more suitable. Additionally, consider the lighting and shadows in your background, as they can affect the overall mood and atmosphere of your video. It's also essential to ensure that your background is high-resolution and clear, as a low-quality background can detract from the overall quality of your video. Furthermore, you can also use a background that matches the theme of your video, such as a holiday-themed background for a Christmas video or a spooky background for a Halloween video. By choosing the right background, you can create a cohesive and engaging video that captures your audience's attention and enhances your message.
Recording Your Video with a Green Screen
Recording your video with a green screen is a crucial step in the green screening process on CapCut. To achieve a seamless and professional-looking result, it's essential to pay attention to the details. First, ensure that your green screen is evenly lit and free from wrinkles or creases. You can use a pop-up green screen or paint a wall green, but make sure it's a bright, vibrant green that will contrast well with your subject. Next, position your subject in front of the green screen, leaving enough space between them and the screen to avoid any shadows or spill. When recording, use a high-quality camera with good lighting, and consider using a tripod to minimize camera shake. Additionally, make sure your subject is aware of their surroundings and can move freely without bumping into the green screen. It's also a good idea to record a few test shots to ensure that the lighting and sound are optimal. Finally, when recording, try to maintain a consistent distance between the camera and the subject, and avoid zooming in or out, as this can affect the green screening process. By following these tips, you'll be able to capture a high-quality video with a green screen that will make it easy to replace the background in CapCut.
Importing Your Video into CapCut
When importing your video into CapCut, it's essential to ensure that the file is in a compatible format to avoid any issues during the editing process. CapCut supports a wide range of video file formats, including MP4, AVI, and MOV. If your video is in a different format, you can convert it using a third-party video converter or the built-in converter in CapCut. To import your video, open CapCut and click on the "New Project" button. Then, select the video file you want to import from your device's storage or record a new video directly from the app. You can also import videos from your social media accounts or cloud storage services like Google Drive or Dropbox. Once you've selected your video, CapCut will automatically detect its resolution, frame rate, and other settings, allowing you to start editing right away. If you're working with a large video file, you may want to consider trimming it down to a smaller size to make it easier to work with and to reduce the risk of lag or crashes during the editing process. Additionally, you can also import multiple videos at once and merge them into a single project, making it easy to create complex videos with multiple scenes and transitions. By importing your video into CapCut, you'll be able to take advantage of the app's powerful editing features and start creating stunning green screen videos in no time.
Applying Green Screen Effects on CapCut
Applying green screen effects on CapCut can elevate your video content to the next level. With this feature, you can replace the background of your video with a different image or video, creating a seamless and professional-looking visual effect. To achieve this, it's essential to understand the process of applying green screen effects on CapCut. This involves selecting and applying the green screen effect, adjusting the settings for optimal results, and adding additional effects and transitions to enhance the overall visual appeal. By mastering these techniques, you can create stunning videos that capture your audience's attention. In this article, we'll explore the step-by-step process of applying green screen effects on CapCut, starting with the first crucial step: selecting and applying the green screen effect.
Selecting and Applying the Green Screen Effect
When selecting and applying the green screen effect on CapCut, it's essential to consider a few key factors to achieve a seamless and professional-looking result. First, choose a green screen background that is evenly lit and has a consistent color tone. Avoid using a green screen with wrinkles, creases, or shadows, as these can be difficult to remove during the editing process. Next, ensure that the subject in front of the green screen is not wearing green or any color that may be similar to the green screen, as this can cause them to blend in with the background. Additionally, consider the lighting of the subject and the green screen, as harsh shadows or uneven lighting can make it challenging to achieve a smooth keying effect. When applying the green screen effect on CapCut, start by selecting the green screen clip and adjusting the threshold and sensitivity settings to fine-tune the keying effect. You can also use the "Edge" and "Spill" tools to refine the edges of the subject and remove any green spill or fringing. Finally, experiment with different background images or videos to find the perfect match for your green screen footage, and adjust the opacity and blending modes to achieve a natural-looking composite. By carefully selecting and applying the green screen effect, you can create stunning and realistic visuals that will elevate your video content to the next level.
Adjusting the Green Screen Settings for Optimal Results
Adjusting the green screen settings is crucial to achieve optimal results when applying the green screen effect on CapCut. To start, select the green screen clip and navigate to the "Chroma Key" section in the effects panel. Here, you can adjust the "Hue" and "Saturation" sliders to fine-tune the color range of the green screen. Increasing the "Hue" value will help to eliminate any green tint from the subject, while adjusting the "Saturation" will allow you to target the specific shade of green used in the background. Additionally, you can also adjust the "Threshold" slider to control the sensitivity of the chroma keying effect. A lower threshold value will result in a more subtle keying effect, while a higher value will produce a more aggressive keying effect. Furthermore, you can also use the "Edge" slider to refine the edges of the subject, allowing for a more precise separation from the background. By carefully adjusting these settings, you can achieve a seamless and professional-looking green screen effect that enhances your video content.
Adding Additional Effects and Transitions
Here is the paragraphy: Adding additional effects and transitions can further enhance the overall visual appeal of your green screen video. CapCut offers a wide range of effects and transitions that can be easily applied to your video. To add effects, simply tap on the "Effects" tab and browse through the various categories, such as "Filters", "Color Adjustments", and "Text". You can also use the search bar to find specific effects. Once you've selected an effect, you can adjust its duration, intensity, and other parameters to fine-tune its appearance. Transitions, on the other hand, can be added by tapping on the "Transitions" tab and selecting from a variety of options, such as "Fade", "Slide", and "Dissolve". You can also customize the transition duration and style to match your video's tone and pace. By adding effects and transitions, you can create a more engaging and polished video that showcases your creativity and style.