How To Screenshot On Acer Laptop
 In the ever-evolving digital world, understanding how to capture vital information on our screen is of high importance. One can find this especially useful when using an Acer laptop, where screenshots can serve as essential tools. Welcome to a comprehensive guide on mastering screenshots on an Acer laptop, where we delve into not just screen capturing itself, but also the crucial elements surrounding it. Central to our exploration is the uncovering of basic mechanics that drive screenshots on Acer laptops, subsequently leading us into a detailed, step-by-step journey of harnessing the screenshot process specifically tailor-designed for Acer users. Last but definitely not least, we navigate the vast landscape post-screenshot, focusing on how to edit and efficiently manage these captured images. Let's start with the cornerstone of our discussion today—Understanding the Basics: How Screenshots Work on Acer Laptops.
Understanding the Basics: How Screenshots Work on Acer Laptops
Taking a screenshot on an Acer laptop might seem like a simple task, but understanding the science behind it can make the process even more seamless. In this article, we'll explore the underlying mechanisms of screenshots and delve deeper into the specifics related to Acer laptops. We'll start with a detailed exploration of the technology involved, move on to Acer-specific features, and finally, discuss the critical keys used for screenshots. This will not only help you understand how screenshots work but also how to effectively utilize this handy tool on your Acer laptop. As we delve into our first discussion, you might be surprised to learn about the fascinating art and science behind what happens when you press those keys to capture a screenshot. The experience might initially seem momentary, but the mechanics behind it are complex and captivating. So, let's unravel that mystery with a glimpse into the science that powers screenshots.
The Science Behind Screenshots
In delving deeper into the function and use of screenshots on Acer laptops, it's integral to comprehend the science behind it all. The term 'screenshot,' sometimes referred to as a 'screen capture' or 'snap', describes the action of capturing a static image of the device's display. The underpinning mechanism behind it is integral to the field of computer graphics. At the core of the screenshot utility lies the concept of the frame buffer - a dedicated block of memory that holds a digital representation of the screen's picture information. Each pixel of the display maps onto a specific portion of this memory. When a screenshot is taken, the system directly copies the contents of this frame buffer. The copied data is then processed and converted into your screenshot's image file format, such as JPEG or PNG. Furthermore, the keyboard shortcut for screenshots, which varies slightly between PC and Mac systems, sends a direct command to the operating system. In the case of Acer laptops, which typically run on Windows, the cmd + Print Screen or cmd + Fn + Print Scr (for some models) combination initiates this process. Simply put, the screenshot function quickly 'reads' the displayed content on your screen, transforming it into a shareable, static image file. This instant information preservation has revolutionized many spheres, from facilitating error reporting in IT to enhancing communication efficiency in the digital space. This perfect blending of computer science and digital communication serves as another testament to the relentless march of technological advancement. Understanding this mechanism not only imprints a sense of appreciation for this tool's convenience but also instills a comprehensive grasp of its intricacies when troubleshooting screenshot issues on your Acer laptop.
Specifics for Acer Laptops
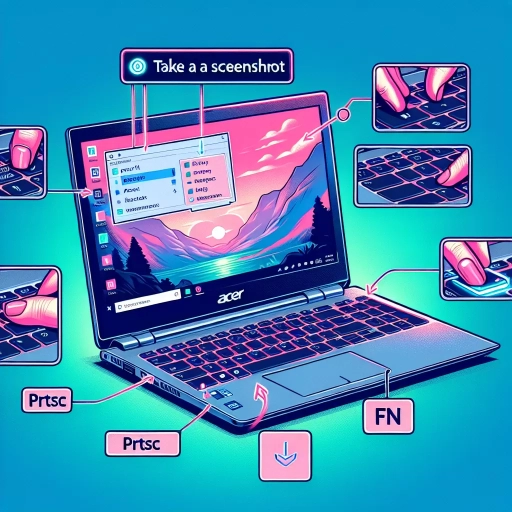
Acer laptops are renowned for their cutting-edge features, designed to improve digital experiences while remaining user-friendly. With multiple series and models under the Acer umbrella, each laptop has specific features tailored to various user needs. Whether it is the elite Acer Predator for gaming enthusiasts or the Acer Swift and Acer Spin models for students and professionals, each of them offers unique services that make them stand out. In the realm of screenshots on Acer laptops, there are specifics that users need to know. An essential feature shared across all Acer laptops is the basic approach for screen capturing. Using a simple key combination, users can capture the full screen, active window, or manually select regions for the screenshot. The function key (Fn) along with the “PrtSc” key is used to capture the entire screen. This becomes a crucial tool during digital presentations, tech-guidance, or even for personal references. The captured images are not only high quality but are also automatically saved to the clipboard. They can further be pasted onto any image editing platform or directly into files and messages. For more complex screenshots, Acer laptops offer the Snipping Tool which allows users to select the parts of the screen they want to capture. This tool provides different modes of capturing, including free-form snip, rectangular snip, and full-screen snip. While Acer laptops exhibit superior functionality in screenshots, their appeal also stems from their collaboration with Windows OS. With the latest versions of Windows, users can implement the “Snip & Sketch” tool which offers more advanced editing features post-screenshot. For instance, you can crop, annotate, and even share the screenshots right from the app. Furthermore, certain Acer models come pre-installed with proprietary software like Acer Quick Access. This provides an even simpler avenue for screenshots, alongside other features like BlueLight Shield and CoolBoost. Understanding these specifics of Acer laptops helps users navigate the screenshot functions smarter and better. However, making the most out of these features also depends on the user's knowledge and comfort with navigating the tools. Hence, it's always worthwhile to spend some time exploring these functionalities on your Acer laptop to become proficient. To wrap up, Acer laptops, across all their diverse series, provide a rich array of options for screen capturing. This, merged with their state-of-the-art digital and hardware capabilities, makes Acer laptops worth a second glance in the ever-evolving digital landscape. A mastery of these screenshot functionalities can significantly uplift and streamline digital experiences and applications.
Important Keys for Screenshot
Creating a high-quality screenshot on an Acer laptop may seem like a straightforward process. However, there's considerably more thought that goes into the procedure, if you're looking to achieve a more precise, effective, and professional result. There are several crucial keys that will assist you in achieving a higher-quality outcome. Primarily, understanding the function keys is vital. Most Acer laptops use the "PrtSc," "Fn," and "windows logo" keys for screenshot actions. The combination of these keys captures the whole screen and copies it to the clipboard. Another key aspect is the snipping tool, a built-in feature in Windows laptops, including Acer. This tool provides more flexibility as it allows you to capture any specific part of the screen with ease. Image quality must not be overlooked when taking a screenshot. Although the image quality greatly depends on the computer's display settings, there are adjustments within the Snipping Tool which can enhance the quality of your screenshots. With options like Free-form, Rectangular, Window, and Full-screen, you can shape your screenshot to fit the intended use, whether it's for a presentation, an email, a tutorial or simply for personal reference. For more professional use, screenshot software like Greenshot, Snagit, or Lightshot can be employed. These tools come with more advanced options including image editing, sharing options and more. The choice of software will mostly depend on your needs and how much you are willing to invest. The timing of the screenshot can also be an important factor. By using the delay feature in the Snipping Tool or third-party software, you can regulate when the screenshot is captured, allowing for more precise screenshots. Screenshots should also be organized and saved properly. Screenshots, by default, can be found in the Pictures folder, where they are stored in chronological order. However, for easy access and retrieval, a dedicated folder with appropriate naming conventions for the screenshots is recommended. In conclusion, taking a high-quality screenshot on Acer laptops is more nuanced than it appears initially. Command over function keys, knowledge of snipping tools, adjusting image quality, and proper organization are crucial keys to mastering screenshots. Once these steps are understood and applied, the process of capturing, saving, and sharing screenshots becomes seamless and efficient.
Step-By-Step Guide: Mastering the Screenshot Process on an Acer Laptop
Mastering the screenshot process on an Acer laptop is a handy skill that can enhance your digital experience and productivity. This comprehensive step-by-step guide will unravel the most practiced methods to achieve high-quality screenshots in no time. These methods include Whole Screen Capturing, Active Window Capturing, and taking a Screenshot of a Specific Area, each serving its unique function and ease. By understanding how to effectively utilize these functions, you can swiftly capture necessary information, solidifying your efficiency when working with digital content. Not only it minimizes the hassle of noting down or memorizing vast information, but also assists in instant reporting and troubleshooting. As we clear the clouds of complexities, the first method we'll explore is the Whole Screen Capturing, a foolproof way to ensure you never miss out on crucial elements when taking a screenshot with your Acer laptop. Let's dive in to master the art of capturing the entire screen in just a few easy steps.
Whole Screen Capturing
Whole screen capturing is an essential component of mastering the screenshot process on an Acer laptop. This feature allows users to capture every visible aspect displayed on their screen in one simple action, and it holds utmost importance in various scenarios, such as saving important data, documenting an error for troubleshooting, or even recording a memorable moment. In a step-by-step guide to utilizing this function, it's worthwhile noting that all Acer models come equipped with a pre-installed ability for total screen captures. The common technique involves the 'PrtSc' key, located towards the upper right side of the keyboard, in combination with the 'Fn' or 'Alt' key depending on the model. By pressing these keys together, the whole screen image is automatically copied to the clipboard, ready to be pasted and saved in your preferred location. But the story doesn't end there. To truly become a pro at whole screen capturing, it's essential to understand a few more elements to this process. For instance, you can use the Snipping Tool or Snip & Sketch for more customized captures, such as rectangular, free-form, or delayed screenshots. These tools also allow you to save the file directly to your drive, skipping the pasting process. Aside from this, various downloadable apps can offer more advanced features, like selecting multiple screenshot modes, editing directly after a screenshot, and one-click sharing options. While this may seem like a simple function, these intricate details significantly elevate your user experience, concurrently optimizing your productive abilities and digital navigation on your Acer laptop. Admittedly, the process may seem daunting at first, but much like riding a bike, once you’ve grasped the concept, it becomes an effortless and invaluable tool. A sound knowledge of whole screen capturing will not only equip users with robust digital literacy skills but also enhances their ability to communicate more effectively in this rapidly evolving digital era. In conclusion, whole screen capturing on an Acer laptop is indeed more than just a feature; it is a time-saving, powerful tool that can be instrumental if used to its full potential. The digital story that unfolds with mastering this process could significantly improve productivity, efficiency, and overall digital communicative capabilities, which makes the journey of learning and practicing these steps truly rewarding.
Active Window Capturing
Active Window Capturing is a key step in mastering the screenshot process on an Acer laptop, serving as a streamlined option for capturing specific information without having to screenshot the entire screen. This function allows users to precisely screenshot only the active or forefront window, removing any irrelevant background distractions, thereby creating clean and focused content. Understanding and making use of this feature can enhance the overall productivity, particularly for tasks such as creating academic assignments, preparing business presentations, or even for reporting technical issues. It promotes resource efficiency as it eliminates the need for post-screenshot edits to cut out unwanted parts. Here's how simple it is: When you're on the window you wish to capture, all you need to do is to hold the Alt key and then press the Print Screen (often labeled as PrtSc) key. With this combination, the system takes a screenshot of your active window instantly. The image is then saved to your Clipboard, ready to be pasted or moved into an image or document file. The magic of Active Window Capturing lies in its simplicity and precision. It smoothly intertwines with multi-tasking workflows, aiding in swift data collection or trouble-shooting processes. As a part of the larger screenshot capturing guide for Acer laptops, understanding and incorporating this function can be a game-changer in your digital journey. Now go forth and capture with confidence, one active window at a time. Remember, while the use of screenshots can be helpful in many situations, always make sure that your use complies with privacy laws and respect for intellectual property rights. Make the most out of this screen capturing feature and let it guide you towards efficient and respectful digital communication.
Screenshot of a Specific Area
Taking a screenshot of a specific area on your Acer laptop can be a localized way to capture only the essential information without crowding your screenshot with unnecessary details. This process, just as accessible and user-friendly, constitutes an integral part of mastering the screenshot process on an Acer laptop. Initially, it warrants understanding that the screenshot functionality can just do much more than recording the full screen. As modern computing demands evolve, the need for customizable screenshot capabilities has become paramount. Acer, acknowledging this user necessity, has built-in accommodating features in its laptops. To take a screenshot of a specified area only, the Snip & Sketch Tool comes in handy. This tool offers better precision and flexibility in screenshot capturing. To use this feature, simply search for the Snip & Sketch Tool in the start menu. Upon opening the utility, you'll notice various snipping options - from rectangular snip to freeform snip. You can select the one as per your requirements. Clicking on 'New' will fade your screen, inviting you to select a specific area for the screenshot. Use your cursor to draw a rectangle over the area you wish to capture. The selected screenshot will then open in the Snip & Sketch window for further editing or saving. Moreover, using this tool, you can also annotate the screenshots for more clarity and detail. The annotations can offer a better understanding and richer context when the screenshots are shared with others. The chosen screenshot area can be quickly saved, discarded, or shared right from the app, making your workflow efficient and seamless. In a nutshell, understanding how to screenshot a specific area on an Acer laptop can be a valuable tool for users. It enhances the communication of ideas, allows the easy sharing of information, and can be a lifesaver when troubleshooting technical issues. This step-by-step guide aims to navigate you through the process, ensuring you are well-equipped to get the most out of your Acer laptop's screenshot features.
Navigating Post-Screenshot: Editing and Managing Screenshots on Acer Laptops
Delving into the peculiar world of Acer laptops, this insightful article will explore an essential feature - screenshots. A commonplace ability across all laptops, screenshotting on Acer machines unveils unique twists that offer both convenience and efficiency. This exposition ponders specifically on enhancing your experience around navigating post-screenshot processes as an Acer laptop owner. In the successive paragraphs, three fundamental facets will be dissected - locating and fetching your screenshots, familiarizing yourself with the basic editing options and, finally, principles of proper organization and management of screenshots. Moving on to our first point of examination; 'Finding and Accessing Screenshots'. This portion aims to demystify the process of tracing your screenshots within the vast labyrinth of laptop directories. An astoundingly simple task disguised as a complex one. Whether you are a seasoned user or a beginner, understanding where your output lands and uncomplicated methods to access them significantly improves your ease of operation. Allow us to guide you through these potentially intricate pathways which lead to your captured moments.
Finding and Accessing Screenshots
Finding and accessing screenshots on your Acer laptop can often feel like navigating through a maze. You've pressed all the right keys and heard that satisfying 'click' indicating a snapshot has been taken. But now, where is it? Screenshots on Acer laptops, like many other computers, are typically directed to a default location — the Screenshot folder in the Pictures library. However, sometimes, they might end up somewhere entirely different, leading to confusion and frustration. Firstly, it's important to understand that the way you capture your screenshot can determine where it is saved. If you use the traditional "Print Screen" method, the screenshot is copied to your clipboard. From here, it's your responsibility to paste it (using Ctrl+V) into a graphics editor, such as Microsoft Paint, Photoshop, or even a Word document, and then save it to your preferred location. Now, if you utilize the Windows + Print Screen method, your laptop automatically saves the screenshot in the Screenshots folder within Pictures. To access this, simply navigate to your File Explorer (Windows + E). On the left pane, you will find Pictures. Click on this, and within it, Screenshots. Here, you will find all your screenshots saved in order of their creation. But, what if you use third-party applications like Lightshot, Snipping Tool, or Snip & Sketch? These allow you to select a region on your screen and take a screenshot, and most often, will likely prompt you to save the image in a location of your choosing as soon as you take it. If you clicked 'save' hurriedly without paying attention to the destination, you might be at a loss where to find your screenshot. In such cases, the quickest route is to retrace your steps. Take another screenshot and carefully observe the save location that pops up. Voila! You found your missing folder. Remember that in the digital realm, understanding your system's mechanics goes a long way in mastering the art of managing files and effortlessly accessing them. Locating screenshots is no different. Getting familiar with capture mechanisms, save prompts, and folder structures can turn what seems like a perplexing task into second nature. Navigating the post-screenshot terrain doesn't have to be daunting. With the correct knowledge and tips, managing screenshots on your Acer laptop becomes about as challenging as taking the screenshot itself. Discover the digital breadcrumb trail that leads straight to your screenshots, and never lose sight of an important capture again.
Basic Editing Options
Editing your screenshots on your Acer laptop can be surprisingly simple, yet immensely powerful with the right knowledge of the basic editing tools available. After taking a screenshot, often the need arises to highlight certain areas, add comments, or even crop out irrelevant sections. Here is where the magic of basic editing options comes into play. First and foremost, the 'Crop' feature is the fundamental tool to shape your screenshot to the perfect size, focusing on the key subject matter. By eliminating unnecessary portions of the image, you highlight the parts that require attention. It's simple to use – just select the 'Crop' option, usually represented by a square or rectangular icon and drag it compassionately over the area you wish to keep. Another essential tool at your disposal is the 'Marker' or 'Pen' tool. These tools allow you to draw lines, arrows, circles, or even freely scribble over your image. Whether its spotlighting a key phrase in a document, circling an area for emphasis, or even just adding a handwritten note, the marker and pen tools are the storytellers of your editing journey. They’re typically symbolized by a pen or brush icon and are available in many thickness and color options to make your edits vibrant and clear. The 'Text' tool is your best friend when it comes to leaving typed comments or instructions on your image. By selecting the usually T-shaped icon, you can insert a text box anywhere on your screenshot and type your observations or guidance into the box. Customization options include different fonts, sizes, and colors to suit your preference and make your notes stand out on the image. In some cases, you may wish to keep a certain part of an image private. The 'Blur' tool becomes your ally in such instances. With this tool, sensitive information can be made unclear, thereby maintaining confidentiality while still using the real image for reference. Lastly, many editing suites also include shape tools like 'Rectangle,' 'Ellipse,' 'Line' tools etc., to allow you to highlight, separate or connect parts of an image with precision and uniformity. These basic editing options, easily accessible and straightforward to use, offer a world of possibilities to augment and enhance your screenshots on an Acer laptop. In the end, it's all about making images serve your purpose better, and with these tools, every screenshot taken can be a powerful and effective communicative aid.
Organizing and Managing Screenshots
Organizing and managing screenshots can initially seem like a daunting task, especially for those who are new to the nuances of technology or those who frequently rely on screenshots for work or personal use. However, with a systematic approach and understanding of Acer laptops' functionalities, it can be simplified significantly. Primarily, organizing your screenshots on Acer laptops involves understanding how to use file storage systems effectively, particularly folders. Every screenshot you take is automatically stored in a default location - usually in the 'Pictures' folder, inside the 'Screenshots' sub-folder. To manage these effectively, you may consider creating separate folders based on categories that make sense to you – it could be project-based, date-based, content-based or even priority-based. This practice can save you precious time in finding specific screenshots later. Screenshot management also extends to activities like renaming and deleting. Renaming screenshots from their default "Screenshot(1),(2)..." nomenclature to something more descriptive can remarkably improve your ease of access. Similarly, routinely deleting unnecessary screenshots can help in decluttering your laptop storage and keeping it optimized. A bonus tip: Acer laptops also allow you to edit screenshots post-capture. Using built-in or third-party editing software, you can annotate, crop, or highlight parts of the screenshot for emphasis, thereby making them more meaningful and useful. Some Acer models even feature a 'Snipping Tool' which allows you to take and edit screenshots in one place. It's crucial not to underestimate the power of organizing and managing your screenshots. By implementing these tactics, you can seamlessly navigate post-screenshot, enhancing productivity and efficiency in your digital workflow. Remember, these strategies do not just apply on Acer laptops, but can inference is across all devices and operating systems. So, whichever tech you’re dealing with, efficient screenshot management can truly make a world of difference in your digital journey. As the saying goes, a well-organized laptop makes for a well-organized mind.