How To Put Ps4 Controller In Pair Mode
The PlayStation 4 (PS4) controller is a vital component of the gaming experience, offering a range of features that enhance gameplay and immersion. However, for many users, pairing the controller with their console can be a frustrating and confusing process. In this article, we will guide you through the steps necessary to put your PS4 controller in pair mode, ensuring a seamless gaming experience. To achieve this, we will first cover the essential preparation required for pairing, including checking the controller's battery level and ensuring the console is in the correct mode. We will then delve into the pairing process itself, providing a step-by-step guide on how to pair the controller with a PS4 console. Finally, we will address common pairing issues and offer troubleshooting tips to help you overcome any obstacles. By following these steps, you will be able to successfully put your PS4 controller in pair mode and enjoy uninterrupted gaming. First, let's start with the preparation for pairing.
Preparation for Pairing
To ensure a seamless gaming experience, it's essential to prepare your PS4 controller for pairing. This process involves a series of steps that will get your controller ready to connect with your console. First, you'll need to charge the PS4 controller to ensure it has enough power to complete the pairing process. Next, updating the PS4 controller firmware is crucial to ensure you have the latest features and security patches. Finally, resetting the PS4 controller can resolve any connectivity issues and restore it to its default settings. By following these steps, you'll be able to pair your controller with your PS4 console without any issues. In this article, we'll dive deeper into each of these steps, starting with charging the PS4 controller.
Charge the PS4 Controller
To charge the PS4 controller, locate the micro-USB port on the top of the controller and plug in the micro-USB cable that came with your PS4 console. Connect the other end of the cable to the PS4 console or a wall adapter. The controller will begin charging, and the light bar on the top will start to flash. It's recommended to charge the controller for at least 2 hours to ensure a full charge. You can also charge the controller while it's in use, but it's best to charge it when it's not in use to avoid any interruptions. If you're using a wall adapter, make sure it's a certified Sony adapter to avoid any damage to the controller. Once the controller is fully charged, the light bar will stop flashing and remain steady. It's also a good idea to charge the controller regularly to maintain its battery life and prevent it from running out of power during gameplay.
Update the PS4 Controller Firmware
To update the PS4 controller firmware, start by connecting the controller to your PS4 console using a USB cable. Ensure the console is turned on and the controller is turned off. Next, go to the PS4 Settings menu and select "Devices" followed by "Bluetooth Devices." If your controller is not listed, select "Add Device" and then "DualShock 4 Wireless Controller." Once your controller is listed, select it and then choose "Update." If an update is available, the PS4 will automatically download and install the new firmware. Wait for the update to complete, and then restart your controller. Your controller's firmware should now be up to date, ensuring optimal performance and compatibility with your PS4 console.
Reset the PS4 Controller
To reset the PS4 controller, you'll need to locate the small reset button on the back of the controller. It's a tiny hole next to the L2 button, and you'll need a small object like a paper clip or a pin to press it. Insert the object into the hole and press the button for about 5 seconds. You'll know it's working when the lights on the controller start flashing. This will reset the controller to its default settings, which can help resolve any connectivity issues or other problems you may be experiencing. Once you've reset the controller, you can proceed with pairing it to your PS4 console. Make sure to follow the pairing instructions carefully to ensure a successful connection. Resetting the controller will not delete any of your saved data or settings, so you don't have to worry about losing any progress or customizations. By resetting the controller, you're essentially giving it a fresh start, which can help resolve any issues that may be preventing it from pairing properly with your console.
Pairing the PS4 Controller with a PS4 Console
To pair a PS4 controller with a PS4 console, you have three convenient options. You can use a USB cable for initial pairing, which is a straightforward and reliable method. Alternatively, you can use the PS4 console's Bluetooth settings to establish a wireless connection. Another option is to use the PS4 controller's share button to initiate the pairing process. In this article, we will explore each of these methods in detail, starting with using a USB cable for initial pairing. By the end of this article, you will be able to easily pair your PS4 controller with your PS4 console and start gaming. So, let's get started with the first method: using a USB cable for initial pairing.
Use a USB Cable for Initial Pairing
To pair your PS4 controller with your console for the first time, using a USB cable is the recommended method. This approach ensures a secure and stable connection, which is crucial for the initial setup. Start by connecting the PS4 controller to the PS4 console using a USB cable. Make sure the console is turned on. Once connected, the PS4 controller will automatically enter pairing mode, and the console will recognize it. The console will then guide you through the setup process, which includes registering the controller and setting it as the primary controller. This method is straightforward and eliminates the risk of interference from other devices, ensuring a seamless pairing experience. After the initial pairing, you can disconnect the USB cable and use the controller wirelessly. The controller will remember the pairing, and you can reconnect it to the console wirelessly whenever you want. Using a USB cable for initial pairing is the most reliable way to establish a connection between your PS4 controller and console, and it's a method recommended by Sony.
Use the PS4 Console's Bluetooth Settings
To use the PS4 console's Bluetooth settings, navigate to the console's home screen and select the "Settings" icon, represented by a toolbox. From there, scroll down to the "Devices" option and select it. In the "Devices" menu, choose "Bluetooth Devices." This will display a list of all available Bluetooth devices in range. If your PS4 controller is in pairing mode, it should appear in this list. Select the controller's name to initiate the pairing process. If prompted, enter the passcode "0000" to complete the pairing. Once paired, the controller will be connected to the PS4 console via Bluetooth, allowing for wireless gameplay. Note that the PS4 console can only be paired with one controller at a time, so if you need to pair multiple controllers, you'll need to repeat the process for each one. Additionally, if you're experiencing issues with your controller's connection, you can try resetting the controller or restarting the PS4 console to resolve the issue.
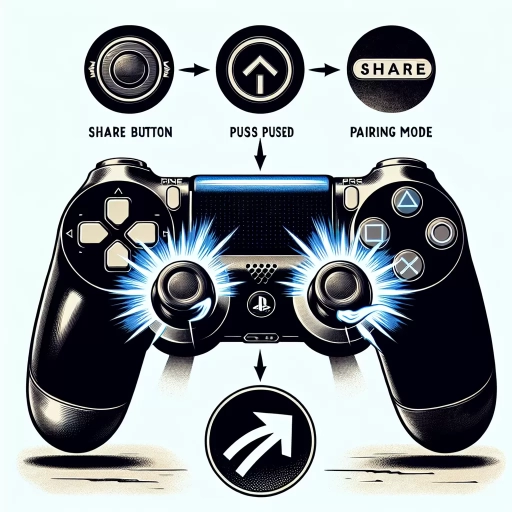
Use the PS4 Controller's Share Button
The PS4 controller's Share button is a powerful tool that allows you to capture and share your gaming moments with the world. Located on the top of the controller, the Share button is easily accessible and can be used to take screenshots, record gameplay videos, and even broadcast your gameplay live. To use the Share button, simply press it once to open the Share menu, where you can choose to take a screenshot, record a video, or broadcast your gameplay. You can also customize the Share button's settings to suit your needs, such as setting the screenshot format or video quality. Additionally, the Share button can be used to share your gaming moments on social media platforms like Twitter and Facebook, making it easy to show off your gaming skills to your friends and followers. Overall, the PS4 controller's Share button is a convenient and powerful tool that allows you to share your gaming experiences with others.
Troubleshooting Common Pairing Issues
When troubleshooting common pairing issues with your PS4 console and controller, there are several steps you can take to resolve the problem. One of the most effective ways to start is by restarting the PS4 console and controller, as this can often resolve connectivity issues. However, if the problem persists, you may need to check for interference from other devices, as other electronic devices can sometimes disrupt the connection between the console and controller. In some cases, you may need to take a more drastic measure and reset the PS4 controller to its default settings, which can help to resolve any software-related issues. By trying these troubleshooting steps, you can quickly and easily resolve common pairing issues and get back to gaming. To start, let's take a closer look at the first step: restarting the PS4 console and controller.
Restart the PS4 Console and Controller
Restarting your PS4 console and controller can often resolve connectivity issues and other problems. To restart your PS4 console, start by making sure it's turned off. If it's in rest mode, press and hold the PS button on your controller, then select "Turn Off PS4." If it's already off, proceed to the next step. Unplug the power cord from the back of the console and wait for 30 seconds. This allows any residual power to drain, which can help resolve issues. After 30 seconds, plug the power cord back in and press the power button on the front of the console. Your PS4 will start up, and you should see the login screen. To restart your controller, start by turning it off. You can do this by holding down the PS button and the Share button at the same time until the lights on the controller turn off. Next, unplug the controller from the PS4 console or any other device it's connected to. Wait for 30 seconds to allow any residual power to drain. After 30 seconds, plug the controller back in or pair it with your PS4 console again. If you're using a wireless controller, you can also try resetting it by inserting a paper clip or small pin into the small hole on the back of the controller. This will reset the controller to its default settings. By restarting your PS4 console and controller, you can often resolve connectivity issues and get back to gaming quickly.
Check for Interference from Other Devices
When troubleshooting common pairing issues with your PS4 controller, it's essential to check for interference from other devices. Other electronic devices in your vicinity can cause interference with your controller's Bluetooth signal, making it difficult to pair or maintain a stable connection. To identify potential sources of interference, look for devices that use the same 2.4 GHz frequency band as your PS4 controller, such as cordless phones, microwaves, and neighboring Wi-Fi routers. Additionally, devices like baby monitors, garage door openers, and neighboring Bluetooth devices can also cause interference. To minimize interference, try moving these devices away from your PS4 and controller or switching them off temporarily. You can also try changing the Wi-Fi channel on your router to one that is less crowded. If you're still experiencing issues, consider using a wired connection or a Bluetooth signal booster to improve the connection between your controller and PS4. By checking for and minimizing interference from other devices, you can help resolve common pairing issues and enjoy a more stable gaming experience.
Reset the PS4 Controller to its Default Settings
To reset the PS4 controller to its default settings, you'll need to perform a few simple steps. First, locate the small reset button on the back of the controller, near the L2 button. Use a small tool, such as a paper clip or a pin, to press and hold the reset button for about 5 seconds. You'll know it's working when the lights on the controller start to flash. Next, release the reset button and wait for the controller to turn off completely. Once it's off, press and hold the PS button and the Share button at the same time until the lights on the controller start to flash again. This will put the controller into pairing mode, allowing you to reconnect it to your PS4 console. Finally, go to your PS4 console and navigate to the Settings menu, then select "Devices" and "Bluetooth Devices." Your controller should appear in the list of available devices. Select it to complete the pairing process. By resetting your PS4 controller to its default settings, you'll be able to resolve any connectivity issues and get back to gaming in no time.