How To Get Tree Sap Off A Car
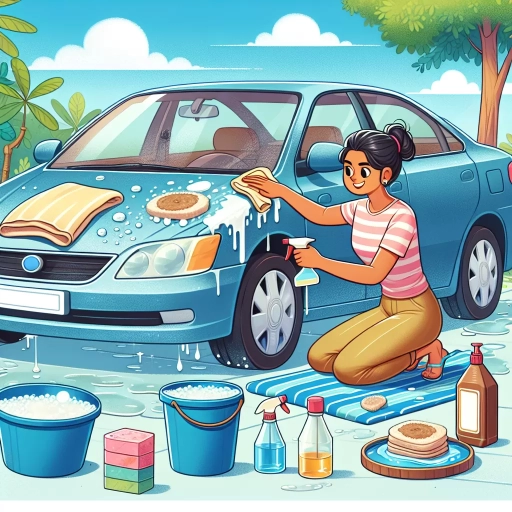
Here is the introduction paragraph: Getting tree sap off a car can be a frustrating and daunting task, especially if it has had time to harden and bond with the paint. However, with the right techniques and materials, it is possible to remove tree sap without damaging the car's finish. To successfully remove tree sap, it is essential to approach the task in a methodical and informed manner. Preparation is key to avoiding damage and ensuring a smooth removal process. In this article, we will explore the steps involved in removing tree sap from a car, including preparation, removal methods, and post-removal care. By understanding these critical components, car owners can effectively remove tree sap and maintain their vehicle's appearance. To start, let's focus on the importance of preparation in the tree sap removal process.
Preparation is Key
When it comes to removing tree sap from surfaces, preparation is key to achieving a successful outcome. To ensure a smooth and efficient process, it's essential to act quickly, choose the right cleaning solution, and test a small area first. By doing so, you'll be able to prevent the sap from hardening, which can make it more difficult to remove. Acting quickly is particularly crucial, as the longer you wait, the more time the sap has to set and become stubborn. Therefore, it's vital to act quickly to prevent sap from hardening, which is the first step in the removal process.
Act Quickly to Prevent Sap from Hardening
Act quickly to prevent sap from hardening, as this will make the removal process much more difficult. The sooner you address the issue, the better chance you have of removing the sap without damaging your car's paint. If you notice sap on your car, try to remove it as soon as possible, even if it's just a small amount. The longer you wait, the more time the sap has to harden and bond with the paint, making it more challenging to remove. Additionally, if the sap is left to sit for an extended period, it can attract dirt and dust, which can further complicate the removal process. By acting quickly, you can prevent the sap from hardening and reduce the risk of damaging your car's paint. This is especially important if you live in an area with high temperatures, as the heat can cause the sap to harden more quickly. If you're unable to remove the sap immediately, try to park your car in a shaded area to slow down the hardening process.
Choose the Right Cleaning Solution
When it comes to removing tree sap from your car, choosing the right cleaning solution is crucial. You'll want to select a product that is specifically designed to break down and dissolve the sticky sap without damaging your car's paint or other surfaces. Avoid using household cleaners or strong chemicals, as they can strip away the wax and damage the paint. Instead, opt for a gentle cleaning solution that is pH-balanced and safe for use on automotive surfaces. Look for products that are labeled as "safe for use on paint, glass, and trim" to ensure you're getting a solution that won't harm your car's exterior. Some popular cleaning solutions for removing tree sap include bug and tar removers, detail sprays, and specialized sap removers. Always read the label and follow the instructions carefully to ensure you're using the product correctly and safely.
Test a Small Area First
Here is the paragraphy: Before attempting to remove tree sap from your car, it's essential to test a small area first. This step is crucial in ensuring that the removal method you choose won't damage your car's paint or other surfaces. Choose a discreet area, such as behind a door or under the trunk lid, and apply a small amount of the removal solution or product. Wait for a few minutes to see how the surface reacts. If the solution doesn't damage the paint or leave any residue, you can proceed with the removal process. However, if the solution damages the paint or leaves a residue, you'll need to try a different method or seek professional help. Testing a small area first can save you from costly repairs and ensure that your car's surface remains intact. Additionally, it's also a good idea to read reviews and do research on the removal method or product you plan to use to ensure it's safe and effective. By taking this precautionary step, you can remove tree sap from your car with confidence and avoid any potential damage.
Removal Methods
Removing tree sap from surfaces can be a frustrating and challenging task, but there are several effective methods to try. One approach is to use a commercial tree sap remover, specifically designed to break down and dissolve the sticky substance. Alternatively, a homemade solution using peanut butter or olive oil can be applied to the affected area to loosen the sap. Another option is to apply heat to the sap, which can help to soften and remove it. In this article, we will explore these methods in more detail, starting with the use of a commercial tree sap remover.
Use a Commercial Tree Sap Remover
When it comes to removing tree sap from your car, using a commercial tree sap remover is often the most effective method. These products are specifically designed to break down and dissolve the sticky sap, making it easy to wipe away. Commercial tree sap removers typically contain solvents that target the sap's adhesive properties, allowing you to quickly and safely remove it from your car's surface. To use a commercial tree sap remover, start by reading the product's instructions and taking any necessary safety precautions, such as wearing gloves and working in a well-ventilated area. Next, apply the remover to the affected area using a soft cloth or sponge, making sure to saturate the sap thoroughly. Allow the product to sit for a few minutes to give it time to penetrate and break down the sap. Then, use a clean, damp cloth to wipe away the sap and remover. Repeat the process as needed until the sap is completely gone. Be sure to test a small, inconspicuous area of your car's surface first to ensure the remover doesn't damage the paint or other materials. By following these steps and using a commercial tree sap remover, you should be able to easily and effectively remove tree sap from your car.
Try a Homemade Solution with Peanut Butter or Olive Oil
If you're not a fan of commercial products or prefer a more natural approach, you can try using peanut butter or olive oil to remove tree sap from your car. Yes, you read that right - peanut butter! The oils in peanut butter can help break down the sap, making it easier to remove. Simply apply a small amount of peanut butter to the affected area and let it sit for about 10-15 minutes. Then, use a soft cloth or paper towel to wipe away the sap. If some sap remains, you can repeat the process until it's completely gone. Alternatively, you can use olive oil in a similar way. Apply a small amount to the affected area, let it sit for a few minutes, and then wipe it away with a soft cloth. Both peanut butter and olive oil are gentle on car surfaces and can be effective at removing tree sap without leaving any residue behind. Just be sure to test a small area first to ensure the oil doesn't damage your car's paint or other surfaces.
Apply Heat to Loosen the Sap
Applying heat to loosen the sap is a common method for removing tree sap from cars. This method involves using a heat source, such as a hair dryer or a heat gun, to warm up the sap and loosen its adhesive properties. The heat causes the sap to soften and become more pliable, making it easier to remove. It's essential to be cautious when using heat, as excessive heat can damage the car's paint or other surfaces. A low to moderate heat setting is recommended, and the heat source should be kept at a safe distance from the car's surface. Additionally, it's crucial to test a small, inconspicuous area of the car first to ensure the heat won't damage the paint or other materials. Once the sap is loosened, it can be wiped away with a soft cloth or removed with a gentle cleaning product. This method is often effective for removing fresh sap, but it may not be as effective for older, dried sap.
Post-Removal Care
When it comes to post-removal care for tree sap on cars, there are several steps you can take to ensure your vehicle remains in top condition. First, it's essential to wash the car thoroughly to remove any residue left behind by the sap. This will prevent any remaining sap from hardening and causing further damage. Additionally, applying a protective wax coating can help prevent future stains from forming. Regular inspections of the car's surface can also help identify new sap spots before they become a problem. By following these steps, you can keep your car looking its best and prevent costly repairs down the line. To start, let's take a closer look at the importance of washing the car thoroughly to remove residue.
Wash the Car Thoroughly to Remove Residue
Wash the car thoroughly to remove any remaining residue from the tree sap removal process. Use a mild car wash soap and avoid using high-pressure washes or harsh chemicals, as they can damage the car's paint or strip away its wax coating. Instead, use a soft-bristled brush or a microfiber cloth to gently scrub away any remaining sap residue. Rinse the car thoroughly with clean water to remove any soap residue, and then dry it with a microfiber towel to prevent water spots. This step is crucial in ensuring that the car's paint is clean and free of any residue that could attract dirt or dust, causing it to become dirty again quickly. Additionally, washing the car thoroughly will also help to remove any remaining solvent or cleaning solution that may have been used to remove the tree sap, which can leave a residue on the car's surface if not properly rinsed off. By washing the car thoroughly, you can ensure that it is clean and free of any residue, and that the paint is protected and looking its best.
Apply a Protective Wax Coating to Prevent Future Stains
Applying a protective wax coating to your car's paint is an essential step in preventing future stains, including those caused by tree sap. A good quality wax creates a barrier between the paint and the environment, shielding it from contaminants and making it easier to clean. When choosing a wax, look for one that is specifically designed for your car's paint type and is resistant to UV rays, water spots, and other environmental factors. Apply the wax according to the manufacturer's instructions, typically using a circular motion to cover the entire surface. Allow the wax to haze and then buff it off with a microfiber cloth to create a glossy finish. Regular waxing, ideally every 2-3 months, will help maintain the protective barrier and prevent future stains from setting in. Additionally, consider using a paint sealant or ceramic coating for added protection and durability. By taking these steps, you can enjoy a stain-free and well-protected car exterior for years to come.
Regularly Inspect the Car for New Sap Spots
Regularly inspecting your car for new sap spots is crucial in maintaining its appearance and preventing damage. After removing tree sap from your car, it's essential to keep a close eye on the vehicle's surface to catch any new sap spots before they harden and become more challenging to remove. Check your car daily, especially during peak sap seasons, to identify any new sap spots. Look for sticky, gooey, or discolored areas on the paint, windows, and trim. If you notice any new sap spots, clean them immediately using a gentle cleaning product and a soft cloth. Regular inspections will help prevent sap from building up and causing damage to your car's paint and other surfaces. Additionally, regular washing and waxing can help protect your car's surface from sap and other contaminants. By staying on top of sap removal and prevention, you can keep your car looking its best and maintain its value.