How To Remove Stucco Ceiling
Removing a stucco ceiling can be a daunting task, but with the right approach, it can be done efficiently and safely. Stucco ceilings were once a popular design element, but they have largely fallen out of favor in recent years. Many homeowners are now opting to remove their stucco ceilings to create a more modern and open look. However, before embarking on this project, it's essential to understand the process involved. To successfully remove a stucco ceiling, one must first prepare for the task at hand. This involves understanding the different removal methods and techniques available, as well as the necessary precautions to take after the removal process is complete. In this article, we will explore the key steps involved in removing a stucco ceiling, including preparation, removal methods, and post-removal procedures. By the end of this article, you will be equipped with the knowledge and confidence to tackle this project yourself. So, let's start with the first crucial step: Preparation is Key.
Preparation is Key
Preparation is key to a successful stucco ceiling repair project. Before starting the repair process, it is essential to assess the condition of the stucco ceiling, gather essential tools and materials, and protect the area and furniture. Assessing the condition of the stucco ceiling will help you identify the extent of the damage and determine the best course of action. Gathering essential tools and materials will ensure that you have everything you need to complete the repair job efficiently. Protecting the area and furniture will prevent damage and make the cleanup process easier. By taking the time to prepare properly, you can ensure a successful repair project. To begin, it is crucial to assess the condition of the stucco ceiling to determine the extent of the damage and develop a plan for repair.
Assess the Condition of the Stucco Ceiling
Assessing the condition of the stucco ceiling is a crucial step before starting the removal process. This involves inspecting the ceiling for any signs of damage, wear, and tear, or water stains. Check for cracks, holes, or soft spots, which can indicate structural issues or water damage. Look for any discoloration, yellowing, or staining, which can be a sign of age or exposure to moisture. Additionally, check for any sagging or unevenness, which can indicate that the stucco is no longer securely attached to the ceiling. It's also essential to check for any asbestos, which was commonly used in stucco ceilings in the past. If you suspect that your stucco ceiling contains asbestos, it's crucial to hire a licensed professional to handle the removal process. By assessing the condition of the stucco ceiling, you can determine the best approach for removal and ensure a safe and successful process.
Gather Essential Tools and Materials
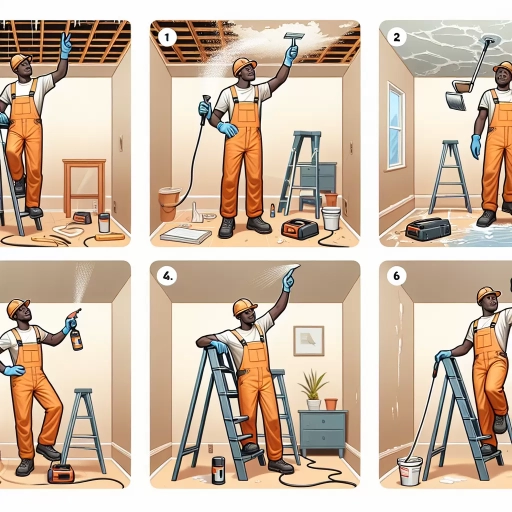
To effectively remove a stucco ceiling, it's crucial to gather the essential tools and materials beforehand. Start by collecting protective gear, including a dust mask, safety goggles, and a pair of gloves to shield yourself from the hazardous materials and debris that will be released during the removal process. A putty knife or a joint knife with a curved blade is necessary for scraping off the stucco, while a hammer or a mallet can be used to gently tap and loosen the material. A vacuum cleaner or a wet/dry vacuum is also vital for containing the mess and minimizing the amount of dust that becomes airborne. Additionally, you'll need a ladder or scaffolding to access the ceiling safely, as well as a drop cloth or plastic sheets to protect the floors and furniture from damage. Other necessary materials include a solution of water and fabric softener to help soften the stucco, a scraper or a putty knife with a flat blade for removing the remaining material, and a broom or a dustpan for cleaning up the debris. By having all these tools and materials at your disposal, you'll be well-prepared to tackle the stucco ceiling removal process efficiently and effectively.
Protect the Area and Furniture
Protecting the area and furniture is a crucial step in the stucco ceiling removal process. Before starting the removal process, it's essential to cover the entire area, including the floor, walls, and any remaining furniture, with drop cloths or plastic sheets. This will prevent any debris, dust, or water from damaging the surrounding surfaces. Additionally, remove any furniture, light fixtures, or ceiling fans to prevent damage and ensure a safe working environment. If removal is not possible, cover them with plastic or drop cloths to protect them from dust and debris. It's also recommended to seal off any adjacent rooms or areas with plastic sheets to prevent dust and debris from spreading. By taking these precautions, you can ensure a safe and mess-free removal process, and avoid any costly repairs or replacements.
Removal Methods and Techniques
When it comes to removing old stucco, there are several methods and techniques that can be employed to achieve a smooth and even surface. Three of the most effective methods include water soaking, scraping and sanding, and using chemical solutions. Water soaking is a gentle and non-invasive method that involves soaking the stucco in water to loosen the bond between the stucco and the surface beneath. This method is ideal for removing stucco from delicate surfaces or for removing small areas of stucco. Scraping and sanding is a more aggressive method that involves using a scraper or sandpaper to remove the stucco. This method is best suited for larger areas of stucco and can be used to remove stucco from a variety of surfaces. Using chemical solutions is a method that involves applying a chemical solution to the stucco to break down the bond between the stucco and the surface beneath. This method is best suited for removing stucco from surfaces that are difficult to access or for removing large areas of stucco. By using one or a combination of these methods, homeowners and contractors can effectively remove old stucco and achieve a smooth and even surface. One of the most effective and easiest methods to start with is the water soaking method, which we will discuss in more detail next.
Water Soaking Method for Easy Removal
The water soaking method is a popular technique for easy removal of stucco ceilings. This method involves soaking the stucco with water to loosen the bond between the stucco and the ceiling surface, making it easier to remove. To start, cover the floor and furniture with drop cloths or plastic sheets to protect them from water damage and debris. Then, use a spray nozzle or a hose with a spray attachment to thoroughly saturate the stucco ceiling with water. It's essential to soak the stucco evenly, ensuring that all areas are moist but not dripping with water. Allow the water to penetrate the stucco for about 30 minutes to an hour, depending on the thickness of the stucco and the ambient temperature. After soaking, use a putty knife or a similar tool to gently scrape off the stucco, working in small sections. The water should have loosened the stucco enough to make it easy to remove, with minimal mess and effort. Repeat the soaking and scraping process as needed until the entire ceiling is cleared of stucco. The water soaking method is a cost-effective and efficient way to remove stucco ceilings, especially when compared to more labor-intensive methods like sanding or using chemicals. However, it's crucial to exercise caution when using this method, as excessive water can damage the underlying ceiling surface or cause mold growth. Therefore, it's essential to monitor the water absorption and adjust the soaking time accordingly to avoid any potential issues.
Scraping and Sanding for a Smooth Finish
Scraping and sanding are essential steps in achieving a smooth finish when removing a stucco ceiling. The scraping process involves using a specialized tool, typically a putty knife or a joint knife, to gently pry away the stucco from the ceiling surface. It's crucial to work in small sections, applying moderate pressure, and using a gentle prying motion to avoid gouging the underlying surface. As the stucco is scraped away, it's essential to vacuum or sweep the area regularly to prevent dust and debris from accumulating. Once the majority of the stucco has been removed, sanding becomes the next critical step. Using a sanding block or an orbital sander, start with a coarse-grit sandpaper (about 80-100 grit) to smooth out the surface, feathering the edges to blend with the surrounding area. Progress to finer grits (120-150) for a higher level of smoothness, and finally, use a high-grit sandpaper (220-240) for a polished finish. Throughout the sanding process, it's vital to work in small, circular motions, applying moderate pressure, and frequently inspecting the surface to avoid over-sanding. By combining scraping and sanding techniques, you'll be able to achieve a smooth, even finish, ready for painting or further finishing.
Using Chemical Solutions for Tough Stucco
When dealing with particularly stubborn stucco, chemical solutions can be a viable option for removal. One common method involves applying a specialized stucco removal solution to the affected area, allowing it to penetrate and break down the stucco's binding agents. This can make it easier to scrape away the stucco without causing damage to the underlying surface. Another approach is to use a mixture of baking soda and water to create a paste, which can be applied to the stucco and left to sit for a period of time before being rinsed off with water. This method can be effective for removing stucco from delicate surfaces, such as drywall or plaster. It's essential to note that chemical solutions should be used with caution, as they can damage certain surfaces or release hazardous fumes. Always follow the manufacturer's instructions and take necessary safety precautions, such as wearing protective gloves and eyewear, when working with chemical solutions. Additionally, it's crucial to test a small, inconspicuous area first to ensure the solution doesn't damage the underlying surface. By using chemical solutions in a controlled and safe manner, you can effectively remove tough stucco and achieve a smooth, even finish.
Post-Removal Procedures and Precautions
After removing a popcorn ceiling, it's essential to follow proper post-removal procedures and precautions to ensure a safe and successful renovation. This process involves several critical steps, including disposing of debris and cleaning the area, repairing and smoothing the ceiling surface, and applying a new finish or coating. By following these steps, homeowners can prevent potential hazards, such as asbestos exposure, and achieve a smooth, even finish. In this article, we will explore each of these steps in detail, starting with the crucial task of disposing of debris and cleaning the area, which is the first and most critical step in the post-removal process.
Disposing of Debris and Cleaning the Area
After removing the stucco ceiling, it's essential to dispose of the debris and clean the area thoroughly to ensure a safe and healthy environment. Start by collecting all the debris, including the stucco material, dust, and any other waste, into large containers or bags. Make sure to wear protective gear, such as gloves, safety glasses, and a dust mask, to prevent injury and exposure to hazardous materials. Next, carefully sweep and vacuum the area to remove any remaining dust and debris, paying particular attention to corners, edges, and crevices. Use a damp cloth to wipe down surfaces, including walls, floors, and any remaining ceiling structures, to remove any stubborn dust and debris. If necessary, use a mild detergent and water solution to clean any stubborn stains or residue. Finally, dispose of the collected debris and cleaning materials responsibly, following local regulations and guidelines for hazardous waste disposal. By taking the time to properly dispose of debris and clean the area, you can ensure a safe and healthy environment for future renovation work.
Repairing and Smoothing the Ceiling Surface
Repairing and smoothing the ceiling surface is a crucial step after removing a stucco ceiling. The process involves several steps to ensure a seamless and even finish. First, inspect the ceiling for any remaining stucco or debris and remove it using a putty knife or a vacuum cleaner. Next, fill any holes or gaps with joint compound, also known as spackling compound, and allow it to dry completely. Once dry, sand the area using a fine-grit sandpaper to create a smooth surface. If necessary, apply additional coats of joint compound and sand again until the surface is even and smooth. To achieve a perfectly smooth finish, use a sanding block or a sanding sponge to sand the entire ceiling surface, feathering the edges to blend with the surrounding area. Finally, apply a coat of primer and paint to match the surrounding ceiling, and your ceiling will be restored to its original state. It's essential to work patiently and meticulously to achieve a smooth and even finish, as any imperfections will be visible after painting. By following these steps, you can successfully repair and smooth your ceiling surface, creating a beautiful and seamless finish.
Applying a New Finish or Coating
Here is the paragraphy: Applying a new finish or coating to your ceiling after removing the stucco is a crucial step to achieve a smooth and even surface. Before applying any finish, ensure the ceiling is clean, dry, and free of dust and debris. If necessary, apply a primer to create a strong bond between the old surface and the new finish. You can choose from a variety of finishes, such as paint, joint compound, or a textured ceiling spray. When applying paint, use a roller to cover large areas and a brush to cut in around edges and corners. For a joint compound finish, apply it with a putty knife, spreading it evenly and smoothly. If you prefer a textured ceiling, use a spray can or a hopper gun to apply the texture, holding the nozzle or gun at a 45-degree angle to achieve the desired pattern. Regardless of the finish you choose, apply it in thin, even coats, allowing each coat to dry completely before applying the next one. This will prevent drips and unevenness, ensuring a professional-looking finish. Additionally, consider applying a coat of clear sealant to protect the finish and make future cleaning easier. By following these steps, you can achieve a beautiful, long-lasting finish that enhances the appearance of your ceiling.