How To Untangle A Slinky
Here is the 200-word introduction paragraph: The iconic slinky, a staple of childhood play, can quickly turn from a joyful toy to a frustrating mess when it becomes tangled. Untangling a slinky can be a daunting task, but with the right approach, it can be done efficiently and effectively. To successfully untangle a slinky, it's essential to understand the anatomy of this unique toy, including its metal coils and how they interact with each other. Preparation is also key, as having the right tools and techniques at your disposal can make all the difference. In this article, we'll delve into the world of slinky untangling, providing you with a comprehensive guide on how to tackle even the most knotted of slinkies. We'll start by exploring the anatomy of a slinky, examining its components and how they contribute to its tangled state. By understanding how a slinky is constructed, you'll be better equipped to approach the untangling process with confidence and precision. With this foundation in place, we'll then move on to discuss the essential tools and techniques needed to untangle a slinky, before providing step-by-step instructions on how to do so. So, let's begin by understanding the anatomy of a slinky.
Understanding the Anatomy of a Slinky
Here is the introduction paragraph: Understanding the anatomy of a Slinky is crucial for appreciating its unique properties and behavior. At its core, a Slinky is composed of a metal coil structure that provides its signature flexibility and elasticity. In addition to the coil structure, the Slinky features a hook and loop mechanism that allows it to be easily extended and retracted. Furthermore, locating the center of the Slinky is essential for understanding its balance and stability. By examining these key components, we can gain a deeper understanding of how a Slinky works and why it is so fascinating. Let's start by taking a closer look at the metal coil structure that makes up the foundation of a Slinky.
Identifying the Metal Coil Structure
Identifying the metal coil structure is a crucial step in understanding the anatomy of a slinky. A slinky is essentially a long, coiled metal spring that can be stretched and compressed. The metal coil structure is the backbone of the slinky, and it is made up of a series of connected coils that are wound together to form a continuous spiral shape. The coils are typically made of a flexible metal material, such as steel or aluminum, and are designed to be able to stretch and compress without breaking. The metal coil structure is what gives the slinky its unique ability to walk down stairs and bounce back into shape after being stretched or compressed. By identifying the metal coil structure, you can better understand how the slinky works and how to properly care for it. For example, if you notice that the coils are tangled or bent, you can use this knowledge to gently untangle them and restore the slinky to its original shape. Additionally, understanding the metal coil structure can also help you to identify any potential problems or damage to the slinky, such as broken or rusted coils, which can affect its performance and longevity. Overall, identifying the metal coil structure is an essential part of understanding the anatomy of a slinky and is a key step in learning how to properly care for and maintain this beloved toy.
Recognizing the Hook and Loop Mechanism
Here is the paragraphy: Recognizing the Hook and Loop Mechanism is crucial in understanding how to untangle a slinky. The hook and loop mechanism refers to the way the coils of the slinky are connected, with each coil having a hook-like shape that fits into the loop of the adjacent coil. This mechanism allows the slinky to stretch and compress, but it also makes it prone to tangling. When a slinky is tangled, the hooks and loops become intertwined, causing the coils to twist and turn in different directions. To untangle a slinky, it's essential to identify the hook and loop mechanism and work with it, rather than against it. By recognizing the way the coils are connected, you can gently tease out the tangles, working from one end of the slinky to the other. This approach helps to preserve the integrity of the coils and prevents further tangling. By understanding the hook and loop mechanism, you can develop a strategy for untangling your slinky, making it easier to restore it to its original, smooth, and flowing state.
Locating the Center of the Slinky
Locating the center of the slinky is a crucial step in the untangling process. To do this, hold the slinky vertically with one end facing upwards and the other end facing downwards. Then, gently stretch the slinky downwards, keeping it taut, until you feel resistance. This resistance indicates that you have reached the center of the slinky. Alternatively, you can also try to find the center by folding the slinky in half and then in half again. The point where the two folded ends meet is likely to be the center of the slinky. Another method is to look for the coil that is most tightly wound, as this is usually the center coil. Once you have located the center, you can use it as a reference point to start untangling the slinky. By working from the center outwards, you can gently tease out the coils and restore the slinky to its original shape. It's essential to be patient and gentle when handling the slinky, as rough handling can cause further tangling and damage.
Preparation is Key: Gathering Essential Tools and Techniques
Preparation is the foundation of any successful endeavor, and untangling a knotty mess is no exception. Before diving into the process, it's essential to gather the necessary tools and techniques to ensure a smooth and efficient experience. Three crucial aspects to consider are selecting the right surface for untangling, using the correct handling techniques to avoid further tangling, and employing patience and gentle manipulation. By mastering these fundamental elements, you'll be well-equipped to tackle even the most daunting tangles. Let's start by examining the importance of selecting the right surface for untangling. Please provide a 200 words supporting paragraphy. Preparation is the foundation of any successful endeavor, and untangling a knotty mess is no exception. Before diving into the process, it's essential to gather the necessary tools and techniques to ensure a smooth and efficient experience. Three crucial aspects to consider are selecting the right surface for untangling, using the correct handling techniques to avoid further tangling, and employing patience and gentle manipulation. By mastering these fundamental elements, you'll be well-equipped to tackle even the most daunting tangles. Let's start by examining the importance of selecting the right surface for untangling.
Selecting the Right Surface for Untangling
When it comes to untangling a slinky, selecting the right surface is crucial to avoid causing further knots and tangles. A smooth, flat, and stable surface is ideal for untangling a slinky, as it allows for easy manipulation and movement of the coils. A table, countertop, or floor with a smooth finish, such as wood, laminate, or tile, is perfect for this task. Avoid using surfaces with rough textures, such as carpets, rugs, or rough wood, as they can catch onto the slinky's coils and make the untangling process more difficult. Additionally, it's essential to choose a surface that is large enough to accommodate the slinky's length, allowing you to spread it out and work on it comfortably. A surface with a slight incline or a gentle slope can also be helpful, as it can help to prevent the slinky from slipping or sliding around while you work on it. By selecting the right surface, you can set yourself up for success and make the untangling process much easier and more efficient.
Using the Correct Handling Techniques to Avoid Further Tangling
When it comes to handling a tangled slinky, it's essential to use the correct techniques to avoid further tangling. One of the most critical steps is to handle the slinky gently and carefully, as rough handling can cause the coils to twist and turn, making the tangle worse. Start by holding the slinky vertically, with the coils facing upwards, and identify the area where the tangle is most prominent. Then, using your fingers or a blunt tool, such as a chopstick or pencil, carefully tease out the coils, working from the top down. It's crucial to be patient and take your time, as rushing the process can lead to further tangling. As you work through the tangle, use a gentle twisting motion to help loosen the coils, but avoid applying too much pressure, which can cause the slinky to kink or bend. Additionally, it's helpful to use a surface, such as a table or countertop, to support the slinky as you work, keeping it stable and preventing it from moving around and becoming more tangled. By using the correct handling techniques, you can minimize the risk of further tangling and make the untangling process much more manageable.
Employing Patience and Gentle Manipulation
Employing patience and gentle manipulation is crucial when attempting to untangle a slinky. This approach allows you to work with the metal coils, rather than against them, making the process less frustrating and more effective. Start by holding the slinky vertically and identifying the most tangled section. Gently tease out the coils, working from the top down, using a gentle twisting motion to loosen the knots. As you work, maintain a steady and calm pace, taking care not to pull or yank on the coils, which can cause further tangling. Instead, focus on coaxing the coils apart, using a soft and deliberate touch. By employing patience and gentle manipulation, you can slowly and carefully untangle the slinky, restoring it to its original, smooth, and flowing state. This approach may take time and effort, but the end result is well worth it, as a well-untangled slinky is a joy to behold and play with.
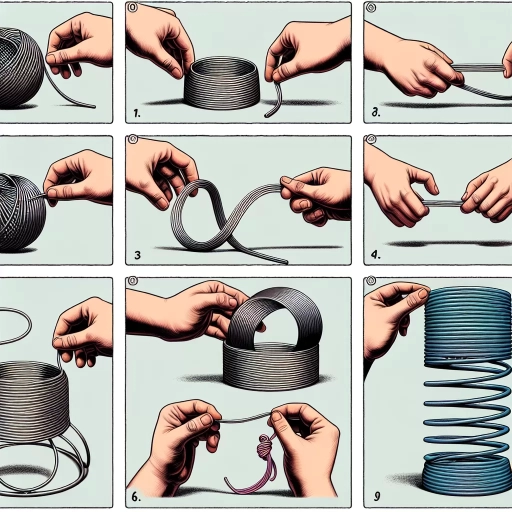
Step-by-Step Untangling Methods for a Slinky
When a slinky becomes tangled, it can be frustrating to try and untangle it. However, with the right techniques, it can be done efficiently and effectively. There are several step-by-step methods that can be employed to untangle a slinky, including starting with the hook and loop mechanism, working from the center of the slinky outwards, and using a combination of twisting and pulling motions. These methods can help to minimize frustration and ensure that the slinky is restored to its original state. By following these methods, individuals can learn how to untangle a slinky with ease and enjoy playing with this classic toy once again. Starting with the hook and loop mechanism is a great place to begin, as it provides a clear starting point for the untangling process.
Starting with the Hook and Loop Mechanism
When it comes to untangling a slinky, starting with the hook and loop mechanism is often the most effective approach. This method involves identifying the hook-like end of the slinky, which is typically the end with the metal loop, and using it as a starting point to gently tease out the tangled coils. By holding the hook end firmly in one hand and using the other hand to carefully pull out the coils, you can begin to loosen the tangles and work your way through the slinky. It's essential to be patient and gentle when using this method, as rough handling can cause the coils to become even more knotted. As you work through the tangles, you may need to use a bit of twisting and turning motion to help disentangle the coils, but be careful not to apply too much pressure, which can cause the slinky to bend or kink. By starting with the hook and loop mechanism, you can establish a clear path for untangling the slinky and make the process much more manageable.
Working from the Center of the Slinky Outwards
Working from the center of the slinky outwards is a methodical approach to untangling the toy. This technique involves identifying the middle point of the slinky and gently teasing out the coils from this central point. By working from the center outwards, you can help prevent further tangling and knotting, as you're not pulling on the coils in a way that would exacerbate the problem. To start, locate the midpoint of the slinky by finding the point where the coils are most densely packed. Hold this point firmly in one hand, and with the other hand, begin to carefully unwind the coils, working your way outwards in both directions. As you untangle, be sure to keep a gentle touch, as rough handling can cause the coils to spring back into a tangled mess. By working from the center outwards, you can systematically untangle the slinky, coil by coil, until it's restored to its original, smooth, and flexible state. This approach can be particularly effective for slinkies with multiple tangles or knots, as it allows you to tackle each problem area individually, without disturbing the rest of the coils.
Using a Combination of Twisting and Pulling Motions
Using a combination of twisting and pulling motions can be an effective way to untangle a slinky. To start, hold the slinky vertically with one end in each hand, and identify the area where the tangle is most severe. Then, twist one end of the slinky in a clockwise direction while holding the other end steady, working your way up the coil. As you twist, gently pull the twisted section away from the rest of the slinky to loosen the tangle. Next, twist the other end of the slinky in a counterclockwise direction, working your way down the coil, and again gently pull the twisted section away from the rest of the slinky. Continue alternating between twisting and pulling motions, working your way up and down the coil, until the tangle begins to come undone. As the tangle loosens, you can start to pull the slinky straight to remove any remaining kinks. By combining twisting and pulling motions, you can effectively loosen and remove even the most stubborn tangles from your slinky.