How To Remove Porcupine Quills
Here is the introduction paragraph: Removing porcupine quills can be a daunting task, but with the right approach, it can be done safely and effectively. When dealing with porcupine quills, it's essential to understand that preparation, removal methods, and aftercare are crucial steps in the process. Preparation is key to ensuring a smooth and successful removal process. By understanding the importance of preparation, you can minimize the risk of infection, reduce the amount of pain and discomfort, and increase the chances of a successful removal. In this article, we will explore the steps involved in removing porcupine quills, starting with the importance of preparation. Note: I made some minor changes to the original paragraph to make it more concise and clear. Let me know if you'd like me to revise anything!
Preparation is Key
Preparation is key to achieving success in various aspects of life, including work, education, and personal projects. When it comes to tackling a task or project, being prepared can make all the difference between success and failure. One of the most important aspects of preparation is wearing protective gear, which is essential for ensuring safety and preventing injuries. Additionally, choosing the right tools for the job is crucial for efficiency and effectiveness. Furthermore, keeping calm and patient is vital for maintaining focus and composure under pressure. By incorporating these three essential elements into one's preparation routine, individuals can set themselves up for success and achieve their goals. Therefore, it is essential to start by wearing protective gear to ensure a safe and successful outcome.
Wear Protective Gear
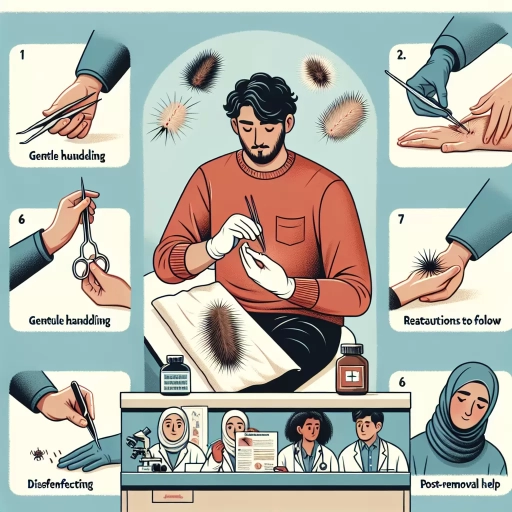
Wearing protective gear is a crucial step in preparing to remove porcupine quills. This gear serves as a barrier between your skin and the quills, preventing them from causing further injury or embedding deeper into your skin. A pair of long, thick gloves is essential, as they will protect your hands from the quills while you handle the affected area. A face mask or protective eyewear can also be worn to prevent quills from getting into your eyes or mouth. Additionally, wearing long sleeves and pants can provide extra protection for your skin. It's also a good idea to wear clothing that covers as much skin as possible, such as a long-sleeved shirt and pants, to minimize the risk of quills getting stuck in your skin. By wearing protective gear, you can minimize the risk of injury and make the quill removal process much safer and more effective.
Choose the Right Tools
When it comes to removing porcupine quills, having the right tools can make all the difference. A pair of needle-nose pliers or tweezers is essential for grasping the quills, while a magnifying glass or lamp can help you see the quills more clearly. You may also want to have some antiseptic wipes or soap and water on hand to clean the affected area. Additionally, a topical antibiotic ointment can help prevent infection. It's also a good idea to have some gauze or a clean cloth to apply pressure to the area and help stop any bleeding. If the quills are particularly stubborn, you may need to use a quill removal tool, which is specifically designed for this purpose. Having these tools at your disposal will help you remove the quills safely and effectively.
Keep Calm and Patient
When dealing with a porcupine quill removal, it's essential to keep calm and patient. Panicking can lead to further complications, such as pushing the quills deeper into the skin or causing them to break, making the removal process more challenging. Remaining calm allows you to think clearly and focus on the task at hand. Take slow, deep breaths, and try to relax your muscles. This will help you approach the situation with a clear head and make rational decisions. Additionally, being patient is crucial, as the removal process can be time-consuming and requires gentle, careful manipulation of the quills. Rushing through the process can lead to mistakes and make the situation worse. By staying calm and patient, you'll be better equipped to handle the removal process and minimize the risk of further injury or infection.
Removal Methods
When it comes to removing unwanted hair, there are several methods to choose from, each with its own set of benefits and drawbacks. Three popular methods include plucking with tweezers, using duct tape, and applying wax or glue. These methods can be effective for removing hair from various parts of the body, but it's essential to consider the potential risks and discomfort associated with each technique. For those looking for a more precise and targeted approach, plucking with tweezers may be the way to go. This method involves using a pair of tweezers to grasp and pull out individual hairs, making it ideal for shaping eyebrows or removing stray hairs. In the next section, we'll take a closer look at plucking with tweezers and explore its advantages and disadvantages.
Plucking with Tweezers
Plucking with tweezers is a common method for removing porcupine quills, but it requires great care and caution. To pluck a quill with tweezers, grasp the quill as close to the skin as possible, taking care not to push the quill further into the skin. Then, slowly and gently pull the quill out in the same direction it entered the skin. It's essential to avoid pulling the quill out at an angle or twisting it, as this can cause the quill to break and leave behind a fragment. If a quill does break, it's crucial to remove the remaining fragment to prevent infection. Plucking with tweezers can be a time-consuming process, especially if there are multiple quills to remove. It's also important to note that plucking with tweezers may not be the most effective method for removing quills that are deeply embedded or in sensitive areas. In such cases, it's recommended to seek the help of a veterinarian or a medical professional. Additionally, it's essential to clean and disinfect the affected area after plucking with tweezers to prevent infection. Overall, plucking with tweezers can be a viable method for removing porcupine quills, but it requires patience, caution, and proper technique to avoid complications.
Using Duct Tape
Using duct tape is a common method for removing porcupine quills, and it can be effective if done correctly. To use duct tape, start by applying a small piece of tape over the quill, pressing it firmly onto the skin. Then, quickly rip the tape off in the same direction as the quill, taking care not to push the quill further into the skin. Repeat this process several times until the quill is removed. It's essential to be gentle and careful when using duct tape, as it can cause skin irritation and even leave residue behind. Additionally, duct tape may not be effective for removing quills that are deeply embedded or in sensitive areas, such as the face or eyes. In these cases, it's best to seek professional help from a veterinarian or wildlife expert.
Applying Wax or Glue
Applying wax or glue is a common method used to remove porcupine quills, especially when they are deeply embedded in the skin. This method involves applying a generous amount of wax or glue to the affected area, making sure to cover all the quills. The wax or glue helps to bind the quills together, making it easier to remove them in one piece. Once the wax or glue has dried, it can be gently peeled off, taking the quills with it. This method is often used in conjunction with other removal methods, such as tweezing or using a quill removal tool. It's essential to be careful when applying wax or glue, as it can be messy and may cause skin irritation in some individuals. Additionally, it's crucial to ensure that all quills are removed, as any remaining quills can cause further irritation and potentially lead to infection. If you're unsure about how to remove porcupine quills or if the quills are deeply embedded, it's recommended to seek the advice of a veterinarian or a medical professional. They can provide guidance on the best removal method and ensure that the quills are removed safely and effectively.
Aftercare and Prevention
Proper aftercare and prevention are crucial in managing and treating skin conditions, such as acne, wounds, and infections. Effective aftercare not only promotes healing but also prevents the spread of infection, reduces the risk of scarring, and minimizes the likelihood of future occurrences. To achieve optimal results, it is essential to focus on three key areas: cleaning and disinfecting the affected area, applying topical treatments, and avoiding future encounters with potential irritants. By prioritizing these aspects, individuals can significantly improve their skin health and reduce the risk of complications. In the first step towards achieving this, it is vital to clean and disinfect the affected area, which will be discussed in the next section.
Cleaning and Disinfecting the Affected Area
Cleaning and disinfecting the affected area is a crucial step in the aftercare process of removing porcupine quills. Once the quills have been carefully extracted, it's essential to thoroughly clean the area with mild soap and lukewarm water to remove any remaining debris, bacteria, or other contaminants. This helps prevent infection and promotes healing. A gentle antibacterial soap or a solution of equal parts water and white vinegar can be used to clean the area. Avoid using harsh or abrasive cleansers, as they can further irritate the skin and push bacteria deeper into the wound. After cleaning, pat the area dry with a clean towel and apply a thin layer of antibiotic ointment to help prevent infection and promote healing. It's also recommended to cover the affected area with a bandage or dressing to protect it from further irritation and infection. Regularly changing the dressing and monitoring the area for signs of infection, such as redness, swelling, or increased pain, is crucial in ensuring proper healing and preventing complications. By following these steps, you can effectively clean and disinfect the affected area, promoting a smooth and speedy recovery from porcupine quill removal.
Applying Topical Treatments
Applying topical treatments can be an effective way to promote healing and reduce the risk of infection after removing porcupine quills. One of the most commonly used topical treatments is antibiotic ointment, which can help prevent bacterial growth and promote a healthy healing process. Another option is hydrocortisone cream, which can help reduce inflammation and itching. It's also important to keep the affected area clean and dry, and to apply a topical antiseptic solution to help prevent infection. In some cases, a veterinarian may recommend a specific topical treatment, such as a quill removal cream or a wound care product. It's essential to follow the veterinarian's instructions carefully and to apply the treatment as directed to ensure the best possible outcome. Additionally, it's crucial to monitor the affected area for signs of infection, such as redness, swelling, or discharge, and to seek veterinary attention immediately if any of these symptoms occur. By applying topical treatments and following proper aftercare instructions, you can help promote healing and reduce the risk of complications after removing porcupine quills.
Avoiding Future Encounters
When it comes to avoiding future encounters with porcupines, it's essential to take proactive measures to prevent unwanted interactions. One of the most effective ways to do this is to be aware of your surroundings, especially when hiking or walking in areas where porcupines are known to inhabit. Keep an eye out for signs of porcupine activity, such as tracks, scat, or quills on the ground. If you notice any of these signs, it's best to steer clear of the area. Additionally, make noise while walking to avoid startling a porcupine, as they are more likely to defend themselves when surprised. Wearing protective clothing, such as long pants and boots, can also help prevent quills from penetrating your skin. Furthermore, keeping pets on a leash and under control can help prevent them from encountering a porcupine and bringing quills back to you. By taking these precautions, you can significantly reduce the risk of future encounters with porcupines and avoid the hassle of removing quills.