How To Port Forward Minecraft Server
Port forwarding is a crucial step in hosting a Minecraft server, allowing players to connect to your server from outside your local network. To successfully port forward your Minecraft server, you need to understand the basics of port forwarding, prepare your network and router, and follow a step-by-step guide to set it up. In this article, we will delve into the world of port forwarding and Minecraft servers, exploring the concepts and techniques necessary to get your server up and running. We will start by understanding the fundamentals of port forwarding and how it applies to Minecraft servers, including the role of IP addresses, ports, and routers. By grasping these concepts, you will be well-equipped to prepare your network and router for port forwarding, and ultimately, successfully port forward your Minecraft server. Let's begin by understanding port forwarding and Minecraft servers.
Understanding Port Forwarding and Minecraft Servers
Port forwarding is a networking technique that allows remote computers to access a specific computer or server on a private network. For Minecraft players, port forwarding is essential to host a server that can be accessed by friends or other players online. However, the concept of port forwarding can be confusing, especially for those who are new to networking and server management. To understand port forwarding and its application in Minecraft servers, it's crucial to grasp the basics of port forwarding, its necessity for Minecraft servers, and key concepts to consider before setting it up. In this article, we'll delve into what port forwarding is and how it works, why it's necessary for Minecraft servers, and key concepts to understand before port forwarding. By the end of this article, you'll have a comprehensive understanding of port forwarding and how to apply it to your Minecraft server. So, let's start by exploring what port forwarding is and how it works.
What is Port Forwarding and How Does it Work?
Port forwarding is a networking technique that allows a computer or device on a private network to be accessed from the internet by forwarding incoming internet traffic to a specific device on the network. In the context of Minecraft servers, port forwarding is necessary to allow players to connect to the server from outside the local network. Here's how it works: when a player tries to connect to a Minecraft server, their computer sends a request to the server's public IP address. However, the request is blocked by the router's firewall, which is designed to prevent unauthorized access to the network. To overcome this, the router is configured to forward incoming traffic on a specific port (in this case, port 25565, which is the default port for Minecraft servers) to the IP address of the computer hosting the Minecraft server. This allows the player's request to reach the server, and the server can then respond to the player's computer, establishing a connection. By forwarding incoming traffic on a specific port, the router effectively "opens up" the network to allow incoming connections to the Minecraft server, while still maintaining the security of the network.
Why is Port Forwarding Necessary for Minecraft Servers?
Port forwarding is necessary for Minecraft servers because it allows players to connect to the server from outside the local network. By default, Minecraft servers are only accessible within the local network, and port forwarding enables the server to be accessed from the internet. This is crucial for online multiplayer gaming, as it allows players to join the server from anywhere in the world. Without port forwarding, players would only be able to join the server if they are connected to the same local network, which defeats the purpose of online gaming. Port forwarding also helps to improve the overall gaming experience by reducing lag and latency, as it allows data to be transmitted directly between the server and the client without being blocked by the router's firewall. Additionally, port forwarding is necessary for Minecraft servers to be listed on online server lists, making it easier for players to find and join the server. Overall, port forwarding is a critical step in setting up a Minecraft server, and it is necessary for creating a seamless and enjoyable online gaming experience.
Key Concepts to Understand Before Port Forwarding
Before diving into the world of port forwarding for your Minecraft server, it's essential to grasp some key concepts to ensure a smooth and successful setup. First and foremost, you need to understand what a port is. In the context of computer networking, a port is a specific endpoint for communication between devices. Think of it as a designated doorway for data to flow in and out of your network. Ports are identified by a unique number, ranging from 0 to 65535, with some ports being reserved for specific services, such as HTTP (port 80) and FTP (port 21). When it comes to Minecraft, the default port is 25565, but you can choose a different one if needed. Another crucial concept is the difference between TCP (Transmission Control Protocol) and UDP (User Datagram Protocol). TCP is a connection-oriented protocol, ensuring that data is delivered in the correct order, whereas UDP is connectionless, prioritizing speed over reliability. Minecraft uses TCP for most of its communication, but some features, like voice chat, may use UDP. Additionally, you should be familiar with your router's configuration, including its IP address, subnet mask, and gateway. You'll also need to know the IP address of the device hosting your Minecraft server, as well as the IP address of the devices that will be connecting to the server. Lastly, it's vital to understand the concept of NAT (Network Address Translation), which allows multiple devices on a private network to share a single public IP address. This is particularly important when setting up port forwarding, as you'll need to configure your router to forward incoming traffic to the correct device on your network. By grasping these fundamental concepts, you'll be well-prepared to tackle the process of port forwarding and get your Minecraft server up and running smoothly.
Preparing Your Network and Router for Port Forwarding
Port forwarding is a crucial step in setting up a Minecraft server, allowing players to connect to your server from outside your local network. To prepare your network and router for port forwarding, you'll need to take a few key steps. First, it's essential to identify your router's make and model, as this information will be necessary for configuring port forwarding settings. Additionally, you'll need to configure your router for port forwarding, which involves setting up rules to direct incoming traffic to your Minecraft server. Finally, setting up a static IP address for your Minecraft server will ensure that it remains accessible even after a reboot. By following these steps, you'll be able to successfully prepare your network and router for port forwarding and enjoy a seamless gaming experience. To get started, let's begin by identifying your router's make and model.
Identifying Your Router's Make and Model for Port Forwarding
To identify your router's make and model for port forwarding, you'll need to access your router's web interface. Start by connecting to your router's network using a computer or mobile device. Open a web browser and type the router's IP address in the address bar. The most common IP addresses are 192.168.0.1, 192.168.1.1, or 10.0.0.1. If you're unsure, check your router's documentation or the manufacturer's website for specific instructions. Once you've accessed the web interface, look for the "Status" or "About" page, which usually displays the router's make and model number. Alternatively, you can check the physical router itself, as the make and model are often printed on the device or on a sticker. Common router manufacturers include Netgear, Linksys, TP-Link, and Asus. Knowing your router's make and model is crucial for port forwarding, as different models have varying settings and configurations. With this information, you can consult your router's user manual or online resources to find specific instructions on how to set up port forwarding for your Minecraft server.
Configuring Your Router for Port Forwarding: A General Overview
Configuring your router for port forwarding is a crucial step in setting up a Minecraft server. To start, you'll need to access your router's web interface, usually by typing its IP address in a web browser. The most common IP addresses are 192.168.0.1 or 192.168.1.1, but this may vary depending on your router model. Once you've logged in, look for the port forwarding or virtual servers section, which is often found under the advanced settings or security tab. Here, you'll need to create a new rule or entry, specifying the protocol (TCP or UDP), the external port number, and the internal IP address of your Minecraft server. You'll also need to specify the internal port number, which is usually 25565 for Minecraft. Be sure to save your changes and reboot your router to apply the new settings. It's also a good idea to set a static IP address for your Minecraft server to ensure that the port forwarding rule always points to the correct device. Additionally, you may need to configure your router's firewall settings to allow incoming traffic on the specified port. By following these steps, you'll be able to successfully configure your router for port forwarding and allow others to join your Minecraft server.
Setting Up a Static IP Address for Your Minecraft Server
To set up a static IP address for your Minecraft server, you'll need to assign a fixed IP address to the device that's hosting the server. This is typically done through your router's settings. Start by accessing your router's web interface, usually by typing its IP address in a web browser. The most common IP addresses for routers are 192.168.0.1 or 192.168.1.1. Once you're logged in, look for the "LAN Settings" or "Local Network" section, where you can find the list of connected devices. Identify the device hosting your Minecraft server and note its current IP address. Then, navigate to the "DHCP Settings" or "IP Address Reservation" section, where you can assign a static IP address to the device. Choose an IP address that's outside the range of addresses assigned by your router's DHCP server, but still within the same subnet. For example, if your router's IP address is 192.168.1.1, you could assign a static IP address like 192.168.1.100 to your Minecraft server. Save your changes and restart your router to apply the new settings. With a static IP address set up, you can now proceed with port forwarding to allow incoming connections to your Minecraft server.
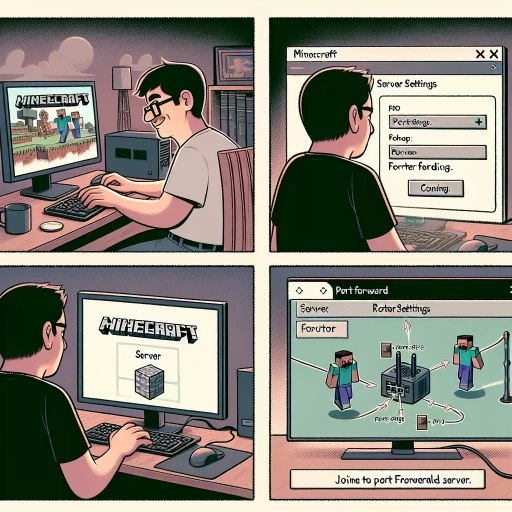
Port Forwarding Your Minecraft Server: A Step-by-Step Guide
Port forwarding is a crucial step in setting up a Minecraft server, allowing players to connect to your server from outside your local network. To successfully port forward your Minecraft server, you'll need to follow a series of steps. First, you'll need to access your router's web interface, which will give you the necessary tools to configure your port forwarding settings. Once you've accessed your router's web interface, you can create a new port forwarding rule specifically for your Minecraft server. This rule will direct incoming traffic on a specific port to your server, allowing players to connect. Finally, you'll need to test your port forwarding setup to ensure that it's working correctly. By following these steps, you can ensure that your Minecraft server is accessible to players from around the world. In this article, we'll take a closer look at each of these steps, starting with accessing your router's web interface for port forwarding.
Accessing Your Router's Web Interface for Port Forwarding
To access your router's web interface for port forwarding, you'll need to follow a few simple steps. First, ensure your computer is connected to the same network as your router. Open a web browser, such as Google Chrome, Mozilla Firefox, or Microsoft Edge, and type the router's IP address in the address bar. The most common IP addresses are 192.168.0.1, 192.168.1.1, or 10.0.0.1, but this may vary depending on your router model. If you're unsure, check your router's documentation or the manufacturer's website for the correct IP address. Once you've entered the IP address, press Enter to load the page. You'll be prompted to log in with your router's admin username and password, which can usually be found on the underside of the router or in the documentation. If you've changed the password, use the new one. After logging in, navigate to the Advanced Setup or Port Forwarding section, which may be located under the Advanced Wireless Settings or Gaming section, depending on your router model. Here, you'll be able to configure port forwarding rules for your Minecraft server. Be sure to save your changes before exiting the web interface to ensure the new settings take effect.
Creating a New Port Forwarding Rule for Your Minecraft Server
To create a new port forwarding rule for your Minecraft server, start by accessing your router's configuration page. This is usually done by typing the router's IP address in a web browser, which can be found in the router's documentation or by searching online for the specific model. Once logged in, navigate to the port forwarding or virtual servers section, which may be located under advanced settings or security features. Here, you will need to create a new rule by specifying the protocol (TCP or UDP), the external port number (usually 25565 for Minecraft), and the internal IP address of your server. You may also need to specify the internal port number, which should match the external port number. Give the rule a name, such as "Minecraft Server," and save the changes. Some routers may require you to reboot or apply the changes for the new rule to take effect. After creating the rule, test your Minecraft server by trying to connect to it from outside your local network using the external IP address and port number. If you encounter any issues, double-check your router's configuration and ensure that the port forwarding rule is correctly set up.
Testing Your Port Forwarding Setup for Minecraft
To ensure that your Minecraft server is accessible to others, it's crucial to test your port forwarding setup. This step is often overlooked, but it's essential to verify that your server is reachable from outside your local network. To test your port forwarding setup, you'll need to use a tool that can connect to your server from an external IP address. One popular option is to use a friend's computer or a mobile device connected to a different network. Have your friend try to connect to your server using the external IP address and the port number you specified in your port forwarding rules. If they're able to join your server successfully, it's a good indication that your port forwarding setup is working correctly. Alternatively, you can use online tools such as Port Checker or CanYouSeeMe to test your port forwarding setup. These tools will attempt to connect to your server from an external IP address and report back whether the connection was successful or not. If the test fails, it may indicate a problem with your port forwarding rules, your router's configuration, or your internet service provider's (ISP) restrictions. In this case, you'll need to revisit your port forwarding setup and make any necessary adjustments to ensure that your Minecraft server is accessible to others. By testing your port forwarding setup, you can ensure that your Minecraft server is reachable and that you can enjoy playing with friends from around the world.