How To Record Video On Iphone
Here is the introduction paragraph: Recording high-quality video on your iPhone is easier than ever, thanks to its advanced camera capabilities and intuitive interface. Whether you're a social media influencer, a vlogger, or simply a parent looking to capture precious moments, knowing how to record video on your iPhone can help you create stunning content. To ensure you get the best results, it's essential to prepare before you start recording. In this article, we'll take you through a step-by-step guide on how to record video on your iPhone, starting with a pre-recording checklist to ensure you're ready to capture your best footage. We'll also cover the basics of recording video on your iPhone and provide tips on how to enhance your video recording experience. By the end of this article, you'll be equipped with the knowledge and skills to create professional-looking videos using your iPhone. So, let's get started with the first step: Pre-Recording Checklist.
Pre-Recording Checklist
Before you start recording a video on your iPhone, it's essential to go through a pre-recording checklist to ensure that your device is ready to capture high-quality footage. This checklist includes several crucial steps that can make a significant difference in the final output of your video. First, you need to choose the right iPhone model that is capable of recording high-quality videos. Not all iPhone models are created equal, and some may not have the necessary features or hardware to produce the desired results. Additionally, you need to ensure that you have sufficient storage space on your iPhone to store your recorded videos. Running out of storage space in the middle of a recording can be frustrating and may result in lost footage. Finally, it's also important to update your iPhone to the latest iOS version to ensure that you have the latest features and bug fixes. By following these steps, you can ensure that your iPhone is ready to record high-quality videos. So, let's start by choosing the right iPhone model for your video recording needs.
Choose the Right iPhone Model
When it comes to recording video on an iPhone, choosing the right model is crucial to ensure you get the best possible quality. If you're planning to record high-quality videos, consider the latest iPhone models such as the iPhone 13 Pro or iPhone 14 Pro, which offer advanced camera features like a telephoto lens, wide-angle lens, and ultra-wide lens. These models also support 4K video recording at 60fps, slow-motion video recording, and extended dynamic range. If you're on a budget, the iPhone 12 or iPhone 13 are also great options, offering 4K video recording at 30fps and a dual-camera setup. However, if you're looking for a more affordable option, the iPhone 11 or iPhone SE may not be the best choice, as they only offer 4K video recording at 30fps and a single-camera setup. Ultimately, the right iPhone model for you will depend on your specific needs and budget.
Ensure Sufficient Storage Space
When it comes to recording video on your iPhone, having sufficient storage space is crucial to avoid any interruptions or losses during the recording process. Ensure that your iPhone has enough free storage space to accommodate the video file. A general rule of thumb is to have at least 1GB of free space for every 10 minutes of video recording. You can check your available storage space by going to Settings > [your name] > Storage & iCloud Usage. If you're running low on storage, consider deleting unused apps, photos, or videos to free up space. Additionally, you can also expand your storage capacity by using iCloud or an external storage device. It's also a good idea to regularly clean up your iPhone's storage by deleting unnecessary files and data to prevent storage space from becoming an issue in the future. By ensuring sufficient storage space, you can record high-quality videos without any interruptions or losses, and have a smooth and enjoyable recording experience.
Update to the Latest iOS Version
To ensure a seamless video recording experience on your iPhone, it's essential to update to the latest iOS version. Apple regularly releases new updates that bring bug fixes, performance enhancements, and exciting features to your device. By updating to the latest iOS version, you'll be able to take advantage of the latest camera capabilities, improved video stabilization, and enhanced editing features. Moreover, updating your iOS will also ensure that your device is secure and protected from potential vulnerabilities. To update your iPhone, go to Settings > General > Software Update, and follow the prompts to download and install the latest version. Make sure your device is connected to a stable Wi-Fi network and has enough battery life to complete the update process. Once you've updated to the latest iOS version, you'll be ready to start recording high-quality videos on your iPhone.
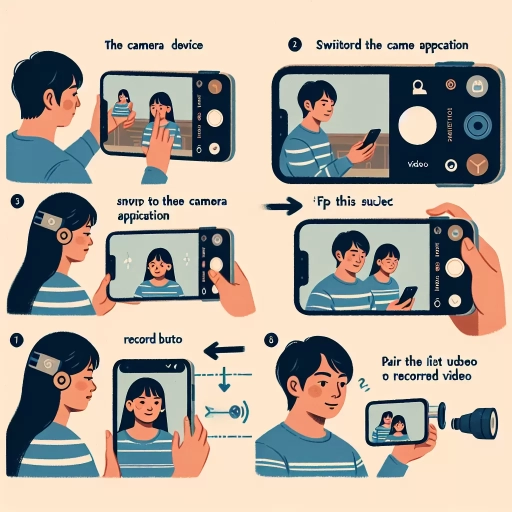
Recording Video on iPhone
Recording video on an iPhone is a straightforward process that can be accomplished with just a few taps on the screen. To start recording a video, you'll need to access the Camera app, which is usually found on the home screen. Once you've opened the app, you'll need to switch to video mode, which is easily done by tapping the camera mode button. From there, you can start and stop the recording as needed, using the record button to capture your video. In this article, we'll take a closer look at each of these steps, starting with accessing the Camera app.
Accessing the Camera App
Accessing the camera app on your iPhone is a straightforward process that allows you to start recording video in no time. To access the camera app, locate it on your home screen, which is typically found on the first page of your iPhone. The camera app icon is a gray camera with a white background, making it easily recognizable. If you can't find the camera app on your home screen, you can also access it from the Control Center. To do this, swipe up from the bottom of the screen (or down from the top right corner on iPhone X and later) to open the Control Center, and then tap the camera icon. Alternatively, you can ask Siri to "open camera" to quickly access the app. Once you've opened the camera app, you'll see a viewfinder that displays what the camera sees. You can then switch between the front and rear cameras by tapping the camera switch icon, which looks like a camera with arrows around it. You can also adjust the camera settings, such as the flash and HDR, by tapping the sun/cloud icon. With the camera app open, you're ready to start recording video on your iPhone.
Switching to Video Mode
When you're ready to start recording video, you'll need to switch to video mode. To do this, open the Camera app and locate the mode selector at the bottom of the screen. Tap on the "VIDEO" option to switch to video mode. You'll know you're in video mode when the camera app displays a red record button and the word "VIDEO" appears at the top of the screen. If you're using an iPhone with a dual-camera setup, you may also see a "1x" or "2x" option, which allows you to switch between the wide-angle lens and the telephoto lens. Additionally, you can also switch to video mode by swiping left on the screen from the photo mode. Once you're in video mode, you can start recording by tapping the red record button. You can also use the volume buttons on the side of your iPhone to start and stop recording.
Starting and Stopping the Recording
When you're ready to start recording a video on your iPhone, locate the red record button at the bottom of the screen. Tap this button to begin recording. You'll know recording has started when the button turns into a red square and the timer begins counting up. To stop recording, simply tap the red square again. The video will automatically be saved to your iPhone's Photos app, where you can view, edit, and share it as desired. If you want to pause the recording, you can do so by tapping the red square, and then tap it again to resume recording. This feature is useful if you need to take a break or want to capture a specific moment without having to start a new recording. Additionally, you can also use the volume buttons on the side of your iPhone to start and stop recording, providing an alternative to tapping the screen. This can be especially helpful when recording in a situation where you need to keep your hands free or want to minimize camera shake.
Enhancing Your Video Recording Experience
When it comes to capturing life's precious moments, a high-quality video recording experience is essential. To take your video recording to the next level, there are several features you can utilize to enhance the overall quality and aesthetic of your footage. Three key features to consider are the High Dynamic Range (HDR) feature, the grid feature, and the flash feature. By incorporating these features into your video recording routine, you can significantly improve the visual appeal and professionalism of your videos. The HDR feature, in particular, is a game-changer when it comes to capturing a wide range of tonal values in a single frame. By using the HDR feature, you can create videos that are more visually stunning and engaging, with a greater sense of depth and dimensionality. In the next section, we'll take a closer look at how to use the HDR feature to elevate your video recording experience.
Using the HDR Feature
Using the HDR feature on your iPhone can significantly enhance the quality of your video recordings. HDR, or High Dynamic Range, allows your iPhone to capture a wider range of colors and contrast levels, resulting in a more vivid and lifelike video. To use the HDR feature, go to Settings > Camera and toggle on the "High Dynamic Range" option. You can also enable HDR for specific video recording modes, such as 4K at 30fps or 60fps, by going to Settings > Camera > Record Video. When HDR is enabled, your iPhone will automatically adjust the exposure and color settings to capture the best possible image. This feature is particularly useful when recording in bright or low-light environments, as it helps to reduce overexposure and underexposure. Additionally, HDR can also enhance the color accuracy and overall visual appeal of your video recordings, making them more engaging and immersive for your viewers. By using the HDR feature, you can take your iPhone video recordings to the next level and capture stunning, high-quality footage that rivals that of professional cameras.
Enabling the Grid Feature
Enabling the grid feature on your iPhone can significantly enhance your video recording experience. The grid feature is a useful tool that helps you compose your shots more effectively, ensuring that your videos are well-balanced and visually appealing. To enable the grid feature, go to your iPhone's Settings app, then select "Camera." From there, toggle the switch next to "Grid" to turn it on. Once enabled, a grid of lines will appear on your camera screen, dividing it into nine equal parts. This grid is based on the rule of thirds, a fundamental principle in photography and videography that suggests placing important elements along the lines or at their intersections to create more balanced and engaging compositions. By using the grid feature, you can ensure that your subjects are properly aligned, and your shots are more visually appealing. Additionally, the grid feature can help you achieve a more cinematic look by allowing you to frame your shots more precisely. Overall, enabling the grid feature is a simple yet effective way to take your video recording skills to the next level and produce high-quality videos that are sure to impress.
Utilizing the Flash Feature
When it comes to recording video on your iPhone, utilizing the flash feature can be a game-changer, especially in low-light environments. The flash can help illuminate your subject, reducing the noise and grain that often accompanies low-light footage. To access the flash feature, simply tap the flash icon, which looks like a lightning bolt, in the top right corner of the screen. You can then choose from three options: On, Off, or Auto. If you select On, the flash will remain on throughout your recording, while Off will disable it entirely. The Auto option allows the iPhone to automatically adjust the flash based on the lighting conditions. It's worth noting that the flash can also be used to add a creative touch to your footage, such as creating a dramatic effect or highlighting a specific aspect of your subject. Additionally, if you're recording in a dimly lit environment, you can also use the flash to create a makeshift fill light, which can help to balance out the lighting and reduce harsh shadows. By experimenting with the flash feature, you can add an extra layer of depth and visual interest to your iPhone videos.