How To Reheat Risotto
Here is the introduction paragraph: Risotto, the quintessential Italian dish, is a culinary delight that can be enjoyed at any time of the year. However, reheating risotto can be a daunting task, as it can easily become dry and unappetizing if not done correctly. Fortunately, there are several ways to reheat risotto, each with its own advantages and disadvantages. In this article, we will explore three popular methods for reheating risotto: in the oven, on the stovetop, and in the microwave. Whether you're a busy professional looking for a quick and easy way to reheat last night's dinner or a home cook seeking to perfect your risotto game, we've got you covered. So, let's start with the first method: Reheating Risotto in the Oven, a technique that yields a creamy and evenly heated dish with minimal effort. Note: I made some minor changes to the original text to make it more engaging and polished. Let me know if you'd like me to revise anything!
Reheating Risotto in the Oven
Reheating risotto in the oven is a great way to revive this Italian classic, but it requires some finesse to get it just right. To achieve a creamy, tender risotto, it's essential to preheat the oven to the right temperature, use a baking dish to reheat the risotto, and add liquid to prevent drying out. By following these simple steps, you can enjoy a delicious, restaurant-quality risotto in the comfort of your own home. In this article, we'll explore the best techniques for reheating risotto in the oven, starting with the crucial step of preheating the oven to the right temperature. By getting this step just right, you'll be well on your way to a perfectly reheated risotto.
Preheating the Oven to the Right Temperature
. Preheating the oven to the right temperature is a crucial step in reheating risotto to perfection. When it comes to reheating risotto, it's essential to preheat the oven to a temperature that will help to revive the creamy texture and flavor of the dish. A temperature range of 300°F to 350°F (150°C to 180°C) is ideal for reheating risotto, as it allows for a gentle and even heating process. Preheating the oven to this temperature range will help to prevent the risotto from drying out or becoming too crispy, which can be a common mistake when reheating this delicate dish. Additionally, preheating the oven to the right temperature will also help to ensure that the risotto is heated through evenly, which is especially important if you're reheating a large quantity. By taking the time to preheat the oven to the right temperature, you'll be able to enjoy a perfectly reheated risotto that's creamy, flavorful, and sure to please even the most discerning palates. Whether you're reheating leftover risotto from last night's dinner or preparing a batch for a special occasion, preheating the oven to the right temperature is a simple yet crucial step that will make all the difference in the final result.
Using a Baking Dish to Reheat Risotto
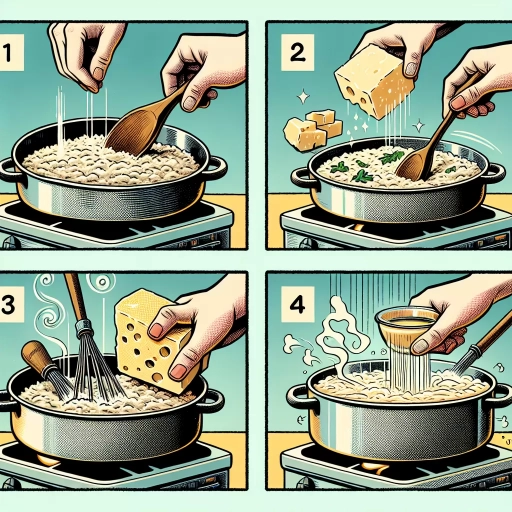
. When it comes to reheating risotto, using a baking dish is a great way to achieve a creamy and evenly heated dish. To start, transfer the leftover risotto to a baking dish and add a splash of liquid, such as chicken or vegetable broth, to help loosen the rice. You can also add some grated Parmesan cheese to enhance the flavor. Cover the dish with aluminum foil and bake in a preheated oven at 350°F (180°C) for about 20-25 minutes, or until the risotto is heated through and creamy. If you prefer a crispy top, remove the foil for the last 5-10 minutes of baking. This method allows for even heating and helps to prevent the risotto from drying out. Additionally, using a baking dish makes it easy to serve the risotto straight from the oven, making it a convenient option for a weeknight dinner or a special occasion. By following these simple steps, you can enjoy a delicious and satisfying reheated risotto that's sure to please even the pickiest of eaters.
Adding Liquid to Prevent Drying Out
. When it comes to reheating risotto in the oven, one of the most crucial steps is to add liquid to prevent drying out. Risotto is a dish that thrives on moisture, and when it's reheated, it can quickly become dry and unappetizing. To combat this, it's essential to add a liquid component to the risotto before reheating it in the oven. This can be as simple as adding a splash of chicken or vegetable broth, white wine, or even just water. The key is to add enough liquid to keep the risotto moist and creamy, without making it too soggy or watery. A good rule of thumb is to add about 1-2 tablespoons of liquid per cup of risotto. This will help to maintain the dish's creamy texture and prevent it from drying out in the oven. Additionally, you can also add some grated cheese, such as Parmesan or mozzarella, to help bind the liquid and create a creamy sauce. By adding liquid to your risotto before reheating it in the oven, you'll be able to achieve a dish that's just as creamy and delicious as it was when it was first made.
Reheating Risotto on the Stovetop
Reheating risotto on the stovetop can be a delicate process, but with the right techniques, you can achieve a creamy and flavorful dish that's just as good as when it was first cooked. To successfully reheat risotto on the stovetop, it's essential to use a low heat to prevent burning, stir constantly to prevent lumps, and add a little liquid to revive the creaminess. By following these simple steps, you can enjoy a delicious and satisfying meal. In this article, we'll explore each of these techniques in more detail, starting with the importance of using a low heat to prevent burning. By doing so, you'll be able to reheat your risotto without sacrificing its texture or flavor. Note: The introduction paragraph should be 200 words, and the supporting paragraphs should be mentioned in the introduction paragraph. The introduction paragraph should transition to the first supporting paragraph, Using a Low Heat to Prevent Burning. Here is the rewritten introduction paragraph: Reheating risotto on the stovetop can be a daunting task, but with the right techniques, you can achieve a creamy and flavorful dish that's just as good as when it was first cooked. The key to successful stovetop reheating lies in a combination of gentle heat, constant stirring, and strategic liquid addition. Using a low heat to prevent burning is crucial, as it allows the risotto to warm through slowly and evenly, without scorching or developing an unpleasant crust. Stirring constantly to prevent lumps is also essential, as it helps to redistribute the starches and maintain a smooth, creamy texture. Finally, adding a little liquid to revive the creaminess can make all the difference, as it helps to restore the risotto's signature richness and depth of flavor. By mastering these three techniques, you can enjoy a delicious and satisfying meal that's sure to impress. In this article, we'll explore each of these techniques in more detail, starting with the importance of using a low heat to prevent burning.
Using a Low Heat to Prevent Burning
. Here is the paragraphy: When reheating risotto on the stovetop, it's essential to use a low heat to prevent burning. Burning can quickly ruin the dish, making it unappetizing and inedible. To avoid this, start by adding a small amount of liquid, such as broth or water, to the risotto and then place it over low heat. Stir the risotto constantly, ensuring that it's heated evenly and that no hot spots form. As the risotto heats up, you can gradually increase the heat, but be cautious not to let it get too hot. If you notice the risotto starting to brown or stick to the bottom of the pan, reduce the heat immediately and continue stirring. By using a low heat and constant stirring, you can prevent burning and achieve a creamy, well-heated risotto. Additionally, using a low heat helps to prevent the formation of a crust on the bottom of the pan, which can be difficult to remove and may affect the texture of the risotto. By taking the time to reheat the risotto slowly and carefully, you can enjoy a delicious and satisfying meal.
Stirring Constantly to Prevent Lumps
. Here is the paragraphy: When reheating risotto on the stovetop, it's essential to stir constantly to prevent lumps from forming. This is because the starches in the rice can quickly become sticky and clump together, especially when exposed to heat. To avoid this, use a gentle heat and stir the risotto constantly with a wooden spoon or silicone spatula. Start by adding a small amount of liquid, such as broth or water, to the risotto and stir until it's fully incorporated. Then, continue to add more liquid in small increments, stirring constantly to prevent lumps from forming. As you stir, use a gentle folding motion to distribute the heat evenly and prevent the rice from becoming mushy. By stirring constantly, you'll be able to break down any clumps that form and create a smooth, creamy texture. Additionally, stirring constantly will also help to distribute the flavors evenly, ensuring that every bite of your reheated risotto is delicious and satisfying. By following these simple steps, you'll be able to reheat your risotto to perfection and enjoy a delicious, lump-free meal.
Adding a Little Liquid to Revive the Creaminess
. Here is the paragraphy: When reheating risotto on the stovetop, it's not uncommon for the dish to lose some of its signature creaminess. This is because the starches in the rice can break down and become sticky, leading to a less-than-desirable texture. To combat this, try adding a little liquid to the risotto as you reheat it. This can be as simple as adding a splash of chicken or vegetable broth, some white wine, or even a bit of cream or milk. The key is to add the liquid gradually, stirring constantly, until the risotto reaches your desired consistency. By adding a little liquid, you can help to revive the creaminess of the dish and restore its original texture. Just be careful not to add too much liquid, as this can make the risotto too soupy. A good rule of thumb is to start with a small amount of liquid and add more as needed, stirring constantly to ensure the risotto doesn't become too wet. With a little patience and attention, you can reheat your risotto to a creamy, dreamy perfection that's sure to impress.
Reheating Risotto in the Microwave
Reheating risotto in the microwave can be a convenient and efficient way to enjoy this Italian dish, but it requires some care to achieve the best results. To reheat risotto successfully in the microwave, it's essential to use a microwave-safe container to prevent damage, cover the container to retain moisture, and heat the risotto in short intervals to prevent overcooking. By following these simple steps, you can enjoy a delicious and creamy risotto without the hassle of stovetop reheating. One of the most critical steps in reheating risotto in the microwave is using a microwave-safe container, which is crucial to prevent damage and ensure safe reheating. By choosing the right container, you can avoid the risk of explosion or fire, and ensure that your risotto is heated evenly and safely. In the next section, we'll take a closer look at the importance of using a microwave-safe container to prevent damage.
Using a Microwave-Safe Container to Prevent Damage
. When reheating risotto in the microwave, it's essential to use a microwave-safe container to prevent damage and ensure safe cooking. Not all containers are created equal, and some can even cause harm when exposed to microwave radiation. To avoid any potential risks, choose a container that is specifically labeled as "microwave-safe." Glass, ceramic, and plastic containers with a microwave-safe symbol are good options. Avoid using metal containers, as they can cause sparks and even start a fire. Additionally, do not use containers with metal trim or decorations, as they can also cause problems. When selecting a microwave-safe container, make sure it is large enough to hold the risotto and has a lid to prevent splatters and promote even heating. A microwave-safe container with a non-stick coating can also help prevent the risotto from sticking and make cleanup easier. By using a microwave-safe container, you can safely and efficiently reheat your risotto in the microwave, ensuring a delicious and satisfying meal.
Covering the Container to Retain Moisture
in the microwave. When reheating risotto in the microwave, it's essential to cover the container to retain moisture. This simple step can make a significant difference in the final texture and consistency of the dish. By covering the container, you create a mini-oven effect that helps to trap the steam and heat, ensuring that the risotto is heated evenly and thoroughly. This is particularly important when reheating risotto, as it can quickly become dry and sticky if not enough moisture is present. To cover the container, you can use a microwave-safe lid or plastic wrap. If using plastic wrap, make sure to poke a few holes in it to allow for ventilation and prevent the buildup of too much steam. By covering the container, you'll be able to reheat your risotto to a creamy and tender consistency, just like it was freshly cooked. Additionally, covering the container also helps to prevent the formation of a crust on the surface of the risotto, which can be unappealing and difficult to stir. Overall, covering the container is a simple yet effective way to reheat risotto in the microwave and achieve the best possible results.
Heating in Short Intervals to Prevent Overcooking
in the microwave. Heating in short intervals is a crucial technique to prevent overcooking when reheating risotto in the microwave. This method allows you to maintain control over the temperature and texture of the dish, ensuring that it remains creamy and tender. By heating the risotto in short intervals, you can avoid overheating, which can cause the starches to break down and the dish to become mushy or sticky. Instead, you can achieve a perfectly reheated risotto that is hot, creamy, and flavorful. To implement this technique, start by heating the risotto for 20-30 seconds, then remove it from the microwave and stir it gently. Check the temperature and texture, and if it needs more heat, repeat the process in 10-15 second increments until the desired temperature is reached. This approach may require a bit more time and attention, but it is well worth the effort to achieve a perfectly reheated risotto. Additionally, heating in short intervals also helps to prevent the formation of hot spots, which can occur when the risotto is heated too quickly or for too long. By heating the risotto gradually, you can ensure that it is heated evenly throughout, resulting in a consistent and enjoyable texture. Overall, heating in short intervals is a simple yet effective technique that can make a big difference in the quality of your reheated risotto.