How To Remove Solder
Removing solder from a circuit board or other electronic component can be a delicate process, requiring patience, attention to detail, and the right techniques. Whether you're a seasoned electronics enthusiast or a DIY novice, knowing how to safely and effectively remove solder is an essential skill. In this article, we'll explore the best practices for solder removal, covering the crucial steps to take before you begin, the various methods for removing solder, and the important procedures to follow after the job is done. To start, it's essential to understand that preparation is key to a successful solder removal process. By taking the time to properly prepare your workspace, tools, and components, you'll be able to avoid common mistakes and ensure a smooth, efficient removal process. In the next section, we'll dive deeper into the importance of preparation and provide valuable tips for getting started.
Preparation is Key
Preparation is key to achieving success in any task or project. Whether you're a DIY enthusiast, a professional contractor, or a homeowner tackling a renovation, having the right mindset and preparation can make all the difference. To ensure a smooth and successful project, it's essential to focus on three critical aspects: choosing the right tools, preparing the workspace, and protecting yourself. By doing so, you'll be able to work efficiently, avoid costly mistakes, and achieve professional-looking results. In this article, we'll explore each of these essential steps in detail, starting with the importance of choosing the right tools for the job.
Choose the Right Tools
When it comes to removing solder, having the right tools for the job is crucial. A good quality soldering iron with a temperature control is essential, as it allows you to adjust the heat to the optimal level for the type of solder you're working with. A soldering iron with a temperature range of 200-450°C (392-842°F) is ideal for most solder removal tasks. Additionally, a solder sucker or desoldering pump is a must-have for removing excess solder from the work area. This tool uses a vacuum to lift the solder off the surface, making it easier to remove and reducing the risk of damage to the surrounding components. A pair of needle-nose pliers can also come in handy for gripping small components and removing solder from tight spaces. A flux pen or brush can be used to apply flux to the solder joint, helping to loosen the solder and make it easier to remove. Finally, a pair of safety glasses and a well-ventilated workspace are essential for protecting yourself from the heat and fumes generated during the solder removal process. By choosing the right tools for the job, you'll be able to remove solder safely and efficiently, and achieve professional-looking results.
Prepare the Workspace
Preparing the workspace is a crucial step in the solder removal process. A well-organized workspace can help prevent accidents, reduce the risk of damage to components, and make the process more efficient. Start by clearing a flat surface, such as a workbench or table, of any clutter or obstructions. Cover the surface with a heat-resistant material, such as a silicone mat or a ceramic tile, to protect it from heat damage. Next, gather all the necessary tools and materials, including the soldering iron, solder sucker, desoldering wick, and safety glasses. Ensure that the soldering iron is set to the correct temperature and that the solder sucker is properly assembled. It's also essential to have a container of water or a fire extinguisher nearby in case of emergencies. Additionally, consider using a fume extractor or a well-ventilated area to minimize exposure to toxic fumes. By taking the time to prepare the workspace, you can ensure a safe and successful solder removal process.
Protect Yourself
Here is the paragraphy: Protecting yourself is a crucial step in the soldering process. When working with hot soldering irons and molten solder, it's essential to take necessary precautions to avoid injuries. Wear protective gear such as safety glasses, gloves, and a face mask to prevent eye and skin damage. Ensure good ventilation in your workspace to prevent inhaling toxic fumes from the solder. Keep loose clothing and long hair tied back to avoid accidents. Additionally, keep a fire extinguisher nearby and a bowl of water to cool down the soldering iron when not in use. By taking these simple precautions, you can minimize the risk of injury and ensure a safe soldering experience.
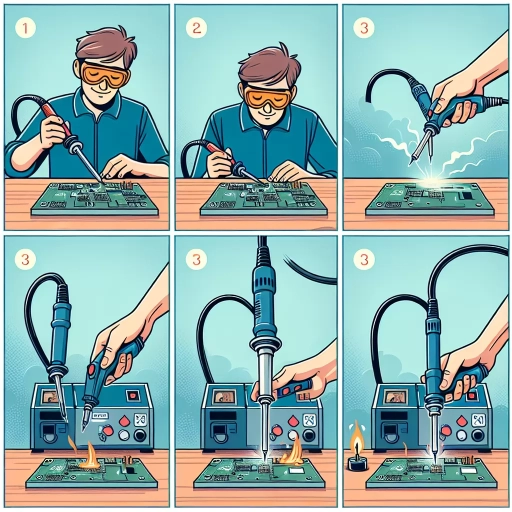
Methods for Removing Solder
When it comes to removing solder from electronic components or circuit boards, there are several methods that can be employed, each with its own set of advantages and challenges. Three of the most common methods include using a solder sucker or desoldering pump, applying heat with a soldering iron, and chemical desoldering with flux. These methods cater to different situations and levels of soldering expertise, making it essential to understand the specifics of each technique to ensure successful solder removal. For instance, when dealing with small, intricate components, precision and control are key, whereas larger solder joints might require more forceful methods. By understanding the nuances of each method, individuals can effectively remove solder without damaging the components or the board. One of the most straightforward and commonly used methods for removing solder is using a solder sucker or desoldering pump.
Using a Solder Sucker or Desoldering Pump
When it comes to removing solder, a solder sucker or desoldering pump is a valuable tool to have in your arsenal. This handheld device is specifically designed to safely and efficiently remove excess solder from a workpiece, making it an essential item for any electronics enthusiast or professional. To use a solder sucker, start by heating the solder you want to remove with a soldering iron. Once the solder is molten, place the nozzle of the solder sucker as close as possible to the solder and press the plunger. The suction created by the plunger will draw the molten solder into the nozzle, leaving the workpiece clean and free of excess solder. It's essential to use the solder sucker quickly, as the solder will solidify rapidly, making it more difficult to remove. Additionally, be careful not to touch the nozzle to the workpiece, as this can cause damage or create a mess. By using a solder sucker or desoldering pump, you can easily and effectively remove solder, making it a crucial step in the solder removal process.
Applying Heat with a Soldering Iron
Applying heat with a soldering iron is a common method for removing solder. To do this, you'll need a soldering iron with a temperature control, a soldering iron tip, and a heat-resistant surface to work on. Start by heating the soldering iron to the appropriate temperature, usually around 350-400°F (175-200°C). Next, place the tip of the soldering iron close to the solder joint, but not touching it. Hold the iron steady and allow the heat to transfer to the solder. As the solder melts, use a solder sucker or desoldering wick to remove the molten solder. Be careful not to touch the hot solder or the soldering iron tip, as they can cause burns. It's also important to work in a well-ventilated area, as the fumes from the solder can be hazardous. To avoid damaging the surrounding components, use a low-wattage soldering iron and keep the heat focused on the solder joint. If the solder is particularly stubborn, you can use a soldering iron with a higher wattage or a heat gun to apply more heat. However, be cautious not to apply too much heat, as this can damage the components or the PCB. By applying heat with a soldering iron, you can effectively remove solder from a joint, but it's essential to be patient and work carefully to avoid damaging the surrounding components.
Chemical Desoldering with Flux
Chemical desoldering with flux is a method that utilizes a combination of heat and chemicals to remove solder from a surface. This technique is particularly useful for removing solder from delicate or sensitive components, as it minimizes the risk of damage from excessive heat or mechanical stress. The process begins with the application of a flux, a substance that lowers the melting point of the solder and helps to break down its surface tension. The flux is typically applied to the solder joint using a brush or a spray, and is allowed to sit for a short period of time to allow it to penetrate the solder. Next, a chemical desoldering solution is applied to the flux-covered solder joint. This solution, which is usually a mixture of solvents and other chemicals, helps to break down the solder and loosen its bond to the surface. The solution is typically applied using a brush or a syringe, and is allowed to sit for a short period of time to allow it to take effect. Once the solution has had time to work, the solder can be easily removed using a desoldering wick or a vacuum desoldering tool. The use of chemical desoldering with flux offers several advantages over other methods of solder removal, including its ability to remove solder from delicate components without causing damage, and its relatively low cost. However, it does require some care and caution, as the chemicals used in the process can be hazardous if not handled properly. Overall, chemical desoldering with flux is a useful technique for removing solder from a variety of surfaces, and can be an effective addition to any electronics repair or manufacturing operation.
Post-Removal Procedures
After a component has been removed from a printed circuit board (PCB), there are several post-removal procedures that must be followed to ensure the board is left in a safe and functional state. These procedures are crucial in preventing damage to the board and its components, as well as ensuring that the removal process does not compromise the integrity of the PCB. The first step in this process is to clean the area where the component was removed, removing any remaining solder or debris. This is followed by a thorough inspection of the area to ensure that no solder or component remnants remain, which can cause shorts or other issues. Finally, the board may need to be reassembled or re-soldered, depending on the type of component that was removed and the extent of the removal process. By following these post-removal procedures, technicians can ensure that the PCB is left in a safe and functional state, ready for further use or repair. Cleaning the area where the component was removed is a critical first step in this process.
Cleaning the Area
Cleaning the area after removing solder is a crucial step to ensure a smooth and successful repair or assembly process. It involves removing any remaining solder, flux, and debris from the work surface, tools, and surrounding areas. This step is essential to prevent contamination, ensure good electrical connections, and maintain a safe working environment. To clean the area, start by removing any large debris or solder chunks using a soft-bristled brush or a cotton swab. Then, use a cleaning solution specifically designed for electronics, such as isopropyl alcohol or a flux remover, to wipe down the work surface and tools. Be sure to follow the manufacturer's instructions for the cleaning solution and take necessary safety precautions, such as wearing gloves and working in a well-ventilated area. For more thorough cleaning, use a lint-free wipe or a soft cloth to remove any remaining residue or flux. It's also important to clean any surrounding areas, such as workbenches or floors, to prevent the spread of debris and contamination. Additionally, cleaning the area helps to prevent the buildup of static electricity, which can damage sensitive electronic components. By taking the time to properly clean the area after removing solder, you can ensure a successful repair or assembly process and maintain a safe and efficient working environment.
Inspecting for Remaining Solder
Here is the paragraphy: Inspecting for Remaining Solder is a crucial step in the post-removal process. After removing the majority of the solder, it's essential to inspect the area for any remaining solder, also known as solder residue or solder splashes. This is typically done using a magnifying glass or a microscope to get a closer look at the area. The inspection should focus on the pads, vias, and any other areas where solder may have accumulated. Remaining solder can cause electrical shorts, corrosion, or other issues, so it's vital to remove as much of it as possible. If any remaining solder is found, it can be removed using a solder wick, solder sucker, or a small brush and some flux. In some cases, a small amount of remaining solder may be acceptable, but it's always best to err on the side of caution and remove as much as possible to ensure the reliability and functionality of the component or PCB.
Reassembling or Re-soldering
Reassembling or re-soldering is a critical step in the post-removal process, requiring attention to detail and precision. After removing the old solder, inspect the area for any remaining debris or oxidation, and clean it thoroughly with a soft brush or a cotton swab dipped in a mild cleaning solution. Next, apply a small amount of flux to the area, ensuring it covers the entire surface where the new solder will be applied. When reassembling, align the components carefully, making sure they are securely in place before applying heat. Use a temperature-controlled soldering iron set to the recommended temperature for the specific type of solder being used. Apply the solder in a smooth, continuous motion, feeding the solder into the joint as the iron melts it. Use a soldering iron with a fine tip to ensure precise control and to prevent overheating the surrounding components. Once the solder has cooled and solidified, inspect the joint for any signs of defects or weaknesses, such as cracks, voids, or unevenness. If necessary, reapply heat and solder to reinforce the joint. Finally, clean the area again to remove any excess flux or debris, and inspect the reassembled component for proper function and performance. By following these steps, you can ensure a strong and reliable bond between the components, and prevent any potential issues or failures down the line.