How To Take A Screenshot On Iphone 14
Here is the introduction paragraph: Taking a screenshot on your iPhone 14 is a simple yet powerful feature that allows you to capture and preserve moments from your screen. Whether you want to save a funny meme, document a problem you're experiencing, or share a great deal with a friend, knowing how to take a screenshot is an essential skill for any iPhone user. In this article, we'll cover the basics of taking a screenshot on your iPhone 14, explore the different methods for capturing your screen, and provide tips on how to edit and share your screenshots. To get started, let's begin with the fundamentals of taking a screenshot on your iPhone 14. Understanding the basics is crucial to mastering this feature, so let's dive in and explore the ins and outs of taking a screenshot on your iPhone 14.
Understanding the Basics of Taking a Screenshot on iPhone 14
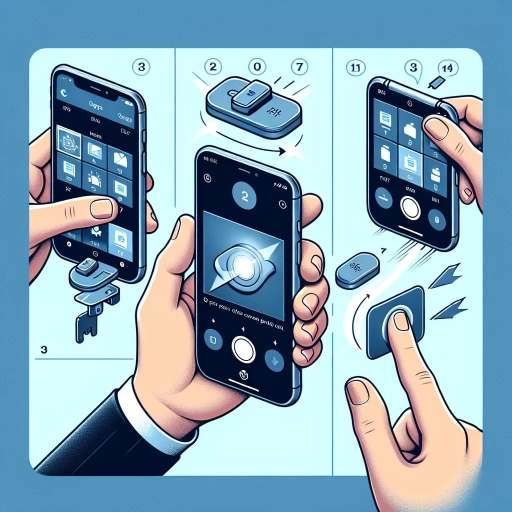
Taking a screenshot on an iPhone 14 is a straightforward process that can be accomplished with just a few simple steps. To get started, it's essential to understand the basics of screenshotting on this device. This involves locating the Sleep/Wake button and Home button, understanding the role of the Volume Down button, and familiarizing yourself with the Screenshot Preview feature. By mastering these fundamental concepts, you'll be able to capture and share your iPhone 14 screen with ease. In this article, we'll delve into each of these topics, starting with the first step: locating the Sleep/Wake button and Home button.
Locating the Sleep/Wake Button and Home Button
To locate the Sleep/Wake button and Home button on your iPhone 14, start by identifying the top right side of the device, where you'll find the Sleep/Wake button. This button is used to turn your iPhone on and off, as well as put it to sleep and wake it up. It's a small, oval-shaped button that's easy to press. On the other hand, the Home button is located at the bottom center of the screen, and it's used to return to the home screen, access the app switcher, and activate Siri. However, it's worth noting that the iPhone 14 does not have a physical Home button, instead, it uses gestures to navigate. To access the home screen, simply swipe up from the bottom of the screen. To access the app switcher, swipe up and hold, and to activate Siri, press and hold the Sleep/Wake button or say "Hey Siri".
Understanding the Role of the Volume Down Button
The Volume Down button plays a crucial role in taking a screenshot on an iPhone 14. Located on the left side of the device, this button is often overlooked, but it's essential to understand its function to capture screenshots successfully. When you press the Volume Down button simultaneously with the Side button, the iPhone 14 captures a screenshot of the current screen. This button combination is the standard method for taking screenshots on iPhone 14 devices. It's worth noting that the Volume Down button is also used for other functions, such as adjusting the volume during music playback or video watching. However, when used in conjunction with the Side button, its primary function is to facilitate screenshot capture. By understanding the role of the Volume Down button, you can take screenshots with ease and precision, allowing you to capture and share important information, funny moments, or memorable experiences with others.
Familiarizing Yourself with the Screenshot Preview
When you take a screenshot on your iPhone 14, a thumbnail preview of the screenshot will appear in the bottom-left corner of the screen. This preview is a great way to quickly review the screenshot you just took and make any necessary edits or share it with others. To familiarize yourself with the screenshot preview, start by taking a screenshot by pressing the Sleep/Wake button and the Home button simultaneously. As soon as you do, you'll see the screenshot preview appear on your screen. Tap on the preview to open it in the Markup editor, where you can crop, draw, or add text to the screenshot. You can also swipe left on the preview to dismiss it and save the screenshot to your Screenshots album in the Photos app. If you want to share the screenshot, tap the Share icon in the Markup editor or swipe up on the preview to access the Share menu. By getting to know the screenshot preview, you'll be able to quickly and easily manage your screenshots and share them with others.
Methods for Taking a Screenshot on iPhone 14
Capturing a screenshot on your iPhone 14 can be a convenient way to save and share information, from a funny meme to an important receipt. Fortunately, Apple provides multiple methods to take a screenshot on your iPhone 14, catering to different user preferences and needs. You can use the traditional method of pressing the Sleep/Wake and Home buttons simultaneously, utilize the AssistiveTouch feature for a more accessible approach, or even use Siri to take a screenshot hands-free. Each of these methods offers a unique advantage, allowing you to choose the one that best suits your situation. In this article, we will explore these methods in detail, starting with the most commonly used technique: Using the Sleep/Wake and Home Buttons Combination.
Using the Sleep/Wake and Home Buttons Combination
To take a screenshot on your iPhone 14, you can use the Sleep/Wake and Home buttons combination. This method is straightforward and works on most iPhone models, including the iPhone 14. To do this, locate the Sleep/Wake button, which is on the top right side of your iPhone, and the Home button, which is at the bottom center of the screen. Press and hold the Sleep/Wake button and the Home button simultaneously for about one second. You will hear a camera shutter sound and see a flash on the screen, indicating that the screenshot has been taken. The screenshot will be saved to your Screenshots album in the Photos app, where you can view, edit, and share it as needed. This method is quick and easy, and it's a great way to capture a screenshot of your iPhone screen at any time.
Utilizing the AssistiveTouch Feature for Screenshot
Utilizing the AssistiveTouch feature is another method for taking a screenshot on your iPhone 14. This feature is particularly useful for individuals who have difficulty pressing the physical buttons or prefer a more accessible way of capturing their screen. To enable AssistiveTouch, go to Settings, then Accessibility, and select Touch. From there, toggle on AssistiveTouch, which will display a floating button on your screen. Customize the button's actions by tapping on it and selecting Device, then More, and finally Screenshot. With AssistiveTouch enabled, you can take a screenshot by simply tapping the floating button and selecting Screenshot from the menu. This feature provides an alternative method for capturing your screen, making it easier to share or save important information. Additionally, you can also use AssistiveTouch to create a custom gesture for taking a screenshot, providing even more flexibility and convenience. By utilizing AssistiveTouch, you can take screenshots with ease, even if you have difficulty with the traditional button combination method.
Using Siri to Take a Screenshot Hands-Free
Using Siri to take a screenshot hands-free is a convenient feature that allows you to capture your screen without having to physically press any buttons. To use this feature, make sure that Siri is enabled on your iPhone 14 by going to Settings > Siri & Search. Once Siri is enabled, you can activate it by saying "Hey Siri" or by long-pressing the side button. Then, say "Take a screenshot" or "Capture the screen" to instruct Siri to take a screenshot for you. Siri will then capture the current screen and save it to your Screenshots album in the Photos app. You can also ask Siri to "Take a screenshot and share it" to immediately share the screenshot with someone via email, message, or social media. This feature is especially useful when you need to take a screenshot of something quickly, such as a fleeting notification or a screenshot of a webpage, without having to physically interact with your phone. Additionally, using Siri to take a screenshot hands-free can be helpful for people with disabilities or injuries that make it difficult to press buttons. Overall, using Siri to take a screenshot hands-free is a convenient and accessible feature that can enhance your iPhone 14 experience.
Editing and Sharing Your Screenshots on iPhone 14
The iPhone 14 offers a seamless screenshot experience, allowing users to capture, edit, and share their screens with ease. With the latest iOS updates, the process of editing and sharing screenshots has become more intuitive and feature-rich. In this article, we will explore the various ways to edit and share your screenshots on iPhone 14, including accessing and editing them in the Photos app, sharing them via messages, email, and social media, and using the Markup tool to annotate and highlight important details. By the end of this article, you will be able to take your screenshot game to the next level and make the most out of this powerful feature. To get started, let's dive into the first step: accessing and editing screenshots in the Photos app.
Accessing and Editing Screenshots in the Photos App
When it comes to accessing and editing screenshots in the Photos app on your iPhone 14, the process is straightforward and intuitive. To start, open the Photos app, which can be found on your home screen or in the Utilities folder. Once the app is open, tap on the "Albums" tab at the bottom of the screen, and then select the "Screenshots" album. This album is automatically created by your iPhone and stores all of your screenshots in one convenient location. From here, you can browse through your screenshots and select the one you want to edit. To edit a screenshot, simply tap on it to open it in full-screen mode, and then tap the "Edit" button in the top right corner of the screen. This will open the editing menu, which offers a range of tools and features, including filters, adjustments, and markup options. You can use these tools to crop, rotate, and enhance your screenshot, as well as add text, drawings, and other annotations. Once you've made your edits, tap the "Done" button to save your changes. Your edited screenshot will be saved in the "Screenshots" album, and you can also share it with others via email, message, or social media. Additionally, you can also use the "Markup" feature to edit your screenshots, which allows you to add text, drawings, and other annotations directly to the screenshot. To access the Markup feature, tap the "Markup" button in the editing menu, and then use the various tools and options to edit your screenshot. Overall, accessing and editing screenshots in the Photos app on your iPhone 14 is a quick and easy process that allows you to enhance and share your screenshots with others.
Sharing Screenshots via Messages, Email, and Social Media
When you've captured the perfect screenshot on your iPhone 14, you'll likely want to share it with others. Fortunately, Apple makes it easy to share your screenshots via Messages, email, and social media. To share a screenshot, simply tap the thumbnail that appears in the bottom-left corner of your screen after taking a screenshot. This will open the Markup editor, where you can edit and annotate your screenshot before sharing it. From here, you can tap the "Share" icon (represented by a box with an arrow coming out of it) to access the Share Sheet. The Share Sheet provides a variety of options for sharing your screenshot, including Messages, Mail, and social media platforms like Facebook, Twitter, and Instagram. You can also use the "More" option to access other sharing options, such as saving the screenshot to your Files app or printing it. If you want to share your screenshot with someone via Messages, simply select the "Messages" option and choose the contact you want to send it to. You can also add a message or caption to your screenshot before sending it. Similarly, if you want to share your screenshot via email, select the "Mail" option and compose a new email with your screenshot attached. You can also share your screenshot on social media by selecting the relevant platform and following the prompts to upload and share your screenshot. Overall, sharing screenshots on your iPhone 14 is a quick and easy process that can be done in just a few taps.
Using Markup to Annotate and Highlight Important Details
When it comes to editing and sharing your screenshots on iPhone 14, using markup to annotate and highlight important details is a game-changer. With the Markup tool, you can add text, draw shapes, and even add a signature to your screenshots, making it easy to communicate your point or highlight specific information. To access Markup, simply take a screenshot and then tap the thumbnail that appears in the bottom-left corner of the screen. From there, you'll be taken to the Markup editor, where you can choose from a variety of tools, including a pen, pencil, and highlighter. You can also add text by tapping the "+" icon and selecting "Text" from the menu. One of the most useful features of Markup is the ability to highlight important details. By using the highlighter tool, you can draw attention to specific parts of the screenshot, making it easy to communicate your point or illustrate a concept. Additionally, you can also use the Markup tool to add a signature to your screenshots, which can be especially useful for business or professional purposes. Overall, using Markup to annotate and highlight important details is a powerful way to enhance your screenshots and communicate more effectively.