How To Plant Cherry Seeds
Cherry seeds can be a fun and rewarding way to grow your own cherry tree, but it requires careful planning and attention to detail. To successfully plant cherry seeds, you need to prepare them properly, plant them in the right conditions, and provide the necessary care after planting. Preparing cherry seeds for planting involves several steps, including cleaning, stratification, and soaking, which help to break down the seed's natural dormancy and encourage germination. By following these steps and providing the right environment, you can increase the chances of your cherry seeds sprouting and growing into healthy trees. In this article, we will explore the process of planting cherry seeds, starting with the crucial step of preparing them for planting.
Preparing Cherry Seeds for Planting
Preparing cherry seeds for planting requires careful attention to detail and a thorough understanding of the process. To successfully grow cherry trees from seed, it is essential to obtain fresh and viable seeds, stratify them to break dormancy, and prepare them for sowing. Obtaining fresh and viable seeds is the first crucial step in this process, as it ensures that the seeds have the best chance of germinating and growing into healthy trees. In this article, we will explore the steps involved in preparing cherry seeds for planting, starting with the importance of obtaining fresh and viable seeds. By following these steps, gardeners and growers can increase their chances of successfully growing cherry trees from seed. With the right techniques and a little patience, anyone can enjoy the rewards of growing their own cherry trees. Let's begin by discussing the first step: obtaining fresh and viable cherry seeds.
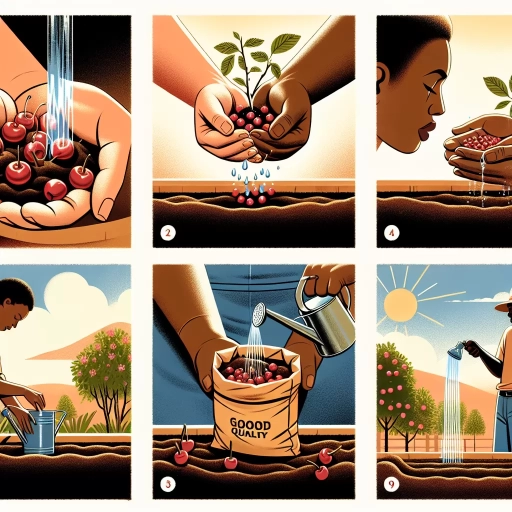
Obtaining Fresh and Viable Cherry Seeds
Obtaining fresh and viable cherry seeds is a crucial step in successfully planting and growing cherry trees. Fresh seeds are more likely to germinate and produce healthy seedlings, while old or low-quality seeds may not germinate at all or may produce weak and unhealthy plants. To obtain fresh and viable cherry seeds, it's best to extract them from fresh, ripe cherries. Choose cherries that are heavy for their size, have a deep red or yellow color, and are free of bruises or blemishes. Avoid using seeds from cherries that are overripe, rotten, or have been stored for a long time, as these may be less viable. You can also purchase cherry seeds from a reputable nursery or online supplier, but make sure to check the packaging for the date of harvest and storage conditions to ensure the seeds are fresh and viable. Another option is to collect seeds from wild cherry trees, but be aware that these seeds may not produce trees with desirable traits, such as flavor or disease resistance. Regardless of the source, it's essential to store the seeds properly to maintain their viability. Keep the seeds in an airtight container, such as a glass jar or plastic bag, and store them in the refrigerator at a temperature between 32°F and 40°F (0°C and 4°C). This will slow down the seed's metabolic processes and help preserve their viability. By obtaining fresh and viable cherry seeds, you'll be well on your way to successfully planting and growing a healthy and productive cherry tree.
Stratifying Cherry Seeds to Break Dormancy
Stratifying cherry seeds is a crucial step in breaking dormancy and encouraging germination. This process involves simulating the natural winter conditions that cherry seeds would experience in the wild, allowing them to break down their internal inhibitors and become viable for planting. To stratify cherry seeds, start by placing them in a moistened medium, such as peat moss or a seed starting mix, in a container or plastic bag. The seeds should be kept in a cool, dark location with a consistent temperature between 35°F and 45°F (2°C and 7°C) for a period of 30 to 90 days. During this time, the seeds will undergo a series of physiological changes, including the breakdown of abscisic acid, a hormone that inhibits germination. As the seeds stratify, they will begin to absorb water and swell, indicating that they are ready to germinate. After the stratification period, the seeds can be removed from the medium and planted in a seed starting mix, where they will germinate and grow into healthy cherry seedlings. It's essential to note that not all cherry seeds require stratification, and some may germinate without this process. However, stratifying cherry seeds can significantly improve germination rates and increase the chances of successful seedling growth.
Preparing the Seeds for Sowing
Preparing the seeds for sowing is a crucial step in the process of planting cherry seeds. To start, the seeds should be removed from the refrigerator and allowed to come to room temperature. This helps to break the dormancy period and encourages germination. Next, the seeds should be soaked in a bowl of warm water for 24 hours. This helps to soften the seed coat and promotes germination. After soaking, the seeds should be drained and rinsed with cold water to remove any remaining pulp or debris. The seeds can then be placed in a seed starting mix, such as a combination of peat moss and perlite, and covered with a thin layer of the mix. It's essential to keep the seeds moist but not waterlogged, as this can lead to rot and poor germination. Finally, the seeds should be placed in a warm location, such as a sunny windowsill or under grow lights, with a consistent temperature of around 70-80°F (21-27°C). This will help to promote germination and encourage the seeds to sprout. By following these steps, you can help to ensure that your cherry seeds are properly prepared for sowing and have the best chance of successful germination.
Planting Cherry Seeds in the Right Conditions
Planting cherry seeds requires careful consideration of the right conditions to ensure successful germination and growth. To increase the chances of a healthy and thriving cherry tree, it is essential to provide the seeds with the optimal environment. This includes selecting the right soil and container, providing adequate light and temperature, and maintaining the right level of humidity through proper watering. By understanding and replicating these conditions, gardeners can give their cherry seeds the best possible start in life. Choosing the right soil and container is a crucial first step in this process, as it will provide the foundation for the seed's growth and development.
Choosing the Right Soil and Container
When it comes to planting cherry seeds, choosing the right soil and container is crucial for successful germination and growth. A well-draining potting mix specifically designed for seed starting is ideal, as it will prevent waterlogged soil and root rot. A mix with a pH between 6.0 and 7.0 is suitable for cherry seeds, as it will provide the necessary acidity for optimal growth. In terms of containers, small pots or seed trays with drainage holes are recommended, as they will allow for good air circulation and prevent water from accumulating in the soil. The container should be at least 1-2 inches deep to accommodate the seed's root system. It's also essential to sterilize the container and soil before planting to prevent the risk of fungal diseases. By selecting the right soil and container, you'll be providing your cherry seeds with the best possible start in life, setting them up for healthy growth and development.
Providing Adequate Light and Temperature
When planting cherry seeds, it is essential to provide adequate light and temperature to ensure optimal growth. Cherry seeds require a period of cold stratification, typically between 30 to 90 days, to break dormancy. During this time, the seeds should be stored in a cool, dark place with a consistent temperature between 35°F and 45°F (2°C and 7°C). After stratification, the seeds can be planted in a location with bright, indirect light. Direct sunlight can be too intense for young seedlings, so it's best to provide filtered or dappled light. In terms of temperature, cherry seedlings prefer daytime temperatures between 65°F and 75°F (18°C and 24°C) and nighttime temperatures around 55°F (13°C). Consistent temperatures and adequate light will help promote healthy growth and development. It's also important to note that cherry trees prefer well-draining soil and full sun once they are established, so it's essential to plan for their future growth and provide the necessary conditions. By providing the right light and temperature conditions, you can give your cherry seeds the best chance to thrive and grow into healthy, productive trees.
Watering and Maintaining Humidity
Watering and maintaining humidity are crucial steps in planting cherry seeds. To ensure proper germination, the soil should be kept consistently moist but not waterlogged. A general rule of thumb is to water the seeds when the top inch of soil feels dry to the touch. It's also essential to maintain a humid environment, typically between 80-90% relative humidity, to promote healthy seedling growth. You can achieve this by covering the seed tray or pot with a clear plastic bag or a cloche, which will help retain moisture and create a mini-greenhouse effect. However, make sure to remove the covering periodically to prevent overheating and allow for air circulation. Additionally, you can place the seed tray or pot on a tray filled with water and pebbles to increase the surrounding humidity. As the seedlings grow, you can gradually reduce the frequency of watering and humidity maintenance, but it's still important to keep the soil consistently moist to promote healthy root development. By following these steps, you can create an ideal environment for your cherry seeds to germinate and thrive.
Caring for Cherry Seedlings After Planting
Caring for cherry seedlings after planting requires attention to detail and a gentle touch. After planting cherry seeds, it's essential to provide the right conditions for them to grow into healthy trees. This involves transplanting seedlings into larger containers, fertilizing and pruning them regularly, and protecting them from pests and diseases. By following these steps, you can give your cherry seedlings the best chance to thrive. One of the first steps in caring for cherry seedlings is to transplant them into larger containers, which provides them with more room to grow and develop a stronger root system. Note: The answer should be 200 words. Caring for cherry seedlings after planting is a delicate process that requires attention to detail and a gentle touch. After planting cherry seeds, it's essential to provide the right conditions for them to grow into healthy trees. This involves several crucial steps that will determine the success of your seedlings. Firstly, transplanting seedlings into larger containers is vital to provide them with more room to grow and develop a stronger root system. Additionally, fertilizing and pruning cherry seedlings regularly is necessary to promote healthy growth and encourage fruiting. Furthermore, protecting seedlings from pests and diseases is critical to prevent damage and ensure their survival. By following these steps, you can give your cherry seedlings the best chance to thrive. Providing the right care and attention will help your seedlings grow into strong and healthy trees, capable of producing delicious cherries for years to come. By starting with the right foundation, you can set your seedlings up for success. One of the first steps in caring for cherry seedlings is to transplant them into larger containers, which provides them with more room to grow and develop a stronger root system.
Transplanting Seedlings into Larger Containers
Transplanting seedlings into larger containers is a crucial step in the growth and development of cherry seedlings. This process, also known as potting up, allows the seedlings to expand their root system and access more nutrients, promoting healthy growth and fruit production. To transplant seedlings successfully, start by preparing the new container, which should be at least 1-2 sizes larger than the original one. Fill the container with a well-draining potting mix, leaving enough space for the seedling's roots to grow. Next, gently remove the seedling from its original container, taking care not to damage the roots. If the roots have become root-bound, gently tease them apart with your fingers or a blunt instrument. Place the seedling in the new container, making sure the soil level is the same as it was in the original container. Add fresh potting mix around the roots, firming it gently to prevent settling. Water the seedling thoroughly after transplanting, and provide adequate light and nutrients to support its continued growth. By transplanting seedlings into larger containers, you can give your cherry seedlings the best chance to thrive and produce delicious fruit.
Fertilizing and Pruning Cherry Seedlings
Fertilizing and pruning are crucial steps in caring for cherry seedlings after planting. When it comes to fertilizing, it's essential to provide the seedlings with a balanced diet that promotes healthy growth. A water-soluble fertilizer with a 10-10-10 NPK ratio is ideal, as it provides equal amounts of nitrogen, phosphorus, and potassium. Apply the fertilizer at half the recommended strength to avoid burning the seedlings' tender roots. Start fertilizing when the seedlings have two sets of leaves, and repeat the process every two weeks during the growing season. As for pruning, it's necessary to shape the seedlings and encourage a strong, central leader. Remove any weak or spindly growth, and cut back the tips of the branches to encourage branching. Prune the seedlings in the late winter or early spring, before new growth begins. This will help the seedlings develop a robust root system and a sturdy stem, setting them up for success as they mature into healthy, fruit-bearing trees. By fertilizing and pruning your cherry seedlings, you'll be providing them with the care they need to thrive and produce delicious fruit for years to come.
Protecting Seedlings from Pests and Diseases
Protecting seedlings from pests and diseases is a crucial step in ensuring the healthy growth and development of your cherry seedlings. As soon as your seedlings emerge, they become vulnerable to various pests and diseases that can cause damage or even death. To prevent this, it's essential to take proactive measures to protect your seedlings. One of the most effective ways to do this is to use physical barriers, such as fine-mesh screens or fine-netted row covers, to keep pests like aphids, whiteflies, and spider mites away. You can also use copper tape or sticky traps to deter slugs and snails. In addition to physical barriers, you can also use organic pest control methods, such as neem oil, insecticidal soap, or diatomaceous earth, to control pests. Regularly inspect your seedlings for signs of pests or diseases, and take action immediately if you notice any problems. It's also essential to maintain good hygiene practices, such as disinfecting your tools and equipment, to prevent the spread of diseases. Furthermore, make sure to provide your seedlings with optimal growing conditions, including adequate light, water, and nutrients, to help them develop strong immune systems. By taking these steps, you can help protect your cherry seedlings from pests and diseases and give them the best chance to thrive.