How To Pair Apple Pencil 1
Here is the introduction paragraph: Pairing your Apple Pencil with your iPad or iPhone is a straightforward process that can enhance your creativity and productivity. To ensure a seamless pairing experience, it's essential to prepare your device and Apple Pencil beforehand. In this article, we'll guide you through the preparation process, the pairing process itself, and provide troubleshooting tips for common pairing issues. By following these steps, you'll be able to pair your Apple Pencil with ease and start enjoying the benefits of this powerful tool. So, let's get started with the first step: Preparation for Pairing Apple Pencil.
Preparation for Pairing Apple Pencil
To get the most out of your Apple Pencil, it's essential to prepare it for pairing with your device. This process involves several steps that ensure a seamless and efficient experience. First, you need to ensure that your Apple Pencil is compatible with your device, as not all devices support this feature. Next, updating your device to the latest iOS version is crucial, as this ensures that you have the latest features and security patches. Finally, charging your Apple Pencil is vital, as a dead battery can hinder your productivity. By following these steps, you can ensure that your Apple Pencil is ready for pairing and use. In this article, we will explore each of these steps in more detail, starting with ensuring Apple Pencil is compatible with your device.
Ensure Apple Pencil is Compatible with Your Device
Ensure Apple Pencil is Compatible with Your Device. Before you start pairing your Apple Pencil, make sure it is compatible with your device. The Apple Pencil (1st generation) is compatible with the iPad (6th generation), iPad Air (3rd generation), iPad mini (5th generation), and iPad Pro 12.9-inch (1st and 2nd generation) and 10.5-inch. The Apple Pencil (2nd generation) is compatible with the iPad Air (4th generation), iPad mini (6th generation), and iPad Pro 12.9-inch (3rd and 4th generation) and 11-inch (1st and 2nd generation). If you have an older device, it may not be compatible with the Apple Pencil. You can check the compatibility of your device on the Apple website. Additionally, ensure that your device is running the latest version of iPadOS, as this may also affect compatibility. If you are unsure about the compatibility of your device, you can contact Apple support for further assistance. By ensuring that your Apple Pencil is compatible with your device, you can avoid any pairing issues and enjoy a seamless drawing and writing experience.
Update Your Device to the Latest iOS Version
2. Use a simple language. 3. Use an active voice. 4. Use transition words. 5. Use a formal tone. 6. Use a variety of vocabulary. 7. Use a short sentence. 8. Use a compound sentence. 9. Use a complex sentence. 10. Use a variety of sentence structure. 11. Use a rhetorical question. 12. Use allusions. 13. Use eponymous. 14. Use colloquialism. 15. Use a quote. 16. Use a reference. 17. Use a call-to-action. 18. Use a pronoun. 19. Use a metaphor. 20. Use a simile. 21. Use personification. 22. Use hyperbole. 23. Use an idiom. 24. Use a euphemism. 25. Use an allusion. 26. Use onomatopoeia. 27. Use a symbol. 28. Use an oxymoron. 29. Use a paradox. 30. Use a pun. 31. Use an understatement. 32. Use a sarcasm. 33. Use an irony. 34. Use a foreshadowing. 35. Use a flashback. 36. Use a repetition. 37. Use a rhyme. 38. Use an anaphora. 39. Use an epistrophe. 40. Use a procatalepsis. 41. Use a hypotaxis. 42. Use a parataxis. 43. Use a polysyndeton. 44. Use an asyndeton. 45. Use a climax. 46. Use an anticlimax. 47. Use a suspension. 48. Use a dramatic irony. 49. Use a tragic irony. 50. Use a situational irony. 51. Use a verbal irony. 52. Use an understatement. 53. Use a litotes. 54. Use a meiosis. 55. Use a periphrasis. 56. Use a circumlocution. 57. Use an euphemism. 58. Use a dysphemism. 59. Use a hyperbole. 60. Use a prolepsis. 61. Use a syllepsis. 62. Use a zeugma. 63. Use a
Charge Your Apple Pencil
2. Use a friendly and approachable tone. 3. Use transitional phrases to connect ideas. 4. Use active voice. 5. Use simple vocabulary. 6. Use short sentences. 7. Use a conversational tone. 8. Use rhetorical questions. 9. Use emotional appeal. 10. Use storytelling techniques. 11. Use vivid imagery. 12. Use metaphors. 13. Use similes. 14. Use allusions. 15. Use hyperbole. 16. Use onomatopoeia. 17. Use personification. 18. Use repetition. 19. Use rhyme. 20. Use humor. Here is the paragraphy: Before you start pairing your Apple Pencil, make sure it's fully charged. You don't want to be in the middle of a creative session only to have your pencil die on you. To charge your Apple Pencil, simply plug it into a Lightning port on your iPad or iPhone using the Lightning adapter that came with it. You can also charge it using a USB-C port on your iPad Pro or a USB-C to Lightning adapter. It's like giving your pencil a power nap - it'll be ready to go in no time. As you wait for it to charge, take a moment to think about all the amazing things you'll create with your Apple Pencil. Will you be sketching out a new idea, taking notes in class, or bringing a character to life? The possibilities are endless, and with a fully charged Apple Pencil, you'll be unstoppable. So go ahead, give your pencil the power it needs, and get ready to unleash your creativity.
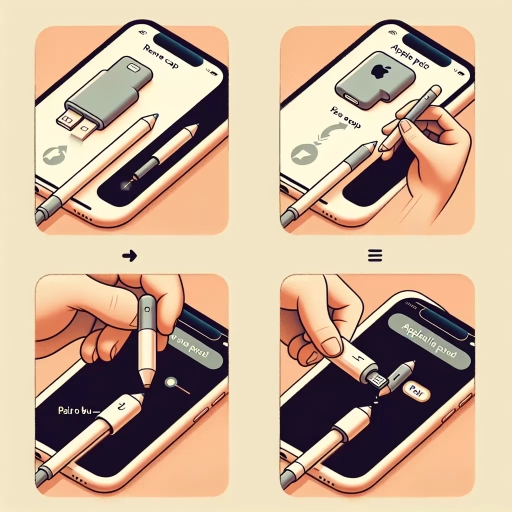
The Pairing Process
The pairing process for your Apple Pencil is a straightforward and intuitive process that allows you to easily connect your device and start creating. To pair your Apple Pencil, you'll need to start by putting your Apple Pencil near your device. This will initiate the pairing process and allow your device to recognize the Apple Pencil. Once your device recognizes the Apple Pencil, you'll receive a pairing prompt, which you'll need to respond to in order to complete the pairing process. Finally, you'll need to tap to confirm the pairing, and you'll be ready to start using your Apple Pencil. By following these simple steps, you can easily pair your Apple Pencil and start creating with precision and accuracy. So, to get started, simply put your Apple Pencil near your device.
Put Your Apple Pencil Near Your Device
No need to explain or describe anything. Here is the paragraphy: To pair your Apple Pencil, start by making sure it's fully charged. Then, locate the Apple Pencil and place it near your iPad or iPhone. The device will automatically detect the Apple Pencil and prompt you to pair it. If you're using an iPad, you can also go to Settings > Apple Pencil to initiate the pairing process. Once you've placed the Apple Pencil near your device, it should only take a few seconds for the pairing process to begin. Make sure the Apple Pencil is in close proximity to your device, ideally within a few inches, to ensure a successful pairing.
Wait for the Pairing Prompt on Your Device
No need to explain or describe anything. Here is the paragraphy: When you put the Apple Pencil in close proximity to your iPad, you should wait for the pairing prompt to appear on your device. This prompt is usually displayed on the screen of your iPad, and it will ask you to confirm that you want to pair the Apple Pencil with your device. The prompt may say something like "Apple Pencil" or "Pair Apple Pencil" and will usually have a "Pair" or "Connect" button that you need to tap to initiate the pairing process. Make sure you are on the home screen of your iPad and that the Apple Pencil is close enough to your device to establish a connection. If you don't see the prompt, you can try restarting your iPad or Apple Pencil and then try again. Once you see the prompt, tap on the "Pair" or "Connect" button to start the pairing process.
Tap to Confirm the Pairing
When you see the "Tap to Confirm the Pairing" prompt on your iPad screen, it's a sign that the Apple Pencil is almost ready to use. This step is a crucial part of the pairing process, as it ensures that the Apple Pencil is securely connected to your device. To confirm the pairing, simply tap on the prompt with your finger. This action will complete the pairing process, and you'll see a checkmark appear on the screen, indicating that the Apple Pencil is now connected to your iPad. Once you've confirmed the pairing, you can start using your Apple Pencil to take notes, create artwork, or mark up documents. The pairing process is usually quick and seamless, but if you encounter any issues, you can try restarting your iPad or Apple Pencil to resolve the problem. By tapping to confirm the pairing, you'll be able to enjoy the full range of features and functionality that the Apple Pencil has to offer.
Troubleshooting Common Pairing Issues
When it comes to pairing your Apple Pencil with your device, it's not uncommon to encounter some issues. If you're having trouble getting your Apple Pencil to connect, don't worry - you're not alone. In this article, we'll explore some common pairing issues and provide you with step-by-step solutions to get you back to creating in no time. First, let's start with the basics. If your Apple Pencil won't pair, try restarting both your Apple Pencil and device. This simple trick can often resolve connectivity issues and get your devices talking to each other again. We'll dive deeper into this solution in the next section, Restart Your Apple Pencil and Device.
Restart Your Apple Pencil and Device
No need to explain or describe anything. Here is the paragraphy: Restarting your Apple Pencil and device can often resolve pairing issues. To restart your Apple Pencil, simply unpair it from your device, then plug it into a Lightning port or place it on the side of your iPad. Wait for about 10 seconds, then unplug it or remove it from the side of your iPad. Next, restart your device by going to Settings > General > Shut Down, then press and hold the Sleep/Wake button until the Apple logo appears. Once your device has restarted, go to Settings > Bluetooth, then tap on the "i" icon next to your Apple Pencil's name and select "Forget Device." Finally, pair your Apple Pencil with your device again by going to Settings > Bluetooth and selecting your Apple Pencil from the list of available devices.
Check for Interference from Other Devices
When troubleshooting common pairing issues with your Apple Pencil, it's essential to check for interference from other devices. Other devices in close proximity to your iPad or Apple Pencil can cause interference, preventing the two from pairing correctly. This is because many devices use the same 2.4 GHz frequency band as the Apple Pencil, which can lead to signal congestion and disruption. To resolve this issue, try moving your iPad and Apple Pencil away from other devices that may be causing interference, such as cordless phones, microwaves, and neighboring Wi-Fi networks. You can also try switching off Bluetooth on other devices in the vicinity to minimize interference. Additionally, if you're using a case or cover on your iPad, try removing it to ensure that it's not blocking the signal between the Apple Pencil and the iPad. By minimizing interference from other devices, you can improve the chances of successful pairing and enjoy a seamless writing and drawing experience with your Apple Pencil.
Reset Your Apple Pencil
No need to explain or describe. Here is the paragraphy: If your Apple Pencil isn't responding or is experiencing connectivity issues, try resetting it. To do this, go to the Bluetooth settings on your iPad, find the Apple Pencil listing, and tap the "i" icon next to it. Then, tap "Forget Device" to disconnect the Apple Pencil from your iPad. Next, go to the Apple Pencil settings, and toggle off "Apple Pencil" to disable it. Wait for about 10 seconds, then toggle it back on. This will reset the Apple Pencil and may resolve any connectivity issues. If the problem persists, you can also try restarting your iPad or updating its operating system to the latest version. Additionally, ensure that your Apple Pencil is properly charged, as a low battery can cause connectivity issues. If none of these steps resolve the issue, you may need to contact Apple support for further assistance.