How To Knit Slippers
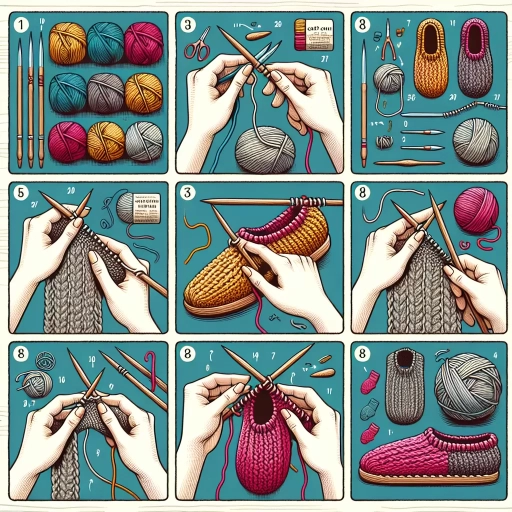
Here is the introduction paragraph: Knitting slippers is a fun and rewarding project that can provide you with a cozy and comfortable way to keep your feet warm during the cold winter months. To create a pair of high-quality slippers, it's essential to start with the right materials, master the essential knitting techniques, and add the finishing touches that will make your slippers stand out. In this article, we will guide you through the process of knitting slippers, from choosing the right yarn and needles to mastering the essential techniques and adding the final details. By following these steps, you'll be able to create a pair of slippers that are not only warm and comfortable but also stylish and durable. So, let's start by exploring the first step in knitting slippers: choosing the right materials for your knitted slippers.
Choosing the Right Materials for Your Knitted Slippers
When it comes to creating the perfect pair of knitted slippers, the choice of materials is crucial. Not only do the right materials ensure a comfortable and cozy fit, but they also play a significant role in determining the overall durability and aesthetic appeal of the slippers. To make an informed decision, it's essential to consider several key factors, including the weight and fiber content of the yarn, the size of the needles, and the use of interfacing and lining. By understanding the importance of yarn weight and fiber content, selecting the perfect needle size, and exploring the role of interfacing and lining, you can create a pair of slippers that are both functional and fashionable. In this article, we'll delve into the world of knitted slipper materials, starting with the foundation of any successful project: understanding the importance of yarn weight and fiber content.
Understanding the Importance of Yarn Weight and Fiber Content
When it comes to knitting slippers, understanding the importance of yarn weight and fiber content is crucial for achieving the desired comfort, durability, and overall performance of the finished product. Yarn weight refers to the thickness of the yarn, which affects the density and warmth of the fabric. Thicker yarns produce denser fabrics that are warmer and more durable, while thinner yarns create lighter and more breathable fabrics. Fiber content, on the other hand, determines the yarn's softness, elasticity, and moisture-wicking properties. Natural fibers like wool, cotton, and silk are breathable, soft, and warm, while synthetic fibers like acrylic and nylon are durable, easy to care for, and often less expensive. Blends of natural and synthetic fibers can offer the best of both worlds, providing a balance of comfort, durability, and affordability. By choosing the right yarn weight and fiber content, knitters can create slippers that are not only comfortable and warm but also long-lasting and easy to care for. For example, a pair of slippers made with a thick, wool-rich yarn will be perfect for cold winter nights, while a pair made with a lightweight, cotton-rich yarn will be ideal for warmer weather. Ultimately, understanding the importance of yarn weight and fiber content allows knitters to make informed decisions and create slippers that meet their specific needs and preferences.
Selecting the Perfect Needle Size for Your Slipper Project
When it comes to selecting the perfect needle size for your slipper project, there are several factors to consider. The type of yarn you're using, the stitch pattern, and the desired fit all play a crucial role in determining the ideal needle size. A good rule of thumb is to start with the recommended needle size on the yarn label, but be prepared to adjust as needed. If you're using a thicker yarn, you may need to use larger needles to achieve the right tension, while thinner yarns may require smaller needles. Additionally, if you're using a complex stitch pattern, you may need to use smaller needles to ensure that the stitches are even and defined. It's also important to consider the fit of the slippers - if you want a snug fit, you may need to use smaller needles, while a looser fit may require larger needles. To ensure the best results, it's a good idea to swatch the yarn and needle size before starting your project, as this will give you a more accurate gauge and help you make any necessary adjustments. By taking the time to select the perfect needle size, you'll be able to create a pair of slippers that are not only comfortable and cozy but also look great.
Exploring the Role of Interfacing and Lining in Slipper Construction
The interfacing and lining of a slipper play a crucial role in its overall comfort, durability, and aesthetic appeal. Interfacing refers to the layer of fabric or material placed between the outer and inner layers of the slipper, providing additional support, stability, and shape retention. It can be made from a variety of materials, such as cotton, polyester, or fusible web, and is often used to add structure and prevent stretching or sagging. On the other hand, the lining is the innermost layer of the slipper that comes into contact with the foot, and is typically made from soft, breathable materials like cotton, fleece, or Sherpa. The lining serves to wick away moisture, regulate temperature, and provide a comfortable surface against the skin. When choosing the right interfacing and lining for your knitted slippers, consider factors such as the type of yarn used, the desired level of support and stability, and the intended use of the slippers. For example, if you're making slippers for outdoor use, you may want to opt for a more durable and water-resistant interfacing and lining. In contrast, if you're making slippers for lounging around the house, a softer and more breathable lining may be preferred. By carefully selecting the right interfacing and lining, you can create slippers that are not only comfortable and durable but also visually appealing and tailored to your specific needs.
Mastering the Essential Knitting Techniques for Slipper Making
Mastering the essential knitting techniques is crucial for creating comfortable and durable slippers. To achieve this, it's vital to understand the fundamentals of knitting, including casting on and binding off, knit and purl stitches, and working with increases and decreases. By learning to cast on and bind off seamlessly, you'll be able to create a smooth, professional-looking edge on your slippers. This technique is the foundation of slipper making, and it's essential to get it right to ensure a comfortable fit. In this article, we'll explore the basics of knit and purl stitches, which will help you create a fabric that's perfect for slippers. We'll also delve into the world of increases and decreases, which will enable you to shape your slippers to fit your feet perfectly. First, let's start with the basics of casting on and binding off, which will set the stage for creating a seamless slipper edge.
Learning to Cast On and Bind Off for a Seamless Slipper Edge
Learning to cast on and bind off is a crucial step in creating a seamless slipper edge. To start, you'll need to choose a cast-on method that works for you, such as the long-tail cast-on or the knitted cast-on. The long-tail cast-on is a popular choice for slippers because it creates a flexible and comfortable edge. To cast on, create a slipknot on your needle, then use your non-dominant hand to hold the working yarn and your dominant hand to pull the yarn to create the desired number of stitches. For a seamless edge, make sure to cast on an odd number of stitches. Once you've cast on, you can begin knitting your slipper. When you're ready to bind off, use a stretchy bind-off method such as the basic bind-off or the elastic bind-off. The basic bind-off is a good choice for slippers because it creates a comfortable and flexible edge. To bind off, knit the first stitch, then pass the second stitch over the first stitch. Repeat this process until you have one stitch left, then cut the yarn and pull it through the last loop. To create a seamless edge, make sure to bind off in pattern, meaning that you should bind off the stitches in the same order that you cast them on. By mastering the cast-on and bind-off techniques, you'll be able to create a seamless slipper edge that is comfortable and durable. With practice, you'll be able to create a professional-looking edge that will make your slippers stand out.
Understanding the Basics of Knit and Purl Stitches for Slipper Fabric
Understanding the basics of knit and purl stitches is crucial for creating a comfortable and durable slipper fabric. Knit and purl stitches are the foundation of knitting, and mastering them will allow you to create a wide range of textures and patterns. A knit stitch is created by inserting the right needle into a stitch on the left needle and pulling up a loop, while a purl stitch is created by inserting the right needle into a stitch on the left needle and pulling up a loop, but working it in the opposite direction. The combination of knit and purl stitches creates a fabric with a soft, smooth texture and a subtle sheen. To create a slipper fabric, you will typically use a combination of knit and purl stitches, working in rows or rounds to create a fabric with a comfortable thickness and texture. For example, you might use a knit-purl-knit-purl pattern to create a fabric with a subtle ribbing, or a knit-knit-purl-purl pattern to create a fabric with a more textured, ridged effect. By understanding the basics of knit and purl stitches, you can experiment with different combinations and patterns to create a unique and comfortable slipper fabric that suits your needs and preferences.
Working with Increases and Decreases to Shape Your Slippers
Working with increases and decreases is a crucial aspect of shaping your slippers to achieve the desired fit and style. Increases are used to add stitches to a row, creating a wider or longer shape, while decreases are used to remove stitches, creating a narrower or shorter shape. To work an increase, you can use techniques such as the make one right (M1R) or make one left (M1L), which involve creating a new stitch by picking up a loop from the row below. Alternatively, you can use the knit front and back (KFB) method, which involves knitting into the front and back of a single stitch to create two new stitches. Decreases, on the other hand, can be worked using techniques such as the knit two together (K2tog) or purl two together (P2tog), which involve knitting or purling two stitches together to create a single stitch. By strategically placing increases and decreases throughout your slipper pattern, you can create a range of shapes and styles, from simple and straightforward to complex and intricate. For example, you can use increases to shape the toe of your slipper, creating a rounded or pointed shape, or use decreases to shape the heel, creating a snug and comfortable fit. By mastering the art of working with increases and decreases, you can take your slipper making to the next level and create truly unique and personalized designs.
Adding the Finishing Touches to Your Hand-Knitted Slippers
The finishing touches on your hand-knitted slippers can elevate them from a cozy, homemade gift to a professional-looking, high-quality footwear. To add the perfect finishing touches, you'll want to consider a few key elements. First, you'll need to add closures and fasteners to ensure a secure fit. This could include buttons, zippers, or elastic, depending on the style and design of your slippers. Additionally, you may want to embellish your slippers with texture, color, and pattern to give them a unique and personalized touch. Finally, blocking and shaping your slippers can help to even out the stitches and give them a professional finish. By incorporating these elements, you can take your hand-knitted slippers to the next level and create a truly special pair. In this article, we'll explore each of these elements in more detail, starting with the importance of adding closures and fasteners for a secure fit.
Adding Closures and Fasteners for a Secure Fit
Adding closures and fasteners is a crucial step in ensuring a secure fit for your hand-knitted slippers. There are several options to choose from, including buttons, zippers, and Velcro. Buttons are a classic choice and can add a decorative touch to your slippers. You can use small buttons or larger ones, depending on the design and style of your slippers. To attach buttons, you will need to create buttonholes on the opposite side of the slipper. This can be done using a tapestry needle and yarn, or a sewing machine. Zippers are another popular option and can provide a more secure closure than buttons. They come in different lengths and styles, so you can choose the one that best suits your slippers. To attach a zipper, you will need to sew it to the slipper using a sewing machine or a needle and thread. Velcro is a great option for slippers that need to be easy to put on and take off, such as for children or people with mobility issues. It is also a good choice for slippers that will be worn with socks, as it can provide a secure fit without being too tight. To attach Velcro, you will need to sew it to the slipper using a sewing machine or a needle and thread. Regardless of the type of closure you choose, make sure to attach it securely to the slipper to prevent it from coming loose over time. You can also add additional features, such as elastic or ribbing, to provide a more secure fit. By adding closures and fasteners, you can ensure that your hand-knitted slippers fit comfortably and securely, and will provide years of warmth and comfort.
Embellishing Your Slippers with Texture, Color, and Pattern
Embellishing your slippers with texture, color, and pattern can elevate them from a simple, functional item to a stylish and eye-catching accessory. One way to add texture is by incorporating different stitch patterns, such as cables, Fair Isle, or intarsia, which can create a visually interesting and tactile experience. You can also experiment with different yarn weights and fibers, such as chunky wool or soft cotton, to add depth and dimension to your slippers. Color is another way to add personality to your slippers, and you can use a variety of techniques such as stripes, polka dots, or ombre to create a unique and playful look. Patterned yarns, such as variegated or self-striping yarns, can also add a fun and dynamic element to your slippers. Additionally, you can use embellishments such as buttons, sequins, or appliques to add a touch of whimsy and personality to your slippers. By combining different textures, colors, and patterns, you can create a truly one-of-a-kind pair of slippers that reflect your personal style and add a touch of handmade charm to your outfit.
Blocking and Shaping Your Slippers for a Professional Finish
To achieve a professional finish on your hand-knitted slippers, blocking and shaping are crucial steps that should not be overlooked. Blocking involves wetting the slippers, stretching them out to the desired shape, and allowing them to dry, which helps to even out the stitches, relax the fibers, and give the slippers a polished appearance. Shaping, on the other hand, involves using a combination of blocking pins, wires, and other tools to mold the slippers into their intended form, ensuring that they fit comfortably and look great. By blocking and shaping your slippers, you can enhance their texture, drape, and overall appearance, making them look like they were made by a professional. To block your slippers, start by wetting them thoroughly, then gently stretch them out to the desired shape, using blocking pins to hold them in place. Allow the slippers to dry completely, which may take several hours or overnight, depending on the yarn and humidity. Once dry, remove the pins and try on the slippers to ensure a comfortable fit. If necessary, use a tapestry needle to weave in any ends and trim excess yarn. To shape your slippers, use a combination of blocking wires and pins to mold the toe, heel, and cuff into their intended form. You can also use a slipper block or shoe tree to help maintain the shape of the slippers while they dry. By taking the time to block and shape your slippers, you can add a professional finish to your hand-knitted creations and enjoy wearing them for years to come.