How To Delete Subscription On Iphone
Here is the introduction paragraph: Managing subscriptions on your iPhone can be a daunting task, especially with the numerous services and apps that offer recurring payments. If you're looking to delete a subscription on your iPhone, you're in the right place. To effectively manage your subscriptions, it's essential to understand what they are and how they work. This article will guide you through the process of deleting a subscription on your iPhone, starting with understanding iPhone subscriptions, including the different types and how they're billed. We'll then cover how to locate and manage your subscriptions on your iPhone, and finally, provide a step-by-step guide on how to cancel and delete unwanted subscriptions. By the end of this article, you'll be able to take control of your iPhone subscriptions and avoid unwanted charges. Let's start by understanding iPhone subscriptions.
Understanding iPhone Subscriptions
In today's digital age, iPhone users are increasingly relying on various subscription-based services to enhance their mobile experience. These services can range from streaming platforms and music apps to cloud storage and software updates. However, managing these subscriptions can be a daunting task, especially when it comes to keeping track of recurring payments and ensuring that you're getting the most value out of your subscriptions. To better understand iPhone subscriptions, it's essential to first identify the different types of subscriptions available, including Apple's own services such as Apple Music and Apple TV+, as well as third-party apps like Netflix and Spotify. By understanding the various types of subscriptions, you can then learn how to effectively manage them, including canceling unwanted subscriptions and adjusting your subscription plans to suit your needs. So, let's start by exploring what iPhone subscriptions are and how they work.
What are iPhone subscriptions?
iPhone subscriptions refer to the various services and features that Apple offers to iPhone users on a recurring basis, often requiring a monthly or annual fee. These subscriptions can include access to exclusive content, premium features, and enhanced services that can enhance the overall iPhone experience. Some common examples of iPhone subscriptions include Apple Music, Apple TV+, Apple Arcade, and Apple News+, which provide users with access to a vast library of music, movies, games, and news content. Additionally, iPhone users can also subscribe to services like iCloud storage, which provides extra storage space for their device, and AppleCare+, which offers extended warranty and support for their iPhone. By subscribing to these services, iPhone users can enjoy a more comprehensive and personalized experience, with access to a wide range of exclusive content and features.
Types of iPhone subscriptions
There are several types of iPhone subscriptions that cater to different needs and preferences. The most common types include Apple One, Apple Music, Apple TV+, Apple Arcade, Apple News+, and Apple Fitness+. Apple One is a bundled subscription that combines Apple Music, Apple TV+, and Apple Arcade into one convenient package. Apple Music is a music streaming service that offers access to millions of songs, playlists, and radio stations. Apple TV+ is a streaming service that features exclusive original content, including TV shows and movies. Apple Arcade is a gaming subscription that offers access to a curated selection of games, with new titles added regularly. Apple News+ is a news and magazine subscription that provides access to thousands of publications, including newspapers, magazines, and online news sites. Apple Fitness+ is a fitness subscription that offers a variety of workouts and training programs, led by expert trainers. Additionally, there are also third-party subscriptions available on the App Store, such as streaming services like Netflix and Hulu, music services like Spotify, and productivity apps like Microsoft Office. These subscriptions can be managed and canceled through the iPhone's Settings app or the App Store.
Why manage iPhone subscriptions?
Managing iPhone subscriptions is essential for several reasons. Firstly, it helps you keep track of your expenses and avoid unexpected charges. With numerous subscription services available, such as Apple Music, Apple TV+, and iCloud storage, it's easy to lose track of what you're paying for. By regularly reviewing your subscriptions, you can identify and cancel any unwanted or unused services, saving you money in the long run. Secondly, managing your iPhone subscriptions helps prevent unauthorized access to your account. If you notice any suspicious activity or unfamiliar subscriptions, you can take immediate action to secure your account and prevent further unauthorized transactions. Additionally, managing your subscriptions allows you to optimize your iPhone's performance. Some subscription services may consume significant storage space or bandwidth, slowing down your device. By canceling or adjusting these services, you can free up resources and improve your iPhone's overall performance. Furthermore, managing your iPhone subscriptions helps you stay organized and clutter-free. By regularly reviewing and canceling unused subscriptions, you can declutter your iPhone and reduce digital noise. This, in turn, can help you focus on the services and apps that truly matter to you. Overall, managing your iPhone subscriptions is crucial for maintaining control over your expenses, securing your account, optimizing your device's performance, and staying organized.
Locating and Managing Subscriptions on iPhone
Locating and managing subscriptions on an iPhone can be a daunting task, especially with the numerous services and apps that offer subscription-based models. However, with the right steps, you can easily keep track of your subscriptions and make necessary changes. To start, you can access the Settings app on your iPhone to view a list of all your active subscriptions. Additionally, you can use the App Store to manage your subscriptions, which provides a centralized location to view and modify your subscription details. Furthermore, you can also view detailed information about each subscription, including the billing cycle and renewal date. By following these steps, you can take control of your iPhone subscriptions and avoid unwanted charges. To begin, let's start by accessing the Settings app.
Accessing the Settings app
To access the Settings app on your iPhone, locate the Settings icon on your home screen, which resembles a gray gear. Tap on the icon to open the app. Alternatively, you can use Siri to open the Settings app by saying "Hey Siri, open Settings." Once the app is open, you will see a list of various settings options, including Wi-Fi, Bluetooth, and Notifications. Scroll down to find the "Subscriptions" option, which is usually located under the "iTunes & App Store" section. Tap on "Subscriptions" to view a list of all your active subscriptions, including Apple Music, Apple TV+, and any other subscription-based services you have signed up for. From here, you can manage your subscriptions, including canceling or changing your subscription plans.
Using the App Store to manage subscriptions
To manage your subscriptions on your iPhone, the App Store is a convenient and centralized hub. Open the App Store, and tap your profile icon in the top right corner. From the dropdown menu, select "Subscriptions" to view a list of all your active and expired subscriptions. Here, you can see the subscription name, the type of subscription, and the renewal date. You can also sort your subscriptions by "Active" or "Expired" to quickly find the ones you want to manage. If you want to cancel a subscription, simply tap on it, and then tap "Cancel Subscription" at the bottom of the page. You'll be asked to confirm your cancellation, and once you do, the subscription will be terminated. Additionally, you can also change your subscription plan or billing period from this page. If you're unsure about a particular subscription, you can also tap "Report a Problem" to contact the app developer or request a refund. The App Store also allows you to view your subscription history, including past subscriptions and the dates they were canceled or expired. By using the App Store to manage your subscriptions, you can easily keep track of your recurring payments and make changes as needed.
Viewing subscription details
Viewing subscription details on your iPhone is a straightforward process that allows you to keep track of your active subscriptions, including the type of subscription, billing date, and amount charged. To view your subscription details, start by opening the Settings app on your iPhone. Then, tap on your name at the top of the screen, followed by "Subscriptions." This will take you to the Subscriptions page, where you'll see a list of all your active subscriptions, including Apple services like Apple Music, Apple TV+, and Apple Arcade, as well as third-party services like Netflix, Hulu, and Spotify. From this page, you can tap on any subscription to view more details, such as the subscription type, billing date, and amount charged. You can also use this page to manage your subscriptions, including canceling or changing your subscription plan. Additionally, you can view your subscription history, including past subscriptions and the dates they were canceled. By regularly viewing your subscription details, you can stay on top of your subscriptions and avoid unexpected charges.
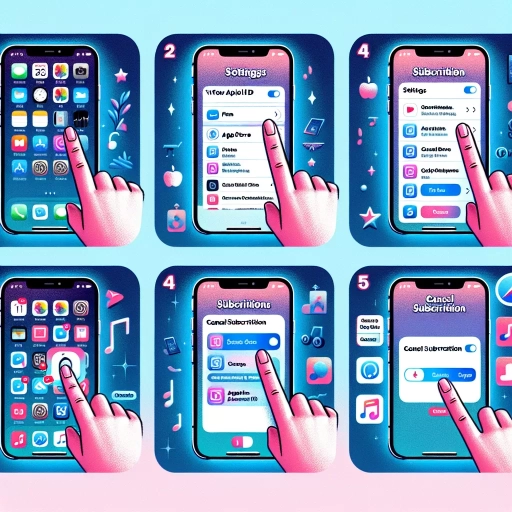
Canceling and Deleting Subscriptions on iPhone
Here is the introduction paragraph: Managing subscriptions on your iPhone can be a daunting task, especially when it comes to canceling and deleting them. With the numerous subscriptions available, it's easy to lose track of which ones you're paying for and which ones you no longer need. Fortunately, Apple provides a straightforward process for canceling and deleting subscriptions on your iPhone. In this article, we'll explore the different methods for canceling subscriptions, including canceling subscriptions through the Settings app, canceling subscriptions through the App Store, and confirming subscription cancellation. By the end of this article, you'll be able to easily manage your subscriptions and avoid unwanted charges. To start, let's take a look at how to cancel subscriptions through the Settings app.
Canceling subscriptions through the Settings app
To cancel a subscription through the Settings app on your iPhone, start by opening the app and tapping on your profile icon in the top right corner. Then, tap on "Subscriptions" and select the subscription you want to cancel. Tap "Cancel Subscription" and confirm your decision. If you don't see the "Cancel Subscription" option, it may be because the subscription is already canceled or it's not available for cancellation. In some cases, you may need to cancel the subscription through the app or website where you originally signed up. Additionally, if you're being charged for a subscription but don't recognize it, you can report a problem to Apple and they'll help you resolve the issue. Canceling a subscription through the Settings app will immediately stop any future payments, but you may still have access to the subscription until the end of the billing cycle.
Canceling subscriptions through the App Store
To cancel a subscription through the App Store on your iPhone, follow these straightforward steps. First, open the App Store and tap your profile icon in the top right corner. Then, tap "Subscriptions" to view a list of all your active subscriptions. Locate the subscription you want to cancel and tap on it. You will then see the subscription details, including the option to "Cancel Subscription." Tap on this option to initiate the cancellation process. You may be asked to confirm your decision to cancel, so tap "Confirm" to proceed. Once you've canceled your subscription, you will still have access to the content or service until the end of the current billing period. After that, your subscription will be terminated, and you will no longer be charged. It's essential to note that canceling a subscription through the App Store will not delete your account or remove any data associated with the subscription. If you want to delete your account entirely, you may need to contact the app's support team or follow their specific instructions for account deletion. By canceling your subscription through the App Store, you can easily manage your subscriptions and avoid unwanted charges.
Confirming subscription cancellation
When you cancel a subscription on your iPhone, it's essential to confirm that the cancellation has been processed successfully. To do this, follow these steps: Open the Settings app, tap on your name, and then select "Subscriptions." Find the subscription you just canceled and tap on it. If the cancellation was successful, you should see a message indicating that the subscription has been canceled and will not renew. Additionally, you can also check the subscription's status by looking for a "Canceled" or "Expired" label next to it. If you don't see this label, it's possible that the cancellation didn't go through, and you may need to try canceling again or contact the app's support team for assistance. It's also a good idea to check your email for a confirmation message from the app or service provider, as they often send a notification to confirm the cancellation. By verifying the cancellation, you can ensure that you won't be charged again and that the subscription has been successfully terminated.