How To Loop Powerpoint
Here is the introduction paragraph: When it comes to creating engaging and interactive presentations, PowerPoint is an indispensable tool. One of its most powerful features is the ability to loop a presentation, allowing it to run continuously without manual intervention. But what exactly is PowerPoint looping, and how can you harness its potential to elevate your presentations? To answer these questions, we'll delve into the world of PowerPoint looping, starting with the basics of understanding how it works. We'll explore the different types of looping, including continuous and timed loops, and discuss the benefits of using this feature. From there, we'll move on to setting up a looping PowerPoint presentation, covering the essential steps and best practices to ensure a seamless experience. Finally, we'll dive into advanced looping techniques, revealing expert tips and tricks to take your presentations to the next level. By the end of this article, you'll be well-equipped to create looping presentations that captivate and engage your audience. So, let's begin by understanding the fundamentals of PowerPoint looping.
Understanding PowerPoint Looping
PowerPoint looping is a feature that allows a presentation to automatically restart from the beginning after the last slide is displayed. This feature is particularly useful for presentations that need to run continuously, such as in a trade show or a retail environment. In this article, we will explore the concept of PowerPoint looping, its benefits, and common use cases. We will start by defining what PowerPoint looping is and how it works. We will then discuss the benefits of looping a PowerPoint presentation, including its ability to engage audiences and convey information in a continuous manner. Finally, we will examine common use cases for looping PowerPoint, such as in retail and event settings. By understanding the ins and outs of PowerPoint looping, you can create more effective and engaging presentations that capture your audience's attention. So, let's dive in and explore what PowerPoint looping is.
What is PowerPoint Looping?
PowerPoint looping is a feature that allows you to continuously play a presentation in a loop, repeating the slides in a predetermined order. This feature is particularly useful for presentations that need to run unattended, such as in a trade show, exhibition, or retail environment. When a presentation is set to loop, it will automatically restart from the beginning after the last slide has been displayed, creating a seamless and continuous playback experience. PowerPoint looping can be customized to loop a specific range of slides, allowing you to focus on key messages or product showcases. Additionally, you can also set the loop to play in a random order, adding an element of surprise and variety to your presentation. To set up PowerPoint looping, you can use the "Set Up Slide Show" feature in PowerPoint, which allows you to specify the loop settings, including the range of slides to loop and the playback order. By using PowerPoint looping, you can create engaging and dynamic presentations that capture your audience's attention and convey your message effectively.
Benefits of Looping a PowerPoint Presentation
Looping a PowerPoint presentation offers several benefits, making it a valuable feature for presenters. One of the primary advantages is that it allows for continuous playback, eliminating the need for manual intervention to restart the presentation. This is particularly useful for trade shows, exhibitions, and other events where the presentation needs to run unattended for an extended period. Looping also enables presenters to create a seamless and professional-looking presentation, as the slides will automatically transition from the last slide back to the first slide, creating a continuous loop. Additionally, looping can help to reduce distractions, as the presenter does not need to worry about restarting the presentation or navigating to the next slide. This feature is also beneficial for presentations that need to be played in a kiosk or self-service environment, where the presentation needs to run continuously without any user interaction. Furthermore, looping can be used to create a dynamic and engaging presentation, as it allows presenters to create a continuous flow of information, keeping the audience engaged and interested. Overall, looping a PowerPoint presentation is a simple yet effective way to enhance the presentation experience and make it more engaging and professional.
Common Use Cases for Looping PowerPoint
When it comes to creating engaging and interactive presentations, looping PowerPoint can be a game-changer. There are several common use cases where looping PowerPoint can be particularly effective. One of the most popular use cases is in trade show booths or exhibitions, where a continuous loop of slides can be used to showcase a company's products or services to attendees. Another common use case is in retail stores, where looping PowerPoint can be used to create eye-catching digital signage that promotes products, offers, or events. Looping PowerPoint can also be used in educational settings, such as in museums or galleries, to provide interactive and immersive experiences for visitors. Additionally, looping PowerPoint can be used in corporate settings, such as in lobbies or reception areas, to display company information, news, or announcements. Furthermore, looping PowerPoint can be used in events, such as conferences or weddings, to create a continuous loop of slides that showcase the event's program, sponsors, or photos. Overall, looping PowerPoint can be used in any situation where a continuous loop of slides is needed to engage, inform, or entertain an audience.
Setting Up a Looping PowerPoint Presentation
Setting up a looping PowerPoint presentation is a great way to create a seamless and engaging visual experience for your audience. To achieve this, there are several key steps you need to take. Firstly, you'll need to configure slide transitions to ensure a smooth and continuous flow between slides. This involves selecting the right transition effects and setting the duration of each transition to create a cohesive and polished presentation. Additionally, you'll need to use the "After" option to set the looping duration, allowing you to control how long the presentation runs before looping back to the start. Finally, you'll need to enable the "Loop Continuously" option to ensure that your presentation runs continuously without interruption. By following these steps, you can create a professional-looking looping presentation that will captivate your audience. In this article, we'll take a closer look at the first step: configuring slide transitions for seamless looping.
Configuring Slide Transitions for Seamless Looping
Configuring slide transitions is a crucial step in creating a seamless looping PowerPoint presentation. To achieve a smooth transition between slides, you can adjust the transition duration, add a transition effect, and set the transition to advance automatically. Start by selecting the slide you want to transition from, then navigate to the Transitions tab in the ribbon. Here, you can choose from a variety of transition effects, such as Fade, Dissolve, or Push. You can also adjust the transition duration by entering a specific time in seconds or using the up and down arrows to increase or decrease the duration. To advance the transition automatically, check the box next to "After" and set the time in seconds. You can also add a sound effect to the transition by clicking on the "Sound" dropdown menu and selecting a sound from the list. Additionally, you can set the transition to repeat by checking the box next to "Loop Until Next Sound" or "Loop Until Stop". By configuring slide transitions, you can create a seamless and engaging looping presentation that will captivate your audience.
Using the "After" Option to Set the Looping Duration
When setting up a looping PowerPoint presentation, you can use the "After" option to specify the duration for which the presentation will loop. This option allows you to set a specific time frame, such as 10 minutes or 1 hour, after which the presentation will automatically restart from the beginning. To use the "After" option, go to the "Transitions" tab in the PowerPoint ribbon, click on the "After" dropdown menu, and select the desired time frame from the list. You can also enter a custom time frame by typing it in the "After" field. Once you've set the looping duration, click "Apply" to apply the changes to the entire presentation. The "After" option is particularly useful when you want to create a self-running presentation that will play continuously for a set period of time, such as in a trade show or exhibition setting. By setting the looping duration, you can ensure that your presentation will run smoothly and continuously, without requiring manual intervention. Additionally, you can also use the "After" option in conjunction with other PowerPoint features, such as animations and transitions, to create a more engaging and dynamic presentation. Overall, using the "After" option to set the looping duration is a simple and effective way to create a seamless and continuous presentation that will captivate your audience.
Enabling the "Loop Continuously" Option
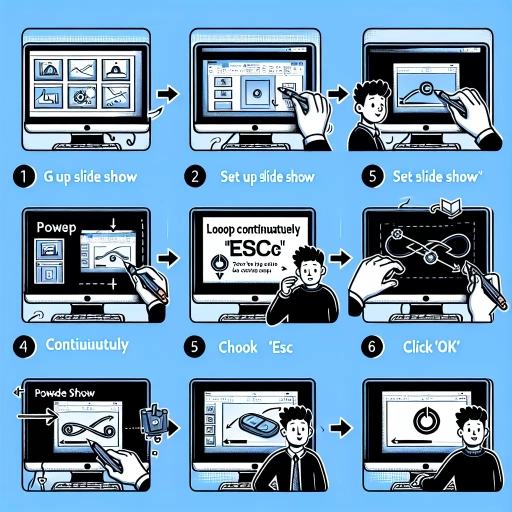
To enable the "Loop Continuously" option in PowerPoint, follow these steps: Open your presentation and go to the "Slide Show" tab in the ribbon. Click on the "Set Up Slide Show" button in the "Set Up" group. In the "Set Up Show" dialog box, check the box next to "Loop continuously until 'Esc'" under the "Show options" section. This option will allow your presentation to loop continuously until you press the "Esc" key. You can also set the presentation to loop a specific number of times by selecting the "Loop" option and entering the desired number of loops. Additionally, you can set the presentation to loop a specific range of slides by selecting the "Loop" option and specifying the start and end slides. Once you have made your selections, click "OK" to save your changes. Your presentation will now loop continuously until you stop it.
Advanced Looping Techniques in PowerPoint
When it comes to creating engaging and interactive presentations, PowerPoint offers a range of advanced looping techniques that can help take your slides to the next level. One of the most effective ways to create a seamless and immersive experience is by using hyperlinks to create a custom looping path. This technique allows you to control the flow of your presentation and guide your audience through a specific sequence of slides. In addition to hyperlinks, PowerPoint's built-in animation features can also be leveraged to create looping effects that add visual interest and depth to your slides. Furthermore, creating a looping presentation with multiple slide shows can help to break up complex information into manageable chunks and keep your audience engaged. By mastering these advanced looping techniques, you can create presentations that are not only informative but also engaging and memorable. In this article, we will explore the first of these techniques in more detail, starting with using hyperlinks to create a custom looping path.
Using Hyperlinks to Create a Custom Looping Path
Using hyperlinks to create a custom looping path in PowerPoint allows you to control the navigation of your presentation and create a unique user experience. To start, you'll need to create a new slide that will serve as the starting point of your loop. From there, you can add hyperlinks to other slides in your presentation, creating a custom path that the user can follow. To add a hyperlink, simply select the text or object you want to link, go to the "Insert" tab, and click on "Hyperlink." Then, select the slide you want to link to and click "OK." You can also add hyperlinks to external websites or other presentations, giving you even more flexibility in your looping path. To create a loop, you'll need to add a hyperlink back to the starting slide, creating a continuous path that the user can follow. You can also use the "Action" feature in PowerPoint to create more complex looping paths, such as looping back to a previous slide or jumping to a specific slide based on user input. By using hyperlinks to create a custom looping path, you can create a more engaging and interactive presentation that keeps your audience engaged.
Utilizing PowerPoint's Built-in Animation Features for Looping
Utilizing PowerPoint's built-in animation features is a great way to create engaging and dynamic presentations. When it comes to looping, PowerPoint offers a range of options to help you create seamless and continuous animations. To access the animation features, simply select the object you want to animate, go to the "Animations" tab, and click on the "Animation Pane" button. From here, you can choose from a variety of animation effects, including entrance, emphasis, exit, and motion path effects. To create a looping animation, you can use the "Repeat" feature, which allows you to specify the number of times the animation should repeat. You can also use the "Trigger" feature to set the animation to start automatically when the slide appears or when a specific action is taken. Additionally, you can use the "Timing" feature to control the duration and delay of the animation, allowing you to fine-tune the looping effect to your liking. By utilizing PowerPoint's built-in animation features, you can create professional-looking looping animations that will enhance your presentations and engage your audience.
Creating a Looping Presentation with Multiple Slide Shows
To create a looping presentation with multiple slide shows in PowerPoint, you'll need to employ some advanced techniques. First, break down your presentation into separate sections or topics, and create a new slide show for each one. This will allow you to control the flow of your presentation and loop specific sections as needed. Next, use the "Slide Show" tab to set up each slide show, specifying the slides that should be included and the transition effects you want to use. To create a seamless loop, you'll need to use the "Rehearse Timings" feature to record the timing of each slide show, and then use the "Record Slide Show" feature to record the entire presentation. This will allow you to set up a loop that plays continuously, with each slide show flowing smoothly into the next. To take it to the next level, you can use PowerPoint's built-in "Actions" feature to create custom buttons and links that allow you to jump between slide shows, creating a non-linear presentation that's fully interactive. By mastering these advanced looping techniques, you'll be able to create complex, dynamic presentations that engage and inform your audience like never before.