How To Prime A Jet Pump
Here is the introduction paragraph: Priming a jet pump is a crucial step in ensuring the efficient operation of your water supply system. A jet pump is a type of pump that uses a combination of suction and pressure to draw water from a well or reservoir and supply it to your home or business. However, like any other pump, a jet pump requires priming to remove air from the system and create suction. In this article, we will guide you through the process of priming a jet pump, starting with understanding the basics of jet pump priming, preparing the pump for priming, and providing a step-by-step guide to priming a jet pump. By the end of this article, you will have a comprehensive understanding of how to prime a jet pump and keep your water supply system running smoothly. To begin, let's start by understanding the basics of jet pump priming.
Understanding the Basics of Jet Pump Priming
Jet pump priming is a crucial process that ensures the efficient operation of jet pumps in various applications, including irrigation, water supply, and industrial processes. To understand the basics of jet pump priming, it's essential to grasp the fundamental concepts involved. This article will delve into the world of jet pump priming, exploring what it is and why it's necessary, the key components involved, and common issues caused by improper priming. By understanding these aspects, individuals can optimize their jet pump systems, minimize downtime, and reduce maintenance costs. In this article, we will first explore what jet pump priming is and why it's necessary, providing a solid foundation for further discussion.
What is Jet Pump Priming and Why is it Necessary
Jet pump priming is the process of removing air from the pump and suction line to create a vacuum that allows the pump to draw water from a well or reservoir. This is necessary because jet pumps are designed to operate with a full column of water, and the presence of air can prevent the pump from functioning properly. When a jet pump is first started or after a period of inactivity, the suction line and pump casing may contain air, which can cause the pump to lose its prime. Priming the pump removes this air and allows the pump to create the necessary suction to draw water into the system. Without priming, the pump may not be able to draw water, leading to a loss of pressure and potentially causing damage to the pump or other components in the system. Regular priming is also necessary to maintain the pump's efficiency and prevent corrosion, as air in the system can cause the pump's impeller to corrode over time. Overall, jet pump priming is a crucial step in ensuring the proper operation and longevity of a jet pump system.
Key Components Involved in Jet Pump Priming
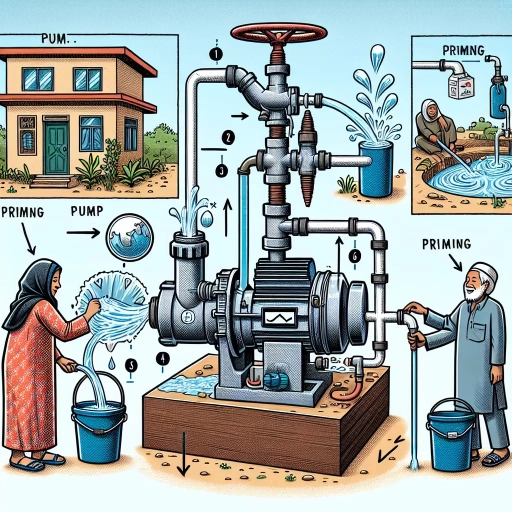
Jet pump priming involves several key components working together to create suction and draw water into the pump. The first component is the pump itself, which is typically a centrifugal pump designed to handle low suction pressures. The pump is connected to a suction pipe that draws water from a well or other water source. The suction pipe is usually equipped with a foot valve, which is a one-way valve that prevents water from flowing back into the well when the pump is turned off. The foot valve is typically located at the bottom of the suction pipe and is designed to open when the pump is turned on, allowing water to flow into the pump. Another critical component is the jet assembly, which is usually located inside the pump casing. The jet assembly consists of a nozzle and a venturi, which work together to create a region of low pressure that helps to draw water into the pump. The nozzle is a narrow, constricted section of pipe that increases the velocity of the water flowing through it, while the venturi is a wider section of pipe that slows down the water and increases its pressure. As the water flows through the jet assembly, it creates a pressure differential that helps to draw water into the pump. The pump is also equipped with a priming plug, which is a small valve that allows air to be removed from the pump and suction pipe during the priming process. The priming plug is usually located on the top of the pump casing and is designed to be opened during priming to allow air to escape. Finally, the pump is connected to a discharge pipe that carries the pressurized water away from the pump and to its intended destination. The discharge pipe is usually equipped with a check valve, which prevents water from flowing back into the pump when it is turned off. Overall, the key components involved in jet pump priming work together to create a suction force that draws water into the pump and pressurizes it for distribution.
Common Issues Caused by Improper Priming
Improper priming of a jet pump can lead to a multitude of issues that can affect its performance, efficiency, and longevity. One of the most common problems caused by improper priming is airlock, which occurs when air enters the pump and prevents it from creating suction. This can result in reduced water flow, increased energy consumption, and even complete pump failure. Another issue that can arise from improper priming is overheating, as the pump works harder to compensate for the lack of suction, leading to increased wear and tear on the motor and other components. Additionally, improper priming can also cause vibration, noise, and cavitation, which can further reduce the pump's performance and lifespan. Furthermore, improper priming can also lead to corrosion and damage to the pump's internal components, particularly if the pump is not properly primed before startup. In severe cases, improper priming can even cause the pump to seize or fail completely, resulting in costly repairs or replacement. Therefore, it is essential to follow the manufacturer's instructions and take the necessary steps to ensure proper priming of the jet pump to avoid these common issues and ensure optimal performance and longevity.
Preparing the Jet Pump for Priming
Preparing a jet pump for priming is a crucial step to ensure its optimal performance and longevity. To achieve this, it's essential to focus on three key areas: checking and replacing the pump's gaskets and seals, ensuring proper alignment of the pump and motor, and inspecting and cleaning the pump's intake and discharge. By addressing these critical components, you can guarantee a smooth priming process and prevent potential issues down the line. In this article, we will delve into the specifics of each step, starting with the importance of checking and replacing the pump's gaskets and seals. This critical task is often overlooked, but it plays a significant role in maintaining the pump's overall health and efficiency. By inspecting and replacing worn-out gaskets and seals, you can prevent leaks, reduce energy consumption, and extend the lifespan of your jet pump. Let's take a closer look at how to check and replace the pump's gaskets and seals.
Checking and Replacing the Pump's Gaskets and Seals
The pump's gaskets and seals play a crucial role in maintaining its efficiency and preventing leaks. Over time, these components can wear out, causing the pump to lose its prime or leak water. To ensure the pump is functioning properly, it's essential to check and replace the gaskets and seals as needed. Start by inspecting the pump's gaskets and seals for any signs of wear, such as cracks, tears, or mineral buildup. If you find any damage, replace the affected gasket or seal with a new one. When replacing the gaskets and seals, make sure to use the correct type and size for your specific pump model. Apply a thin layer of lubricant, such as silicone-based grease, to the new gasket or seal to ensure a proper seal. Once the new gasket or seal is in place, reassemble the pump and test it for leaks. Regularly checking and replacing the pump's gaskets and seals can help prevent costly repairs and ensure the pump continues to function efficiently. Additionally, it's recommended to replace the gaskets and seals every 6-12 months, depending on the pump's usage and operating conditions. By doing so, you can help extend the lifespan of your jet pump and maintain its optimal performance.
Ensuring Proper Alignment of the Pump and Motor
Ensuring proper alignment of the pump and motor is a crucial step in preparing the jet pump for priming. Misalignment can lead to reduced pump performance, increased vibration, and premature wear on the pump and motor. To ensure proper alignment, start by checking the manufacturer's instructions for specific alignment recommendations. Typically, the pump and motor should be aligned within 1/8 inch of each other, with the pump's shaft aligned with the motor's shaft. Use a straightedge or laser alignment tool to check the alignment, and make any necessary adjustments to the motor or pump mounts. Additionally, ensure that the pump and motor are securely fastened to their respective mounts to prevent movement during operation. Proper alignment will help ensure smooth operation, reduce noise, and prolong the life of the pump and motor. By taking the time to ensure proper alignment, you can help prevent common issues and ensure a successful priming process.
Inspecting and Cleaning the Pump's Intake and Discharge
Inspecting and cleaning the pump's intake and discharge is a crucial step in preparing the jet pump for priming. The intake and discharge pipes are responsible for drawing in water and expelling it, respectively, and any blockages or debris in these pipes can prevent the pump from functioning properly. To inspect the intake and discharge, start by shutting off the power to the pump and closing the valves on both the intake and discharge pipes. Next, remove any fittings or adapters from the ends of the pipes and inspect the interior for any signs of blockages, such as mineral buildup, sediment, or debris. If you find any blockages, use a pipe cleaning brush or plumber's snake to remove them. Additionally, check the intake screen or filter for any blockages or debris and clean or replace it as needed. Once the intake and discharge pipes are clean, reassemble the fittings and adapters and open the valves to allow water to flow through the pipes. Finally, turn the power back on and check the pump's performance to ensure that it is functioning properly. By inspecting and cleaning the pump's intake and discharge, you can help ensure that your jet pump is primed and ready to go, and that it will continue to function efficiently and effectively over time.
Step-by-Step Guide to Priming a Jet Pump
Priming a jet pump can seem like a daunting task, but with the right steps, it can be done efficiently and effectively. To ensure your pump is working at its best, it's essential to follow a step-by-step guide to priming a jet pump. The process involves three crucial steps: filling the pump casing with water, bleeding air from the pump and piping, and starting the pump and checking for leaks. By following these steps, you'll be able to prime your jet pump successfully and have it up and running in no time. In this article, we'll break down each step in detail, starting with the first and most critical step: filling the pump casing with water.
Step 1: Filling the Pump Casing with Water
Priming a jet pump requires careful attention to detail to ensure the pump operates efficiently and effectively. The first step in priming a jet pump is to fill the pump casing with water. This is a crucial step, as it helps to remove any air pockets that may be present in the pump and ensures that the pump is able to create suction. To fill the pump casing with water, start by locating the priming plug, which is usually located on the top or side of the pump. Remove the plug and pour water into the pump casing until it is about half full. It's essential to use a hose or a bucket to fill the pump casing, as pouring water directly from a faucet may not provide enough water pressure to fill the pump. Once the pump casing is filled with water, replace the priming plug and make sure it is securely tightened to prevent any leaks. It's also important to check the pump's suction pipe for any blockages or kinks, as these can prevent the pump from priming properly. By filling the pump casing with water, you are creating a vacuum that will help to draw water into the pump and initiate the priming process. This step is critical in ensuring that the pump operates efficiently and effectively, and it's essential to follow the manufacturer's instructions for priming the pump to avoid any damage or malfunction.
Step 2: Bleeding Air from the Pump and Piping
To prime a jet pump, the next step after preparing the pump is to bleed air from the pump and piping. This is a crucial step as air pockets can prevent the pump from functioning properly. Start by locating the bleed valve, usually found on the pump casing or near the pump outlet. Open the valve slowly, allowing air to escape while water flows in to replace it. You may hear a hissing sound as the air is released. Continue to open the valve until water starts to flow out, indicating that the air has been successfully bled from the system. If you're using a self-priming pump, you may need to repeat this process several times to ensure all air is removed. It's also essential to check the pump's manual for specific instructions on bleeding air, as different models may have varying procedures. Additionally, if you're working with a pump that has a built-in air release valve, you may need to activate it according to the manufacturer's instructions. By bleeding air from the pump and piping, you'll be able to create a vacuum that will help to draw water into the pump, ultimately allowing it to prime successfully.
Step 3: Starting the Pump and Checking for Leaks
The third step in priming a jet pump is to start the pump and check for leaks. This is a critical step in the priming process, as it helps ensure that the pump is functioning properly and that there are no issues with the suction or discharge lines. To start the pump, simply flip the switch or turn the knob to the "on" position. As the pump begins to run, listen for any unusual noises or vibrations, which could indicate a problem with the pump or its installation. At the same time, inspect the suction and discharge lines, as well as any fittings or connections, for signs of leaks. Look for water droplets or a steady stream of water, which could indicate a leak in the system. If you notice any leaks, turn off the pump immediately and investigate the source of the leak. Make any necessary repairs before proceeding. Once you've confirmed that there are no leaks, allow the pump to run for a few minutes to ensure that it's primed and functioning properly. During this time, check the pump's pressure gauge to ensure that it's within the recommended range. If the pressure is too low, it may indicate that the pump is not primed correctly, while high pressure could indicate a blockage or other issue in the system. By starting the pump and checking for leaks, you can help ensure that your jet pump is working efficiently and effectively, and that you're getting the water pressure you need.