How To Add Video To Powerpoint
In today's dynamic digital landscape, PowerPoint presentations have evolved beyond static slides to incorporate engaging multimedia elements. Among these, video integration stands out as a powerful tool to captivate audiences and convey complex information effectively. Whether you're a seasoned presenter or a novice looking to enhance your slideshows, mastering the art of adding videos to PowerPoint can significantly elevate your presentation game. This comprehensive guide will walk you through the process of incorporating video content into your PowerPoint presentations, ensuring your message resonates with viewers and leaves a lasting impression. We'll begin by exploring the fundamentals of video integration in PowerPoint, providing you with a solid foundation for understanding the various options and considerations. Next, we'll offer a step-by-step guide to adding videos, catering to users of different skill levels and PowerPoint versions. Finally, we'll delve into advanced video techniques, empowering you to create truly professional and impactful presentations. By the end of this article, you'll have the knowledge and confidence to seamlessly blend video content into your PowerPoint slides, taking your presentations to the next level. Let's start by understanding the basics of video integration in PowerPoint and why it's such a valuable tool for presenters.
Understanding Video Integration in PowerPoint
In today's digital age, presentations have evolved far beyond simple text and static images. PowerPoint, a cornerstone of professional communication, has kept pace with this evolution by offering robust video integration capabilities. Understanding how to effectively incorporate video into your PowerPoint presentations can significantly enhance your ability to engage audiences, convey complex information, and leave a lasting impression. This article delves into the world of video integration in PowerPoint, exploring three key aspects that every presenter should know. First, we'll examine the numerous benefits of adding video to presentations, from increased audience engagement to improved information retention. Next, we'll provide an overview of the various video formats supported by PowerPoint, helping you choose the right format for your needs. Finally, we'll discuss important considerations regarding file size and compatibility, ensuring your video-enhanced presentations run smoothly across different devices and platforms. By mastering these elements, you'll be well-equipped to harness the full potential of video in your PowerPoint presentations. Let's embark on this journey to understanding video integration in PowerPoint and elevate your presentation skills to new heights.
Benefits of adding video to presentations
Adding video to presentations has become an increasingly popular and effective way to enhance the impact and engagement of PowerPoint slideshows. This dynamic multimedia element offers a multitude of benefits that can significantly improve the overall quality and effectiveness of your presentations. One of the primary advantages of incorporating video into presentations is its ability to capture and maintain audience attention. In today's fast-paced, visually-driven world, viewers are accustomed to consuming information through video content. By integrating video clips, you can break up the monotony of static slides and provide a more engaging experience for your audience. This variety in content delivery helps to combat "death by PowerPoint" and keeps viewers interested throughout your presentation. Videos also have the power to convey complex information more efficiently than text or static images alone. Whether you're explaining a complicated process, demonstrating a product, or showcasing a case study, video can provide a clear and concise visual representation that is often easier for viewers to understand and retain. This visual reinforcement of key concepts can lead to improved comprehension and better retention of the presented material. Furthermore, video integration allows presenters to leverage the emotional impact of audiovisual content. A well-chosen video clip can evoke powerful emotions, tell compelling stories, and create a lasting impression on your audience. This emotional connection can be particularly valuable when trying to persuade, inspire, or motivate viewers, making your presentation more memorable and impactful. Another significant benefit of adding video to presentations is the ability to incorporate expert opinions, customer testimonials, or real-world examples directly into your slides. This external validation can lend credibility to your message and provide social proof, which can be especially useful in sales presentations or when introducing new ideas or concepts. Video integration also offers presenters the opportunity to showcase their creativity and technical proficiency. By seamlessly blending video content with traditional PowerPoint elements, you can create a more polished and professional-looking presentation that stands out from the crowd. This attention to detail and willingness to embrace multimedia can leave a positive impression on your audience and enhance your overall credibility as a presenter. Moreover, the inclusion of video can help accommodate different learning styles within your audience. While some individuals prefer reading text or examining static images, others may be more receptive to audiovisual information. By incorporating video, you can cater to a broader range of learning preferences, ensuring that your message resonates with as many viewers as possible. Lastly, video integration can save valuable presentation time by condensing information that would otherwise require multiple slides or lengthy explanations. This efficiency allows you to cover more ground in less time, leaving room for audience interaction, questions, and discussion. In conclusion, the benefits of adding video to presentations are numerous and significant. From improved engagement and understanding to enhanced emotional impact and professionalism, video integration can elevate your PowerPoint presentations to new heights, making them more effective, memorable, and impactful for your audience.
Types of video formats supported by PowerPoint
PowerPoint supports a variety of video formats, allowing users to seamlessly integrate multimedia content into their presentations. Understanding the different types of video formats compatible with PowerPoint is crucial for creating engaging and dynamic slideshows. The most commonly supported formats include MP4, WMV, MOV, and AVI, each with its own strengths and limitations. MP4 (MPEG-4) is widely regarded as the most versatile and reliable format for PowerPoint presentations. It offers excellent compression while maintaining high quality, making it ideal for both online and offline presentations. MP4 files are compatible with most devices and operating systems, ensuring smooth playback across various platforms. PowerPoint supports H.264 encoded MP4 files, which provide optimal performance and visual quality. Windows Media Video (WMV) is another popular format, particularly for users working primarily on Windows systems. WMV files are typically smaller in size compared to other formats, making them suitable for presentations with storage or bandwidth limitations. However, they may require additional codecs on non-Windows devices for proper playback. QuickTime Movie (MOV) files, developed by Apple, are well-supported in PowerPoint and offer high-quality video playback. MOV files are known for their excellent image quality and are frequently used in professional video production. However, they tend to have larger file sizes compared to MP4 or WMV formats. Audio Video Interleave (AVI) is an older format that remains compatible with PowerPoint. While AVI files can offer high quality, they often result in larger file sizes and may not be as efficient as more modern formats like MP4. In addition to these primary formats, PowerPoint also supports other video types such as ASF, MPG, and M4V, although compatibility may vary depending on the PowerPoint version and the operating system being used. It's worth noting that newer versions of PowerPoint, particularly those included in Microsoft 365, offer broader format support and improved video handling capabilities. When choosing a video format for your PowerPoint presentation, consider factors such as file size, playback quality, compatibility across different devices, and the intended distribution method of your presentation. For optimal results, it's generally recommended to use MP4 files encoded with H.264, as this format provides the best balance of quality, compatibility, and file size. To ensure smooth playback and avoid potential issues, it's advisable to test your videos within PowerPoint before delivering your presentation. This allows you to verify compatibility, adjust settings if necessary, and ensure that your multimedia content enhances rather than hinders your presentation's effectiveness.
Considerations for file size and compatibility
When integrating videos into PowerPoint presentations, file size and compatibility are crucial considerations that can significantly impact the overall quality and performance of your presentation. As multimedia elements become increasingly prevalent in professional and educational settings, it's essential to strike a balance between visual appeal and practical functionality. File size is a primary concern when incorporating videos into PowerPoint slides. Large video files can bloat your presentation, making it difficult to share, transfer, or even open on some devices. This is particularly problematic when presenting on less powerful computers or when sharing your presentation via email or cloud storage services with file size limitations. To mitigate this issue, consider compressing your videos before insertion. Many video editing tools offer compression options that can reduce file size while maintaining acceptable quality. Additionally, PowerPoint itself provides options to compress media files within the presentation, which can be accessed through the File menu. Compatibility is another critical factor to consider. Different versions of PowerPoint and various operating systems may handle video formats differently. To ensure your presentation runs smoothly across different platforms, it's advisable to use widely supported video formats such as MP4 with H.264 codec. This format offers a good balance between quality and compatibility. However, if you're certain about the system on which you'll be presenting, you can optimize for that specific environment. It's also worth noting that embedding videos directly into your PowerPoint file can increase compatibility across different systems, as opposed to linking to external video files. Embedded videos travel with the presentation file, reducing the risk of broken links or missing media when presenting on different computers. However, this approach does increase the overall file size of your presentation. Another consideration is the resolution and quality of your video. While high-resolution videos can enhance the visual impact of your presentation, they also significantly increase file size. Consider whether the additional quality is necessary for your specific presentation context. In many cases, a lower resolution video that maintains clarity while reducing file size can be a more practical choice. Lastly, it's crucial to test your presentation on different devices and PowerPoint versions before your actual presentation. This helps identify any potential compatibility issues or performance problems in advance, allowing you to make necessary adjustments. Remember that what works perfectly on your computer might not perform the same way on another system. By carefully considering file size and compatibility when integrating videos into PowerPoint, you can create presentations that are not only visually engaging but also practical and reliable across various presentation environments. This thoughtful approach ensures that your message is delivered effectively without technical hitches, maintaining professionalism and audience engagement throughout your presentation.
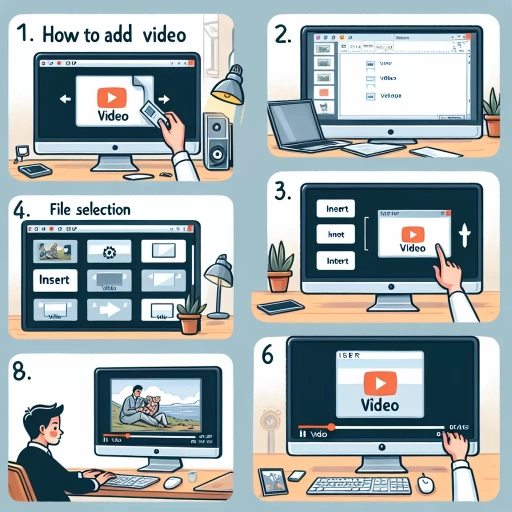
Step-by-Step Guide to Adding Video in PowerPoint
PowerPoint presentations have long been a staple in business, education, and various professional settings. However, in today's multimedia-rich world, static slides alone may not always capture your audience's attention effectively. Enter video integration – a powerful tool that can elevate your presentations to new heights of engagement and impact. This comprehensive guide will walk you through the process of adding videos to your PowerPoint slides, enabling you to create dynamic and captivating presentations. We'll explore three primary methods of incorporating video content: inserting videos from your computer, adding videos from online sources, and embedding YouTube videos directly into your slides. Each approach offers unique advantages and caters to different needs, ensuring you can find the perfect solution for your presentation requirements. By mastering these techniques, you'll be able to seamlessly blend visual and auditory elements, making your message more memorable and persuasive. As we delve into the intricacies of video integration in PowerPoint, you'll gain a deeper understanding of how this feature can transform your presentations and captivate your audience like never before.
Inserting video from your computer
Inserting a video from your computer into your PowerPoint presentation is a straightforward process that can significantly enhance your slides' visual appeal and engagement factor. This method is particularly useful when you have locally stored videos that you want to incorporate into your presentation without relying on internet connectivity. To begin, ensure that your video file is in a compatible format such as MP4, WMV, or AVI, as these are widely supported by PowerPoint. Navigate to the slide where you want to add the video and click on the "Insert" tab in the top menu. Look for the "Video" button, which is usually located in the "Media" group. Clicking on this button will open a dropdown menu where you should select "Video on My PC." This action will prompt a file explorer window to appear, allowing you to browse your computer's folders and locate the desired video file. Once you've found the video you want to insert, select it and click "Insert" or double-click the file. PowerPoint will then embed the video into your slide, and you'll see a preview thumbnail of the video's first frame. At this point, you can resize and reposition the video on your slide as needed by clicking and dragging the corners or edges of the video frame. PowerPoint also offers various formatting options to customize the video's appearance, such as adding borders, applying video styles, or adjusting brightness and contrast. These options can be accessed through the "Video Format" and "Playback" tabs that appear when the video is selected. It's important to consider the video's playback settings, such as whether it should start automatically or on click, loop continuously, or play full screen. These settings can be adjusted in the "Playback" tab to suit your presentation style and needs. Remember that inserting a video from your computer means the video file becomes part of your PowerPoint file, which can significantly increase the overall file size of your presentation. This larger file size may make it more challenging to share or email the presentation, so consider compressing the video or using file-sharing services for large presentations. Additionally, when presenting on a different computer, ensure that the necessary video codecs are installed to play the embedded video smoothly. By following these steps and considerations, you can effectively incorporate compelling video content from your computer into your PowerPoint presentations, creating a more dynamic and engaging experience for your audience.
Adding video from online sources
Adding video from online sources to your PowerPoint presentation can significantly enhance your content and captivate your audience. This method allows you to incorporate a vast array of video content from popular platforms like YouTube, Vimeo, and other streaming services directly into your slides. To begin, ensure you have a stable internet connection, as the video will stream during your presentation. Start by navigating to the desired slide where you want to insert the video. Click on the "Insert" tab in the PowerPoint ribbon, then select "Video" and choose "Online Video" from the dropdown menu. A dialog box will appear, providing you with several options for adding online videos. For YouTube videos, you can simply copy and paste the video's URL into the search bar or use keywords to find a specific video. PowerPoint will display a list of search results, allowing you to preview and select the most appropriate video for your presentation. Once you've chosen your video, click "Insert" to add it to your slide. For other platforms like Vimeo, you may need to obtain the video's embed code from the source website and paste it into the designated field in PowerPoint's "Insert Video" dialog box. After inserting the video, you can resize and position it on your slide as needed. PowerPoint also offers various formatting options to customize the video's appearance, such as adding borders, applying video styles, or adjusting brightness and contrast. To ensure smooth playback during your presentation, consider setting the video to start automatically or on click, depending on your preference. You can access these options by selecting the video and navigating to the "Playback" tab in the ribbon. It's important to note that online videos require an active internet connection to play during your presentation. If you're concerned about potential connectivity issues, you may want to consider downloading the video and inserting it as a local file instead. Additionally, be mindful of copyright restrictions and ensure you have the necessary permissions to use the video content in your presentation. By incorporating online videos into your PowerPoint slides, you can leverage a wealth of existing content to support your message, demonstrate concepts visually, or add a dynamic element to your presentation. This feature is particularly useful for educational presentations, business pitches, or any scenario where you want to engage your audience with multimedia content without the need to create or download videos yourself.
Embedding YouTube videos in PowerPoint
Embedding YouTube videos in PowerPoint presentations can significantly enhance the visual appeal and informational value of your slides. This feature allows you to seamlessly integrate relevant video content from the world's largest video-sharing platform directly into your presentation, without the need to switch between applications or rely on an internet connection during your presentation. By incorporating YouTube videos, you can illustrate complex concepts, provide real-world examples, or add entertainment value to keep your audience engaged. To embed a YouTube video in PowerPoint, start by locating the desired video on YouTube and copying its URL. Then, in PowerPoint, navigate to the "Insert" tab and click on "Video." From the dropdown menu, select "Online Video" and paste the YouTube URL into the provided field. PowerPoint will automatically generate a preview of the video, allowing you to adjust its size and position on the slide. It's important to note that this method requires an active internet connection during the presentation to stream the video content. For those who prefer to have more control over the video playback or need to present in environments without reliable internet access, downloading the YouTube video and inserting it as a local file is an alternative option. However, it's crucial to respect copyright laws and obtain necessary permissions before downloading and using third-party content in your presentations. When embedding YouTube videos, consider the timing and relevance of the content to your overall presentation. Use videos strategically to reinforce key points, provide visual breaks, or stimulate discussion. It's also wise to test the embedded videos before your presentation to ensure they play smoothly and at the desired quality. PowerPoint offers various formatting options for embedded videos, including the ability to set start and end times, add a poster frame, and apply video styles or effects. These features allow you to customize the video's appearance and behavior to seamlessly integrate with your slide design and presentation flow. Remember that while YouTube videos can be powerful tools in presentations, they should complement your content rather than overshadow it. Use them judiciously and always have a backup plan in case of technical difficulties. By mastering the art of embedding YouTube videos in PowerPoint, you can create more dynamic, engaging, and memorable presentations that effectively communicate your message and captivate your audience.
Advanced Video Techniques in PowerPoint
PowerPoint, a versatile tool in the Microsoft Office suite, has evolved far beyond simple slide presentations. With the increasing importance of multimedia in communication, mastering advanced video techniques in PowerPoint has become essential for creating engaging and impactful presentations. This article delves into the sophisticated video capabilities of PowerPoint, exploring how users can elevate their presentations through expert video manipulation. We'll examine three key areas that can transform your approach to video in PowerPoint: customizing video playback options, editing and trimming videos within the application, and troubleshooting common video issues. By mastering these techniques, presenters can ensure seamless integration of video content, maintain audience engagement, and effectively convey their message. Whether you're a business professional, educator, or creative enthusiast, understanding these advanced video techniques will empower you to create more dynamic and professional presentations. As we explore these topics, you'll gain insights into maximizing the potential of video in your PowerPoint projects, setting the stage for a deeper understanding of video integration in PowerPoint.
Customizing video playback options
Customizing video playback options in PowerPoint offers a wealth of possibilities to enhance your presentation and create a more engaging experience for your audience. By fine-tuning these settings, you can seamlessly integrate videos into your slides and maintain control over how they appear and behave during your presentation. One of the most useful customization features is the ability to trim your video, allowing you to showcase only the most relevant portions. This is particularly beneficial when working with longer clips or when you need to highlight specific segments. PowerPoint's built-in trimming tool enables you to set precise start and end points, ensuring that your video content remains concise and on-topic. Another powerful option is the ability to adjust video playback speed. This feature can be leveraged to emphasize certain parts of the video by slowing them down or to quickly skim through less critical sections by speeding them up. By manipulating the playback speed, you can effectively control the pacing of your presentation and maintain audience engagement. PowerPoint also allows you to add bookmarks to your videos, which serve as navigation points within the clip. These bookmarks can be used to jump to specific sections during your presentation, making it easy to reference particular moments or skip to relevant parts as needed. This feature is especially valuable when dealing with longer videos or when you want to create an interactive presentation structure. Fade effects can be applied to both the beginning and end of your videos, creating a smoother transition between your slides and video content. This subtle touch can significantly enhance the overall polish of your presentation, making it appear more professional and cohesive. For a more dynamic presentation, you can utilize the loop feature, which allows your video to play continuously until you move to the next slide. This can be particularly effective for background videos or when you want to emphasize a specific point through repetition. PowerPoint also offers options to control how your video starts playing. You can set it to begin automatically when the slide appears, start with a click, or even delay the start by a specified number of seconds. This flexibility allows you to time your video perfectly with your spoken content or other elements on the slide. Additionally, you can customize the poster frame, which is the static image displayed before the video starts playing. This can be a selected frame from the video itself or an entirely different image, giving you control over what your audience sees before the video begins. By mastering these customization options, you can create a more polished, professional, and engaging presentation that effectively utilizes video content to support your message and captivate your audience.
Editing and trimming videos within PowerPoint
Editing and trimming videos within PowerPoint is a powerful feature that allows users to refine and customize their video content without the need for external video editing software. This functionality, introduced in more recent versions of PowerPoint, empowers presenters to create more polished and focused presentations by fine-tuning video clips directly within the familiar PowerPoint interface. To begin editing a video in PowerPoint, users simply need to insert the video onto a slide and select it. The "Video Tools" contextual tab will appear, offering a range of editing options. One of the most useful features is the ability to trim videos, which allows users to remove unwanted portions from the beginning or end of a clip. This is particularly helpful when you want to highlight a specific segment of a longer video or remove irrelevant content. The trimming process is intuitive, with a simple drag-and-drop interface that lets users adjust the start and end points of the video visually. Beyond basic trimming, PowerPoint offers more advanced editing capabilities. Users can apply various video styles and effects to enhance the visual appeal of their clips. These include adjusting brightness and contrast, adding borders, and applying artistic effects like blur or sharpen. The software also allows for color correction, enabling users to modify the tone and saturation of their videos to better match the overall presentation aesthetic. Another valuable feature is the ability to add bookmarks to specific points in a video. These bookmarks can be used to create custom navigation within the video, allowing presenters to jump to key moments during their presentation. This is particularly useful for longer videos or when you need to reference different parts of a video throughout your presentation. PowerPoint also offers options for adding fade effects to the beginning and end of videos, creating smoother transitions between slides or sections of your presentation. Users can control the volume of the video, fade audio in or out, and even set the video to play in the background across multiple slides. For those looking to create more dynamic presentations, PowerPoint allows for the insertion of multiple videos on a single slide. This feature enables users to create engaging comparisons or showcase different aspects of a topic simultaneously. Additionally, users can set videos to play automatically or on click, giving presenters greater control over the flow of their presentation. While PowerPoint's video editing capabilities may not be as extensive as dedicated video editing software, they provide a convenient and accessible way for users to enhance their video content directly within their presentations. This integration streamlines the presentation creation process, eliminating the need to switch between multiple applications and ensuring that videos are perfectly tailored to complement the overall message and structure of the presentation.
Troubleshooting common video issues in presentations
Troubleshooting common video issues in presentations is an essential skill for creating polished and professional PowerPoint slideshows. While incorporating videos can significantly enhance your presentation, it's not uncommon to encounter various challenges along the way. By understanding these issues and knowing how to address them, you can ensure your videos play seamlessly and effectively convey your message. One of the most frequent problems presenters face is video playback failure. This can occur due to compatibility issues between the video format and PowerPoint or the computer's media player. To resolve this, try converting your video to a widely supported format like MP4 using H.264 codec. Additionally, ensure that you have the latest version of PowerPoint installed and all necessary codecs are up to date on your system. Another common issue is poor video quality or choppy playback. This can be caused by large file sizes or high-resolution videos that strain your computer's resources. To mitigate this, compress your videos without significantly sacrificing quality, or consider using lower resolution versions for smoother playback. You can also try embedding the video file directly into your presentation rather than linking to an external source, which can help reduce lag and buffering issues. Audio problems are also prevalent in video presentations. If your video plays without sound, check that the audio is not muted within PowerPoint or on your computer. Ensure that the correct audio output device is selected and that the volume is turned up. In some cases, the audio codec may be incompatible, so converting the video to a different format might resolve the issue. Timing and synchronization problems can occur when videos don't start or stop at the desired points. To address this, use PowerPoint's built-in video editing tools to trim the video to the exact length you need. You can also set custom start and end times, as well as configure playback options like looping or playing automatically. Sometimes, videos may not display correctly on different computers or when using various projection systems. To avoid this, test your presentation on multiple devices and consider bringing your own laptop to important presentations. It's also wise to have a backup plan, such as embedding screenshots of key video frames or having alternative content ready in case of technical difficulties. Lastly, file size constraints can be a significant hurdle when working with videos in PowerPoint. Large video files can make your presentation unwieldy and difficult to share or transfer. To overcome this, compress your videos, use cloud storage solutions to stream content, or consider breaking your presentation into smaller, more manageable files. By anticipating these common video issues and knowing how to troubleshoot them effectively, you can create more reliable and impactful presentations that leverage the power of video content without succumbing to technical setbacks. Remember to always test your presentation thoroughly before delivering it to ensure a smooth and professional experience for your audience.