How To Wax Snowboard
Waxing your snowboard is an essential part of maintaining its performance and longevity. A well-waxed snowboard can make all the difference in your riding experience, allowing you to glide smoothly and effortlessly down the mountain. However, many snowboarders are unsure of how to properly wax their boards, leading to subpar performance and premature wear. In this article, we will break down the process of waxing a snowboard into three key steps: preparation, the waxing process, and finishing touches. To start, preparation is key to a successful wax job. Before you can even think about applying wax, you need to make sure your board is clean and free of debris. This involves removing any dirt, grime, or old wax from the surface of the board, as well as repairing any scratches or damage. By taking the time to properly prepare your board, you'll be able to ensure a smooth and even wax application, which is essential for optimal performance. Note: The introduction paragraph should be 200 words. Here is the introduction paragraph: Waxing your snowboard is an essential part of maintaining its performance and longevity. A well-waxed snowboard can make all the difference in your riding experience, allowing you to glide smoothly and effortlessly down the mountain. However, many snowboarders are unsure of how to properly wax their boards, leading to subpar performance and premature wear. In fact, a poorly waxed snowboard can be frustrating to ride, causing you to struggle with speed and control. On the other hand, a well-waxed snowboard can be a game-changer, allowing you to ride with confidence and precision. To achieve this level of performance, it's essential to understand the process of waxing a snowboard. In this article, we will break down the process into three key steps: preparation, the waxing process, and finishing touches. By following these steps, you'll be able to give your snowboard the TLC it needs to perform at its best. To start, preparation is key to a successful wax job, and it's essential to take the time to properly prepare your board before applying wax.
Preparation is Key
Preparation is key to a successful snowboard waxing experience. To ensure a smooth and efficient process, it's essential to gather essential tools and materials, choose the right wax for your snowboard, and prepare your workspace. Having the right tools and materials will save you time and frustration, while selecting the right wax will ensure your snowboard performs optimally. A well-prepared workspace will also help you stay organized and focused. By taking the time to prepare, you'll be able to achieve a high-quality wax job that will keep your snowboard in top condition. In this article, we'll explore the importance of preparation and provide tips on how to get started. First, let's take a look at the essential tools and materials you'll need to get started.
Gather Essential Tools and Materials
To ensure a successful snowboard waxing experience, it's crucial to gather all the essential tools and materials beforehand. Start by collecting a snowboard wax, which comes in various types, including all-temperature, cold, and warm waxes. Choose a wax that suits your snowboard's base material and the temperature conditions you'll be riding in. Next, gather a wax iron, which is specifically designed for melting and spreading wax evenly. A scraper, preferably a plastic or metal one, is necessary for removing excess wax from the base of the board. A soft, clean cloth or paper towel will come in handy for wiping away any remaining wax residue. Additionally, a base cleaner or citrus-based cleaner can be used to remove dirt, grime, and old wax from the base before applying new wax. A thermometer can also be useful in determining the ideal temperature for waxing. Finally, make sure you have a well-ventilated workspace, as the waxing process can release strong fumes. By having all these tools and materials at your disposal, you'll be well-prepared to give your snowboard the TLC it needs to perform at its best.
Choose the Right Wax for Your Snowboard
Here is the paragraphy: Choosing the right wax for your snowboard is crucial for optimal performance and durability. With various types of waxes available, selecting the right one can be overwhelming. The first step is to consider the temperature range you'll be riding in. Cold waxes are designed for temperatures below 25°F (-4°C), while warm waxes are suitable for temperatures above 25°F (-4°C). All-temperature waxes are a good option if you ride in varying conditions. Next, think about the snow conditions you'll encounter. If you'll be riding in icy or hardpack conditions, a harder wax with a higher fluorine content is recommended. For softer snow, a softer wax with a lower fluorine content is better. Additionally, consider the type of snowboard you have. If you have a high-performance board, a high-performance wax with advanced additives is a good choice. If you have a beginner or all-mountain board, a standard wax will suffice. Finally, consider the environmental impact of the wax. Eco-friendly waxes made from natural ingredients are a great option for those who want to reduce their carbon footprint. By considering these factors, you can choose the right wax for your snowboard and enjoy a smooth, fast ride.
Prepare Your Workspace
Here is the paragraphy: To ensure a smooth and successful waxing process, it's essential to prepare your workspace. Start by clearing a flat and stable surface, such as a table or countertop, of any clutter or obstructions. Cover the surface with a drop cloth or old sheets to protect it from wax drips and spills. Next, gather all the necessary tools and materials, including your snowboard, wax, iron, scraper, and brush. Make sure the area is well-ventilated, as the waxing process can release strong fumes. If possible, work in a room with a temperature between 60°F to 70°F (15°C to 21°C), as this will help the wax melt and spread evenly. Finally, put on some protective gear, such as gloves and safety glasses, to prevent any accidents or injuries. By preparing your workspace, you'll be able to focus on the waxing process and achieve a professional-looking finish.
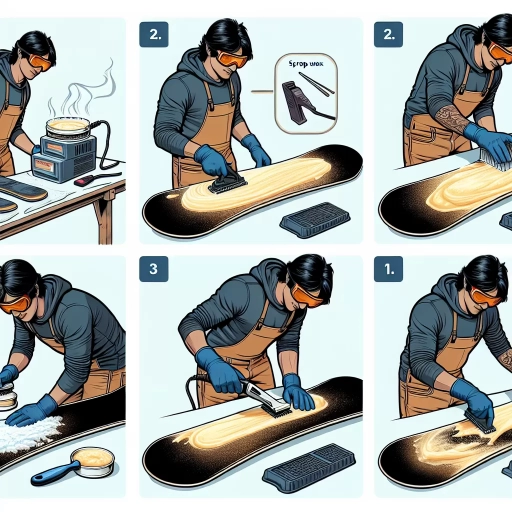
The Waxing Process
The waxing process is a crucial step in maintaining the performance and longevity of a snowboard. It involves applying a layer of wax to the base of the board, which helps to reduce friction and improve glide on the snow. To achieve this, there are three key steps to follow. First, the wax must be applied to the base of the snowboard, ensuring an even and consistent layer. Next, a wax iron is used to melt and spread the wax, allowing it to penetrate the base material. Finally, excess wax is scraped off and the base is inspected to ensure a smooth finish. By following these steps, snowboarders can enjoy improved performance and extend the life of their board. To get started, the first step is to apply the wax to the base of the snowboard.
Apply the Wax to the Base of the Snowboard
Apply the wax to the base of the snowboard by holding the wax bar at a 45-degree angle and moving it back and forth along the base, applying even pressure. Make sure to cover the entire base, including the edges, with a thin, even layer of wax. It's essential to apply the wax in a consistent pattern to ensure an even distribution of the wax. You can use a circular motion or a back-and-forth motion, whichever feels more comfortable for you. As you apply the wax, you'll start to see a thin, white layer forming on the base of the board. This is a good indication that the wax is being applied evenly. Be careful not to apply too much wax, as this can lead to a sticky mess and affect the performance of the board. The goal is to apply a thin, even layer that will provide the necessary protection and performance for your snowboard.
Use a Wax Iron to Melt and Spread the Wax
To effectively melt and spread the wax on your snowboard, a wax iron is an essential tool. A wax iron is a specialized iron designed specifically for melting and spreading wax on snowboards, and it's a crucial step in the waxing process. To use a wax iron, start by plugging it in and allowing it to heat up to the recommended temperature, usually around 250-300°F (120-150°C). Once the iron is hot, place a small amount of wax on the base of the snowboard, and then place the iron on top of the wax. Move the iron slowly and evenly back and forth, applying gentle pressure, to melt and spread the wax across the base of the board. Be careful not to apply too much pressure, as this can cause the wax to pool or create uneven coverage. As you move the iron, you'll start to see the wax melt and spread evenly across the base of the board. Continue to move the iron back and forth, covering the entire base of the board, until the wax is evenly distributed and the base is fully covered. It's also important to make sure the wax is not too hot, as this can damage the base of the board. By using a wax iron to melt and spread the wax, you'll be able to achieve a smooth, even coat of wax that will help your snowboard glide smoothly and perform at its best.
Scrape Off Excess Wax and Inspect the Base
After scraping off the excess wax, inspect the base of your snowboard to ensure it's clean and free of debris. This step is crucial in the waxing process, as any dirt or debris left on the base can affect the performance of your snowboard. Use a clean cloth or a base cleaner to wipe down the base, paying particular attention to the edges and any areas with visible dirt or debris. Check for any scratches or damage to the base, and make any necessary repairs before proceeding. A clean and well-maintained base is essential for optimal performance and to prevent damage to your snowboard. By taking the time to inspect the base, you can ensure your snowboard is in top condition and ready for the next step in the waxing process.
Finishing Touches
The finishing touches are the final steps in preparing your snowboard for the slopes. After a long day of riding, your snowboard's base can become clogged with wax, dirt, and other debris, affecting its performance and speed. To ensure your snowboard is in top condition, it's essential to apply a few finishing touches. This involves applying a base cleaner to remove any residue, using a brush to remove any remaining wax and debris, and inspecting and testing the snowboard's base to ensure it's smooth and even. By following these simple steps, you can keep your snowboard in great condition and ensure it continues to perform at its best. To start, apply a base cleaner to remove any residue that may have built up on the base of your snowboard.
Apply a Base Cleaner to Remove Any Residue
When it comes to applying a base cleaner to remove any residue, it's essential to choose the right product for the job. A base cleaner is specifically designed to remove dirt, grime, and old wax from the base of your snowboard, leaving it clean and ready for a new coat of wax. Look for a cleaner that is safe to use on your snowboard's base material, whether it's P-tex, sintered, or extruded. Apply the cleaner to the base of the snowboard using a soft cloth or brush, working in small circular motions to ensure the cleaner penetrates evenly. Be sure to follow the manufacturer's instructions for application and drying times, as some cleaners may require a specific amount of time to sit on the base before wiping clean. Once the cleaner has been applied and allowed to sit, use a clean, dry cloth to wipe away any residue, paying particular attention to any areas with heavy buildup. Repeat the process as needed until the base is clean and free of any residue. By taking the time to properly clean the base of your snowboard, you'll ensure a strong bond between the base and the new wax, resulting in a faster, more durable ride.
Use a Brush to Remove Any Remaining Wax and Debris
When it comes to the finishing touches of waxing your snowboard, using a brush to remove any remaining wax and debris is a crucial step. This process, also known as "brushing out" the wax, helps to remove any excess wax that may have been left behind during the application process. By using a brush, you can ensure that your snowboard's base is smooth and even, allowing it to glide effortlessly across the snow. To do this, simply take a soft-bristled brush, such as a horsehair or nylon brush, and gently sweep it across the base of your snowboard in the direction of the base's texture. This will help to remove any remaining wax and debris, leaving your snowboard's base feeling smooth and slick. It's also a good idea to use a clean, dry cloth to wipe down the base of your snowboard after brushing out the wax, to remove any remaining residue. By taking the time to properly brush out the wax and remove any debris, you can ensure that your snowboard is performing at its best and that you're getting the most out of your time on the mountain.
Inspect and Test the Snowboard's Base
Inspect and test the snowboard's base to ensure it's free from dirt, dust, and other debris that can affect the wax's adhesion and performance. Start by visually inspecting the base for any visible dirt, scratches, or damage. If you find any, use a base cleaner and a soft cloth to gently remove the debris. Next, use a base file or a diamond stone to lightly scrape the base and remove any remaining imperfections. This will help create a smooth surface for the wax to adhere to. After cleaning and filing the base, use a wax scraper to remove any excess wax and debris from the previous wax job. Finally, use a clean cloth to wipe down the base and remove any remaining residue. Now, test the base by applying a small amount of wax to a discreet area and scraping it off with a wax scraper. If the wax comes off easily and leaves a smooth surface, the base is ready for waxing. If not, repeat the cleaning and filing process until the base is smooth and even.