How To Level Ground For Pool
Here is the introduction paragraph: Installing a pool in your backyard can be a thrilling experience, but it requires careful planning and execution to ensure a safe and enjoyable swimming experience. One of the most critical steps in the process is leveling the ground, which can be a daunting task for many homeowners. To achieve a perfectly level surface, it's essential to follow a step-by-step approach that involves preparation, assessment, and execution. In this article, we'll guide you through the process of leveling ground for a pool, starting with the importance of preparation. We'll cover the key steps to take before breaking ground, including assessing and marking the area, and then dive into the actual leveling process. By the end of this article, you'll be equipped with the knowledge and confidence to tackle this critical step and create a safe and enjoyable pool area. So, let's get started with the first crucial step: Preparation is Key.
Preparation is Key
When it comes to installing a new pool, preparation is key to ensuring a successful and stress-free process. Before the construction team arrives, it's essential to take several crucial steps to prepare the area. This includes clearing the area of debris and obstructions, marking out the pool area with stakes and twine, and checking for underground utilities and obstacles. By taking the time to complete these tasks, homeowners can avoid costly delays and ensure that their pool is installed correctly and safely. One of the first and most critical steps in preparing the area is to clear the area of debris and obstructions. This will provide a clean slate for the construction team to work with and prevent any potential hazards or obstacles from interfering with the installation process.
Clear the Area of Debris and Obstructions
Clear the area of debris and obstructions is a crucial step in preparing the ground for a pool installation. This involves removing any objects that could interfere with the leveling process or the pool's placement, such as rocks, trees, and power lines. Start by walking the area and identifying any potential hazards or obstacles. Remove any loose debris, such as leaves or branches, and set aside any larger objects, like rocks or roots, for later removal. If there are any trees or shrubs in the area, consider hiring a professional to remove them, as they can be difficult to remove safely. Additionally, check for any underground utilities, such as electric or gas lines, and mark their locations to avoid damaging them during the leveling process. By clearing the area of debris and obstructions, you can ensure a safe and successful pool installation.
Mark Out the Pool Area with Stakes and Twine
Marking out the pool area with stakes and twine is a crucial step in preparing the ground for your pool installation. This process helps you visualize the pool's placement and ensures that the area is accurately measured and marked. To start, drive stakes into the ground at each corner of the pool area, making sure they are level and secure. Then, tie twine or string around the stakes, creating a clear boundary of the pool area. This will give you a clear visual representation of the space and help you identify any potential obstacles or issues. As you mark out the area, double-check the measurements to ensure accuracy and make any necessary adjustments. With the pool area clearly defined, you can move forward with the next steps in the preparation process, confident that your pool will be installed in the right location.
Check for Underground Utilities and Obstacles
Before installing a pool, it's essential to check for underground utilities and obstacles to avoid any potential hazards or costly delays. This involves contacting your local utility companies to locate any underground cables, pipes, or wires that may be present in the area where you plan to install your pool. You can also use specialized equipment, such as ground-penetrating radar or electromagnetic locators, to detect any hidden obstacles. Additionally, it's crucial to check for any underground storage tanks, septic systems, or other hidden features that could interfere with your pool installation. By taking the time to thoroughly inspect the area and identify any potential hazards, you can ensure a safe and successful pool installation process.
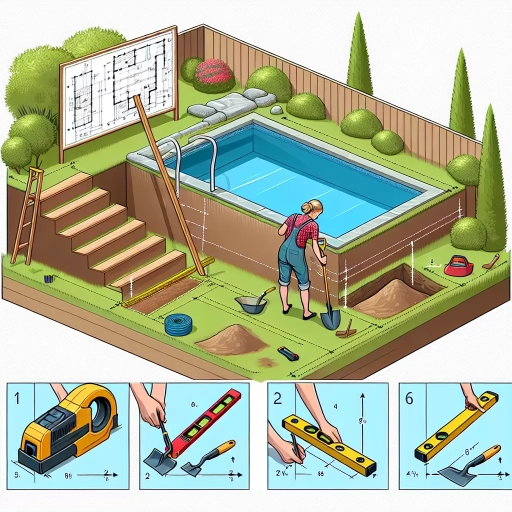
Assessing and Marking the Ground
Assessing and marking the ground is a crucial step in various construction and landscaping projects. It involves evaluating the terrain to determine its slope, identifying high and low points, and establishing a reference point for future work. To achieve this, it is essential to use a leveling tool to determine the slope of the ground, which will provide a clear understanding of the terrain's incline. Additionally, marking the high and low points of the ground with stakes will help to visualize the lay of the land and identify areas that require attention. Furthermore, identifying the desired level and marking it with a string line will serve as a guide for subsequent construction or landscaping activities. By following these steps, individuals can ensure that their project is built on a solid foundation, literally. To begin, it is vital to use a leveling tool to determine the slope of the ground, which will set the stage for the entire assessment and marking process.
Use a Leveling Tool to Determine the Slope of the Ground
When it comes to determining the slope of the ground, a leveling tool is an essential instrument to ensure accuracy. A leveling tool, also known as a spirit level or bubble level, is a device that indicates whether a surface is perfectly horizontal or vertical. To use a leveling tool to determine the slope of the ground, start by placing the tool on the ground at the location where you want to install the pool. Make sure the tool is stable and level, then take note of the bubble's position. If the bubble is centered between the lines, the ground is level. If the bubble is not centered, it indicates that the ground is sloping. Take multiple readings at different locations to get an accurate picture of the ground's slope. You can also use a laser level, which projects a level line or dot onto the ground, making it easier to determine the slope. By using a leveling tool, you can determine the slope of the ground and make the necessary adjustments to ensure a level and stable surface for your pool.
Mark the High and Low Points of the Ground with Stakes
Here is the paragraphy: Marking the high and low points of the ground with stakes is a crucial step in assessing and leveling the ground for a pool. To do this, start by driving stakes into the ground at regular intervals, typically 10-15 feet apart, around the perimeter of the pool area. Then, use a string level or a laser level to determine the high and low points of the ground. Tie a string or a ribbon around the stakes, making sure it's level, to create a visual reference point. Next, use a measuring tape to measure the distance from the string to the ground at each stake, noting the high and low points. Mark these points with a marker or a flag, so you can easily identify them later. This process will give you a clear understanding of the ground's topography and help you determine the best course of action for leveling the ground. By marking the high and low points, you'll be able to identify areas that need to be filled or excavated, ensuring a stable and even surface for your pool.
Identify the Desired Level and Mark it with a String Line
To identify the desired level and mark it with a string line, start by determining the highest point on the ground where you want to install the pool. This will be the reference point for your leveling process. Next, use a level tool to ensure the ground is even and plumb. If necessary, make adjustments to the ground to achieve the desired level. Once you have established the reference point, use a string line to mark the desired level around the perimeter of the pool area. The string line should be taut and level, providing a clear visual guide for your excavation and grading work. It's essential to double-check the string line to ensure it's accurate and level, as this will affect the overall installation of the pool. By marking the desired level with a string line, you'll be able to achieve a precise and even surface for your pool, ensuring a safe and enjoyable swimming experience.
Leveling the Ground
Leveling the ground is a crucial step in various outdoor projects, such as building a deck, installing a patio, or creating a garden. It ensures that the surface is even and stable, preventing any potential hazards or damage. To achieve a perfectly leveled ground, it's essential to follow a series of steps. First, remove or add soil as necessary to achieve the desired level, taking into account the natural slope of the land and the intended use of the area. Next, use a rake and shovel to smooth out the ground, removing any debris or obstacles that could interfere with the leveling process. Finally, compact the soil to prevent settling or shifting, ensuring that the ground remains stable over time. By following these steps, you can create a level and even surface that is perfect for your outdoor project. To start, let's focus on the first step: removing or adding soil as necessary to achieve the desired level.
Remove or Add Soil as Necessary to Achieve the Desired Level
To ensure a stable and even surface for your pool, it's essential to remove or add soil as necessary to achieve the desired level. Start by checking the ground's elevation using a level tool or a laser level, which can provide more accurate readings. Identify the high and low spots, and mark them with stakes and twine. Next, remove soil from the high areas using a shovel or a skid-steer loader, taking care not to damage the surrounding soil. If you need to add soil, use a mixture of topsoil and compost to create a stable base. Apply the soil in thin layers, compacting each layer with a hand tamper or a plate compactor to prevent settling. Continue adding and removing soil until the ground is level, checking your progress regularly with the level tool. It's also crucial to consider the pool's drainage requirements, ensuring that the ground slopes away from the pool to prevent water accumulation. By carefully removing or adding soil, you can create a stable and even surface for your pool, ensuring a safe and enjoyable swimming experience.
Use a Rake and Shovel to Smooth Out the Ground
To smooth out the ground, use a rake and shovel to remove any debris, rocks, or uneven soil. Start by raking the entire area to loosen the top layer of soil and remove any visible debris. Then, use a shovel to scoop up and remove any rocks, twigs, or other obstacles that could interfere with the leveling process. Next, use the rake to smooth out the soil, working in sections to create a uniform surface. As you rake, use the shovel to fill in any low spots or holes, and to remove excess soil from high spots. Continue this process until the ground is smooth and even, using a level to check your progress and make any necessary adjustments. By using a rake and shovel to smooth out the ground, you'll be able to create a stable and level surface for your pool, ensuring a safe and enjoyable swimming experience.
Compact the Soil to Prevent Settling or Shifting
When it comes to leveling the ground for a pool, compacting the soil is a crucial step that should not be overlooked. Compacting the soil helps to prevent settling or shifting of the ground, which can lead to an uneven surface and potentially damage the pool or its surroundings. To compact the soil, you can use a hand tamper, plate compactor, or a lawn roller, depending on the size of the area and the type of soil. Start by removing any debris, rocks, or weeds from the surface, and then use the chosen tool to apply even pressure to the soil. It's essential to compact the soil in layers, typically 2-3 inches at a time, to ensure that the soil is evenly compacted and stable. This process may need to be repeated several times to achieve the desired level of compaction. Additionally, it's recommended to compact the soil when it's moist, as this will help to reduce the risk of settling or shifting. By compacting the soil, you can create a stable and even surface for your pool, ensuring a safe and enjoyable swimming experience.