How To Draw A Cross
Drawing a cross is a simple yet meaningful task that can be used in various contexts, from art and design to spirituality and symbolism. Whether you're looking to create a beautiful piece of art or simply want to learn how to draw a cross for personal or cultural reasons, this article will guide you through the process. To get started, it's essential to understand the basics of drawing a cross, including the different types of crosses and their unique characteristics. From there, you can follow a step-by-step guide to drawing a cross, which will help you create a precise and symmetrical design. Finally, you can add details and embellishments to the cross to make it more visually appealing and meaningful. In this article, we'll explore these three key aspects of drawing a cross, starting with the fundamentals. Understanding the Basics of Drawing a Cross is the first step in creating a beautiful and meaningful cross, and it's where we'll begin our journey.
Understanding the Basics of Drawing a Cross
Drawing a cross is a fundamental skill that can be applied to various artistic and design contexts. To create a well-proportioned and visually appealing cross, it's essential to understand the basics of drawing this shape. This involves defining the shape and structure of a cross, choosing the right drawing tools and materials, and understanding proportions and symmetry. By grasping these fundamental concepts, artists and designers can create a wide range of cross designs, from simple to intricate. In this article, we will delve into the basics of drawing a cross, starting with the foundation of the shape and structure. By understanding the underlying components of a cross, artists can build a strong foundation for their design. Let's begin by defining the shape and structure of a cross.
Defining the Shape and Structure of a Cross
A cross is a geometric shape consisting of two intersecting lines or bars, typically with one vertical and one horizontal axis. The shape and structure of a cross can vary depending on its intended use, cultural context, and artistic interpretation. In general, a cross is defined by its two main components: the vertical beam, also known as the upright or shaft, and the horizontal beam, also known as the crossbeam or arm. The point where the two beams intersect is called the center or the crossing point. The shape and structure of a cross can be further defined by its proportions, with some crosses having a longer vertical beam and others having a longer horizontal beam. Additionally, some crosses may have additional features such as a circle or oval shape surrounding the center, or decorative elements such as flourishes or finials at the ends of the beams. Understanding the basic shape and structure of a cross is essential for drawing and creating accurate and meaningful representations of this symbol.
Choosing the Right Drawing Tools and Materials
Choosing the right drawing tools and materials is essential for creating a precise and visually appealing cross. To start, you'll need a pencil with a fine tip, such as a 0.5mm or 0.7mm mechanical pencil, which will allow you to draw sharp lines and details. A sharpener is also necessary to keep your pencil tip sharp and prevent smudging. For added precision, consider using a ruler or straightedge to help you draw straight lines and ensure your cross is symmetrical. Additionally, a eraser, such as a kneaded eraser or a white vinegar eraser, will come in handy for correcting mistakes and erasing guide lines. When it comes to paper, choose a high-quality, smooth paper with a fine texture, such as cartridge paper or Bristol board, which will allow your pencil marks to glide smoothly and evenly. Finally, consider using a drawing board or a clipboard to provide a stable surface for drawing and to prevent your paper from moving around. By investing in the right tools and materials, you'll be able to create a beautiful and precise cross that reflects your artistic skills.
Understanding Proportions and Symmetry
Understanding proportions and symmetry is crucial when drawing a cross, as it ensures that the final product is visually appealing and balanced. Proportions refer to the relationship between the different parts of the cross, such as the length and width of the vertical and horizontal beams. Symmetry, on the other hand, refers to the arrangement of the parts in a way that creates a sense of balance and harmony. To achieve symmetry, the vertical and horizontal beams should be equal in length and width, and the arms of the cross should be evenly spaced. The proportions of the cross can vary depending on the style and design, but a general rule of thumb is to make the vertical beam slightly longer than the horizontal beam. By understanding and applying these principles, you can create a cross that is not only aesthetically pleasing but also meaningful and symbolic.
Step-by-Step Guide to Drawing a Cross
Drawing a cross can be a simple yet meaningful activity, allowing you to express your creativity and spirituality. To create a beautiful and precise cross, it's essential to follow a step-by-step guide. In this article, we will walk you through the process of drawing a cross, breaking it down into three key steps: sketching the vertical beam, adding the horizontal beam, and refining the edges and corners. By following these steps, you'll be able to create a stunning cross that reflects your artistic skills and personal style. To begin, let's start with the foundation of the cross: sketching the vertical beam.
Sketching the Vertical Beam of the Cross
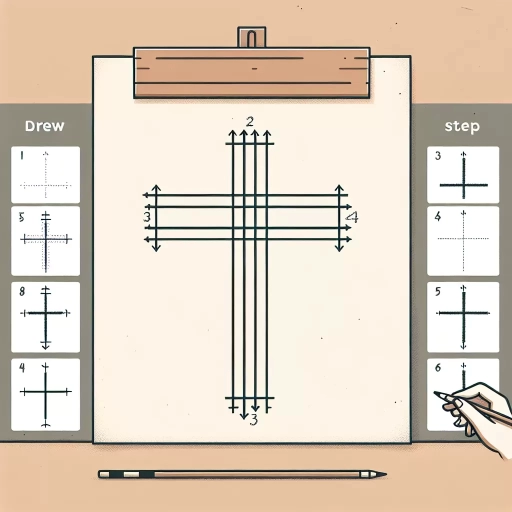
To sketch the vertical beam of the cross, start by drawing a long, straight line that extends from the top of the cross to the bottom. This line should be perpendicular to the horizontal beam and should be centered on the page. The length of the vertical beam will depend on the overall size of the cross you want to draw, but it should be roughly two to three times the length of the horizontal beam. As you draw the vertical beam, pay attention to the proportions of the cross and make sure that it is symmetrical. You can use a ruler or a straightedge to help you draw a straight line, or you can freehand it if you prefer. Once you have drawn the vertical beam, you can add some details such as a small notch at the top where the horizontal beam intersects, or some texture to give the cross some depth and dimension. The vertical beam is the foundation of the cross, so take your time and make sure it is drawn accurately and with care.
Adding the Horizontal Beam to the Cross
To add the horizontal beam to the cross, start by drawing a line that intersects the vertical beam at a 90-degree angle. The length of the horizontal beam can vary depending on the type of cross you are drawing, but a good starting point is to make it about one-third to one-half the length of the vertical beam. Begin by placing the tip of your pencil on the vertical beam at the desired intersection point, and then draw a straight line to the left or right, depending on the orientation of your cross. Make sure to keep your line smooth and even, using a gentle motion to guide your pencil. As you draw the horizontal beam, pay attention to its proportions in relation to the vertical beam, ensuring that it is symmetrical and balanced. You can use a ruler or other straightedge to help you draw a straight line, or practice drawing freehand to develop your skills. Once you have completed the horizontal beam, take a step back to evaluate the overall shape of your cross, making any necessary adjustments to the proportions or placement of the beams.
Refining the Edges and Corners of the Cross
Refining the edges and corners of the cross is a crucial step in creating a precise and visually appealing drawing. To refine the edges, start by carefully examining the lines that make up the cross, paying attention to any wobbles or inconsistencies. Use a ruler or a straightedge to draw a new line along the edge of the cross, making sure it is straight and smooth. Repeat this process for all four edges of the cross, ensuring that they are all even and symmetrical. Next, focus on refining the corners of the cross. Use a sharp pencil to carefully draw a small triangle at each corner, making sure the lines are crisp and clean. The triangle should be small enough to fit snugly within the corner of the cross, and its edges should be aligned with the edges of the cross. By refining the edges and corners of the cross, you can create a more polished and professional-looking drawing that accurately represents the symbol.
Adding Details and Embellishments to the Cross
Adding details and embellishments to the cross is a great way to make it more visually appealing and meaningful. There are several ways to do this, including incorporating symbols and patterns onto the cross, adding shading and texture to the cross, and creating a background or context for the cross. By incorporating symbols and patterns, you can add an extra layer of meaning and significance to the cross, making it a more powerful and thought-provoking piece of art. For example, you could add a pattern of interlocking circles to represent unity and wholeness, or a symbol of a dove to represent peace and love. By adding these details, you can create a cross that is not only beautiful, but also rich in meaning and symbolism. One way to start adding these details is by incorporating symbols and patterns onto the cross, which can be done using a variety of techniques and materials.
Incorporating Symbols and Patterns onto the Cross
Incorporating symbols and patterns onto the cross can add an extra layer of meaning and visual interest to your design. One popular symbol to include is the ichthys, or Jesus fish, which can be drawn at the top or bottom of the cross. You can also add other Christian symbols, such as the dove, representing the Holy Spirit, or the alpha and omega, representing the beginning and end of all things. Geometric patterns, such as chevrons or herringbone, can add a decorative touch to the cross, while also representing the connection between heaven and earth. Celtic knots and other interlacing patterns can also be used to symbolize the unity and interconnectedness of all things. When incorporating symbols and patterns, be mindful of the overall balance and harmony of the design, and use them sparingly to avoid overwhelming the cross. You can also experiment with different textures and shading techniques to add depth and dimension to your design. By incorporating symbols and patterns, you can create a unique and meaningful cross that reflects your personal style and faith.
Adding Shading and Texture to the Cross
Adding shading and texture to the cross can elevate its visual appeal and create a more realistic representation. To add shading, start by identifying the light source and determining where the shadows would naturally fall. Use a range of values, from light to dark, to create depth and dimension. You can use hatching, cross-hatching, or stippling techniques to achieve the desired shading effect. For a more dramatic look, you can also use bold lines and contrasting values to create a sense of volume and texture. To add texture, consider using different line weights and patterns to suggest the roughness or smoothness of the cross's surface. You can also use subtle gradations of tone to imply the texture of the material, such as the roughness of wood or the smoothness of metal. Additionally, you can use visual elements like cracks, knots, or other imperfections to add character and interest to the cross. By incorporating shading and texture, you can create a more nuanced and engaging representation of the cross that invites the viewer to explore its details.
Creating a Background or Context for the Cross
When creating a background or context for the cross, consider the overall theme and message you want to convey. A simple yet effective approach is to use a subtle gradient or texture that complements the cross's design. For a more dramatic effect, you can add a bold, contrasting color or pattern to make the cross stand out. Alternatively, you can incorporate symbolic elements, such as a sunrise or sunset, to represent the cross's significance in a particular faith or culture. If you're drawing a cross for a specific occasion or holiday, consider adding relevant details, like holly for Christmas or lilies for Easter. You can also experiment with abstract shapes or geometric patterns to create a unique and eye-catching background. Ultimately, the background should enhance the cross without overpowering it, allowing the viewer's focus to remain on the central symbol.