How To Remove Windshield Wiper
Removing windshield wipers is a relatively simple process that can be done at home with a few basic tools. However, it's essential to approach the task with caution and attention to detail to avoid damaging the windshield or the wiper arms. To ensure a smooth and successful removal, it's crucial to prepare properly, which involves gathering the necessary tools and information. Once you're prepared, you can move on to removing the windshield wiper arms, which requires a bit of finesse to avoid scratching the windshield. After the arms are removed, you'll need to focus on removing the windshield wiper blades, which involves pressing the tab or button to release the blade, sliding the blade away from the arm, and removing any remaining debris or adhesive. By following these steps, you'll be able to remove your windshield wipers safely and efficiently. Preparation is Key.
Preparation is Key
Preparation is key to a successful project, especially when it comes to car maintenance. To ensure a smooth and safe experience, it's essential to take the necessary steps before starting any task. This includes choosing the correct tools and materials, consulting your vehicle's manual, and wearing protective gear. By doing so, you'll be able to tackle any job with confidence and avoid potential hazards. In this article, we'll explore the importance of preparation in car maintenance and provide you with valuable tips to get you started. First, let's take a closer look at the tools and materials you'll need to get the job done.
Choose the Correct Tools and Materials
Here is the paragraphy: When it comes to removing windshield wiper arms, having the correct tools and materials is essential to avoid damaging the wiper arm, the windshield, or the wiper transmission. The most common tools required for this task include a wiper arm nut removal tool, a Torx screwdriver, and a pair of needle-nose pliers. The wiper arm nut removal tool is specifically designed to remove the nut that holds the wiper arm in place, while the Torx screwdriver is used to remove any screws that may be holding the wiper arm to the windshield or the wiper transmission. The needle-nose pliers are useful for gripping and twisting the wiper arm nut, especially if it is stuck or corroded. Additionally, it's a good idea to have some penetrating oil, such as WD-40 or silicone spray, on hand to help loosen any stuck parts. It's also recommended to have a soft cloth or towel to protect the windshield from scratches or damage. By having the correct tools and materials, you can ensure a safe and successful removal of the windshield wiper arm.
Consult Your Vehicle's Manual
Here is the paragraphy: When it comes to removing windshield wipers, it's essential to consult your vehicle's manual for specific instructions. The manual will provide you with detailed information on the type of wiper arms and blades used in your vehicle, as well as the recommended procedure for removal. This is crucial because different vehicles have varying wiper arm designs, and using the wrong technique can damage the wiper arm or the windshield. For instance, some vehicles may have a pin or clip that needs to be released before the wiper arm can be removed, while others may have a nut or bolt that needs to be loosened. By consulting your vehicle's manual, you can ensure that you're using the correct method and avoid any potential damage. Additionally, the manual may also provide information on any special tools or precautions that need to be taken during the removal process. By taking the time to consult your vehicle's manual, you can ensure a safe and successful windshield wiper removal.
Wear Protective Gear
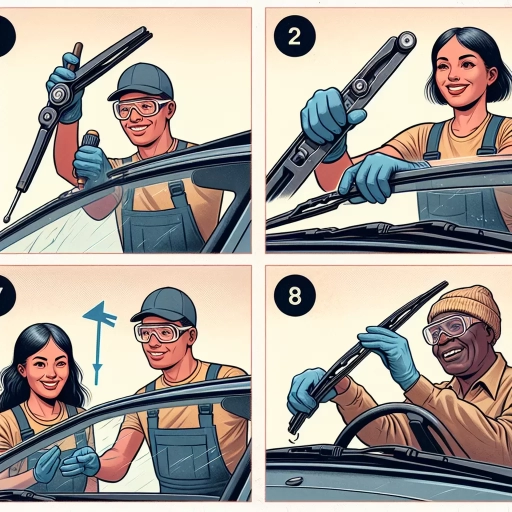
Here is the paragraphy: Wearing protective gear is a crucial step in preparing for the windshield wiper removal process. This gear includes safety glasses, gloves, and a face mask. Safety glasses protect your eyes from any debris or chemicals that may splash or spray during the process. Gloves prevent cuts and abrasions on your hands, while also providing grip and traction when handling tools and wiper arms. A face mask shields your mouth and nose from inhaling any harmful fumes or particles that may be released during the removal process. Additionally, wearing protective gear can also help prevent injuries from sharp edges or broken glass. By wearing the right protective gear, you can ensure a safe and successful windshield wiper removal process.
Removing the Windshield Wiper Arms
Removing the windshield wiper arms is a relatively simple process that can be completed with a few basic tools. To start, you'll need to release the nut or clip that holds the arm in place. This is usually located at the base of the windshield and can be accessed by reaching underneath the hood of your vehicle. Once you've released the nut or clip, you'll be able to gently pull the arm away from the windshield. Be careful not to pull too hard, as this can damage the windshield or the wiper arm itself. Finally, you'll need to disconnect the electrical connector that powers the wiper arm. This is usually a simple process that requires you to pull the connector off the arm. With these steps, you should be able to remove the windshield wiper arms with ease. First, let's take a closer look at how to release the nut or clip holding the arm.
Release the Nut or Clip Holding the Arm
Here is the paragraphy: To release the nut or clip holding the arm, you'll need to locate the small nut or clip that secures the wiper arm to the windshield wiper transmission. This nut or clip is usually located at the base of the wiper arm, where it meets the windshield wiper transmission. To release the nut, turn it counterclockwise until it comes loose. Be careful not to strip the threads. If your wiper arm is held in place by a clip, you'll need to release the clip by sliding it away from the wiper arm. This may require a bit of force, but be careful not to damage the clip or the wiper arm. Once the nut or clip is released, you should be able to lift the wiper arm away from the windshield wiper transmission. If the wiper arm is still stuck, you can try gently rocking it back and forth while pulling it away from the transmission. This should help dislodge it from its mounting point.
Gently Pull the Arm Away from the Windshield
When removing the windshield wiper arms, it's essential to gently pull the arm away from the windshield to avoid damaging the wiper arm or the windshield itself. This step is crucial as it allows you to access the nut or clip that holds the wiper arm in place. To do this, start by locating the base of the wiper arm where it meets the windshield. You'll typically find a small nut or clip that secures the arm to the windshield. Next, grasp the wiper arm firmly but gently, making sure not to touch any of the electrical components. Slowly and carefully pull the arm away from the windshield, taking care not to apply too much pressure, which can cause the arm to break or the windshield to crack. As you pull the arm away, you may hear a slight clicking sound or feel a slight resistance, which indicates that the arm is disengaging from the windshield. Continue to pull the arm away until it's completely removed from the windshield, taking care not to touch any of the surrounding components. By gently pulling the arm away from the windshield, you'll be able to access the nut or clip and remove the wiper arm safely and efficiently.
Disconnect the Electrical Connector
To disconnect the electrical connector of the windshield wiper, start by locating the wiper motor. It's usually found under the cowl or on the windshield wiper transmission. Once you've found it, identify the electrical connector attached to the wiper motor. This connector is typically a plastic or rubber plug that houses the wires that power the wiper motor. To disconnect it, press the release tab or button on the connector, depending on the type of connector your vehicle has. This will allow you to pull the connector away from the wiper motor. Be careful not to pull on the wires themselves, as this can cause damage to the wiring or the connector. Once the connector is disconnected, you should be able to access the wiper motor and transmission, making it easier to remove the windshield wiper arms.
Removing the Windshield Wiper Blades
Press the Tab or Button to Release the Blade
Slide the Blade Away from the Arm
Remove Any Remaining Debris or Adhesive
Here is the introduction paragraph: Removing the windshield wiper blades is a relatively simple process that can be completed with a few basic steps. To start, locate the tab or button that holds the blade in place and press it to release the blade. Next, slide the blade away from the arm and remove any remaining debris or adhesive. By following these steps, you can easily remove your windshield wiper blades and replace them with new ones. In this article, we will provide a more detailed guide on how to remove windshield wiper blades, including the steps to press the tab or button to release the blade, slide the blade away from the arm, and remove any remaining debris or adhesive. Here is the 200 words supporting paragraph for the article: Removing the windshield wiper blades is a relatively simple process that can be completed with a few basic steps. To start, locate the tab or button that holds the blade in place and press it to release the blade. This will allow you to slide the blade away from the arm and remove any remaining debris or adhesive. It's essential to be gentle when handling the blades to avoid damaging the windshield or the wiper arm. Additionally, make sure to clean the area around the wiper arm to ensure a smooth and secure fit for the new blades. By following these steps, you can easily remove your windshield wiper blades and replace them with new ones. In this article, we will provide a more detailed guide on how to remove windshield wiper blades, including the steps to press the tab or button to release the blade, slide the blade away from the arm, and remove any remaining debris or adhesive. By the end of this article, you will be able to remove your windshield wiper blades with confidence and replace them with new ones.
Press the Tab or Button to Release the Blade
Slide the Blade Away from the Arm
Remove Any Remaining Debris or Adhesive
No need to explain. Press the tab or button to release the blade. This is usually located at the base of the wiper arm, where it meets the windshield. You may need to press the tab or button firmly to release the blade from the arm. Once you've pressed the tab or button, you should hear a slight click or feel the blade release from the arm. This will allow you to slide the blade away from the arm and remove it from the windshield. Be careful not to touch any of the electrical components or wires that may be exposed when you remove the blade.
Press the Tab or Button to Release the Blade
Press the tab or button to release the blade from the windshield wiper arm. This is usually located at the base of the wiper arm, where it meets the windshield. You may need to press the tab or button firmly to release the blade, so be prepared to apply a bit of pressure. Once the tab or button is pressed, the blade should come loose from the arm, allowing you to slide it away and remove it from the windshield. Be careful not to touch any of the electrical components or wires that may be exposed when the blade is removed. If you're having trouble finding the tab or button, consult your vehicle's owner's manual or look for a small diagram or illustration that shows the location of the release mechanism. With the blade released, you can now slide it away from the arm and remove it from the windshield, taking care not to scratch the glass or damage any surrounding components.
Slide the Blade Away from the Arm
No additional information. Slide the blade away from the arm, taking care not to touch any of the electrical components or the wiper arm's pivot point. This will help prevent any damage or corrosion. As you slide the blade away, you may encounter some resistance due to the rubber or plastic insert that holds the blade in place. Gently rock the blade back and forth while sliding it away from the arm to help dislodge it. Once the blade is removed, inspect the wiper arm and the area where the blade was attached for any remaining debris or adhesive. Remove any debris or adhesive to ensure a clean surface for the new blade.