How To Set Margins In Google Docs
Here is the introduction paragraph: When working with Google Docs, setting the right margins is crucial for creating a well-formatted and visually appealing document. Margins play a significant role in determining the overall layout and readability of your document. However, many users struggle with setting margins in Google Docs, which can lead to a poorly formatted document. In this article, we will explore the world of Google Docs margins, starting with understanding the basics of Google Docs margin settings. We will then dive into the process of adjusting margins in Google Docs, including the different options available and how to use them effectively. Finally, we will discuss advanced margin settings in Google Docs, including how to customize your margins for specific document types. By the end of this article, you will have a comprehensive understanding of how to set margins in Google Docs, starting with the fundamentals of Google Docs margin settings.
Understanding Google Docs Margin Settings
Google Docs is a popular word processing tool used by millions of people around the world. One of the key features that make Google Docs stand out is its flexibility and customization options. When it comes to formatting a document, margin settings play a crucial role in determining the overall layout and appearance of the page. In this article, we will delve into the world of Google Docs margin settings, exploring what the default settings are, how to access and adjust them, and why it's essential to do so. By understanding these settings, users can create professional-looking documents that are tailored to their specific needs. So, let's start by examining the default margin settings in Google Docs. What are the default margin settings in Google Docs?
What are the default margin settings in Google Docs?
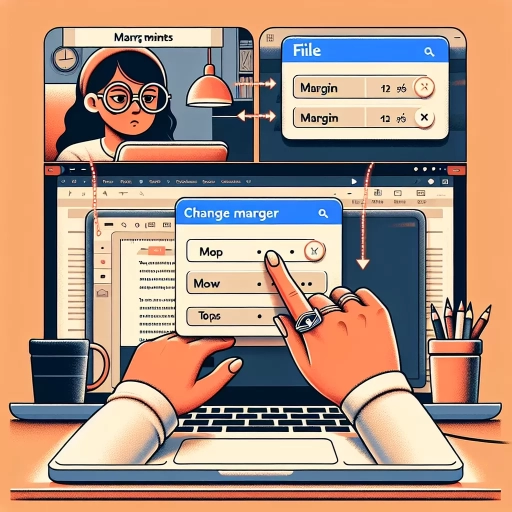
The default margin settings in Google Docs are 1 inch (2.54 cm) on all sides, including top, bottom, left, and right. These default margins are applied to all new documents created in Google Docs, and they can be adjusted as needed to suit the specific requirements of your document. The default margin settings are designed to provide a standard and professional layout for most documents, but you can easily change them to accommodate different types of content, such as images, tables, or text-heavy documents. To adjust the margin settings in Google Docs, you can go to the "File" menu, select "Page setup," and then enter your desired margin values in the "Margins" section. You can also use the "Ruler" tool to adjust the margins by dragging the margin markers on the ruler.
How to access the margin settings in Google Docs?
To access the margin settings in Google Docs, follow these simple steps. First, open your Google Docs document and click on the "File" menu located at the top left corner of the screen. From the drop-down menu, select "Page setup." This will open a new window with various page settings, including margins. In the "Page setup" window, you will see the margin settings section, which includes the top, bottom, left, and right margin fields. You can enter the desired margin values in inches or centimeters, and the changes will be applied to your document. Alternatively, you can also access the margin settings by clicking on the "Format" tab in the top menu bar and selecting "Page setup" from the drop-down menu. Either way, you will be able to adjust the margin settings to suit your needs and create a well-formatted document.
Why is it important to adjust margin settings in Google Docs?
Adjusting margin settings in Google Docs is crucial for several reasons. Firstly, it allows you to control the amount of white space around your text, which can significantly impact the overall appearance and readability of your document. Properly set margins can make your text more visually appealing, easier to read, and help to prevent overwhelming the reader with too much information. Additionally, adjusting margins is essential for printing purposes, as it ensures that your document is properly aligned and formatted to fit the paper size. If margins are not set correctly, your document may print with cut-off text or uneven spacing, which can be frustrating and unprofessional. Furthermore, adjusting margin settings is also important for collaboration and sharing purposes. When working with others, it's essential to ensure that your document is formatted consistently, and margin settings play a critical role in achieving this. By adjusting margin settings, you can ensure that your document looks the same on different devices and platforms, which is particularly important when sharing documents with others or presenting them in a professional setting. Overall, adjusting margin settings in Google Docs is a simple yet crucial step in creating a well-formatted, visually appealing, and professional-looking document.
Adjusting Margins in Google Docs
Adjusting margins in Google Docs is a crucial step in creating a well-formatted document. Margins play a significant role in determining the overall appearance of a document, and setting them correctly can make a huge difference in the readability and professionalism of the final output. In this article, we will explore three ways to adjust margins in Google Docs: setting custom margins using the ruler, setting margins using the page setup dialog box, and setting margins for a specific section. By the end of this article, you will be able to adjust margins in Google Docs with ease and precision. To start, let's take a look at how to set custom margins in Google Docs using the ruler.
How to set custom margins in Google Docs using the ruler?
To set custom margins in Google Docs using the ruler, start by opening your document and clicking on the "View" menu. From the drop-down list, select "Show ruler" to display the ruler at the top of the page. The ruler will show the current margin settings, with the left and right margins marked by a blue line. To adjust the margins, click and drag the blue line to the desired position. You can also enter a specific margin value in the "Margin" field, located in the top right corner of the ruler. For example, to set a 1-inch left margin, click on the "Margin" field and type "1". The margin will be updated accordingly. Additionally, you can use the "Tab stops" feature to set custom margins for specific sections of your document. To do this, click on the "Tab stops" button, located in the top left corner of the ruler, and select "Add tab stop". Then, enter the desired margin value and click "OK". The custom margin will be applied to the selected section of your document. By using the ruler to set custom margins in Google Docs, you can easily control the layout and formatting of your document.
How to set margins in Google Docs using the page setup dialog box?
To set margins in Google Docs using the page setup dialog box, follow these steps: Open your Google Doc and click on "File" in the top menu bar, then select "Page setup" from the drop-down menu. In the Page setup dialog box, you'll see a section labeled "Margins" with fields for "Top," "Bottom," "Left," and "Right" margins. Enter your desired margin values in inches or centimeters, or use the up and down arrows to adjust the values. You can also select a preset margin option from the "Margins" dropdown menu, such as "Normal," "Narrow," or "Wide." If you want to set custom margins for a specific section of your document, select the text or section you want to adjust, then click on "Format" in the top menu bar and select "Columns" to access the column settings. In the Column settings dialog box, you can adjust the margins for the selected section. Once you've set your margins, click "OK" to apply the changes to your document.
How to set margins for a specific section in Google Docs?
To set margins for a specific section in Google Docs, you can use the "Section break" feature. First, place your cursor at the beginning of the section where you want to adjust the margins. Then, go to the "Insert" menu and select "Break," followed by "Section break (next page)" or "Section break (continuous)." This will create a new section in your document. Next, click on the "Format" tab in the top menu and select "Page setup." In the "Page setup" dialog box, click on the "Margins" tab. Here, you can adjust the top, bottom, left, and right margins for the specific section. You can also set the gutter margin, which is the space between the margin and the text. Once you've made your changes, click "OK" to apply them to the section. Note that these margin changes will only apply to the specific section where you inserted the section break, and not to the entire document.
Advanced Margin Settings in Google Docs
Google Docs offers a range of advanced margin settings that can help you create professional-looking documents. One of the key features is the ability to set mirror margins, which is essential for double-sided printing. Additionally, you can also set gutter margins to accommodate binding, and adjust header and footer margins to customize the layout of your document. By mastering these advanced margin settings, you can take your document creation to the next level. In this article, we will explore how to set mirror margins in Google Docs for double-sided printing, as well as other advanced margin settings such as gutter margins for binding and header and footer margins. Let's start with the basics of setting mirror margins in Google Docs for double-sided printing.
How to set mirror margins in Google Docs for double-sided printing?
To set mirror margins in Google Docs for double-sided printing, follow these steps: First, open your Google Doc and click on "File" in the top menu bar, then select "Page setup" from the drop-down menu. In the Page setup window, click on the "Margins" tab and check the box next to "Mirror margins." This will allow you to set different margins for the left and right sides of the page, which is necessary for double-sided printing. Next, set the margin sizes for the top, bottom, left, and right sides of the page. You can enter the margin sizes in inches or centimeters, depending on your preference. Make sure to set the left and right margins to the same size, as this will ensure that the margins are symmetrical and look professional when printed. Finally, click "OK" to save your changes and apply the mirror margins to your document. By following these steps, you can easily set mirror margins in Google Docs and achieve professional-looking double-sided printing.
How to set gutter margins in Google Docs for binding?
When it comes to setting gutter margins in Google Docs for binding, it's essential to consider the type of binding you'll be using and the size of the margins you need. A gutter margin is the space between the text and the binding edge of the page, and it's crucial to set it correctly to ensure that your text doesn't get cut off or obscured during the binding process. To set gutter margins in Google Docs, go to the "File" menu and select "Page setup." In the "Page setup" dialog box, click on the "Margins" tab and select the "Custom" option. In the "Gutter" field, enter the desired margin size, taking into account the type of binding you'll be using. For example, if you're using a standard three-ring binder, you may want to set the gutter margin to 0.5 inches. If you're using a spiral binding, you may want to set it to 0.25 inches. Once you've entered the gutter margin size, click "OK" to apply the changes. You can also use the "Mirror margins" option to set the gutter margin for both the left and right sides of the page. This is particularly useful if you're creating a document that will be bound on both sides. By setting the gutter margin correctly, you can ensure that your text is properly aligned and that your document looks professional and polished.
How to set header and footer margins in Google Docs?
To set header and footer margins in Google Docs, navigate to the "File" menu and select "Page setup." In the "Page setup" dialog box, click on the "Margins" tab. Here, you can adjust the header and footer margins by entering the desired values in the "Header" and "Footer" fields. You can also use the up and down arrows to incrementally increase or decrease the margin sizes. Additionally, you can check the "Header" and "Footer" checkboxes to enable or disable the display of headers and footers in your document. If you want to set different margin sizes for the first page, you can check the "Different first page" checkbox and enter the desired values in the "First page header" and "First page footer" fields. Once you've made your changes, click "OK" to apply the new margin settings to your document.