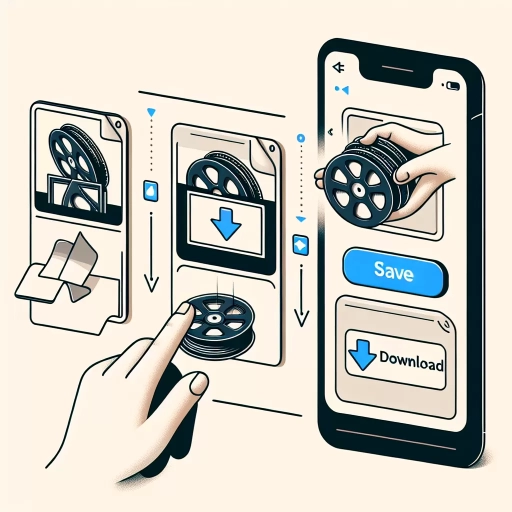
How To Save Reels From Instagram To Gallery
Here is the introduction paragraph: Are you tired of losing your favorite Instagram Reels? Do you want to save them to your gallery for future reference or to share with friends and family? Saving Instagram Reels can be a bit tricky, but don't worry, we've got you covered. In this article, we'll explore three easy methods to save Instagram Reels to your gallery. You can use the Instagram app itself, third-party apps, or even screen recording to save your favorite Reels. In this article, we'll dive into each of these methods, starting with the most straightforward one: using the Instagram app. By the end of this article, you'll be able to save your favorite Reels with ease. So, let's get started with Method 1: Using the Instagram App.
Method 1: Using the Instagram App
Instagram has become an essential platform for content creators and users alike, with its vast array of features that make it easy to share and discover new content. One of the most popular features on Instagram is the Reels feature, which allows users to create and share short videos. However, saving these Reels can be a bit tricky, especially for those who are new to the platform. Fortunately, there are several methods to save Instagram Reels, and in this article, we will explore Method 1: Using the Instagram App. This method involves enabling the "Save to Camera Roll" feature, using the "Share" option to save Reels, and accessing saved Reels through the Instagram app. By the end of this article, you will know how to save your favorite Reels using the Instagram app, starting with enabling the "Save to Camera Roll" feature.
Enabling the "Save to Camera Roll" Feature
To enable the "Save to Camera Roll" feature, navigate to the Instagram app's settings. Tap the three horizontal lines on the top right corner of the screen, then select "Settings" from the dropdown menu. Scroll down to the "Account" section and tap on "Original Photos" (for iOS devices) or "Original Posts" (for Android devices). Toggle the switch next to "Save Original Photos" or "Save Original Posts" to the right, turning it blue. This will allow you to save your Instagram Reels to your camera roll. Additionally, you can also enable the "Save to Camera Roll" feature for individual Reels by tapping the three dots on the top right corner of the Reel and selecting "Save" from the menu. By enabling this feature, you can easily save your favorite Reels to your device's gallery for later viewing or sharing.
Using the "Share" Option to Save Reels
Using the "Share" option is a straightforward way to save Reels from Instagram to your gallery. To do this, open the Instagram app and navigate to the Reel you want to save. Tap the three dots on the top-right corner of the screen and select "Share." From the share menu, choose "Save to Camera Roll" or "Save to Gallery," depending on your device. This will download the Reel to your device's gallery, where you can view it later or share it with others. Note that this method only works for public Reels, and you may not be able to save Reels from private accounts. Additionally, the Reel will be saved in its original format, without any edits or modifications. If you want to save a Reel with edits, you may need to use a third-party app or take a screenshot. Overall, using the "Share" option is a quick and easy way to save Reels from Instagram to your gallery, as long as the Reel is public and you don't need to make any edits.
Accessing Saved Reels through the Instagram App
To access saved Reels through the Instagram app, navigate to your profile page by tapping the profile icon, usually located at the bottom right corner of the screen. From there, tap the three horizontal lines (≡) on the top right corner to open the menu, and then select "Saved" from the list of options. This will take you to the Saved page, where you can view all the posts, including Reels, that you have saved. To specifically view saved Reels, tap the "Reels" tab at the top of the screen. Here, you can browse through the Reels you've saved, and even watch them again if you want to. Additionally, you can also use the search bar at the top of the Saved page to look for specific Reels you've saved by typing in keywords or hashtags. This feature allows you to easily access and re-watch your favorite Reels, and even share them with others if you want to.
Method 2: Using Third-Party Apps
If you're looking for a more convenient way to download Instagram Reels, using third-party apps is a viable option. There are several apps available that allow you to download Reels with just a few taps. By using these apps, you can save your favorite Reels to your device and watch them offline. In this method, we'll explore how to download Reels using apps like InShot or Video Downloader, as well as other apps like Reels Saver or InstaSave. We'll also cover how to transfer the saved Reels to your gallery. To get started, let's take a look at downloading Reels with apps like InShot or Video Downloader.
Downloading Reels with Apps like InShot or Video Downloader
If you're looking for a more convenient way to download Instagram Reels, you can use third-party apps like InShot or Video Downloader. These apps allow you to download Reels with just a few taps, and they often come with additional features like video editing and sharing capabilities. To download a Reel using InShot or Video Downloader, simply copy the link of the Reel you want to download, open the app, and paste the link into the app's download bar. The app will then fetch the video and allow you to download it to your device. You can also use these apps to download Reels in different qualities, such as HD or 4K, depending on your device's capabilities. Additionally, some apps may also allow you to download Reels with audio, which can be useful if you want to save a Reel with music or voiceovers. Overall, using third-party apps like InShot or Video Downloader can be a quick and easy way to download Instagram Reels and save them to your device.
Using Apps like Reels Saver or InstaSave to Download Reels
Using apps like Reels Saver or InstaSave is a convenient way to download Reels from Instagram. These third-party apps are specifically designed to help users save their favorite Reels to their device's gallery. To use these apps, simply copy the link of the Reel you want to download, open the app, and paste the link. The app will then process the link and allow you to download the Reel in various formats, such as MP4 or GIF. Some apps also offer additional features, such as the ability to download Reels in high definition or to save multiple Reels at once. Once the Reel is downloaded, you can find it in your device's gallery, where you can view it, share it, or edit it as you like. It's worth noting that some apps may have limitations or restrictions on the number of Reels you can download per day, so be sure to check the app's terms of use before getting started. Overall, using apps like Reels Saver or InstaSave is a quick and easy way to save your favorite Reels from Instagram.
Transferring Saved Reels to the Gallery
Transferring saved reels to the gallery is a straightforward process that can be accomplished using third-party apps. One of the most popular apps for this purpose is InShot, a video editing and saving app that allows users to download and save Instagram reels to their device's gallery. To transfer saved reels to the gallery using InShot, users can follow a few simple steps. First, they need to download and install the InShot app from the Google Play Store or Apple App Store. Once installed, users can open the app and navigate to the "Reels" section, where they can browse through their saved reels. From there, they can select the reels they want to transfer to the gallery and click on the "Download" button. The app will then prompt users to choose the video quality and format they prefer, and the reel will be saved to their device's gallery. Alternatively, users can also use other third-party apps such as Video Downloader for Instagram or Reels Saver, which offer similar features and functionality. By using these apps, users can easily transfer their saved reels to the gallery and enjoy them offline or share them with others.
Method 3: Using Screen Recording
Here is the introduction paragraph: To create a high-quality Instagram Reel, you can use the screen recording feature on your device. This method allows you to record your screen while navigating through the app, making it easier to create a seamless and engaging video. By using screen recording, you can capture your screen activity, edit the recording to remove unwanted parts, and save the final video to your gallery. In this article, we will explore how to use screen recording to create a high-quality Instagram Reel, including enabling screen recording on your device, recording the reel and saving it to the gallery, and editing the recorded reel to remove unwanted parts. To get started, let's first look at how to enable screen recording on your device. Here is the supporting paragraph: Screen recording is a built-in feature on most devices, and enabling it is a straightforward process. To enable screen recording on your device, you need to access the settings menu and look for the "Screen Recording" option. On some devices, this option may be located in the "Advanced Features" or "Developer Options" section. Once you have located the screen recording option, toggle the switch to enable it. You may also be prompted to grant permission for the screen recording feature to access your device's microphone and camera. Once you have enabled screen recording, you can proceed to record your Instagram Reel by navigating to the app and starting the recording process.
Enabling Screen Recording on Your Device
To enable screen recording on your device, you'll need to access your phone's settings. For Android users, go to Settings > Advanced features > Screenshots and screen recorder, then toggle on the switch next to "Screenshots and screen recorder." For iOS users, go to Settings > Control Center > Customize Controls, then tap the "+" icon next to "Screen Recording." Once you've enabled screen recording, you can start recording your screen by opening the Control Center (iOS) or the Quick Settings panel (Android) and tapping the screen recording icon. You can also add a floating screen recording button to your screen for easy access. On Android, go to Settings > Advanced features > Screenshots and screen recorder, then toggle on the switch next to "Floating button." On iOS, go to Settings > Control Center > Customize Controls, then tap the "Screen Recording" icon and select "Floating button." With screen recording enabled, you can now record your Instagram Reels and save them to your gallery.
Recording the Reel and Saving it to the Gallery
To record the reel and save it to the gallery, start by opening the Instagram app and navigating to the Reels tab. Locate the reel you want to save and tap the three dots on the right side of the screen. From the menu that appears, select "Copy Link." Next, open the screen recording feature on your device. On iOS devices, this can be done by swiping up from the bottom of the screen and tapping the screen recording icon, while on Android devices, you can find it in the quick settings panel. Once the screen recording feature is activated, go back to the Instagram app and play the reel you want to save. The screen recording will capture the reel, and you can stop the recording when it's finished. Finally, the recorded reel will be saved to your device's gallery, where you can view, edit, and share it as desired.
Editing the Recorded Reel to Remove Unwanted Parts
Editing the recorded reel to remove unwanted parts is a crucial step in refining your content. To do this, you can use the built-in editing features of your screen recording app or a third-party video editing software. Start by reviewing your recorded reel and identifying the parts you want to remove, such as mistakes, awkward pauses, or unnecessary footage. Then, use the trimming or splitting tool to cut out the unwanted sections, making sure to save the edited version as a new file. You can also use the editing software to add transitions, effects, or music to enhance the overall quality and engagement of your reel. Additionally, you can adjust the audio levels, brightness, and contrast to ensure your reel looks and sounds professional. By editing your recorded reel, you can create a polished and engaging video that showcases your content in the best possible light.