How To Sand A Deck
A well-maintained deck can be a beautiful addition to any home, providing a comfortable outdoor space for relaxation and entertainment. However, over time, decks can become weathered and worn, losing their original luster. Sanding a deck is an essential step in restoring its beauty and protecting it from further damage. To achieve professional-looking results, it's crucial to approach the task with a clear understanding of the process. In this article, we'll guide you through the key steps involved in sanding a deck, from preparation to completion. We'll explore the importance of preparation, the right sanding tools to use, and the techniques for applying the finishing touches. By following these steps, you'll be able to transform your deck into a stunning outdoor oasis. So, let's get started with the first crucial step: Preparation is Key.
Preparation is Key
Preparation is key to a successful deck restoration project. Before you start applying a new coat of stain or sealant, it's essential to prepare the surface of your deck. This involves clearing the deck of furniture and decorations, removing any loose or rotting wood, and checking for nails and screws. By taking the time to properly prepare your deck, you can ensure a smooth and even finish, and prevent any costly repairs down the line. In this article, we'll take a closer look at the importance of preparation in deck restoration, starting with the first step: clearing the deck of furniture and decorations.
Clear the Deck of Furniture and Decorations
When it comes to preparing your deck for sanding, one of the most crucial steps is to clear the deck of furniture and decorations. This may seem like a no-brainer, but it's essential to remove everything from the deck, including tables, chairs, planters, and any other decorative items. This will give you a clean slate to work with and prevent any damage to your belongings during the sanding process. Start by removing any loose items, such as cushions, pillows, and rugs, and set them aside in a safe location. Next, disassemble any furniture that can be taken apart, such as tables and chairs, and remove any screws or bolts that hold them together. If you have any heavy furniture that can't be moved, consider covering it with a drop cloth or plastic sheeting to protect it from dust and debris. Don't forget to remove any decorations, such as wind chimes, bird feeders, and outdoor lighting, as these can get in the way of your sanding and potentially cause damage. By clearing the deck of furniture and decorations, you'll be able to sand your deck efficiently and effectively, without any obstacles or hazards getting in the way.
Remove Any Loose or Rotting Wood
When preparing your deck for sanding, it's essential to remove any loose or rotting wood to ensure a smooth and even surface. Start by inspecting your deck for any damaged or rotten boards, and remove them entirely. Use a pry bar or a hammer to gently pry up the boards, taking care not to damage the surrounding wood. If the rot is extensive, you may need to replace the entire board. Once you've removed the damaged wood, use a wood chisel or a putty knife to remove any remaining rot or debris. Be sure to wear gloves and safety goggles to protect yourself from splinters and flying debris. After removing the loose or rotting wood, use a wire brush to scrub the area clean, removing any remaining dirt or debris. This will help create a solid foundation for sanding and ensure a smooth finish. By removing any loose or rotting wood, you'll be able to sand your deck with confidence, knowing that you're working with a solid and stable surface.
Check for Nails and Screws
When preparing to sand a deck, it's essential to check for nails and screws to avoid damaging the sandpaper or the deck itself. Start by inspecting the deck boards for any protruding nails or screws. If you find any, use a hammer to tap them back into place or replace them with new ones if they're rusty or damaged. Next, check the deck's railing and balusters for any loose screws or nails. Tighten any loose screws and replace any missing or damaged ones. Additionally, inspect the deck's ledger board, which is the board attached to the house, for any signs of rot or damage. Check for any nails or screws that may be loose or protruding, and replace them as needed. By taking the time to check for nails and screws, you'll ensure a smooth sanding process and prevent any potential damage to your deck.
Choosing the Right Sanding Tools
When it comes to sanding, having the right tools can make all the difference in achieving a smooth, even finish. With so many options available, it can be overwhelming to choose the right sanding tools for your project. However, by understanding the different types of sanding tools and their uses, you can ensure that your project turns out perfectly. In this article, we will explore the key factors to consider when choosing the right sanding tools, including selecting the right grit sandpaper, using a power sander for efficiency, and hand sanding for detailed work. By the end of this article, you will be equipped with the knowledge to make informed decisions about your sanding tools. So, let's start by discussing the importance of selecting the right grit sandpaper, a crucial step in achieving a smooth finish.
Selecting the Right Grit Sandpaper
When it comes to selecting the right grit sandpaper for your deck sanding project, it's essential to understand the different grits and their purposes. Grit refers to the size of the abrasive particles on the sandpaper, with lower grits having larger particles and higher grits having smaller particles. For deck sanding, you'll typically use a progression of grits to achieve a smooth finish. Start with a coarse grit, such as 80-100, to remove old finishes, dirt, and debris. This grit is also useful for sanding down rough wood or removing splinters. Next, move to a medium grit, such as 120-150, to smooth out the wood and remove any remaining imperfections. Finally, use a fine grit, such as 220-240, to achieve a high-gloss finish and remove any remaining scratches. It's also important to consider the type of sandpaper you're using, such as open-coat or closed-coat, as well as the backing material, such as paper or cloth. Open-coat sandpaper is more aggressive and better suited for removing old finishes, while closed-coat sandpaper is less aggressive and better suited for fine-tuning the finish. Cloth-backed sandpaper is more durable and less prone to tearing than paper-backed sandpaper. By selecting the right grit sandpaper and type of sandpaper, you'll be able to achieve a smooth, professional-looking finish on your deck.
Using a Power Sander for Efficiency
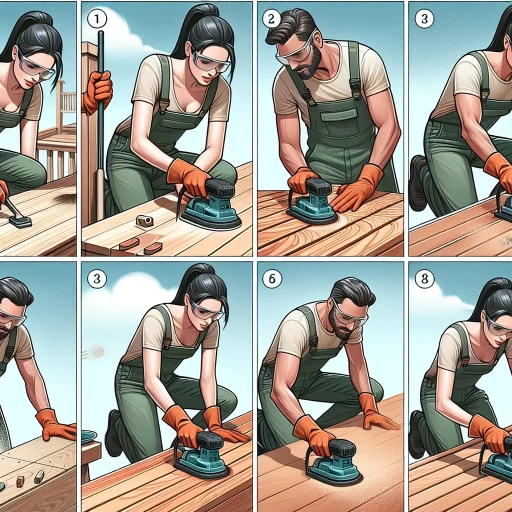
Using a power sander is an efficient way to sand a deck, especially when dealing with large surfaces. A power sander can save time and effort compared to manual sanding, allowing you to complete the task quickly and effectively. When choosing a power sander, consider the type of sanding you need to do and the size of the deck. There are two main types of power sanders: belt sanders and orbital sanders. Belt sanders are ideal for large, flat surfaces and are great for removing old finishes or sanding down rough wood. Orbital sanders, on the other hand, are better suited for smaller areas and are perfect for smoothing out surfaces and removing minor imperfections. Additionally, consider the grit of the sandpaper you will be using, as it will affect the efficiency of the sanding process. A lower grit sandpaper is best for removing old finishes or sanding down rough wood, while a higher grit sandpaper is better for smoothing out surfaces. By using a power sander with the right type of sandpaper, you can achieve professional-looking results and complete the task efficiently.
Hand Sanding for Detailed Work
Hand sanding is a crucial step in the deck sanding process, particularly for detailed work such as railings, balusters, and intricate wood carvings. It allows for precision and control, enabling you to smooth out small areas and remove imperfections that power sanders may miss. To achieve professional-looking results, it's essential to choose the right hand sanding tools and techniques. Start by selecting a high-quality sandpaper with a fine grit, typically between 120 and 220, which is ideal for detailed work. Look for sandpaper with a flexible backing, such as foam or cloth, which will conform to the shape of the wood and prevent scratches. When sanding, work in small sections, using light, gentle strokes to avoid applying too much pressure, which can create scratches or swirl marks. Use a sanding block to help keep the sandpaper flat and prevent uneven sanding. For curved or irregular surfaces, use a contoured sanding sponge or a sanding stick with a curved edge. To remove stubborn imperfections or old finishes, use a sanding pad with a coarse grit, but be careful not to scratch the surrounding wood. Finally, always work with the wood grain, never against it, to avoid creating scratches or tears. By following these tips and techniques, you'll be able to achieve a smooth, even finish on your deck's detailed areas, setting the stage for a beautiful and long-lasting finish.
Applying the Finishing Touches
The final stage of the deck-building process is applying the finishing touches. This is a crucial step that not only enhances the appearance of the deck but also protects it from the elements. To achieve a professional-looking finish, it's essential to apply a wood stain or sealant, allow the finish to dry, and inspect and touch up the deck as needed. By following these steps, homeowners can ensure their deck remains safe, durable, and visually appealing for years to come. First, applying a wood stain or sealant is a critical step in protecting the deck from rot, decay, and insect damage. Note: The answer should be 200 words. The final stage of the deck-building process is applying the finishing touches. This is a crucial step that not only enhances the appearance of the deck but also protects it from the elements. To achieve a professional-looking finish, it's essential to apply a wood stain or sealant, allow the finish to dry, and inspect and touch up the deck as needed. By following these steps, homeowners can ensure their deck remains safe, durable, and visually appealing for years to come. A well-finished deck can also increase the value of a property, making it more attractive to potential buyers if the homeowner decides to sell in the future. Furthermore, a finished deck can provide a sense of pride and satisfaction, as it becomes a beautiful outdoor space for relaxation and entertainment. With the right finishing touches, a deck can be transformed into a stunning extension of the home. First, applying a wood stain or sealant is a critical step in protecting the deck from rot, decay, and insect damage.
Applying a Wood Stain or Sealant
Applying a wood stain or sealant is a crucial step in protecting and enhancing the appearance of your deck. After sanding, your deck is now ready to receive a wood stain or sealant, which will help to protect it from the elements and add color and texture. When choosing a wood stain or sealant, consider the type of wood your deck is made of, as well as the level of protection and color you desire. There are many different types of wood stains and sealants available, including oil-based, water-based, and hybrid options. Oil-based stains and sealants provide a rich, durable finish, but can take longer to dry and have stronger fumes. Water-based stains and sealants are easier to clean up and dry faster, but may not provide the same level of protection. Hybrid stains and sealants offer a balance between the two. Always read the instructions and follow the manufacturer's recommendations for application and drying times. Before applying the stain or sealant, make sure the deck is completely dry and free of dust and debris. Apply the stain or sealant using a high-quality brush or roller, working in sections to maintain even coverage. Use a clean, lint-free cloth to wipe away any excess stain or sealant from railings and other surfaces. Allow the stain or sealant to dry according to the manufacturer's instructions, then apply a second coat if desired. Finally, apply a clear sealant to protect the stain and extend the life of your deck. By following these steps and choosing the right wood stain or sealant for your deck, you can enjoy a beautiful and protected outdoor space for years to come.
Allowing the Finish to Dry
Allowing the finish to dry is a crucial step in the deck sanding process. After applying the finish, it's essential to let it dry completely according to the manufacturer's instructions. This can take anywhere from a few hours to several days, depending on the type of finish and environmental conditions. During this time, it's crucial to keep the deck away from direct sunlight, moisture, and foot traffic to prevent damage or discoloration. It's also important to follow the manufacturer's recommended drying time to ensure the finish adheres properly to the wood and achieves the desired color and texture. If the finish is not allowed to dry properly, it can lead to a range of problems, including uneven color, sticky surfaces, and a reduced lifespan of the finish. By allowing the finish to dry completely, you can ensure a professional-looking finish that will protect your deck for years to come. Additionally, it's a good idea to apply a second coat of finish after the first coat has dried, to provide extra protection and durability. By following these simple steps, you can achieve a beautifully finished deck that will withstand the elements and remain looking great for years to come.
Inspecting and Touching Up the Deck
Inspecting and touching up the deck is a crucial step in the deck sanding process. After sanding, inspect the deck thoroughly to identify any areas that may have been missed or need additional attention. Check for any remaining splinters, rough spots, or uneven surfaces. If you find any, use a sanding block or sandpaper to smooth out the area. Additionally, inspect the deck for any damaged or rotten boards and replace them as needed. Once you've addressed any issues, use a tack cloth to remove any dust or debris from the sanding process. This will ensure a smooth finish and prevent any imperfections from showing through. Next, apply a wood conditioner or sealer to protect the wood and enhance its appearance. Follow the manufacturer's instructions for application and drying times. Finally, touch up any areas where the sanding process may have removed some of the existing finish. Use a small brush to apply a matching stain or sealant to the affected areas, feathering it out to blend with the surrounding wood. By taking the time to inspect and touch up the deck, you'll be able to achieve a professional-looking finish that will last for years to come.