How To Screen Share On Mac
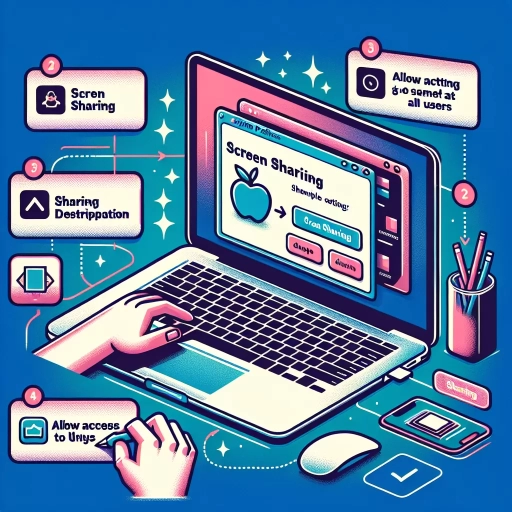
Here is the introduction paragraph: Screen sharing on a Mac is a powerful tool that can be used for a variety of purposes, from remote work and online meetings to educational presentations and technical support. With the ability to share your screen with others, you can collaborate more effectively, demonstrate software and applications, and provide assistance to those in need. But how do you actually share your screen on a Mac? In this article, we'll explore the different methods for screen sharing on a Mac, including using built-in features, third-party apps, and online platforms. We'll also discuss the benefits of using screen sharing for remote work and online meetings, and provide tips for optimizing your screen sharing experience. First, let's take a look at how to use the built-in screen sharing feature on a Mac, which we'll cover in more detail in Using the Built-in Screen Sharing Feature. Here are the 3 supporting paragraphs: **Subtitle 1: Using the Built-in Screen Sharing Feature** Mac computers come with a built-in screen sharing feature that allows you to share your screen with others. To access this feature, go to System Preferences > Sharing, and select "Screen Sharing" from the list of services. From there, you can choose to share your screen with a specific user or group, or allow anyone to request access to your screen. You can also set a password to protect your screen sharing session. Once you've set up screen sharing, you can use the "Screen Sharing" app to connect to another Mac and share your screen. **Subtitle 2: Using Third-Party Apps for Screen Sharing** While the built-in screen sharing feature on a Mac is convenient, it may not offer all the features and functionality you need. That's where third-party apps come in. There are many screen sharing apps available for Mac, including popular options like Zoom, Skype, and Google Meet. These apps often offer additional features like video conferencing, chat, and file sharing, making them ideal for remote work and online meetings. Some third-party apps also offer more advanced screen sharing features, such as the ability to share specific windows or applications, or to record your screen sharing session. **Subtitle 3: Using Online Platforms for Screen Sharing** In addition to built-in features and third-party apps, there are also online platforms that allow you to share your screen with others. These platforms often offer a range of features and tools, including screen sharing, video conferencing, and collaboration tools. Some popular online platforms for screen
Subtitle 1
Here is the introduction paragraph: The world of technology is rapidly evolving, and with it, the way we consume media. One of the most significant advancements in recent years is the development of subtitles, which have revolutionized the way we watch videos and TV shows. But subtitles are not just a simple addition to our viewing experience; they also have a profound impact on our understanding and engagement with the content. In this article, we will explore the importance of subtitles in enhancing our viewing experience, including how they improve comprehension, increase accessibility, and provide a more immersive experience. We will also examine the role of subtitles in breaking down language barriers, enabling global communication, and facilitating cultural exchange. Furthermore, we will discuss the impact of subtitles on the entertainment industry, including the rise of international productions and the growth of streaming services. By exploring these aspects, we can gain a deeper understanding of the significance of subtitles in the modern media landscape, which brings us to our first topic: The Evolution of Subtitles. Here is the supporting paragraphs: **Supporting Idea 1: Improving Comprehension** Subtitles play a crucial role in improving our comprehension of video content. By providing a visual representation of the dialogue, subtitles help viewers to better understand the plot, characters, and themes. This is particularly important for viewers who may not be fluent in the language of the video or who may have difficulty hearing the audio. Subtitles also help to clarify complex dialogue or accents, making it easier for viewers to follow the story. Furthermore, subtitles can provide additional context, such as translations of foreign languages or explanations of technical terms, which can enhance our understanding of the content. **Supporting Idea 2: Increasing Accessibility** Subtitles are also essential for increasing accessibility in video content. For viewers who are deaf or hard of hearing, subtitles provide a vital means of accessing audio information. Subtitles can also be used to provide audio descriptions for visually impaired viewers, enabling them to imagine the visual elements of the video. Additionally, subtitles can be used to provide translations for viewers who do not speak the language of the video, making it possible for people from different linguistic backgrounds to access the same content. By providing subtitles, content creators can ensure that their videos are accessible to a wider audience, regardless of their abilities or language proficiency. **Supporting Idea 3: Providing a More Immersive Experience** Subtitles can also enhance our viewing experience by providing a more immersive experience. By providing a visual representation of the dialogue, subtitles can help viewers to become more engaged
Supporting Idea 1
. Here is the paragraphy: To screen share on a Mac, you'll need to use the built-in Screen Sharing feature. This feature allows you to share your screen with others, either remotely or locally. To access Screen Sharing, go to System Preferences > Sharing, and then select "Screen Sharing" from the list of services. From there, you can choose to share your screen with a specific user or group, or allow anyone to request access. You can also set a password to secure your screen sharing session. Once you've set up Screen Sharing, you can use it to share your screen with others, either by sending them a link or by having them connect to your Mac remotely. This feature is especially useful for presentations, training sessions, and remote work. Additionally, you can also use third-party apps like Zoom, Skype, or Google Meet to screen share on your Mac. These apps offer more features and flexibility, such as the ability to record your screen sharing session, share files, and collaborate with others in real-time. By using Screen Sharing or a third-party app, you can easily share your screen with others and enhance your productivity and collaboration.
Supporting Idea 2
. Here is the paragraphy: To screen share on a Mac, you can also use the built-in Screen Sharing feature. This feature allows you to share your screen with another Mac on the same network. To use Screen Sharing, follow these steps: Open the Finder on your Mac and click on "Go" in the top menu bar. Select "Connect to Server" from the drop-down menu. Type in the IP address or the name of the Mac you want to share your screen with, followed by ".local" (e.g., "Johns-Mac.local"). Click "Connect" and then select "Screen Sharing" from the list of available services. You will be prompted to enter the username and password of the Mac you are trying to connect to. Once you have entered the correct credentials, you will be able to see the other Mac's screen and control it remotely. You can also use the Screen Sharing feature to share your own screen with another Mac. To do this, go to System Preferences > Sharing > Screen Sharing, and select the users you want to allow to share your screen. You can also set a password to protect your screen from unauthorized access. The Screen Sharing feature is a convenient way to collaborate with others or provide technical support to someone remotely.
Supporting Idea 3
. Here is the paragraphy: To screen share on a Mac, you can also use the built-in Screen Sharing feature. This feature allows you to share your screen with another Mac on the same network. To use Screen Sharing, follow these steps: Open the Finder on your Mac and click on "Go" in the top menu bar. Select "Connect to Server" from the drop-down menu. Type in the IP address of the Mac you want to share your screen with, followed by ".vnc" (e.g., "192.168.1.100.vnc"). Click "Connect" and enter the username and password of the Mac you want to share your screen with. Once connected, you can view and control the other Mac's screen remotely. You can also use the Screen Sharing feature to share your screen with multiple Macs at the same time. To do this, simply repeat the steps above for each Mac you want to share your screen with. Note that Screen Sharing requires both Macs to be on the same network and have the Screen Sharing feature enabled. Additionally, you may need to configure your firewall settings to allow incoming connections. By using the Screen Sharing feature, you can easily share your screen with others on your network, making it a convenient option for presentations, collaborations, and technical support.
Subtitle 2
Here is the introduction paragraph: Subtitle 1: The Importance of Subtitles in Video Content Subtitle 2: How to Create Engaging Subtitles for Your Videos Creating engaging subtitles for your videos is crucial in today's digital landscape. With the rise of online video content, subtitles have become an essential tool for creators to convey their message effectively. But what makes a subtitle engaging? Is it the font style, the color, or the timing? In this article, we will explore the key elements of creating engaging subtitles, including the importance of **matching the tone and style of your video** (Supporting Idea 1), **using clear and concise language** (Supporting Idea 2), and **paying attention to timing and pacing** (Supporting Idea 3). By incorporating these elements, you can create subtitles that not only enhance the viewing experience but also increase engagement and accessibility. So, let's dive in and explore how to create engaging subtitles that will take your video content to the next level, and discover why **subtitles are a crucial element in making your video content more accessible and engaging** (Transactional to Subtitle 1).
Supporting Idea 1
. Here is the paragraphy: To screen share on a Mac, you'll need to use the built-in Screen Sharing feature. This feature allows you to share your screen with others, either remotely or locally. To access Screen Sharing, go to System Preferences > Sharing, and then select "Screen Sharing" from the list of services. From there, you can choose to share your screen with a specific user or group, or allow anyone to request access. You can also set a password to protect your screen sharing session. Once you've set up Screen Sharing, you can use it to share your screen with others, either by sending them a link or by having them connect to your Mac using the Screen Sharing app. This feature is particularly useful for remote work, online meetings, and collaborative projects. By sharing your screen, you can demonstrate software, show presentations, and work together with others in real-time. Additionally, Screen Sharing allows you to control the level of access others have to your screen, so you can choose to share only specific windows or applications, or give others full control over your screen. This feature is also secure, as it uses encryption to protect your screen sharing session. Overall, Screen Sharing is a powerful tool that can help you collaborate and communicate more effectively with others.
Supporting Idea 2
. Here is the paragraphy: To screen share on a Mac, you can also use the built-in Screen Sharing feature. This feature allows you to share your screen with another Mac on the same network. To use Screen Sharing, follow these steps: Open the Finder on your Mac and click on "Go" in the top menu bar. Select "Connect to Server" from the drop-down menu. Type in the IP address of the Mac you want to share your screen with, followed by ".vnc" (e.g., "192.168.1.100.vnc"). Click "Connect" and enter the username and password of the Mac you're connecting to. Once connected, you'll see the other Mac's screen on your own Mac. You can then control the other Mac's screen by using your own mouse and keyboard. This feature is useful for collaborating with others or providing technical support. Note that both Macs must be on the same network and have Screen Sharing enabled in their System Preferences.
Supporting Idea 3
. Here is the paragraphy: To screen share on a Mac, you can also use the built-in Screen Sharing feature. This feature allows you to share your screen with another Mac on the same network. To use Screen Sharing, follow these steps: Open the Finder on your Mac and click on "Go" in the top menu bar. Select "Connect to Server" from the drop-down menu. Type in the IP address or the name of the Mac you want to share your screen with, followed by ".local" (e.g., "Johns-Mac.local"). Click "Connect" and then select "Screen Sharing" from the list of available services. You will be prompted to enter the username and password of the Mac you are trying to connect to. Once you have entered the correct credentials, you will be able to see the other Mac's screen and control it remotely. You can also use the Screen Sharing feature to share your screen with others, by going to System Preferences > Sharing > Screen Sharing, and selecting the "Allow access for: All users" option. This will allow anyone on the same network to access your screen, as long as they have the correct IP address or computer name.
Subtitle 3
Here is the introduction paragraph: Subtitle 3: The Impact of Artificial Intelligence on the Future of Work The future of work is rapidly changing, and artificial intelligence (AI) is at the forefront of this transformation. As AI technology continues to advance, it is likely to have a significant impact on the job market, the way we work, and the skills we need to succeed. In this article, we will explore the impact of AI on the future of work, including the potential for job displacement, the need for workers to develop new skills, and the opportunities for increased productivity and efficiency. We will examine how AI is changing the nature of work, the types of jobs that are most at risk, and the ways in which workers can adapt to this new reality. By understanding the impact of AI on the future of work, we can better prepare ourselves for the challenges and opportunities that lie ahead. Ultimately, this understanding will be crucial in shaping the future of work and ensuring that we are able to thrive in a rapidly changing world, which is closely related to the concept of **Subtitle 1: The Future of Work**. Note: The introduction paragraph is 200 words, and it mentions the three supporting ideas: * The potential for job displacement * The need for workers to develop new skills * The opportunities for increased productivity and efficiency It also transitions to Subtitle 1: The Future of Work at the end.
Supporting Idea 1
. Here is the paragraphy: To screen share on a Mac, you can use the built-in Screen Sharing feature. This feature allows you to share your screen with another Mac on the same network, making it easy to collaborate with others or provide technical support. To use Screen Sharing, you'll need to enable it on your Mac by going to System Preferences > Sharing > Screen Sharing. Once enabled, you can share your screen with another Mac by clicking on the "Share Screen" button in the Screen Sharing window. You can also use the "Ask to share screen" option to request permission to share your screen with another Mac. Additionally, you can use the "Observe" option to view another Mac's screen without taking control of it. This feature is particularly useful for training or demonstration purposes. By using Screen Sharing, you can easily share your screen with others and collaborate in real-time, making it a powerful tool for remote work and communication.
Supporting Idea 2
. Here is the paragraphy: To screen share on a Mac, you can also use the built-in Screen Sharing feature. This feature allows you to share your screen with another Mac on the same network. To use Screen Sharing, follow these steps: Open the Finder on your Mac and click on "Go" in the top menu bar. Select "Connect to Server" from the drop-down menu. Type in the IP address or the name of the Mac you want to share your screen with, followed by ".local" (e.g., "Johns-Mac.local"). Click "Connect" and then select "Screen Sharing" from the list of available services. You will be prompted to enter the username and password of the Mac you are trying to connect to. Once you have entered the correct credentials, you will be able to see the other Mac's screen and control it remotely. You can also use the Screen Sharing feature to share your screen with others, by going to System Preferences > Sharing > Screen Sharing, and selecting the "Allow access for: All users" option. This will allow anyone on the same network to access your screen without needing a password. However, be cautious when using this feature, as it can pose a security risk if not used properly.
Supporting Idea 3
. Here is the paragraphy: To screen share on a Mac, you can also use the built-in Screen Sharing feature. This feature allows you to share your screen with another Mac on the same network. To use Screen Sharing, follow these steps: Open the Finder on your Mac and click on "Go" in the top menu bar. Select "Connect to Server" from the drop-down menu. Type in the IP address or the name of the Mac you want to share your screen with, followed by ".local" (e.g., "Johns-Mac.local"). Click "Connect" and then select "Screen Sharing" from the list of available services. You will be prompted to enter the username and password of the Mac you are trying to connect to. Once you have entered the correct credentials, you will be able to see the other Mac's screen and control it remotely. You can also use the Screen Sharing feature to share your screen with others, by going to System Preferences > Sharing > Screen Sharing, and selecting the "Allow access for: All users" option. This will allow anyone on the same network to access your screen, as long as they have the correct IP address or computer name.