How To Take A Picture Of The Moon
 Embarking on the exciting journey of capturing the mystique and magnificence of the moon requires more than just pointing your camera and shooting. It's an intricate art that combines your understanding of photography with unique techniques that optimize each shot and post-production practices that maximize the potential of your images. This high-quality, informative, and engaging article will serve as your guide to mastering moon photography, ensuring that you embolden your skills and bring the celestial beauty of the moon into focus. We'll firstly delve into understanding moon photography's nuances; you'll realise it's more than meets the eye. Then, you'll learn effective strategies for refining your lunar shots, investing in the craft of planned, intentional moon imagery. Lastly, we'll step into the world of post-production, where amazing moon photos are further elevated. Your journey begins here as we transition into a deeper dive into 'Understanding Moon Photography: It's More Than Just Pointing and Shooting.'
Understanding Moon Photography: It's More Than Just Pointing and Shooting
Understanding Moon Photography is more than just pointing your camera and shooting; it indeed involves a number of nuanced elements to capture the breathtaking beauty of the celestial body. This article will illuminate the intricacies of moon photography, helping both beginners and seasoned photographers alike to take their moon captures to the next level. We'll plunge into the basics of moon photography, shedding light on the essential aspects game-changing to one's photography skillset. We'll also delve into the essential gear for moon photography, ensuring you have the right tools to highlight the moon's cratered surface details. Lastly, we'll guide you in choosing the ideal time and place ensuring your chance of capturing stellar photographs heightened. Filled with insightful tips and practical information, each of these components will equip you with the knowledge to navigate the complexities of moon photography. So, grab your camera and let’s venture into the first key step in our lunar journey – The Basics of Moon Photography.
The Basics of Moon Photography
Moon photography can be an incredibly fulfilling pursuit, but it's not as easy as pointing your camera towards the night sky and pressing the shutter. It requires an understanding of both photographic principles and some specific techniques. The first step is having the proper gear. A DSLR or mirrorless camera with manual controls is a must, as it allows you to adjust your settings to capture the best possible image. A tripod is also essential, as it provides stability during the long exposure times needed to shoot in low light conditions. Understanding your camera settings is the next essential step in moon photography. First, you will need to adjust your ISO. The ISO controls the sensitivity of your camera's sensor. A lower ISO number (100 or 200) is ideal for photographing the moon because it reduces noise and captures sharp details. The aperture affects the amount of light that hits your sensor. While it may seem counterintuitive, a smaller aperture (around f/11) is recommended as it helps to capture a much sharper and detailed image of the moon. The shutter speed also plays a crucial role in moon photography. Faster shutter speeds allow less light into the sensor, reducing the risk of overexposing the moon. But remember, the exact settings may vary based on environmental conditions. Always be prepared to adjust as needed. Your focus should also be set to infinity, ensuring that the moon – a very distant subject – is in sharp focus. You must also consider the moon's phase and position in the sky. The best time to capture the moon's intricate details is during the 'Golden Hour,' right after sunset or just before sunrise when the light from the sun illuminates the moon from the side. Lastly, practicing patience is part and parcel of moon photography. It involves plenty of trial and error, and climatic conditions may not always be in your favor. But with perseverance and a solid understanding of these fundamental aspects, you can capture stunning images of our celestial neighbor that truly are out of this world. And most importantly, whether you are a professional or amateur photographer, shooting the moon offers an incredible opportunity to hone your skills and harness your creativity. Remember, photography is a journey, and while the moon may be a far-off destination, every click of the shutter brings you one step closer. Unlock the secret to brilliant moon photography and let your images tell a magical moonlit story.
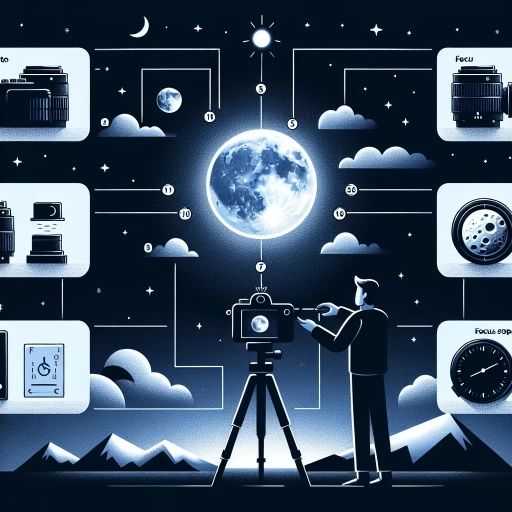
Essential Gear for Moon Photography
Capturing the ethereal beauty of the moon requires not just technical knowledge and timing, but also the right gear. Understanding that moon photography is more than just pointing and shooting is pivotal in getting that perfect shot which can take your breath away. First and foremost, a powerful DSLR or mirrorless camera that excels in low-light conditions is crucial for moon photography. Look for a camera with a large sensor and high dynamic range to capture the finest details even under limited light. Be aware that while mobile phone cameras continue to evolve, they still can't compete with the advanced controls and image quality of a standalone camera. Focus is fundamental when it comes to moon photography, and a reliable lens plays a significant part in it. A telephoto lens, preferably with a focal length of 200mm or higher, is recommended as it allows you to shoot from a distance while keeping the moon in sharp focus. A solid and steady tripod is another essential item owing to the long shutter speeds moon photography often requires. It eliminates the risk of blurred images resulting from camera shake. And don't forget to equip your kit with a remote shutter release as well. This device enables you to click pictures without touching your camera, further reducing potential disturbances. Using a high-quality barlow lens can also play a pivotal role in your moon photography adventures. This magnifying tool can amplify the focal length of your camera lens, bringing the moon's subtle features into clearer view. But remember, using a barlow lens requires precise focus adjustments, so practice beforehand. Lastly, having an app or software to process your images is equally important as the other gear. Programs like Adobe Photoshop or Lightroom help in tweaking the contrast, sharpness, and clarity of your pictures, enhancing the crater and mountain details on the moon's surface. These software also offer noise reduction tools for low-light images, helping in refining your moon shots. In moon photography, the right gear can make all the difference between a merely good image and a splendid one. When armed with the correct apparatus and a deep understanding of how to use them, you are all set to embark on a lunar photographic adventure that is bound to produce stunning results. Remember, practise and patience are key to mastering the art of moon photography. Aim for that perfect shot, but don't forget to enjoy the fascinating journey to get there.
Choosing the Ideal Time and Place
Choosing the ideal time and place for capturing the moon's majesty cannot be stressed enough in moon photography. The time you choose is crucial as the moon's position, size, and radiance differ significantly with each passing minute. As a rule of thumb, professional photographers tout the "Golden Hour," sometimes extended to the "Blue Hour," as the best periods for moon photography. This time coincides with sunrise or sunset when the earth's atmosphere scatters sunlight in a way where it yields a warm and softly diffused light. Also, moon visibility tends to be clearer due to reduced pollution and traffic dust. Location choice also dramatically influences the quality of your moon shots. The key is to locate a spot with minimal light pollution, this explains why rural areas often produce the best moon photographs. City lights can cause a glaring effect or wash out the image entirely. The ideal location is somewhere with an unobstructed view, say an open field, a high hill, or the roof of a building. Avoid locations with high-rise structures or towering trees that might block your view. Remember that the weather plays a significant role as well. A misty or cloudy sky can hinder the moon's visibility and ruin your shot. Therefore, check the weather forecast and moonrise and moonset times before setting up your tripod. Moreover, for a more comprehensive and dramatic shot, consider incorporating some earthbound elements - landscapes, landmarks, waterscapes, or people. They not only add depth to your photograph but also accentuate the moon's size and distance. To put it succinctly, selecting an ideal time and location for moon photography needs careful consideration and thoughtful planning. It is a harmonious blend of scientific understanding, strategic planning, and artistic vision.
Strategies for Optimizing Your Lunar Shots
Developing exceptional moon photography that consistently catches the eye necessitates a deeper understanding of certain strategies that substantially enhance your lunar shots. By adopting technical aspects like utilizing manual mode effectively, using bracketing for better moon images, and the application of composition techniques, like the Rule of Thirds among others, your skill in lunar photography can drastically improve. This is a journey set to propel amateur astronomer photographers into a realm of awe-striking celestial visuals. The first pivotal strategy involves mastering the use of Manual Mode. Modern cameras are equipped with innovative technology designed for day-to-day photography, however, the unique conditions and characteristics of lunar photography demand manual intervention. By implementing manual mode, photographers gain comprehensive control over shutter speed, aperture, and ISO, disallowing automatic systems to undermine the details of the moon's surfaces. In the upcoming section, we delve into the detailed techniques and tips for leveraging Manual Mode, allowing your moon photography to truly shine.
Techniques for Utilizing Manual Mode Effectively
Manual mode in photography, particularly when capturing the elusive beauty of the moon, offers you the freedom to control exposure, offering an opportunity to achieve optimal lunar shots. One critical technique in utilizing manual mode effectively is learning how to adjust your ISO. The ISO controls the sensitivity of your camera's sensor to light. By decreasing its sensitivity, you can minimize the 'noise' or graininess, often visible in your moon photos indirectly improving the image's quality. However, caution must be heeded as low ISO means less sensitivity to light, thereby demanding longer exposure times and potentially introducing motion blur. Therefore, start with a small ISO – perhaps around 100 or 200, and gradually increase as required. Another essential part of manual mode is controlling the aperture. A low aperture (represented by higher f-numbers) decreases the amount of light that can enter the camera. Since the moon is a bright object, an adequate aperture setting would fall somewhere between f/11 and f/16. This constraint on light entry produces a sharper, more focused image of the moon, enhancing the details visible on the lunar surface. Shutter speed is an equally vital component of manual mode photography. An extended shutter speed means more light is captured over time. However, when photographically our lunar companion, a longer exposure could result in a blurred image because the moon is continually moving across the sky. Balance is crucial here. Start with a shutter speed around 1/125th of a second and adjust till you achieve the desired brightness without compromising on sharpness. Finally, there's your camera's white balance setting. While auto white balance often results in bluish lunar shots, setting it to daylight will give your images a more natural colour, closely emulating what one would see on a clear night. Optimizing your lunar shots demands balance and skill. Take multiple shots, experimenting with different settings, and learning from each one. The ability to quickly adapt to changing conditions, coupled with an intimate understanding of your camera’s manual mode, will yield significant improvements in your lunar photography. Remember, these are simple starting points. As you explore, you will develop your own unique strategies for lunar photography, optimizing each shot for your specific conditions and equipment. Mastering the manual mode will allow you to control your photographic outcomes, pushing your moonshots from simple documents of reality to creative art forms. Practise, patience and perseverance will be your guiding stars on this exciting journey to capturing the moon's mystique.
How to Use Bracketing for Better Moon Images
Bracketing is an essential technical strategy when aiming to capture stunning images of the moon. As a vital component of the broader 'Strategies for Optimizing Your Lunar Shots', understanding the bracketing technique could drastically uplift the quality and precision of your lunar photography. The technique involves taking multiple shots of the subject scene (in this case, the moon) at different exposure settings. This strategy ensures that you capture your lunar subject in a variety of lighting and contrast ratios, significantly increasing the chances of getting an exposure that perfectly balances the moon's unique brightness against the darkness of the night sky. Begin by setting your camera to the bracketing mode, which can typically be found in your camera's settings menu. Most digital cameras have an 'auto bracketing' option that allows you to specify the number of bracketed shots and the exposure variation between them. For optimal lunar images, taking five shots with a 1 EV (Exposure Value) difference is typically effective. This range captures the scene from underexposed to overexposed versions, allowing you greater freedom in choosing the best shot or combining them during post-processing. When shooting the moon, a common mistake is overexposing the shot, consequently losing the moon's intricate craters and details in a wash of brightness. Bracketing combats this issue by ensuring you also capture underexposed shots, where these finer details are more pronounced. You can then blend these underexposed images with the correctly exposed images using photo editing software to create a beautifully detailed and well-balanced final image. Another key point to note is your starting point for bracketing. It could constitute a shot at nominal, 'correct' exposure, Although this is generally a good option, you can also decide to start from an underexposed or overexposed shot, primarily depending on factors such as the amount of ambient light, the phase of the moon, and your specific artistic vision. In summary, bracketing is an essential, skills-advancing strategy for those wishing to capture high-quality, detailed, and captivating moon images. By taking multiple shots at varying degrees of exposure, photographers can ensure they have a wide spectrum of images to choose from. This vital technique maximizes the chances of obtaining the perfect shot that truly captures the grandeur and mystical beauty of our nearest celestial neighbor. A perfect blend of technique and art, mastering bracketing inevitably leads to better lunar photography.
Composing Your Moon Photography: Rule of Thirds and More
Composing Your Moon Photography: Rule of Thirds and More Mastering the art of moon photography involves understanding many facets, from ensuring proper exposure and sharpness to incorporating the environment for a complete story. However, a central element in creating compelling lunar shots is composition – a principle that dabbles in creativity and visual aesthetics while heavily borrowing from the science of perception. One time-tested tool that photographers swear by is the Rule of Thirds. This principle proposes that an image should be divided into nine equal parts by two equally spaced horizontal and vertical lines. The points of intersection are where you should ideally place your subject, in this case, the moon. Implementing the Rule of Thirds in moon photography can dramatically improve your images by making them balanced, focused, and engaging to the eye. Aligning the moon along these 'third lines’ or at their intersections allows for a dynamic composition that invites the viewer to wander through the photograph. However, remember that photography rules are not set in stone and are meant primarily to guide your creative process. In addition to the Rule of Thirds, other composition strategies can optimize your lunar shots. For instance, include elements from the environment to yield depth and context to your moon photos. Silhouetted trees, towering skyscrapers, or a lonely lighthouse could add drama and scale to the frame. Shooting the moon against a stark sky can result in a minimalist yet strong composition. However, including dramatic clouds or celestial bodies like the stars or the Milky Way can create a more intricate and compelling narrative for your image. Incorporating water bodies to solicit beautiful reflections or using leading lines to direct the viewer’s attention towards the moon are effective strategies. Finally, remember to experiment and let your creativity guide you. Click multiple shots from different perspectives and at various focal lengths to ultimately capture an image that resonates with your artistic intuition. Understand that optimization is not about making every shot perfect but about improving, learning, and growing with every click of the shutter. Hence, put these strategies into practice, and keep honing your skills to fully optimize your lunar shots. Embrace the beauty of the lunar landscape, and let it guide your lens. With the right composition strategies, your moon photography can transition from simple astronomical snapshots to powerful digital storytelling images. The magic lies in your perspective, creativity, and understanding of the visual architecture. Make your moon images not just a photograph, but a story waiting to unravel through its compelling composition.
Post-Production: Making Great Moon Photos Even Better
Taking remarkable pictures of the moon is an endearing pursuit for photographers worldwide, but often than not, the true magic happens in the post-production phase that brings out the best of these celestial shots. In this comprehensive guide, we will delve deep into key elements of moon photo editing, namely, the Advantage of Shooting in RAW, Utilizing Editing Tools to Enhance Moon Images, and adding Touches of Creativity through Color Adjustment, Cropping, and Filters. Firstly, shooting in the RAW format allows photographers to capture a broader range of details, which gives them greater flexibility in the post-edit operations. Secondly, numerous editing tools have been specifically designed to coax out the finer details of moon photographs, helping to illuminate the more subdued elements of the composition. Lastly, letting your creativity flare with color adjustment, cropping, and the use of artistic filters can provide a completely refreshed look to your moon photographs. Our journey into enhancing lunar photography starts with the significant advantages of shooting in RAW.
The Advantage of Shooting in RAW
The Advantages of Shooting in RAW The phenomenal advantages of shooting in RAW lie in its infinite capabilities for post-production edits, a factor that becomes crucial when dealing with fickle and adaptable subjects like the moon. There's a certain thrill in capturing the moon's mystical charm in its raw, celestial glory - a beauty made even finer when shot in RAW. Akin to unprocessed film, RAW files store extensive data directly from your camera's sensor, providing a larger pool of information for detailed manipulation during post-production processes. This is invaluable in creating visually stunning moon photos. A significant advantage of shooting the moon in RAW is the greater color depth it provides for higher tonal range, capturing the nuances of the moon’s surface and underlying subtleness of its celestial glow. It eases the capturing of these color variations in a wide-spectrum palette than what a JPEG format can offer. Furthermore, in tricky lighting conditions that could potentially wash out the moon's surface or shroud it darkness, RAW files allow recovery of blown out highlights and drowned shadows, the leeway not offered by any other file format. The true power of RAW, however, becomes even more evident in the post-production phase. Unlike JPEGs, where the camera applies automatic settings that are permanently baked into the image, RAW files arrive unadulterated. This means complete control over settings like white balance, noise, sharpness, and exposure for the photographer during post-production. As any lunar enthusiast knows, the devil lies in the detail. Shooting the moon in RAW ensures minute features and textures are not lost, encapsulating the unique craters and valleys on the moon’s surface. It provides the flexibility to enhance these details during post-production, making for a more captivating image, bringing to life the very allure and tranquility of the moon. Ultimately, the power of shooting in RAW build the bridge between reality and the finished image, heightening the visual impact of every frame. In an arena like moon photography, where lighting conditions fluctuate and the subject is at the mercy of our atmosphere, RAW lends itself as not a mere option but a necessity in our tool kit. It allows for unparalleled freedom in photo personalization, ensuring we achieve the ever-elusive 'perfect shot' of the moon, thus making great moon photos even better.
Using Editing Tools to Enhance Moon Images
Post-production is a critical stage where your magical moon images are fine-tuned and enhanced to reveal their true potential. An integral component of this phase is leveraging the power of sophisticated editing tools to optimize the appearance of your moon shots. This isn't just about making corrections or adjustments; it's an artistic process that involves a tasteful blend of creativity, technology, and an understanding of the lunar aesthetic. To begin with, there is the issue of exposure. Given the strong contrast between the moon's illumination and the dark sky, getting the perfect exposure during the shoot can be challenging. Editing tools help smoothly balance this contrast, ensuring the moon’s surface isn't overexposed, while also preserving the surrounding detail in the night sky. Tools like Lightroom and Photoshop offer a range of controls for exposure compensation that can be delicately fine-tuned for optimal effects. Sharpening is another key aspect of moon image enhancement. The clarity and detail of the lunar surface can heavily influence the impact of the photograph. Tools like unsharp mask, smart sharpen, detail extractor, and clarity sliders in different editing software can increase the resolution of the picture, making the moon’s craters, ridges, and valleys more pronounced and visually striking. Enhancing the color and tone of the image can also add a unique dimension to your moon photography. Although largely monochromatic, varying shades of grey present on the moon can be experimented with using these digital tools. Whether you intend to highlight the natural silver hues, or add a hint of mystical blue for a more surreal effect, image editing software offer you boundless opportunities to experiment and innovate. Noise reduction deserves a special mention when perfecting moon images. Due to the high ISO settings often used in night photography, your images can become noisy. Sophisticated noise reduction tools help maintain the image's quality, softly removing the grainy details without compromising the overall image sharpness. Lastly, remember that while these tools offer incredible assistance, the art of editing lies in subtlety. Over-editing can make your images appear unrealistic and overly processed. Adopt an approach that respects the natural wonder of the moon while utilizing technology to highlight its magnificence. In summary, editing is not just a post-production necessity but a form of digital-artistry that can significantly elevate the end result of your moon photography. By harnessing the capability of these editing tools, you can ready your photographs for a display-worthy status, showing them off, not just as captured images, but as beautifully crafted pieces of lunar art.
Touches of Creativity: Color Adjustment, Cropping, and Filters
Touch of Creativity: Color Adjustment, Cropping and Filters Unveiling the enigmatic beauty of the moon demands more than just a good shot; it requires an attentive eye for detail in post-production as well. Post-production is where your moon photo transforms from good to great. Underlying this transformative process are the creative arts of color adjustment, cropping, and the application of filters. Color adjustment is one of the most crucial aspects of the post-production process. A well-adjusted color balance can highlight the subtle shades of gray that give the moon's craters and valleys their textural appeal; it amplifies the luminous glow of our celestial neighbor against the stark blackness of the night sky. Experiment with different levels of brightness, contrast, and saturation to illuminate the moon’s hidden beauty. Remember―there's no right or wrong here, adjust the colors in ways that express your unique artistic vision and complement the overall theme of your photo. Then comes the art of cropping. Cropping eliminates distractions and places the moon at center stage. It enables you to change the focal point, highlighting the moon in all its resplendent glory. The rule of thirds can be beneficial here as it balances the moon within the frame, making the image visually appealing. Feel free to experiment with different compositions before deciding on the final one. Keep in mind that each crop tells a different story - in one, the moon might be the lone protagonist, and in another, it might share its limelight with other elements, such as silhouettes, skyscrapers, or even the playful interaction of clouds. Finally, applying filters can further emphasize the mesmerizing features of your moon shot. Again, this is about personal creativity and preference, but choosing the right filter can transform an ordinary moon photo into an otherworldly image. A black and white filter, for instance, can underscore the stark contrasts between light and shadow, while cooling filters may impart a dreamy, ethereal vibe to the image. Conversely, warming filters may provide a hint of nostalgia or sentimentality to the picture. In essence, post-production is your chance to add an extra sparkle that makes your moon photo truly stand out. Just like an artist adds subtle touches to their canvas, you can use color adjustment, cropping, and filters to highlight the moon's enchanting allure. As with any art form, there are infinite iterations and endless possibilities to explore. Remember, your imagination is the only limit!